Labels#
Labels are a useful feature that help with the organization of nodes and workloads. They can be defined and used freely. All labels that have been created are listed in the labels menu.
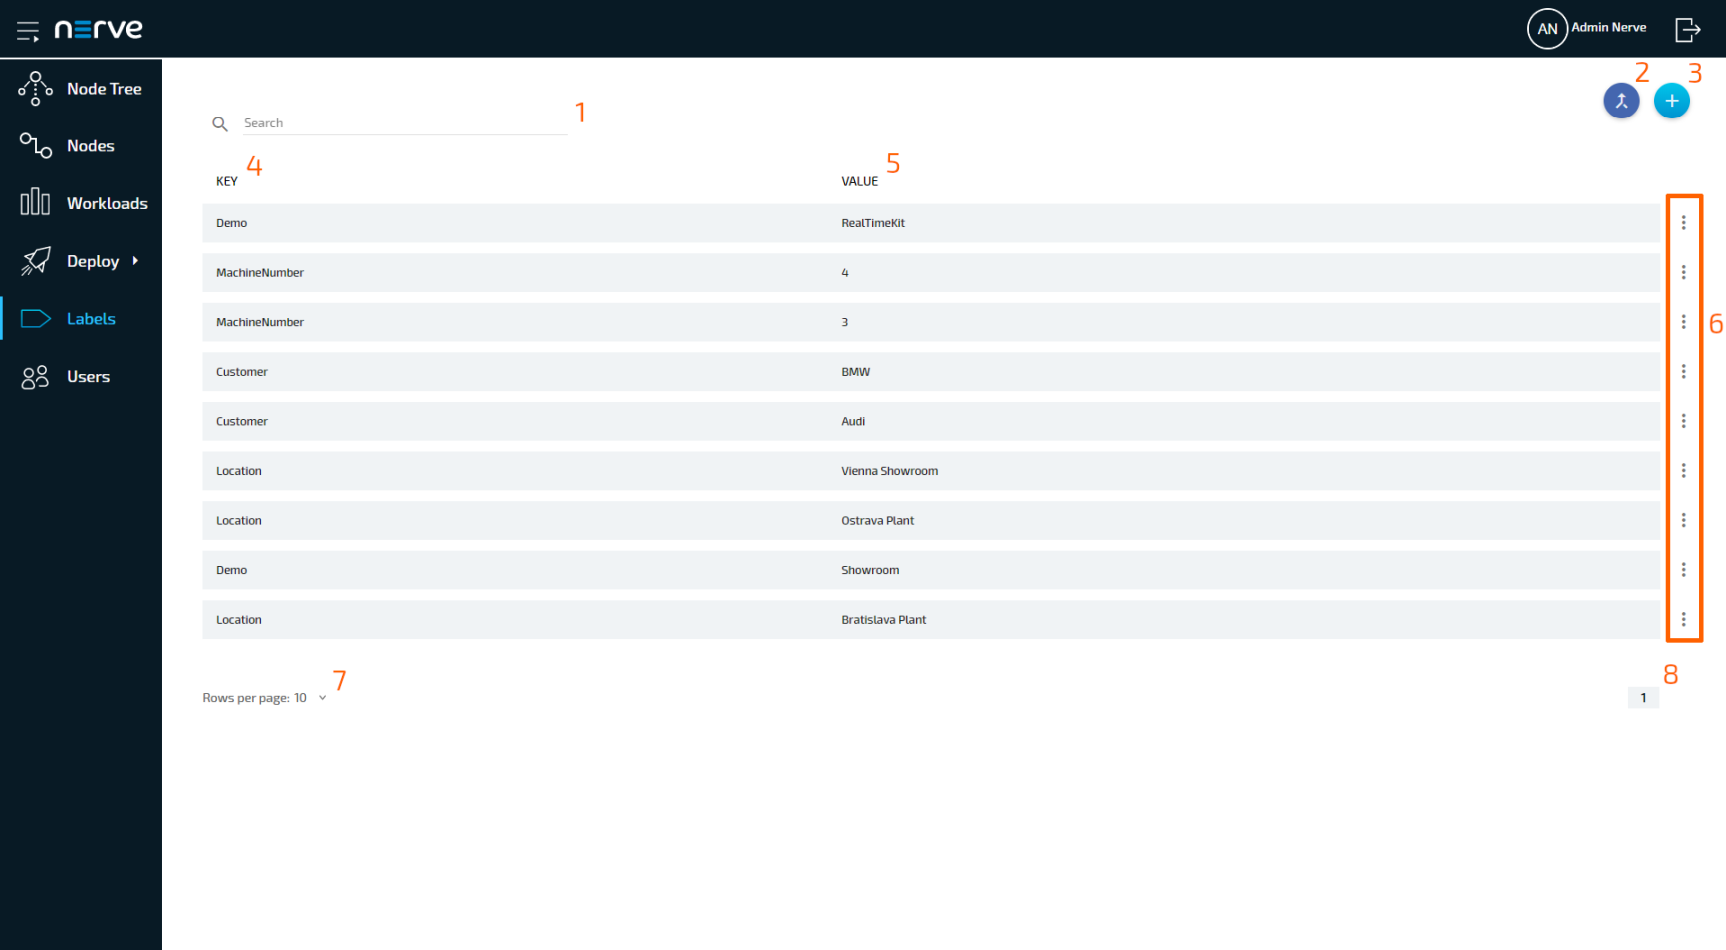
| Item | Description |
|---|---|
| Search bar (1) | Use the search bar to filter labels by key. |
| Merge labels (2) | Clicking here leads to a page that allows you to merge existing labels. |
| Add new label (3) | Click here to add a new label consisting of label key and label value. |
| KEY (4) | This is the key of the label. It can be understood as the "category" of the label. Examples of label keys are location, machine number or hardware. |
| VALUE (5) | This is the value of the label. It corresponds to the key of the label. Examples are Vienna, Machine 1 or MFN 100. |
| Ellipsis menu (6) | Clicking here opens an overlay that allows the deletion of labels. |
| Rows per page (7) | Specify how many labels are displayed on one page. You can select 5, 10 or 15 labels per page. |
| Page navigation (8) | Use the arrows to switch between pages. Clicking the number in the middle opens a list of all page numbers. Selecting a number jumps to that page. |
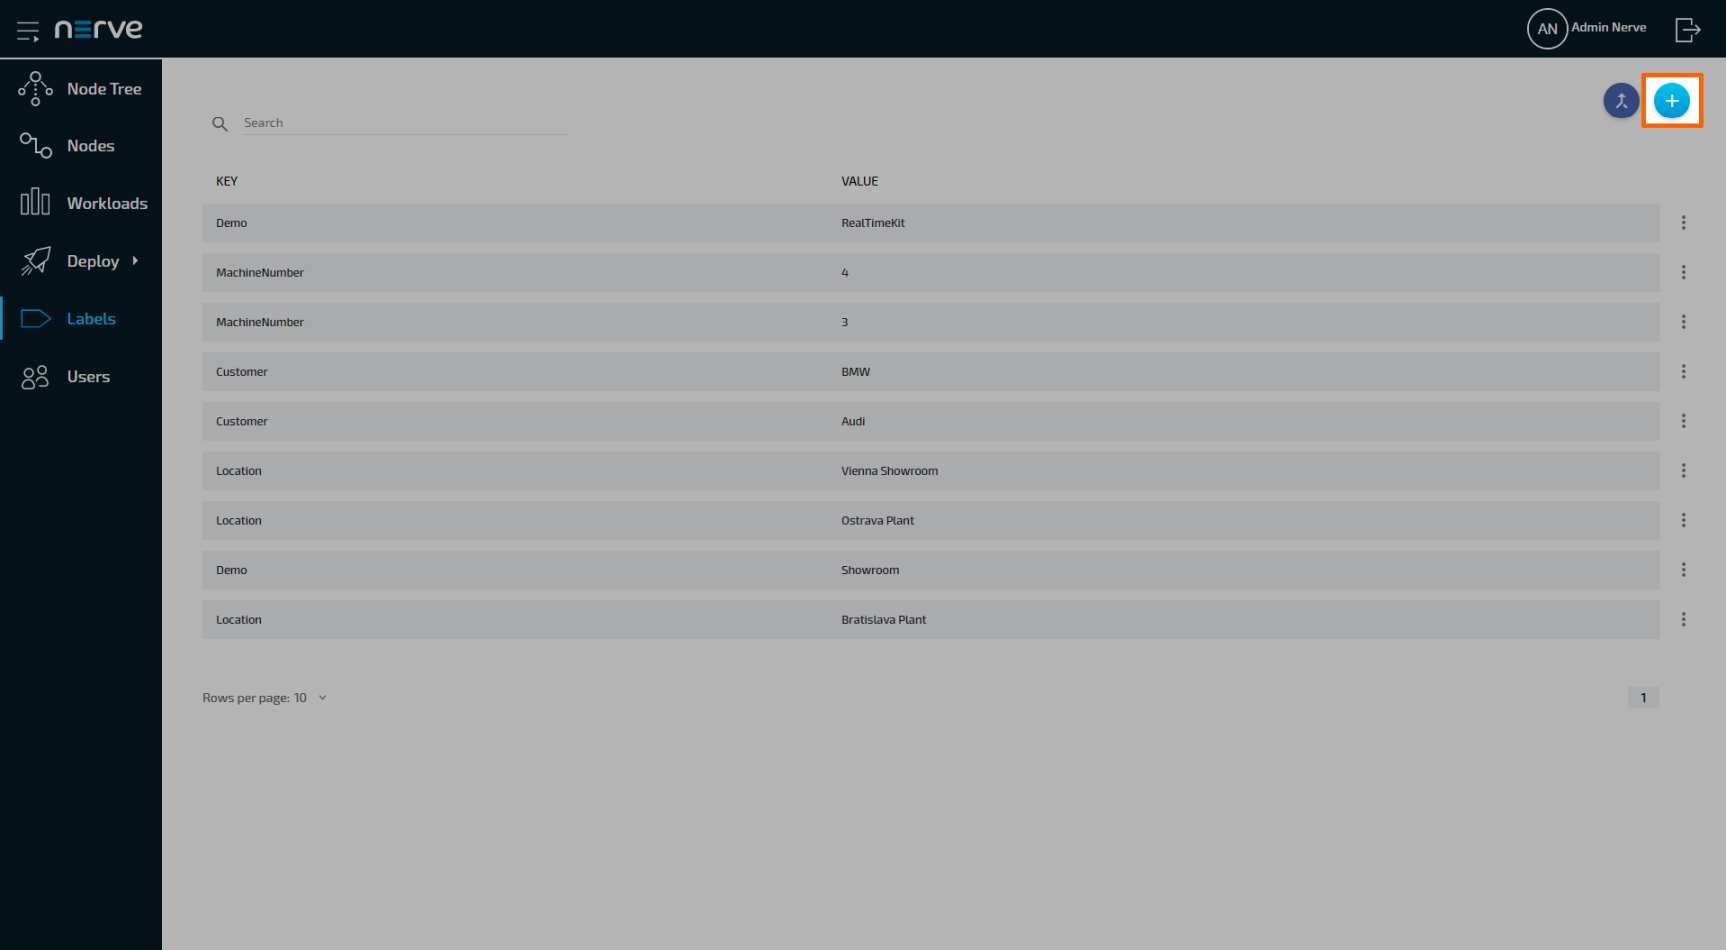
Adding a New Label#
Labels can be defined with any key and value. They can also be defined in the registration process of a node. When a label is defined there, it is automatically assigned to the node that has been registered.
- Select Labels in the menu on the left side.
-
Click the Add new label icon in the upper-right corner.
-
Enter the following information:
Item Description Label key Enter the "category" of the label. Example: Hardware. Label value Enter the value for the label here. Example: MFN 100. Note
Label keys must consist of one word only. Please use
-and_as separators. -
Click Save to add the new label.

The label now appears in the label list and can be used in the Management System. Labels can be assigned to nodes when node details are edited. In the workload provisioning process they can be chosen as selectors.
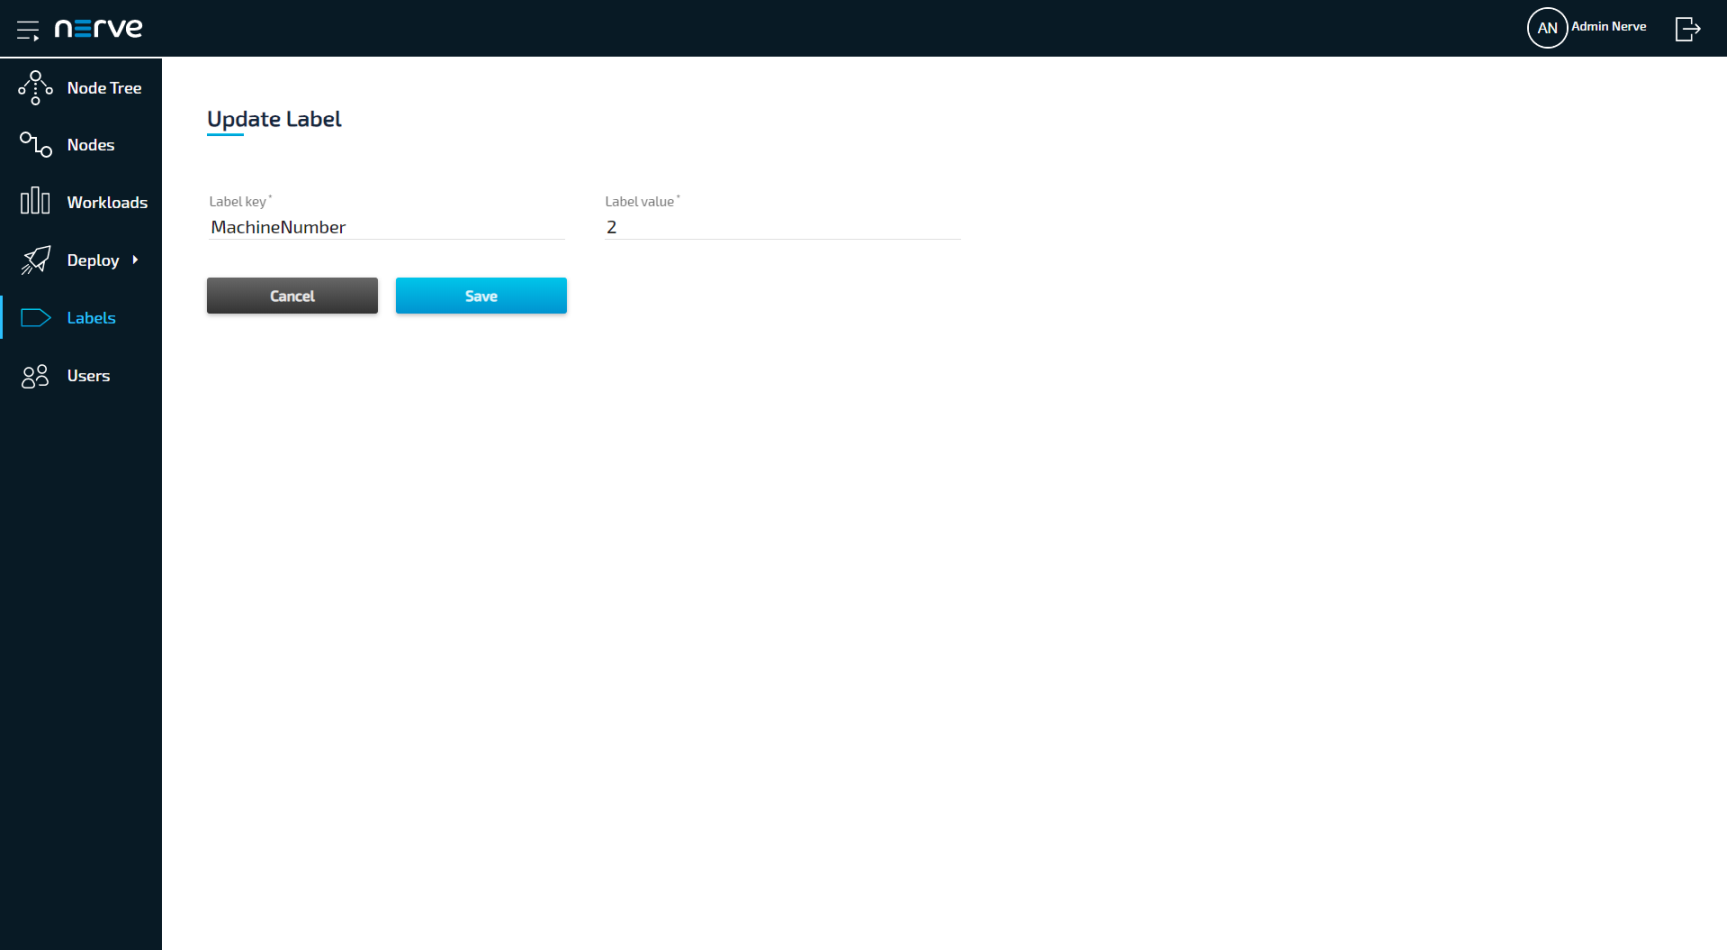
Editing a Label#
The process of editing a label is very straightforward and virtually identical to the process of creating a new label. Please note that labels will be edited even if they are currently assigned to nodes or used as selectors by workloads.
- Select Labels in the menu on the left side.
-
Click the label you would like to edit.
-
Edit Label key and Label value.
-
Click Save to update the label.
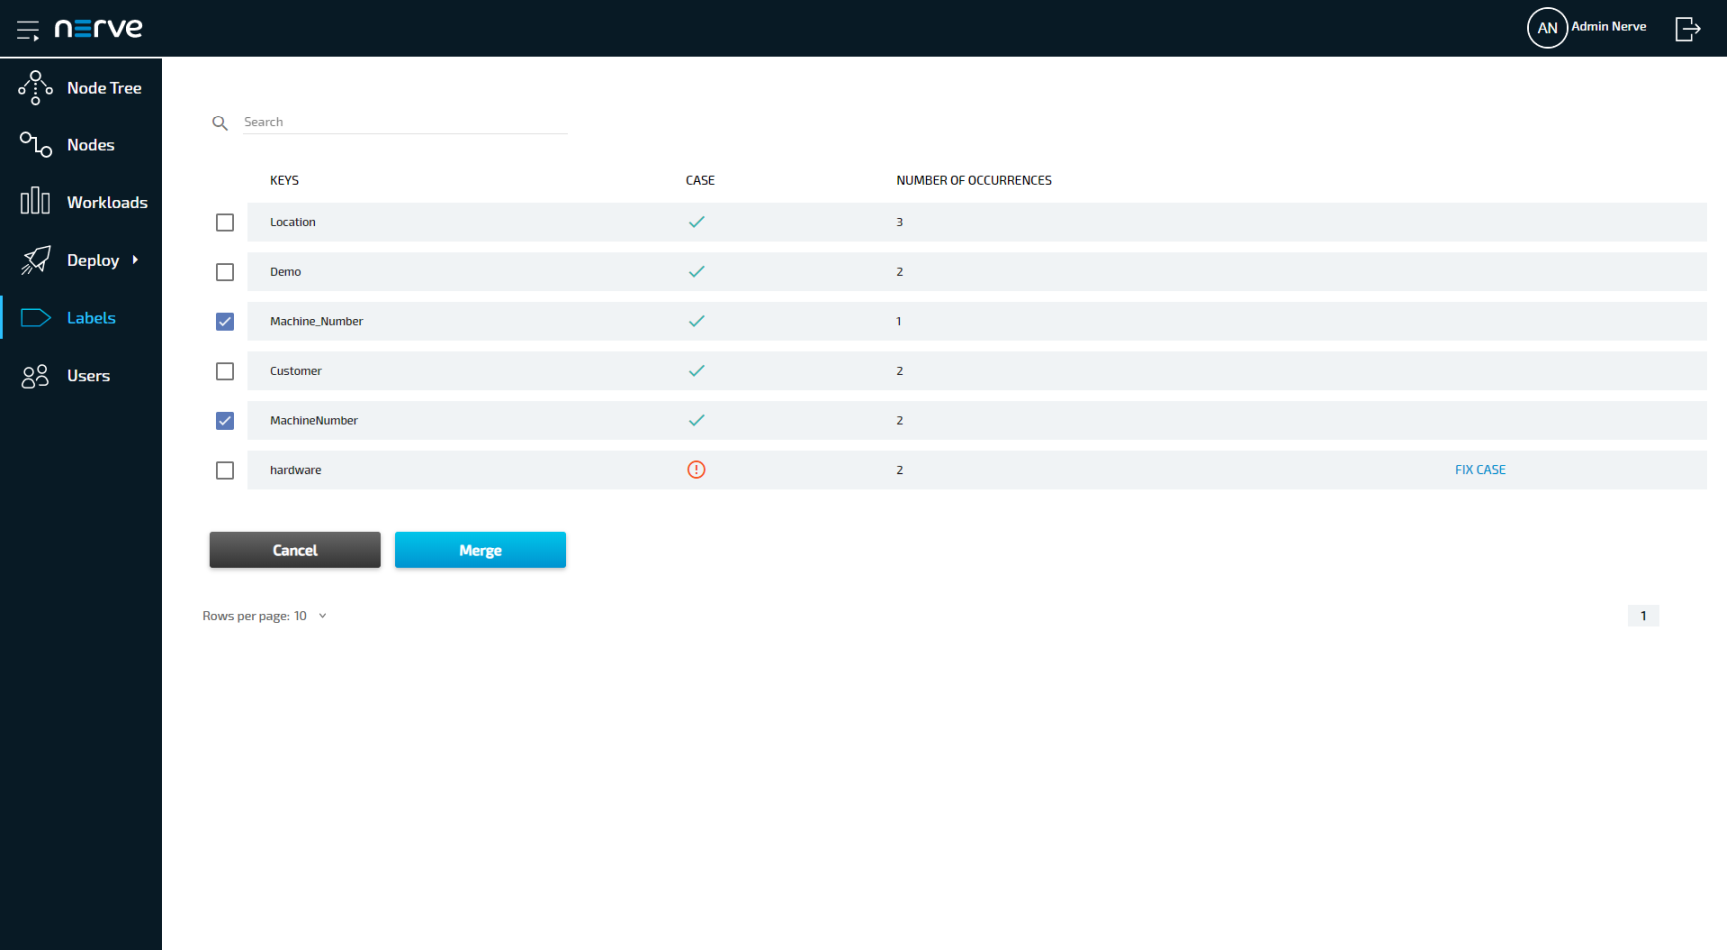
Merging Labels#
Labels with overlapping information or typos can be merged into one. However, only label keys are merged. The label values are left untouched and assigned to the new label key.
- Select Labels in the menu on the left side.
-
Click the Merge labels icon in the upper-right corner.

-
Tick the checkboxes left of the labels you would like to merge. You can select two labels or more.
-
Select Merge.
Note
The table here gives the following information:
-
CASE
The system checks if labels that use the same characters are also written in the same case. A green check mark indicates that the case matches. A circled red exclamation mark appears if the case does not match. -
NUMBER OF OCCURRENCES
The number here indicates how many labels have been defined with the same label key.
-
-
Type in the new name for the label key.
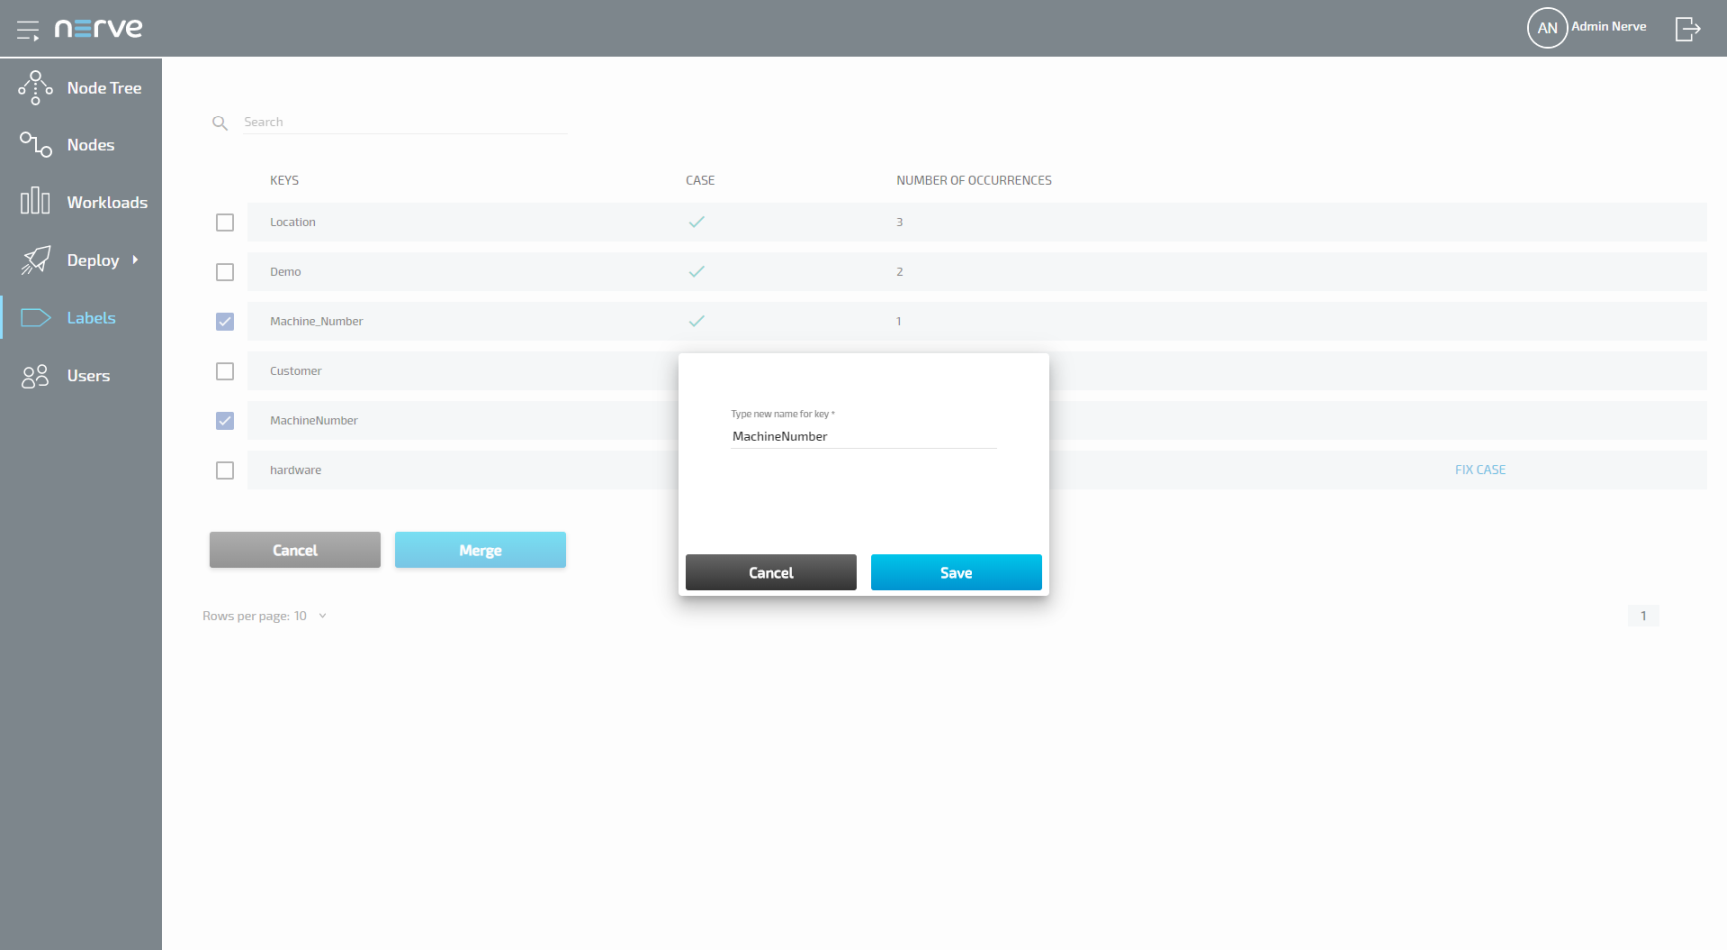
-
Click Save to save the new label.
Note
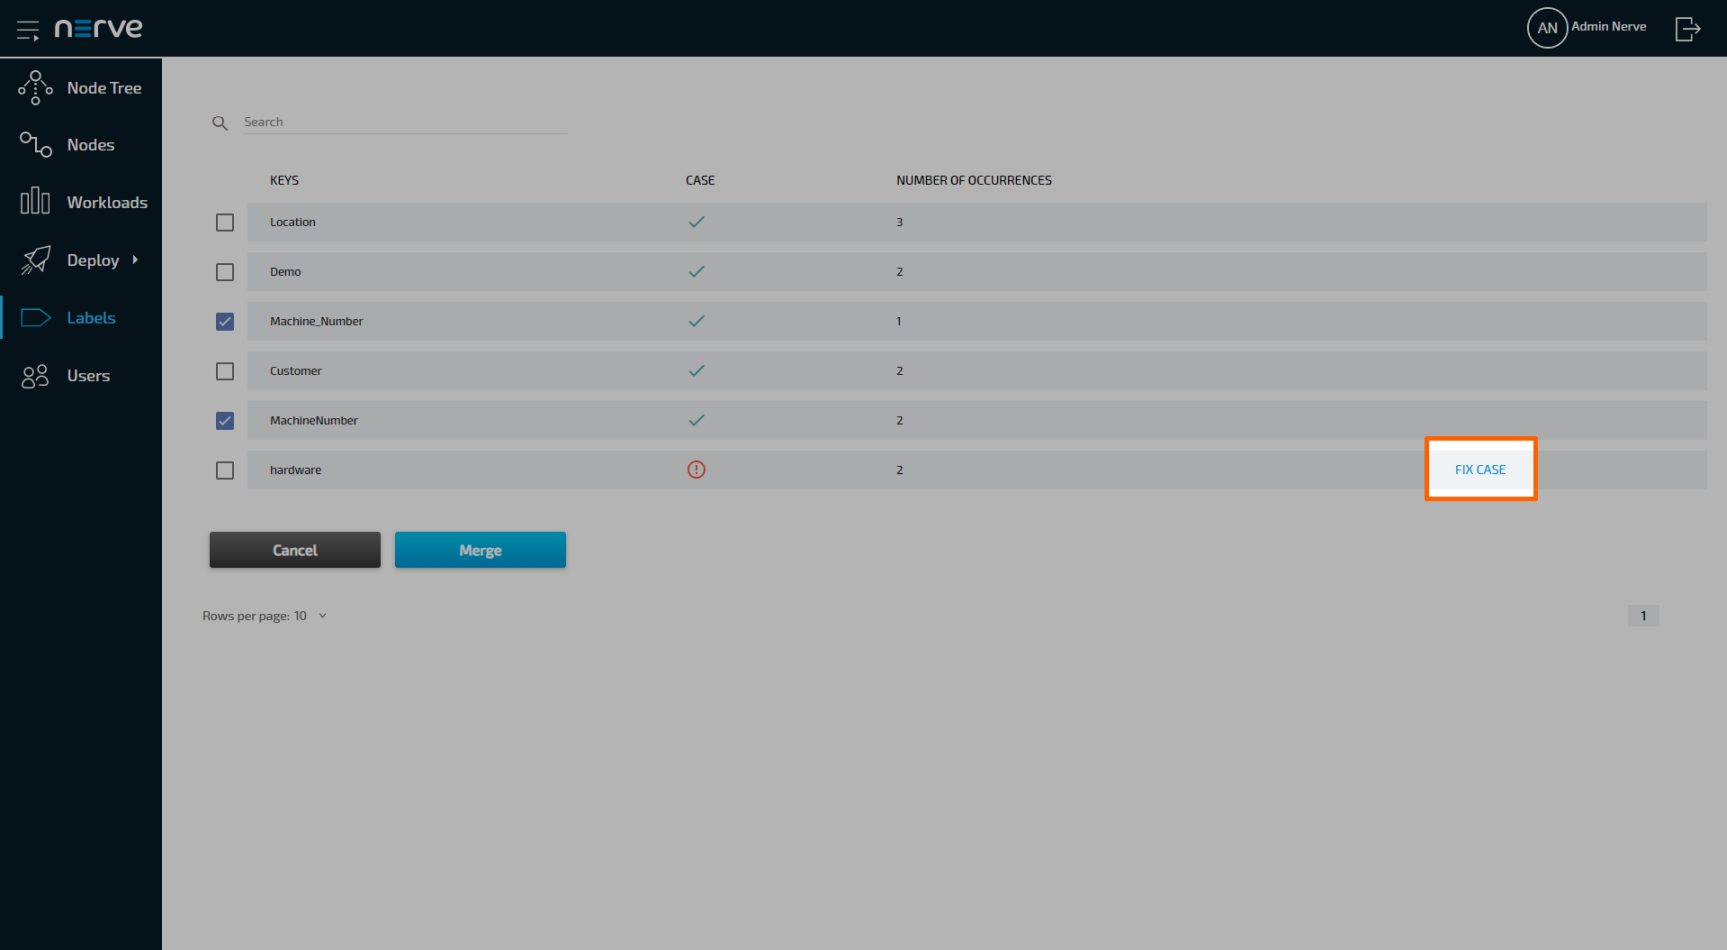
If labels have the same name but are not written in the same case, the Management System will recognize it. In this case, click FIX CASE in the list, type in the new name for the label key and select Save.
Deleting a Label#
Please note that when a label is deleted from the list, it will also be deleted from any node or workload that had the label assigned.
- Select Labels in the menu on the left side.
-
Choose the label you would like to delete.
-
Click the ellipsis menu on the right side of the label.
-
Select Delete in the overlay that appeared.

-
Click OK to delete the label.