Working with the Management System API
Users that are not familiar with how to work with APIs can find pointers here. This section covers how to generate client source code and basic steps on using calls and functions of the Management System API.
Generating client source code from the OpenAPI file
To easily generate a workable client that enables working with the Management System API according to the OpenAPI standard, follow the instructions below. While there are many other tools for generation, it is highly recommended to use the Swagger Editor.
-
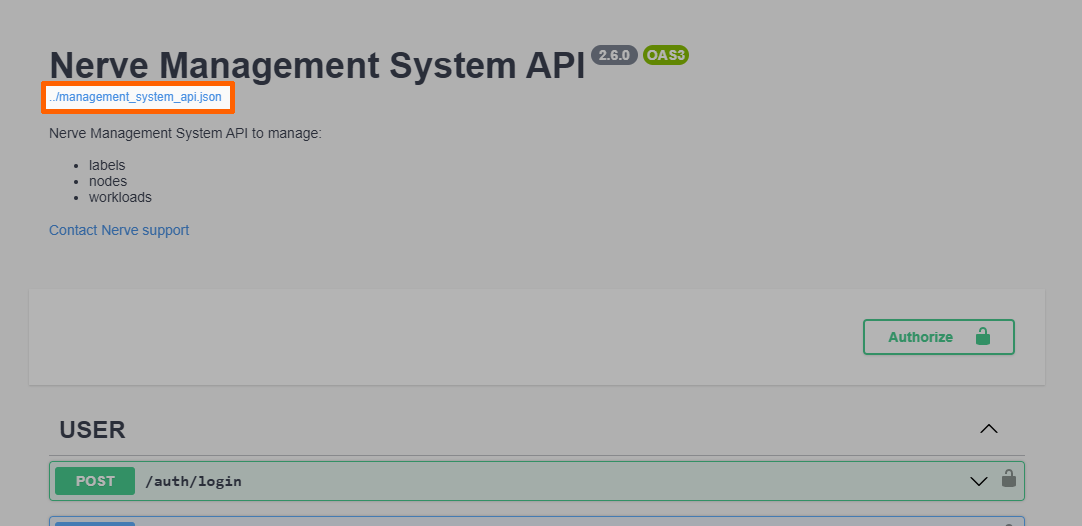
Right-click and save as management_system_api.json in the Swagger UI on the Management System API page.
-
Go to Swagger Editor.
-
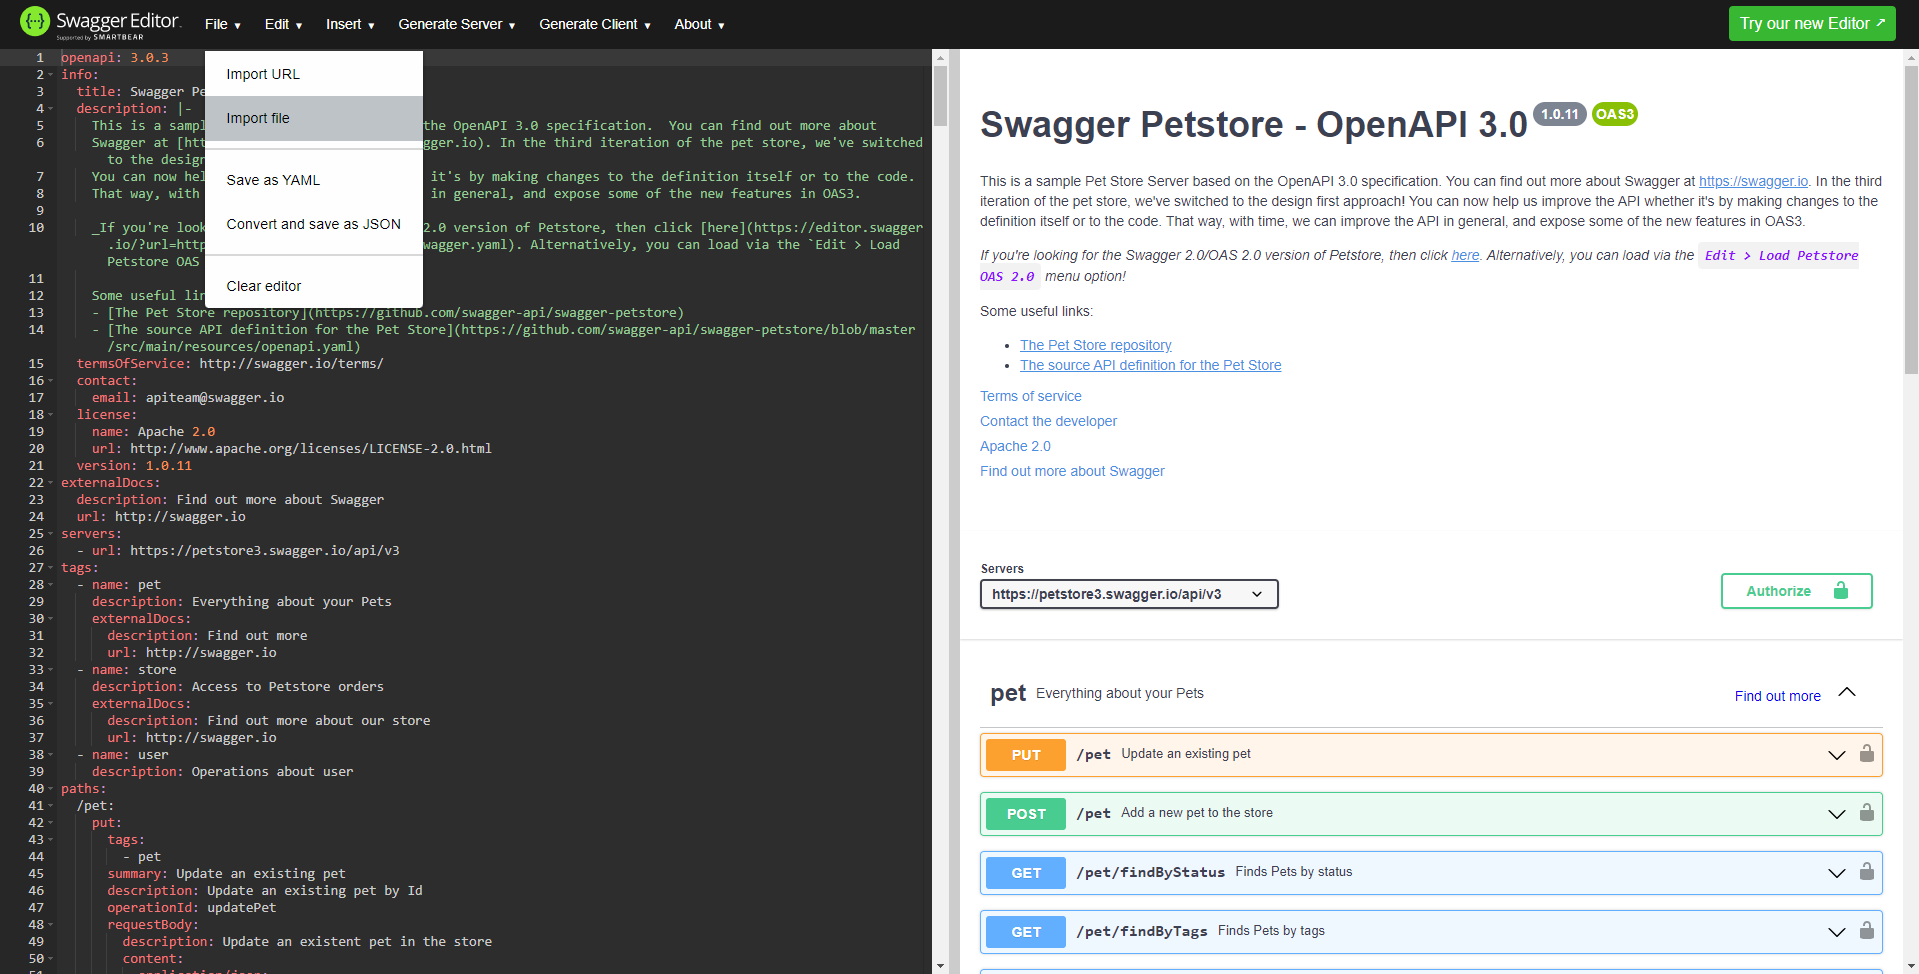
Select File > Import file in the navigation bar.
-
Open the
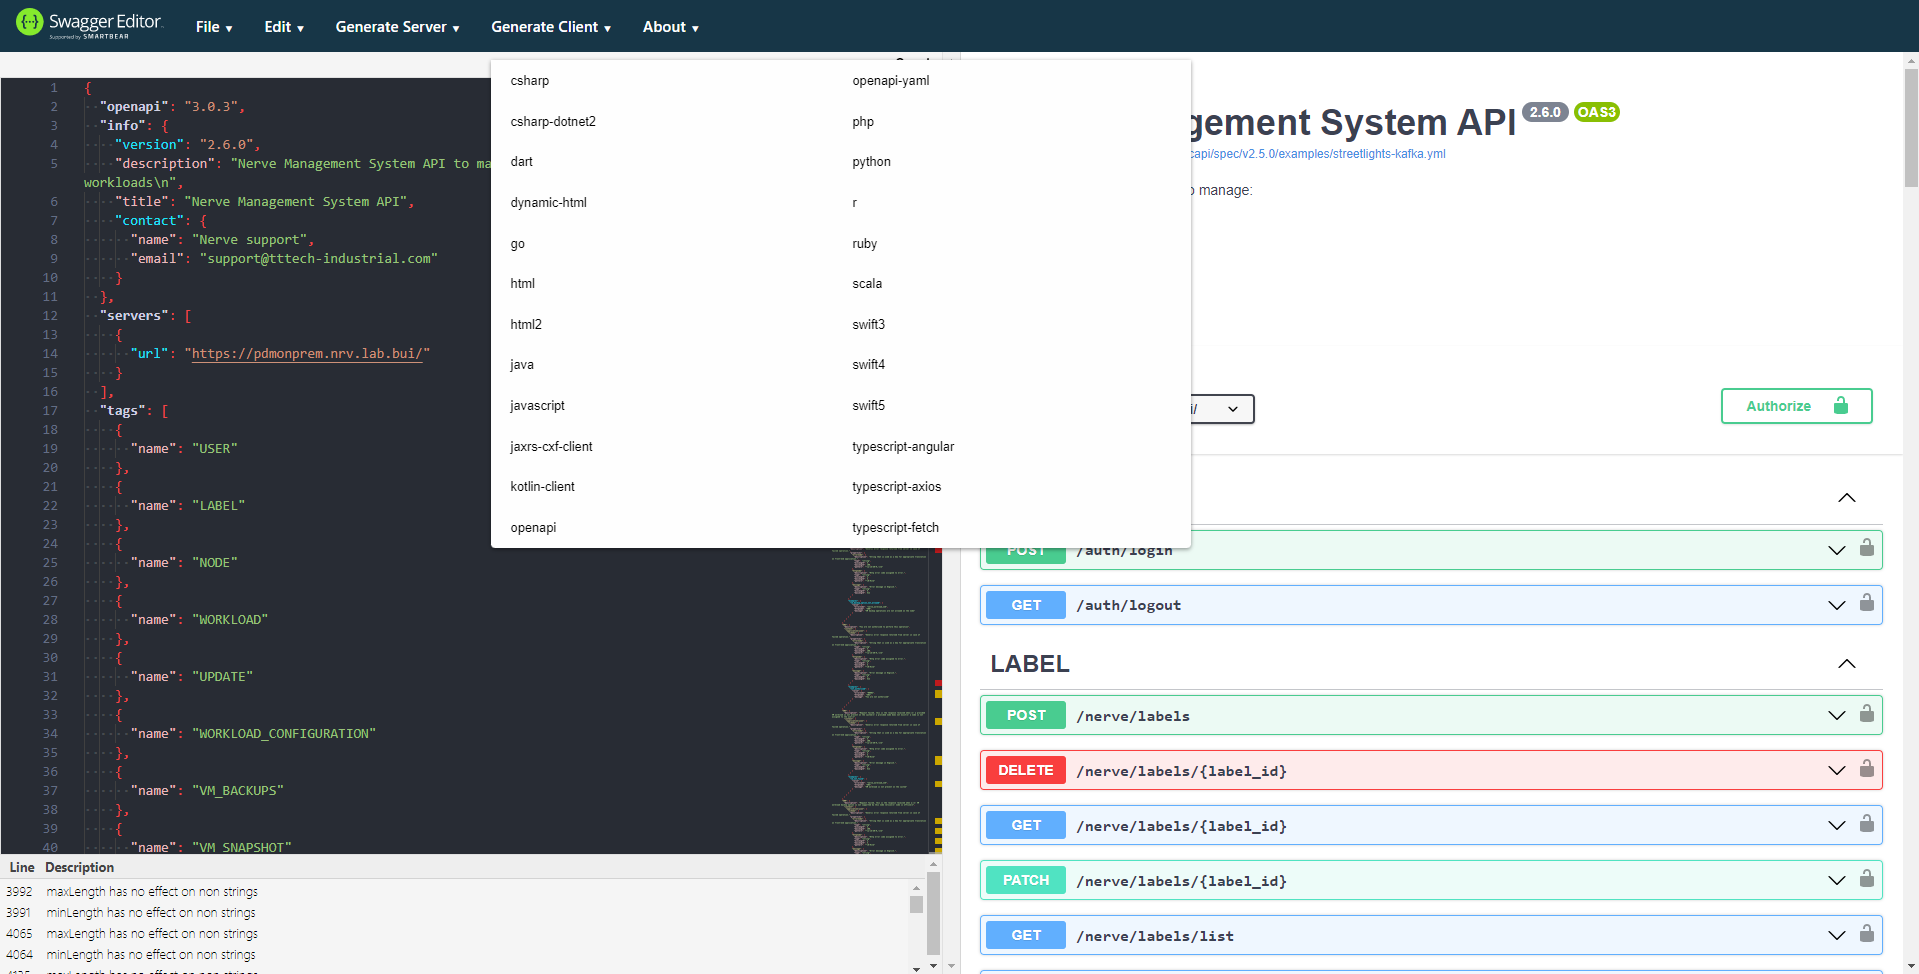
management_system_api.jsonthat was downloaded before. It takes Swagger Editor a couple of seconds to generate the result. - Select Generate Client in the navigation bar.
-
Select a language from the list.
After a couple of seconds, a download will start for a ZIP file containing the generated client.
Trying out the Management System API
To try out the API in the Swagger Editor, a Management System and a user account in this Management System are required. Note that the user account needs admin permissions to use certain calls and functions. In case of no Management System being available, write an issue through the TTTech Industrial support portal.
-
Right-click and save as management_system_api.json in the Swagger UI on the Management System API page.
-
Go to Swagger Editor.
-
Select File > Import file in the navigation bar.
-
Open the
management_system_api.jsonthat was downloaded before. It takes Swagger Editor a couple of seconds to generate the result. -
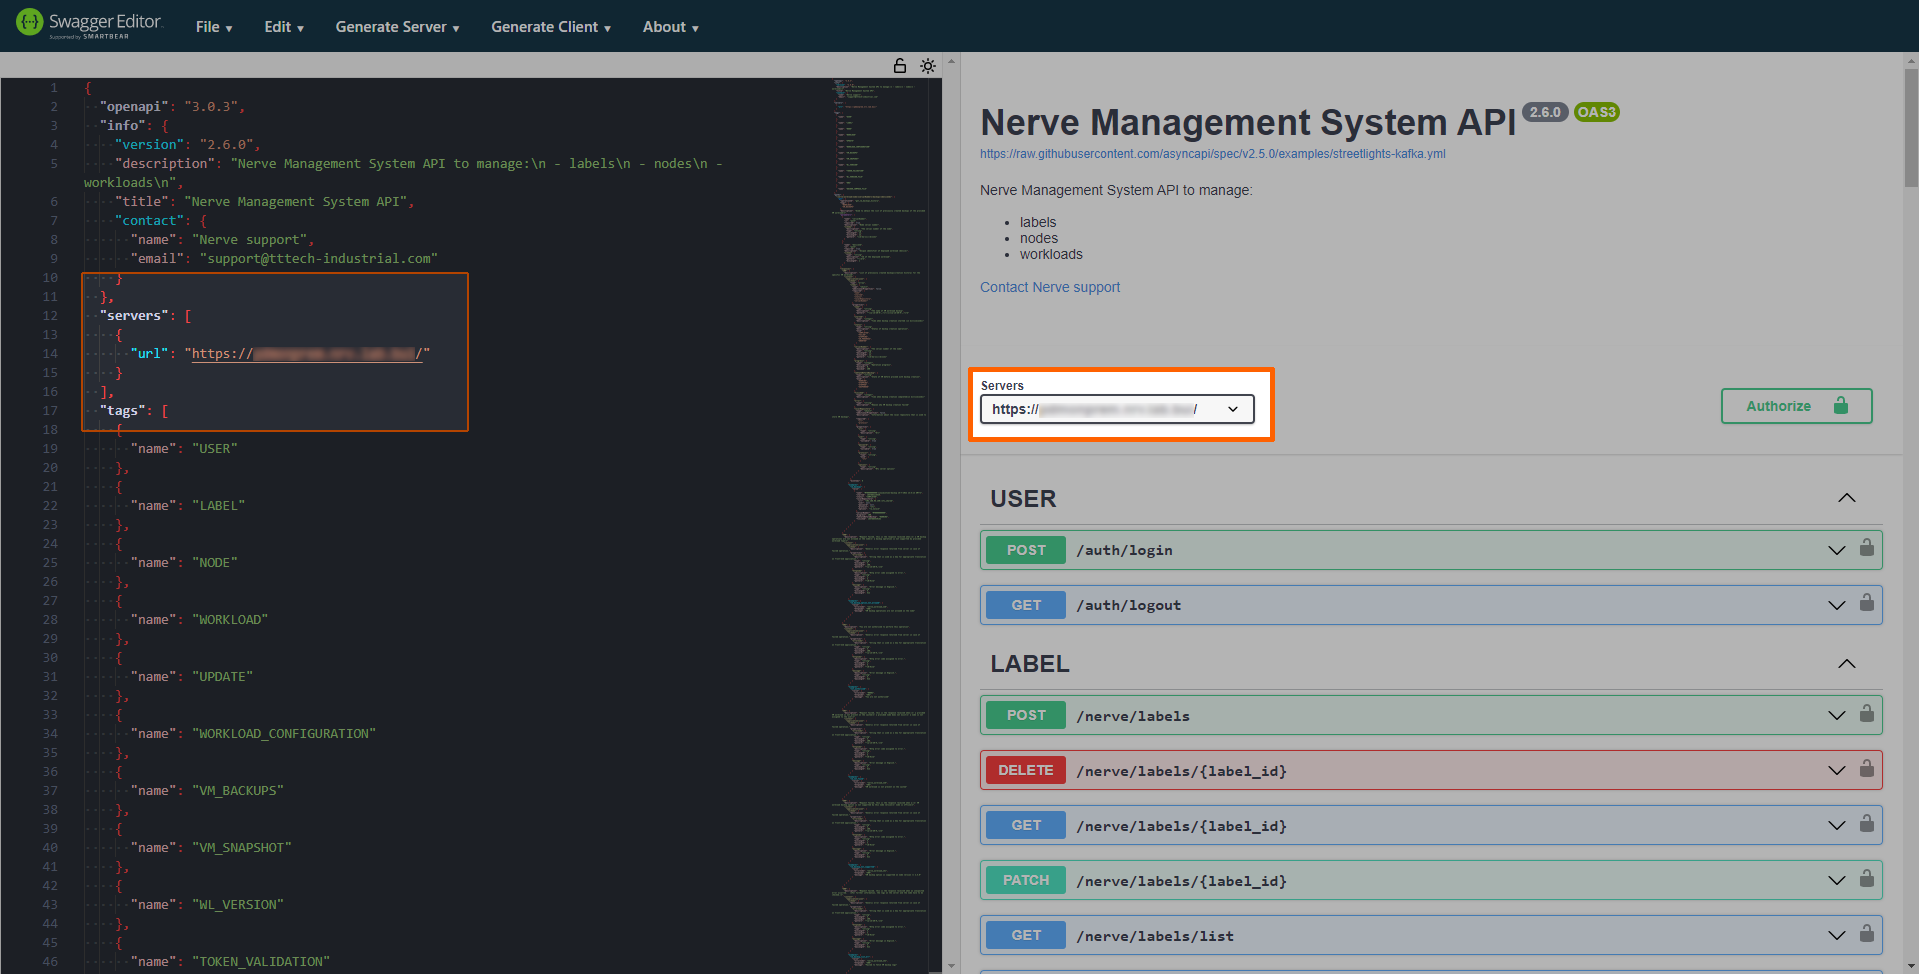
Insert the following lines after line 11:
12
13
14
15
16
"servers": [
  {
    "url": "<managementsystemURL>"
  }
],
This will make a drop-down menu appear in the generated output on the right side.
Note
Replace
<managementsystemURL>with the actual URL of the Management System. -
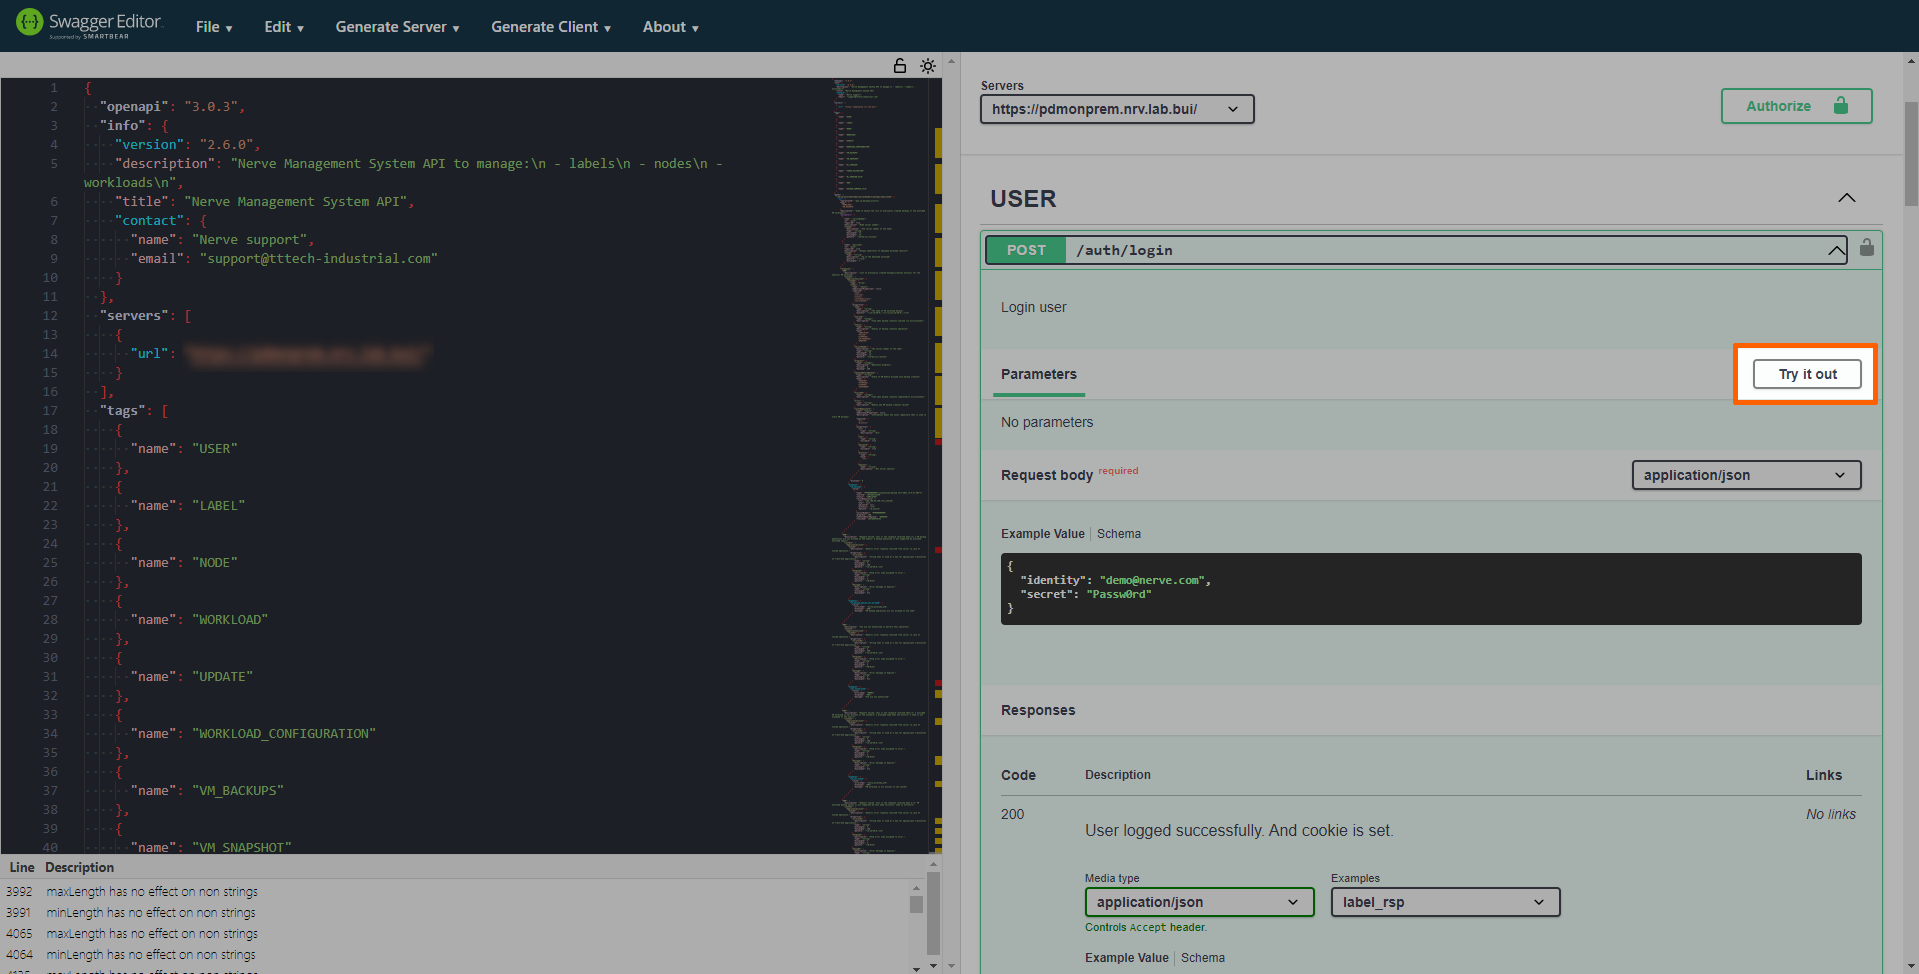
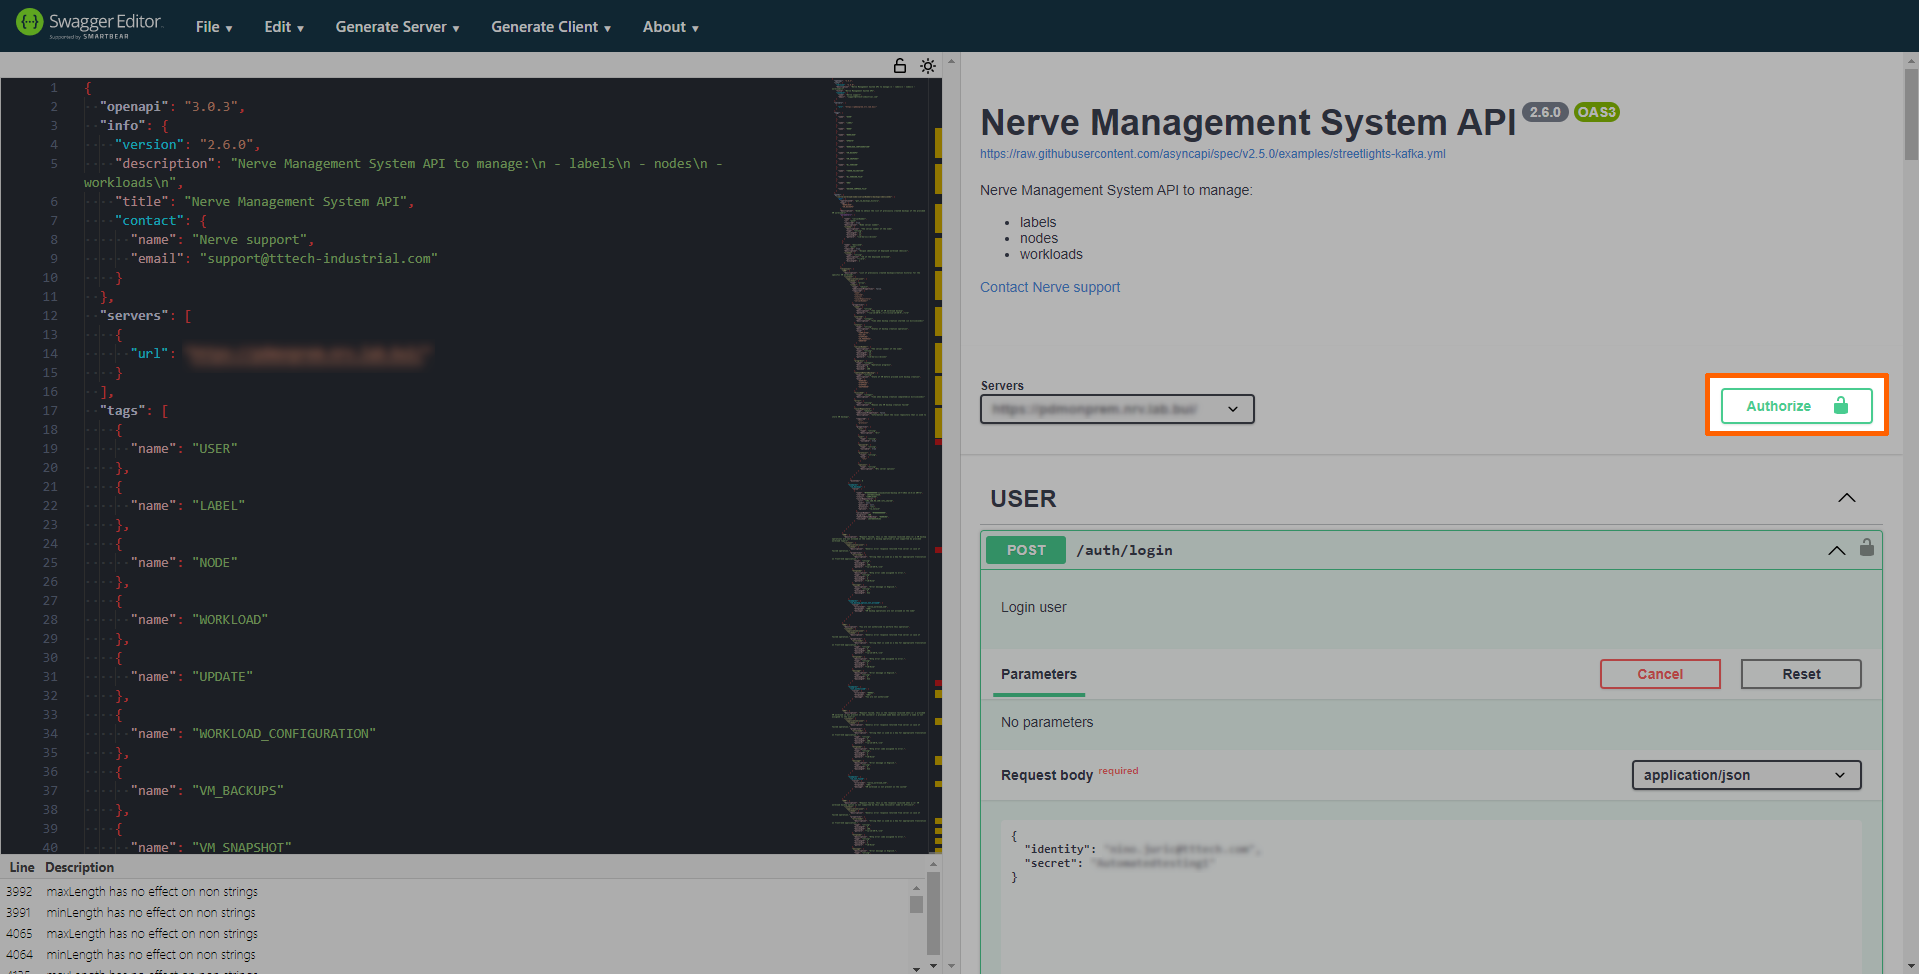
Expand POST /auth/login under USER on the right side.
-
Select Try it out.
-
Select the text field.
-
Enter the following information:
Item Description identity Enter the user name of the account used to log in to the Management System. secret Enter the password of the account used to log in to the Managment System. 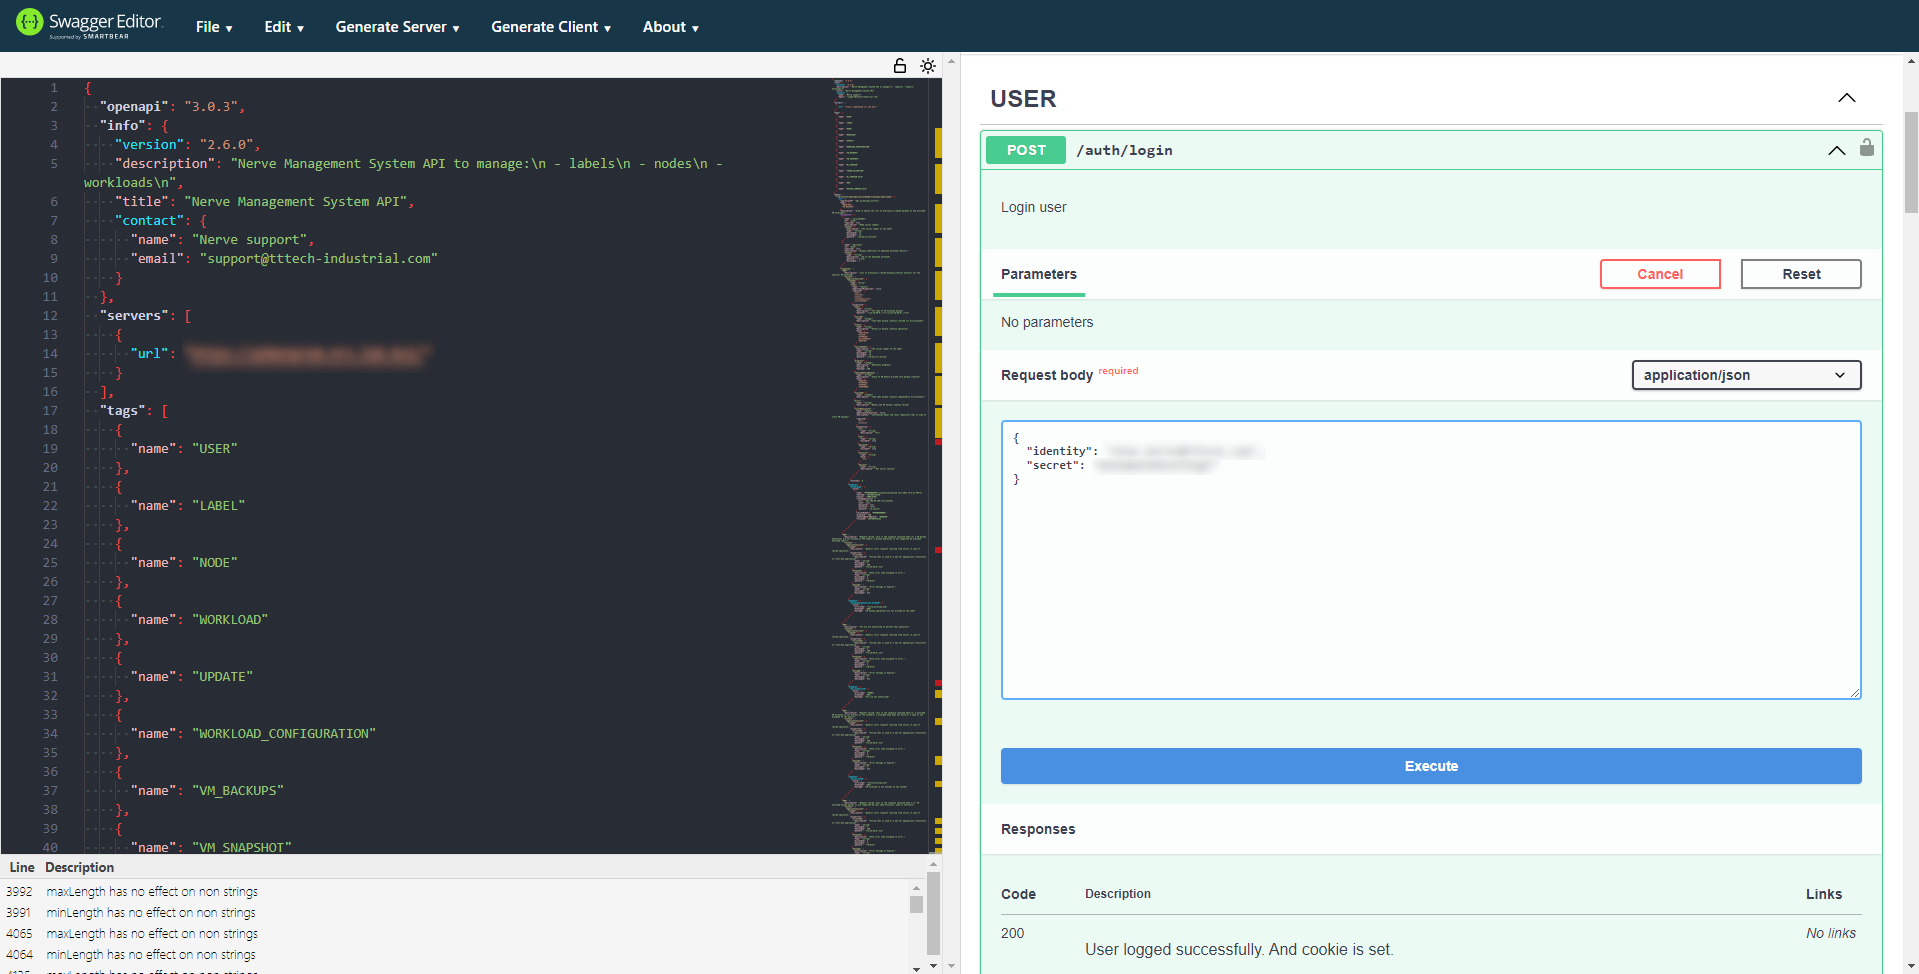
-
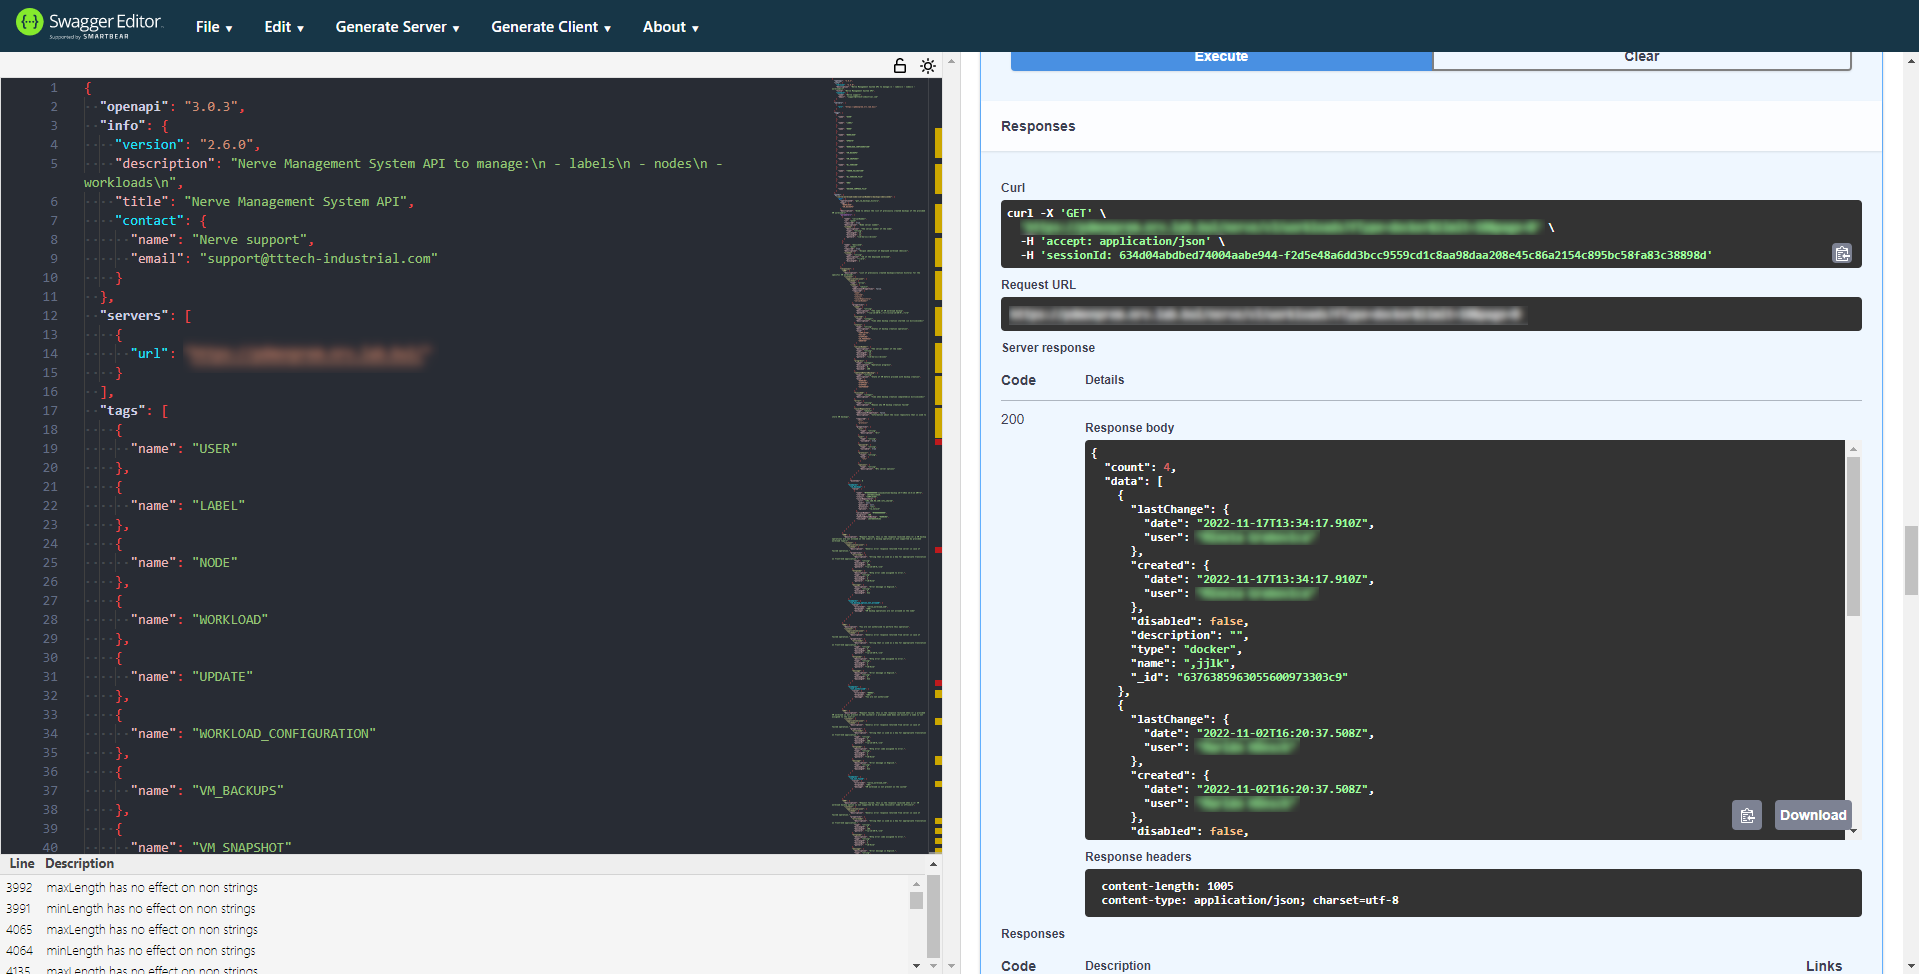
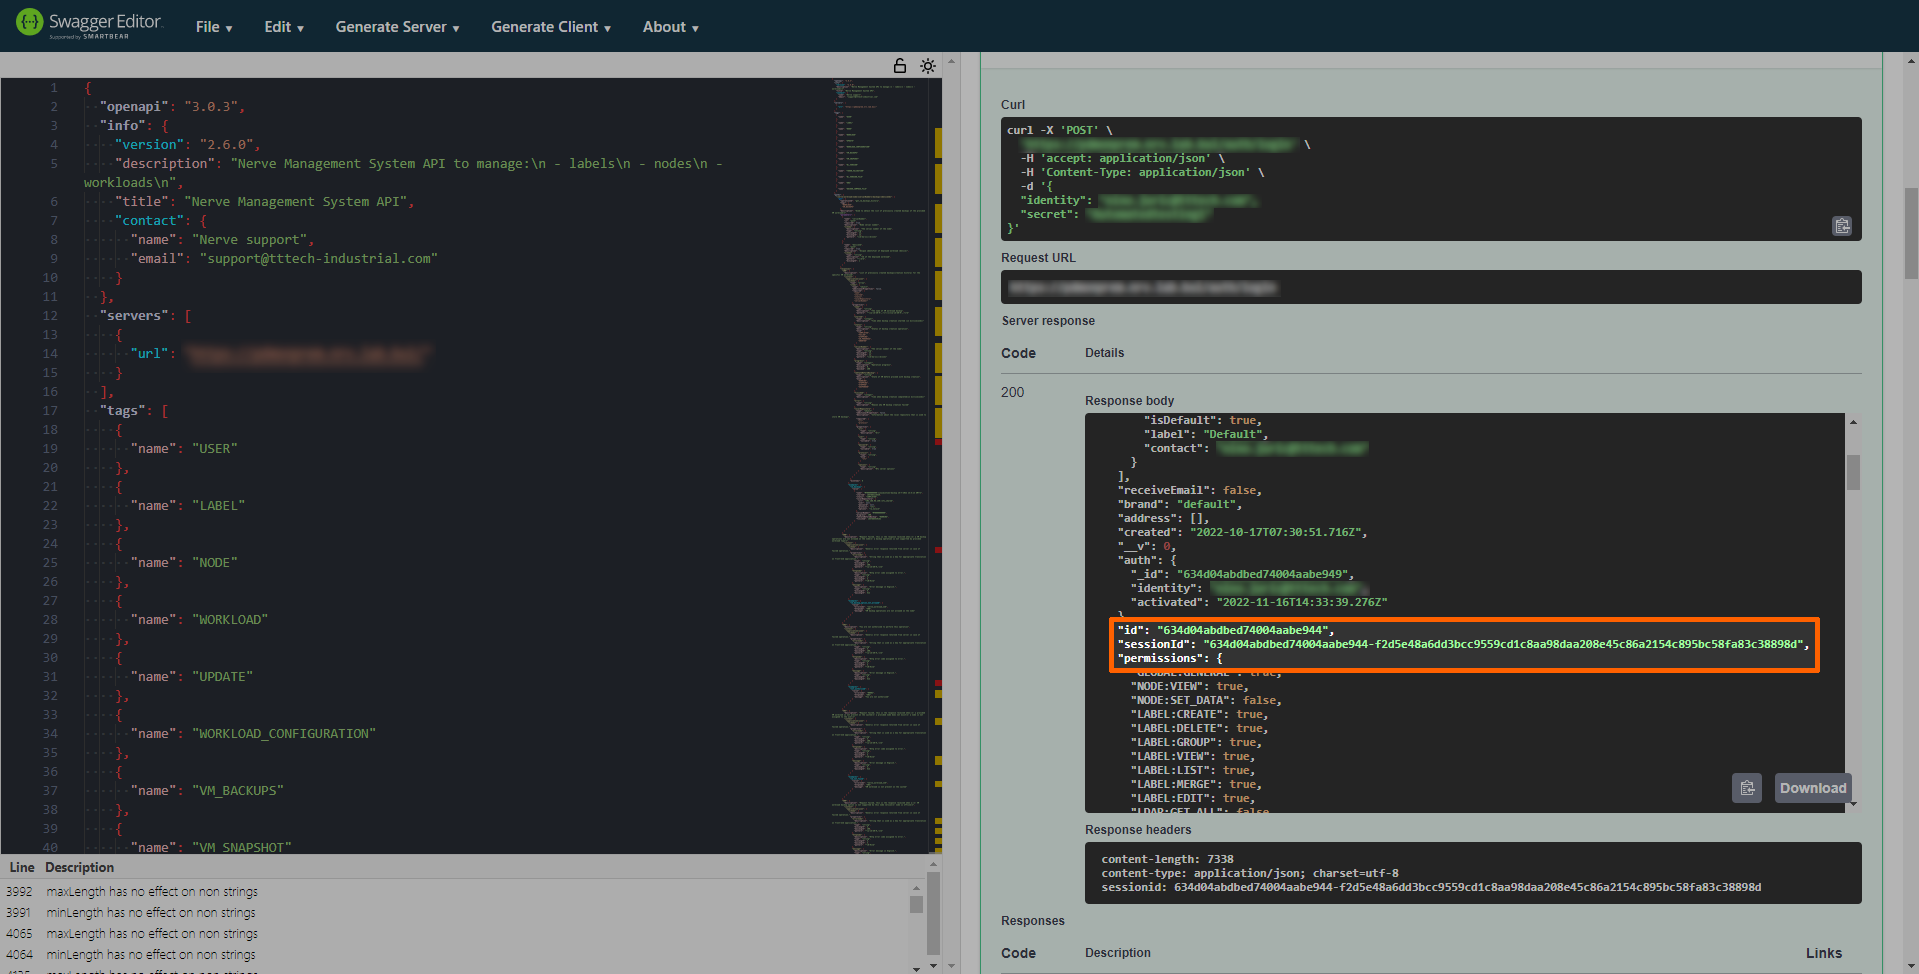
Select Execute. A response from the server will pop up below the Execute button.
-
Look for sessionId in the server response.
-
Copy the value next to sessionId.
Note
Take note to only copy the numeric value without quotation marks.
-
Select Authorize at the top of the screen. A new window will appear.
-
Paste the session ID value into the Value field under sessionId (apiKey).

-
Select Authorize.
- Select Close to close the window.
The user is now authenticated and successfully logged in. Functions can now be experimented with. As a demonstration, follow the instructions below to fetch a list of Docker workloads provisioned in the Management System.
-
Expand GET /nerve/v3/workloads under WORKLOAD_v3.

-
Select Try it out.
- Select the drop-down menu next to fType string (query).
-
Select docker from the drop-down menu.

-
Select Execute.
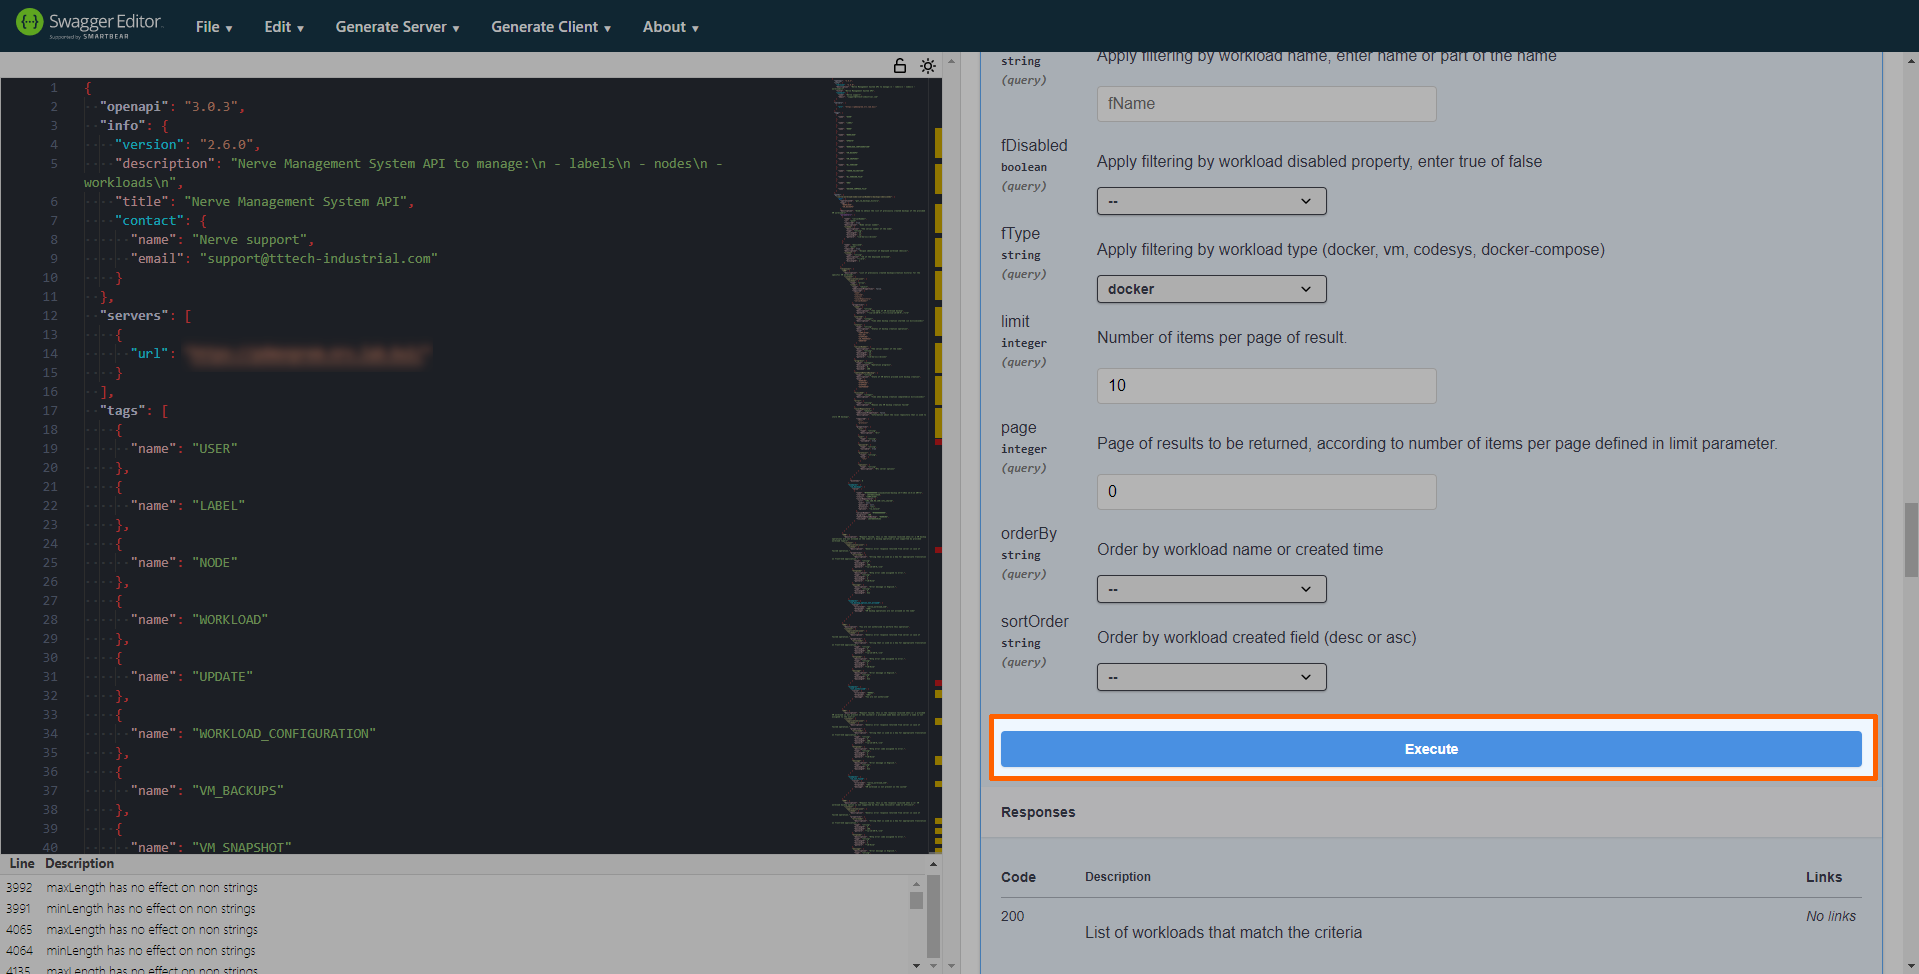
A response from the server will pop up below the Execute button, presenting a list of Docker workloads available in the Management System.