Provisioning a Docker Compose workload
The core value of Docker Compose is to manage multiple services in a system and establish a link between them. However, in this version Docker Compose is only usable for one Docker container in the form of a Docker Compose workload. Still, with the Docker Compose workload, users have the possibility to use a Docker container in combination with a compose file to use the full extent of Docker Compose. In contrast, a Docker workload in the Nerve system is designed to cover basic functionalities and configuration options of a Docker container through the UI of the Management System.
Before provisioning a Docker Compose workload, a compose file needs to be written.
Docker Compose file
A Docker Compose file is required when provisioning the workload. It needs to be written in YAML format. For information on how to write a Docker Compose file, refer to the official Docker Compose documentation. However, keep the following things in mind:
- Nerve validates the compose file to v3.7 of the compose schema. Follow this schema to write a valid compose file.
- The image attribute is required to be included in the compose file. It also needs to be consistent with the image specified through the UI.
The validation check for the compose file schema happens as soon as the file is uploaded in the workload settings with the UI giving a message whether the check has passed.
Restrictions and constraints
Certain options are not allowed due to security concerns. These options are validated in a second check during the deployment process of the workload. Take a look at the list of prohibited parameters:
- network_mode: "host"
or
 - networks:
     nerve-test:
         name: nerve-test
         driver: host
The host network cannot be used. Use the default bridge network or user-defined bridge networks. Predefined Nerve networks can also be used. Refer to Networks for Docker workloads for more information.
- ipam:...
It is not possible to use ipam parameters for configuring networks in order to specify a custom driver or a subnet, for example.
- privileged: true
Privileged mode cannot be set for any service. This is to avoid the container having root capabilities on the host.
- volumes:
      - type: bind
        source: ./static
        target: /opt/app/static
or
- /opt/data:/var/lib/mysql (where the first part is a host path)
Bind mounts to host locations are not allowed. The only exception is /etc/localtime. This allows a service to use the host time zone setting.
Environment variables
There is a set of restrictions and constraints for defining environment variables, especially when working with Nerve DNA. The Nerve system handles certain aspects in a certain way due to security concerns, which makes two things not possible:
- Environment variables cannot be used for ports to avoid the possibility of workload ports being reserved more than once.
- Environment variables cannot be used for volumes, bind volumes specifically, because users are restricted from using bind volumes with Nerve.
However, to work around the above restriction in regards to environment variables being used for ports, certain things should be considered:
- It is recommended to define default values for environment variables in the Docker Compose file. Otherwise they cannot be set via the Management System but only through the Nerve DNA process in an ENV file.
- Specific syntax should be used to make sure that environment variables from ENV files are considered as well.
Consider these suggestions especially when one Docker Compose workload is to be used on different nodes with ENV files further configuring environment variables for specific nodes.
Take a look at the following excerpt of a compose file as an illustration:
    restart: unless-stopped
    environment:
      - NGINX_PORT=${NGINX_PORT:-81}
    ports:
      - "8888:80"
      - "8889:81"
An environment variable NGINX_PORT is defined as NGINX_PORT=${NGINX_PORT:-81}, following this syntax rule:
${VARIABLE:-default}evaluates to default ifVARIABLEis unset or empty in the environment.
So in the file above this means that the value for NGINX_PORT will be 81, unless NGINX_PORT is defined in an ENV file that has been added through the Nerve DNA process.
While there are corner cases and combinations of defining environment variables that work with Nerve as well, the way described above is the recommended best practice to avoid error cases and complications.
For more information on working with Nerve DNA, refer to Nerve DNA.
Provisioning a Docker Compose workload
The following instructions only cover the required settings for provisioning a Docker Compose workload. Optional settings will be left out. Extended options are addressed in the last section of this chapter. However, note that some settings are necessary to provision a functioning workload. Make sure to understand the workload and its purpose before provisioning a workload.
Other workload types that can be provisioned are:
The process for each workload is highlighted in its respective chapter.
Note
A Docker image is required for the following instructions. Refer to the Docker documentation for help on creating a Docker image. Note that Docker images in TAR.GZ format are not supported.
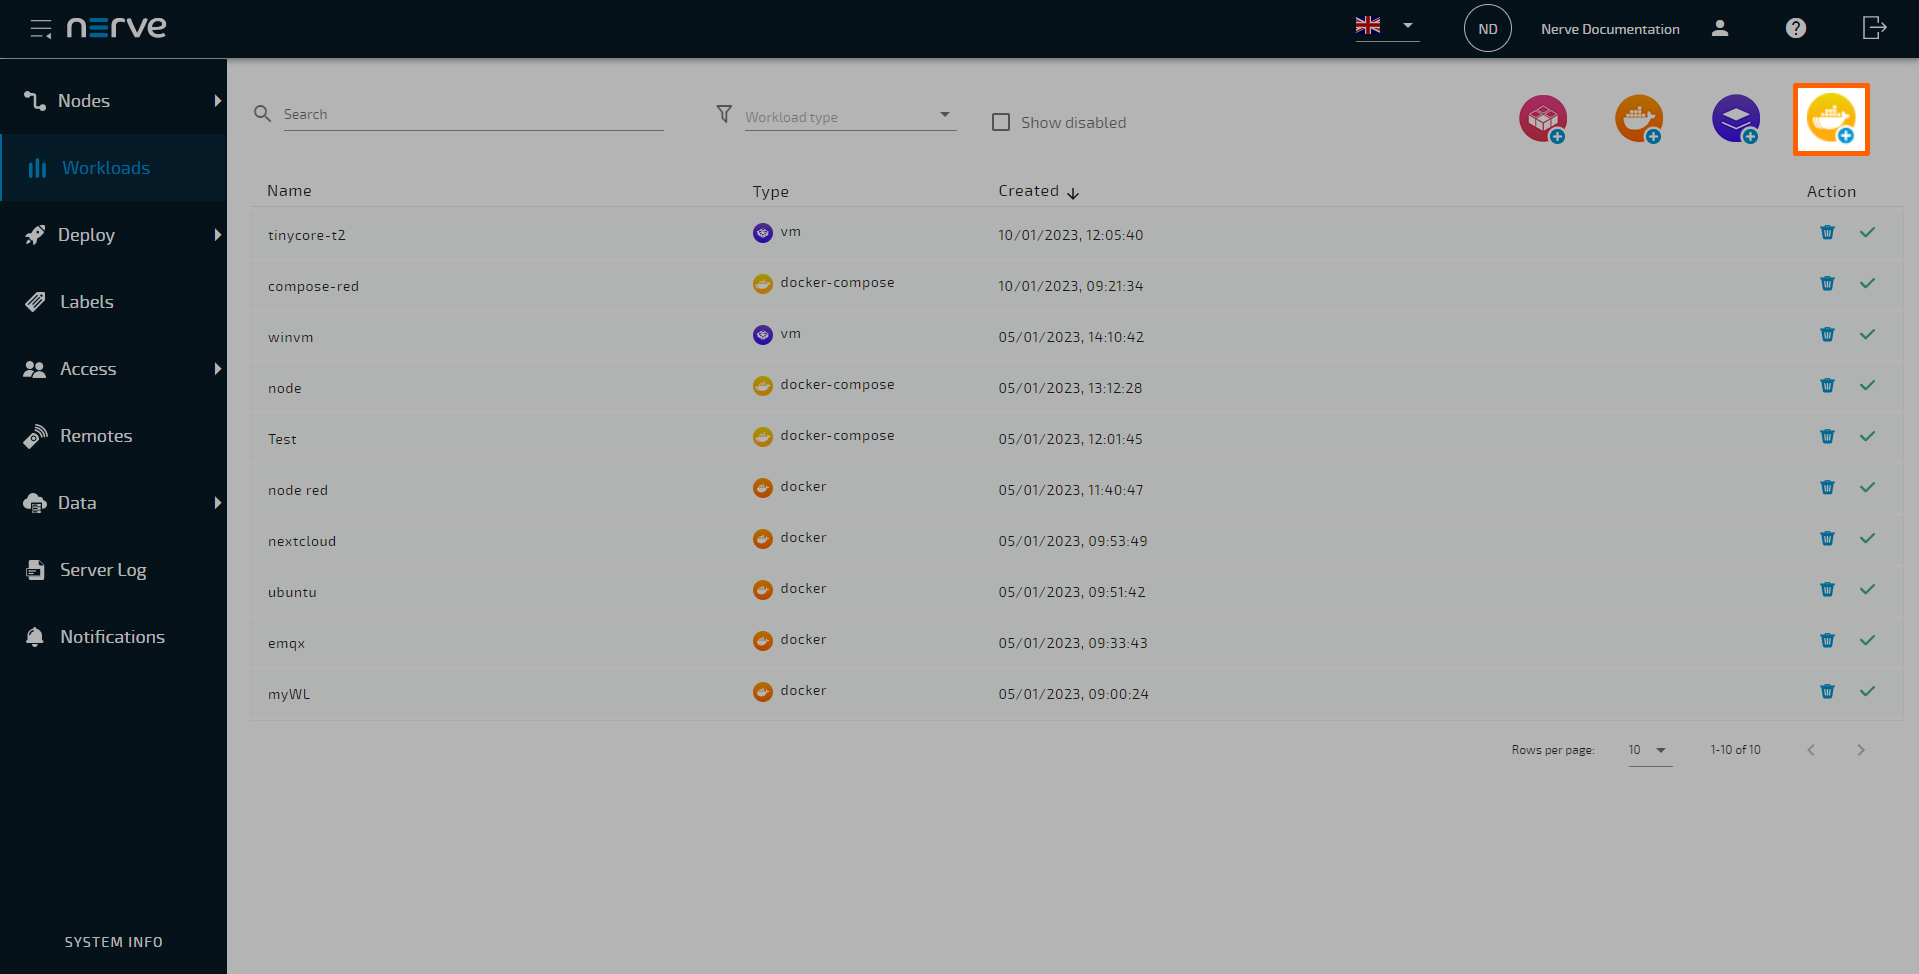
- Log in to the Management System.
- Select Workloads in the navigation on the left.
-
Select the Docker Compose symbol (Add new Compose workload) in the upper-right.
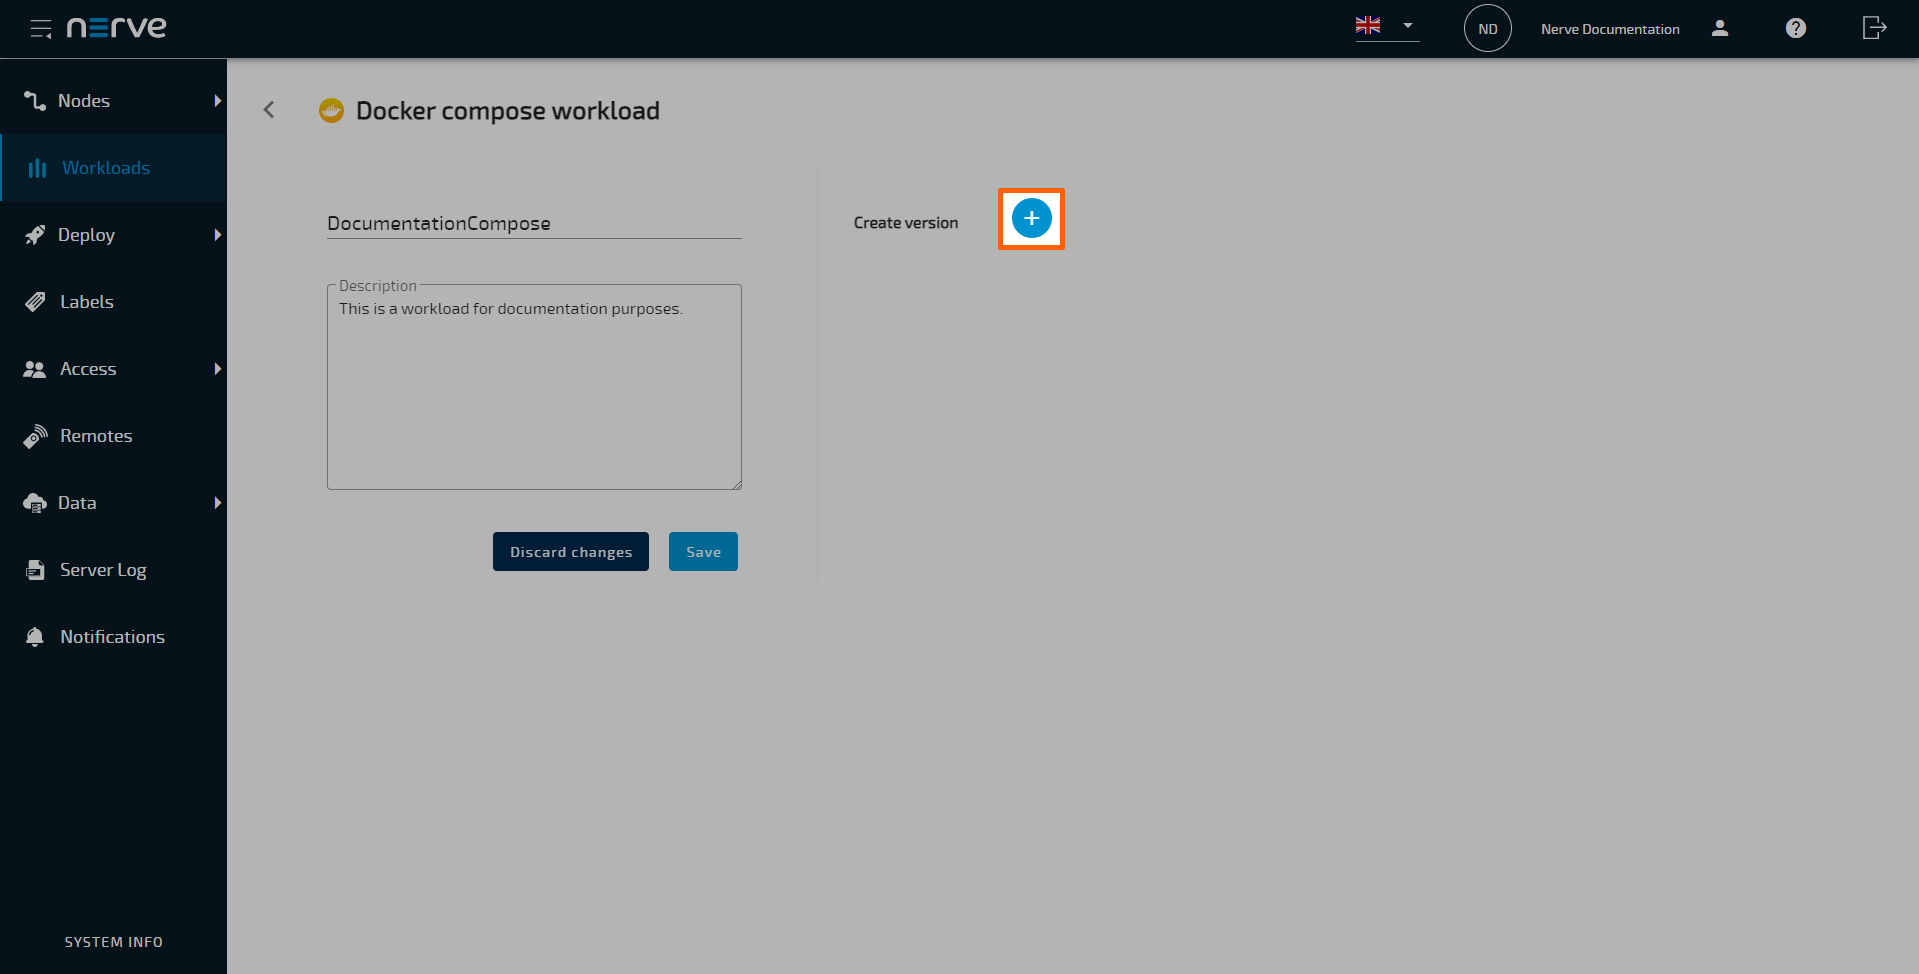
-
In the new window, enter a name for the workload.
-
Select the plus symbol next to Create version to add a new version of the workload.
-
In the next window, enter the following information in the Basic tab:
Category Settings and descriptions VERSION SPECIFIC INFO Version name
Enter a name for the version of this workload.DOCKER IMAGE Select From registry or Upload. Note that Docker images in TAR.GZ format are not supported.
From registry:
Enter the Docker registry to the Docker container image under Image path.
Note that the image path in the screenshot is a placeholder path. Enter registries according to their name and URL found on Docker Hub or in private registries. Refer to the Docker image settings in the Basic tab below for more information.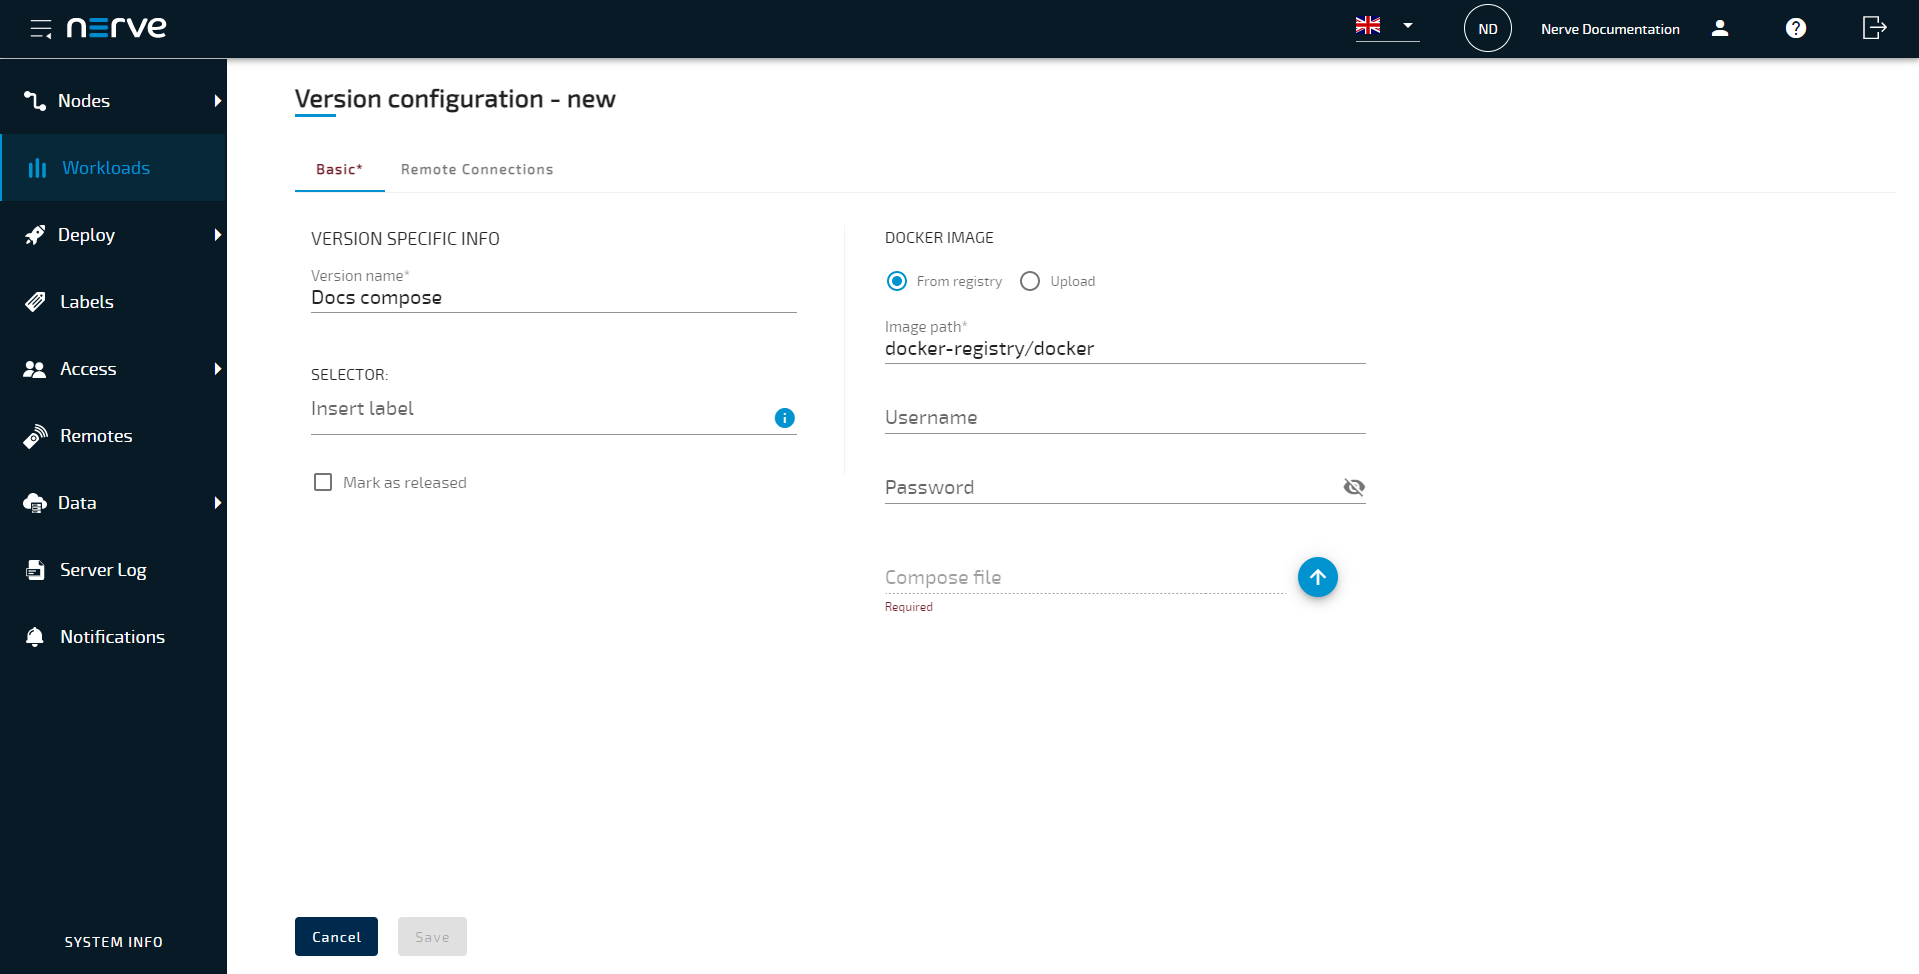
Upload:
Select the upward arrow symbol to open the file browser and upload the Docker container image. Do not upload a Docker image in TAR.GZ format. This will produce a Docker workload file in the wrong format when the workload is exported.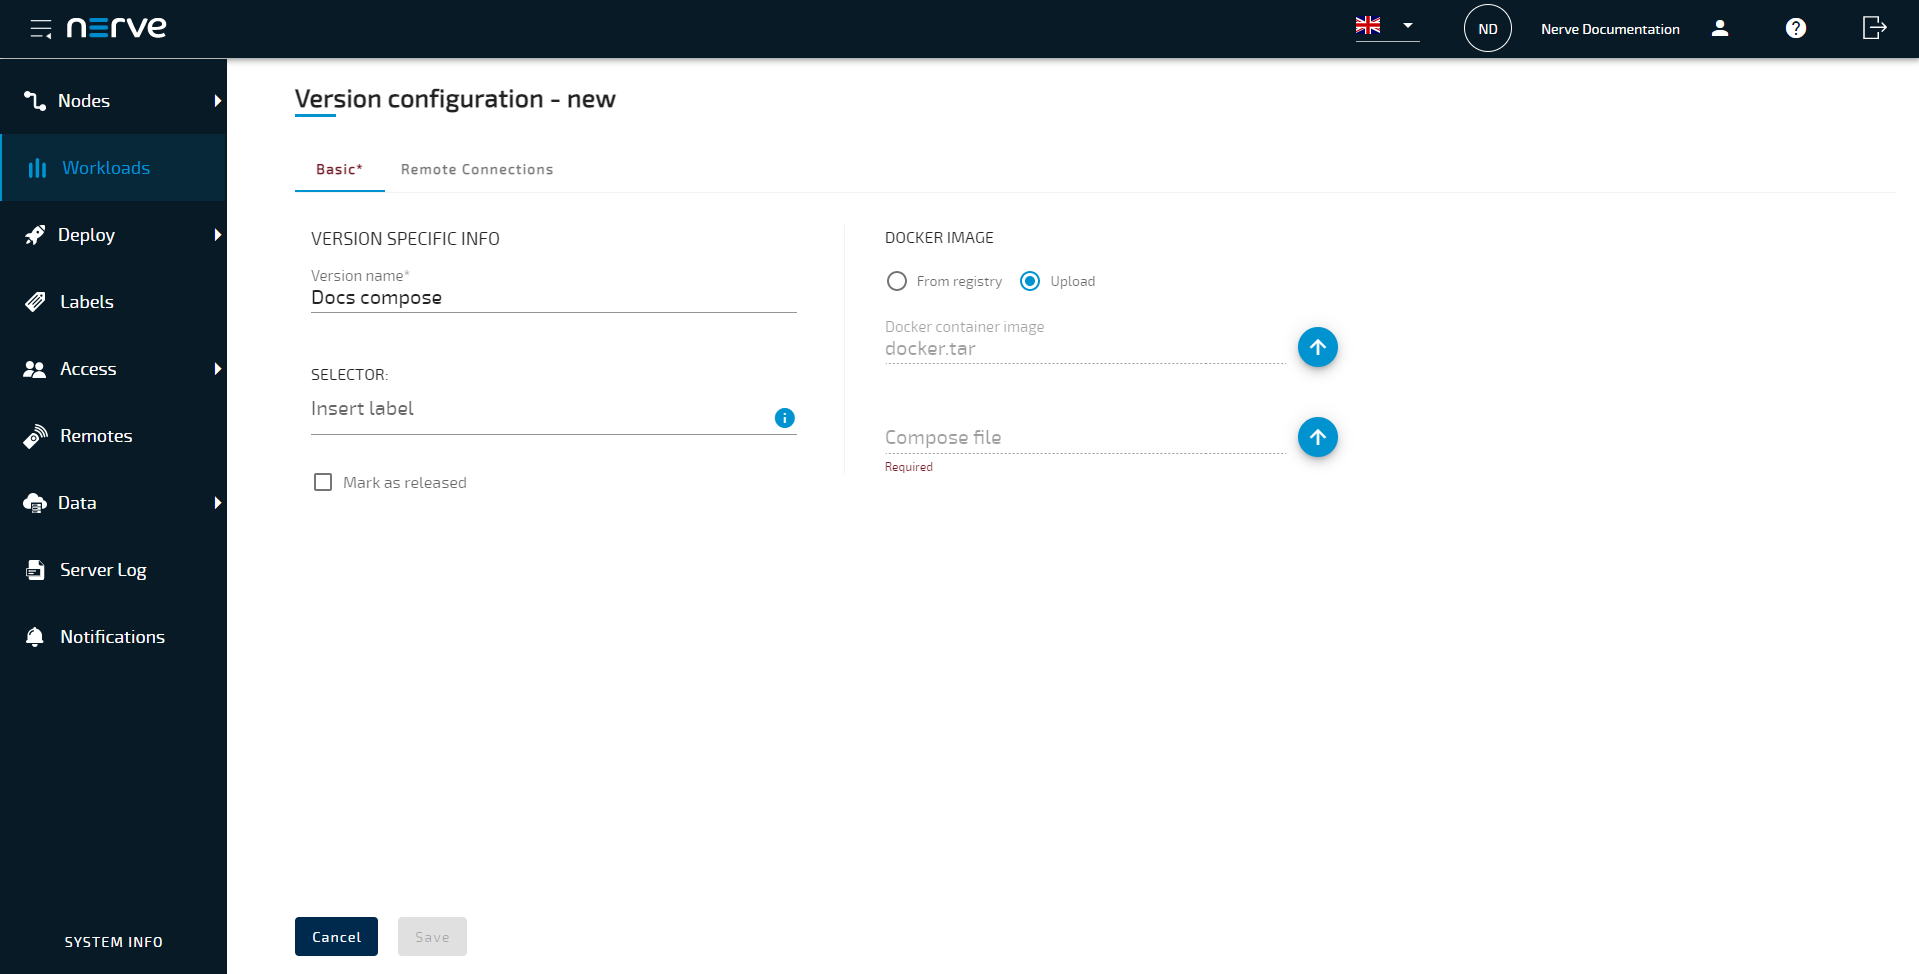
Compose file Select the upward arrow symbol to open the file browser and upload a compose file for the Docker container here. The compose file needs to be written according to the Docker Compose schema v3.7.
Note that the image path needs to be included in the compose file. It also needs to be consistent with the image specified through the UI. Refer to Docker Compose file for more information.
Once a compose file is added, its contents are displayed on the right. Note that the attributes of the compose file in the screenshot are placeholder attributes.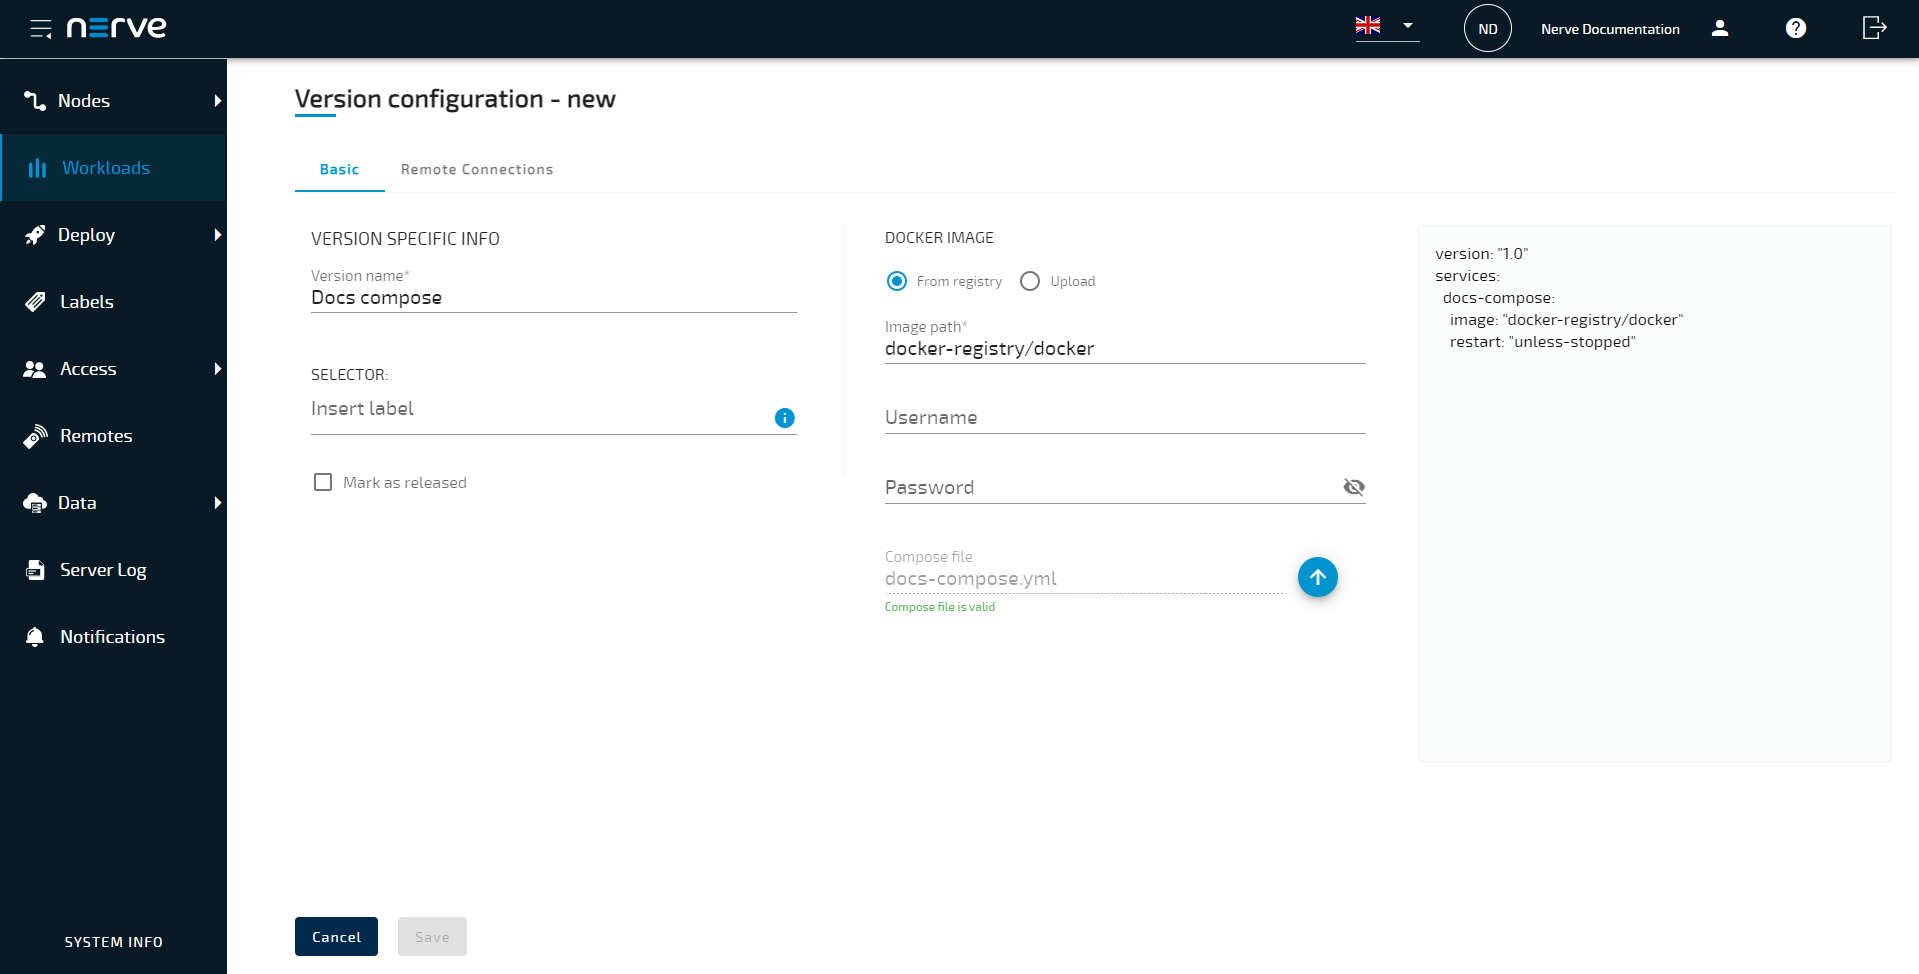
-
Select Save in the lower-left corner to save the workload version.
The workload has now been provisioned and is ready to be deployed in the Deploy menu.
Settings for Docker Compose workloads
In the instructions above, all optional settings have been left out. Below is an overview of all the options with an explanation to each option.
Basic tab
| Category | Settings and descriptions |
|---|---|
| VERSION SPECIFIC INFO | Version name A name for the workload version. This could be a reminder for a certain configuration. Example: "Unlimited" as a name for a Node-RED version that has unlimited access to CPU resources. SELECTOR If labels have been defined and assigned to nodes, add them as selectors to the workload. When deploying a workload, the list of nodes will be filtered automatically to the specified label. Select the Insert label field to see a list of available labels. Mark as released Tick this checkbox to mark this workload as released. Once marked as released, the workload cannot be edited anymore. |
| DOCKER IMAGE | Select between two options here and either use a Docker registry URL to link to an online repository or upload the Docker container image from the workstation. Note that Docker images in TAR.GZ format are not supported. From registry Specify a URL pointing to the Docker container image under Image path. Note the differences between public Docker Hub registries and private registries. Private registries require the full URL to be specified, as well as a username and password if they require authentication. Public Docker Hub registries can be specified in their short form. Visit Docker Hub to find Docker images and their paths. Examples:
Upload the Docker container image from the workstation. Obtain a Docker image for the upload by executing a command on the workstation where the Docker image for provisioning is located. Enter docker save <image_name> -o <filename>. Then in the Management System select the upward arrow symbol to open the file browser and upload the resulting <filename> Docker image. Also, do not upload Docker images in TAR.GZ format. This will produce a Docker workload file in the wrong format when the workload is exported.Compose file Select the upward arrow symbol to open the file browser and upload a compose file for the Docker container here. The compose file needs to be written according to the Docker Compose schema v3.7. Note that the image path needs to be included in the compose file. It also needs to be consistent with the image specified through the UI. Refer to Docker Compose file for more information. Configuration storage This setting only appears when one or more Docker volumes have been defined through the compose file. A volume can be used as storage for configuration files. Select a Docker volume from the drop-down menu to designate a volume as configuration storage and enable the application of configuration files. Refer to Applying configuration files to a workload for more information. Restart on configuration update Tick this checkbox to trigger an automatic restart of the workload when configuration files are applied. |
Remote connections tab
| Category | Settings and descriptions |
|---|---|
| REMOTE CONNECTIONS | Select the Remote connections tab to configure a remote connection to the workload. Make sure to configure the workload first so that a remote connection can be established. Refer to Remote connections for more information and instructions for all remote connection types. |
Example Compose files
This section presents two example compose files that can be used to provision a Compose workload immediately. They are designed for trying out Docker Compose workloads. The applications used for the examples are PostgreSQL and Grafana.
Example 1: PostgreSQL
The simple compose file below defines a service with the name db using the postgres container image. The container exposes the port 5432 that must be available for linked services. The file shows how to define environment variables and a named volume for the container. At deployment time, a default network is created and the container joins it under the name db.
version: '3.5'
services:
   db:
    image: postgres:alpine
    environment:
      - POSTGRES_USER=admin
      - POSTGRES_PASSWORD=postgres
      - POSTGRES_DB=postgres
    restart: always
    volumes:
      - db_data:/var/lib/postgresql/data
    expose:
      - 5432
volumes:
  db_data:
Refer to the official Docker Compose documentation for more information on writing compose files.
Example 2: Grafana
The compose file for Grafana shows how to map the container port to a host port. Most importantly, it shows how to connect the container to an existing Nerve network. The use of pre-configured Nerve networks for Docker and Docker Compose workloads is recommended. Refer to Node internal networking for more information on Nerve networks.
version: '3.5'
services:
  grafana:
    image: grafana/grafana:7.5.17
    container_name: grafana
    ports:
      - 3002:3000
    restart: unless-stopped
    environment:
      - GF_SECURITY_ADMIN_USER=admin
      - GF_SECURITY_ADMIN_PASSWORD=grafana
    networks:
        extern1:
            aliases:
                - nerve_grafana
    volumes:
      - grafana_ds:/etc/grafana/provisioning/datasources
volumes:
  grafana_ds:
networks:
  extern1:
    external: true
Refer to the official Docker Compose documentation for more information on writing compose files.