Workload Example: Installing Node-RED#
As a hands-on example, this chapter will guide you through provisioning and deploying Node-RED in a Docker workload with recommended settings. This is an example and a combination of the previous chapters that covers provisioning a Docker workload containing Node-RED and then deploying the provisioned Node-RED workload.
If you do not need Node-RED or if you feel confident in provisioning and deploying workloads, please feel free to skip this chapter.
Provisioning the Node-RED Workload#
Before you can deploy a Node-RED workload, it needs to be provisioned first. Since this chapter provides a specific example, it will include recommended settings for the deployment of a Docker workload containing Node-RED.
If you want a more detailed look into the general process of provisioning a Docker workload, please refer to the chapter Working with Docker Containers.
- Log in to the Management System.
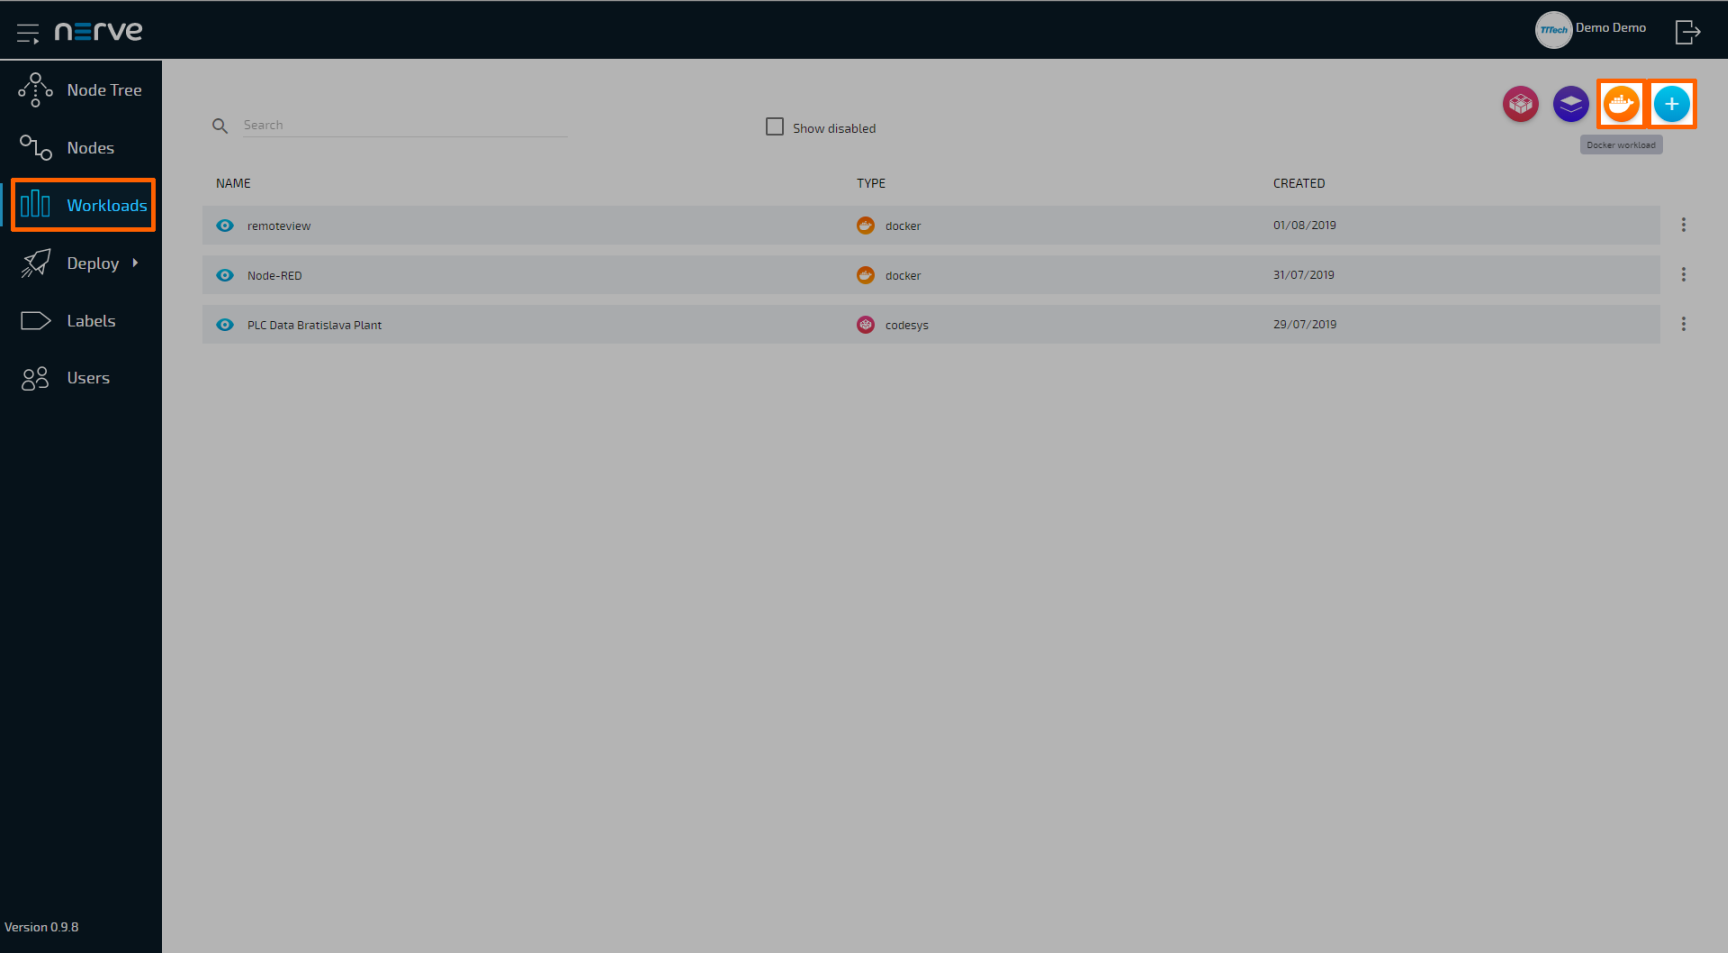
- Select Workloads in the left-hand menu.
- Select + in the upper-right corner.
-
Select the Docker symbol (Docker workload) on the right of the three symbols that expanded.
-
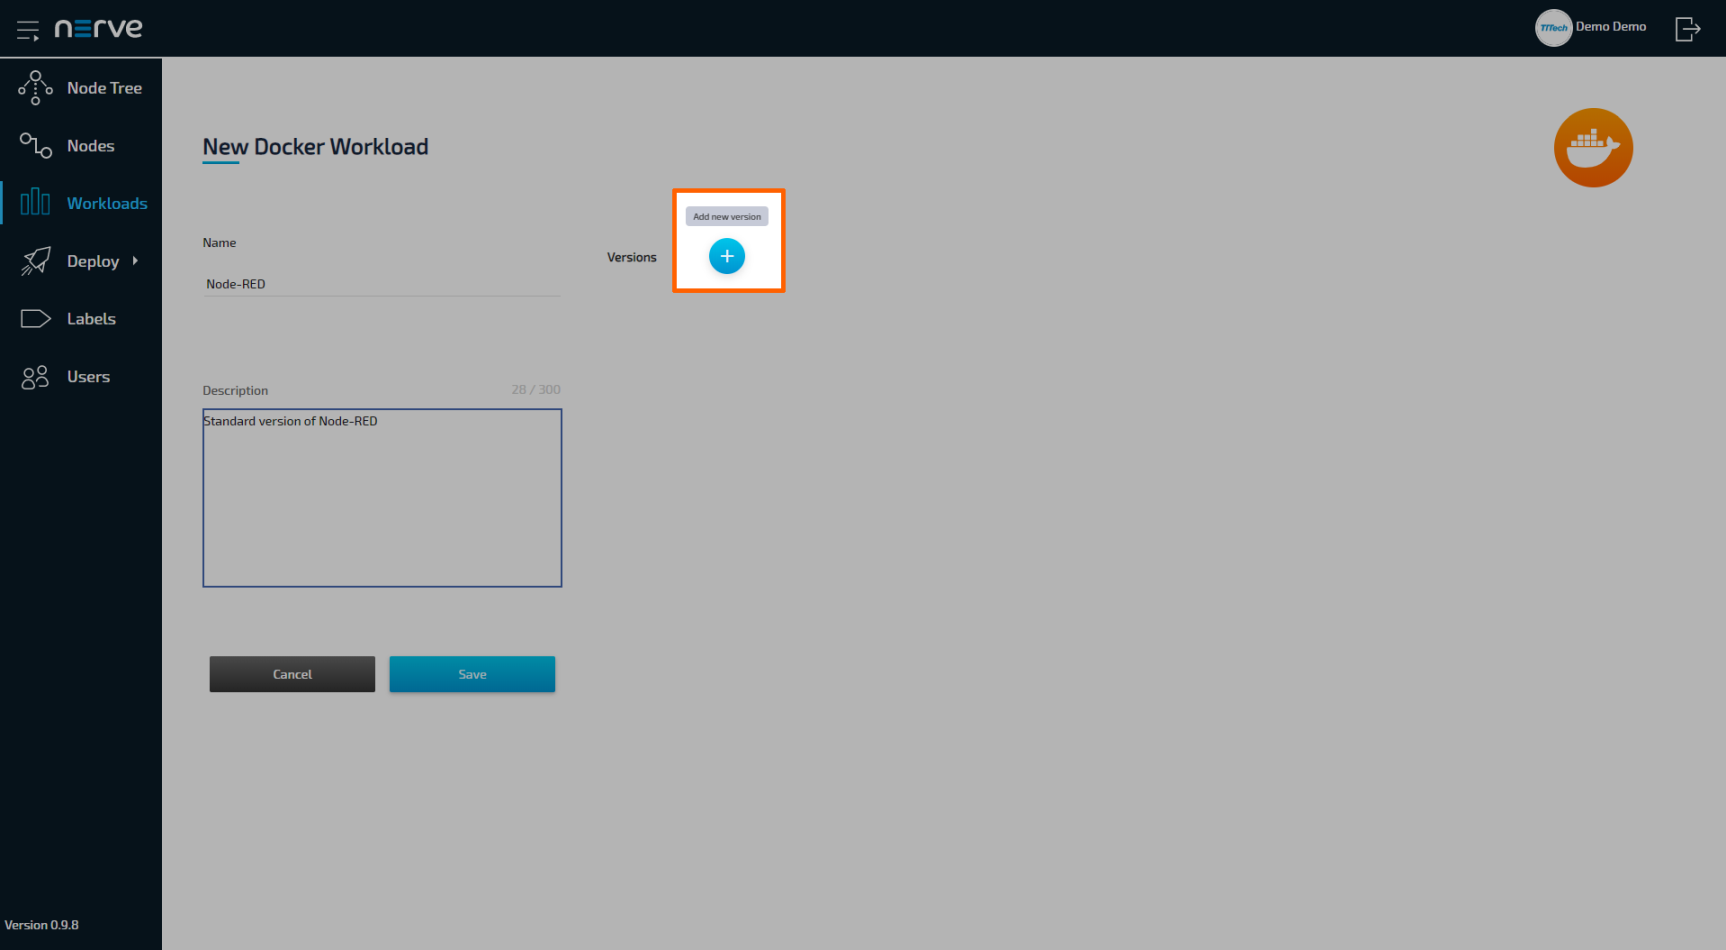
In the new window, enter a name for your workload.
Optional: Enter a description for your workload.
-
Select + next to Versions to add a new version of the workload.
-
In the next window, enter the following information:
Item Description Name Enter a Name for the version of this workload. Here Data Flow is chosen to signify the functionality of this workload version. Release name Enter a Release name for the version of this workload. This can be a version number. 1.0 is used here as an example. DOCKER IMAGE Select From registry or Upload.
If you select From registry, you need to enter the Docker registry to the Docker container image under Image path. For a Node-RED workload this isnodered/node-red-docker.
If you select Upload, click the upward arrow symbol to upload the Node-RED Docker container image. Please refer to the Docker documentation if you need help with creating a Docker image.Add port Click here to define a Host port and a Container port. This setting is depending on the Docker container you are going to deploy. Therefore this is set to 1880:1880 as this is the default port that Node-RED listens on. System memory to reserve Assign how much system memory you would like to reserve for this workload. Here this is set to 512 MB. Container restart policy Choose the container restart policy here to determine when the Docker container can be restarted. This is set to unless-stopped here so that Node-RED container only restarts if it is manually stopped. 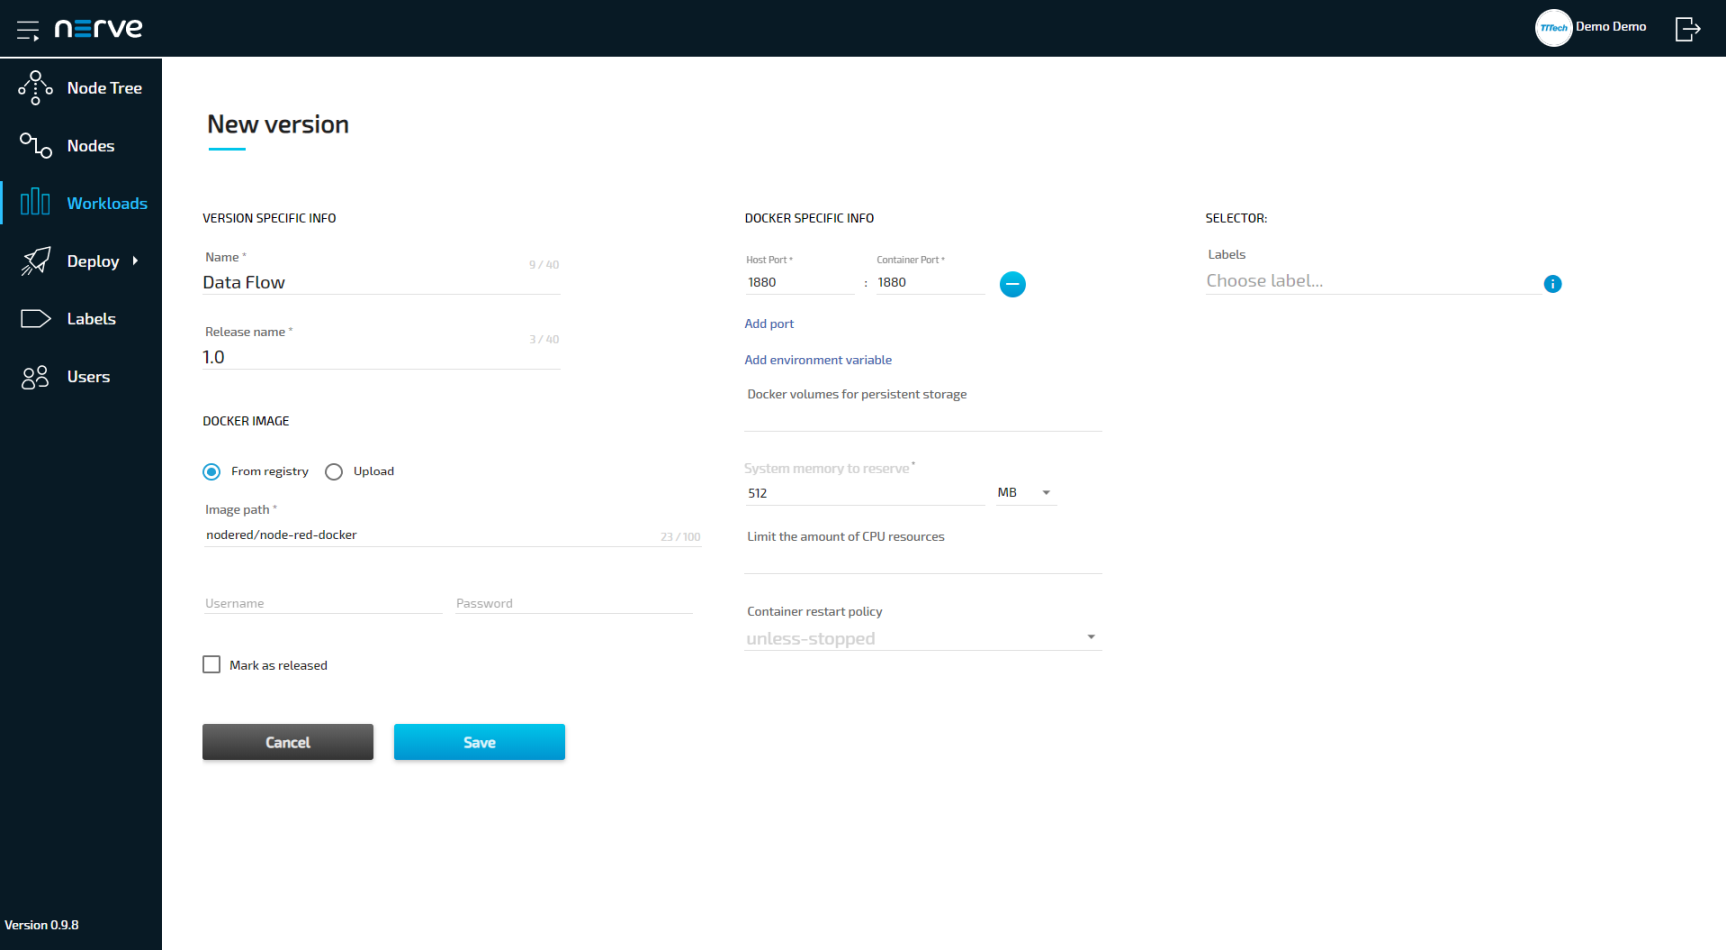
-
Select Save in the lower-left corner.
The Node-RED workload has now been provisioned and is ready to be deployed in the Deploy menu.
Deploying the Node-RED Workload#
Now that the Node-RED workload is provisioned, you can deploy the workload to any designated node.
-
Select Deploy in the left-hand menu.
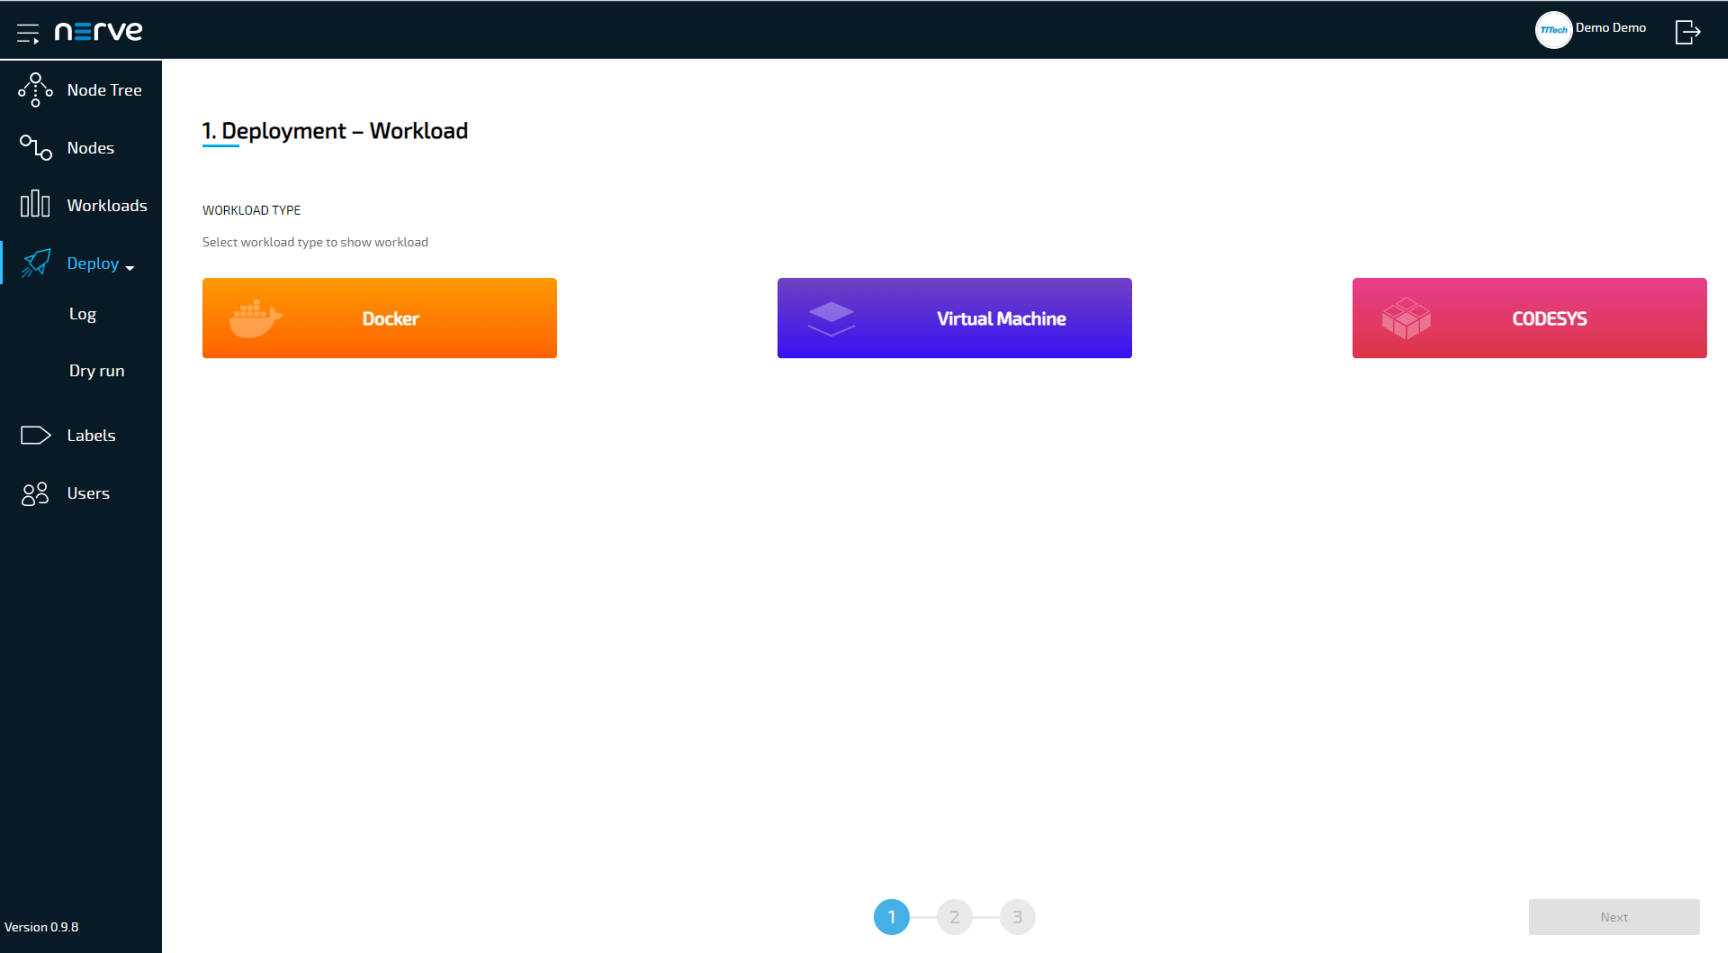
-
Select the Docker icon. A list of Docker workloads will appear below.
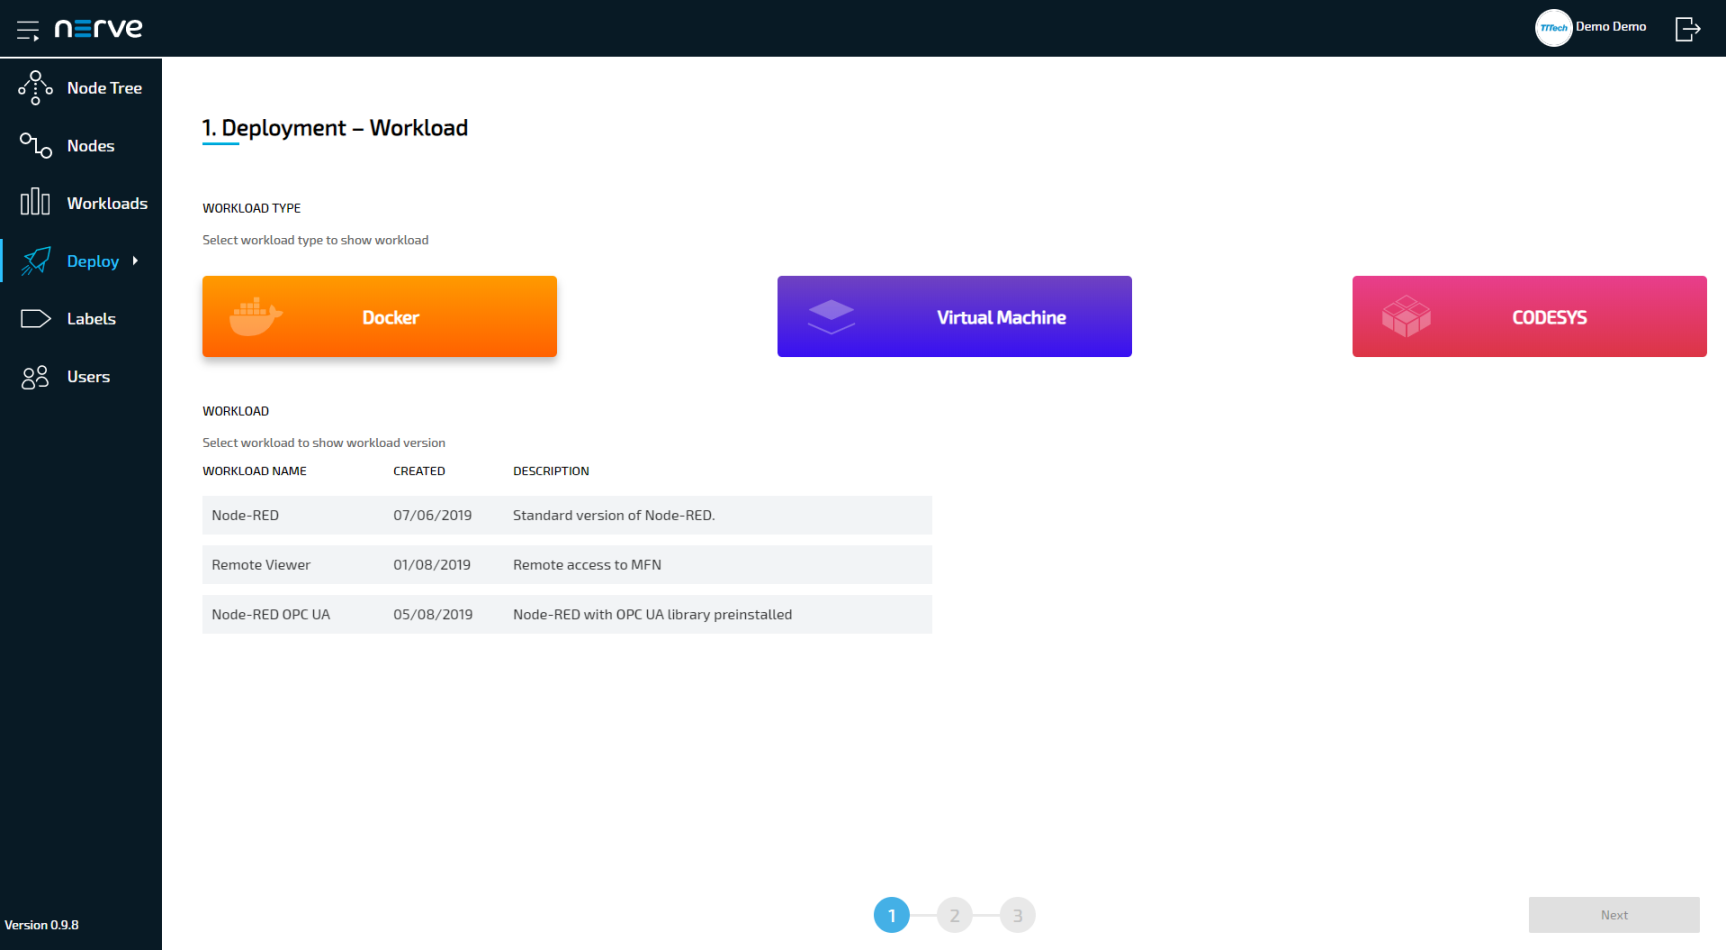
-
Select the Node-RED workload that you have provisioned before from the list. A list of versions of this workload will appear to the right.

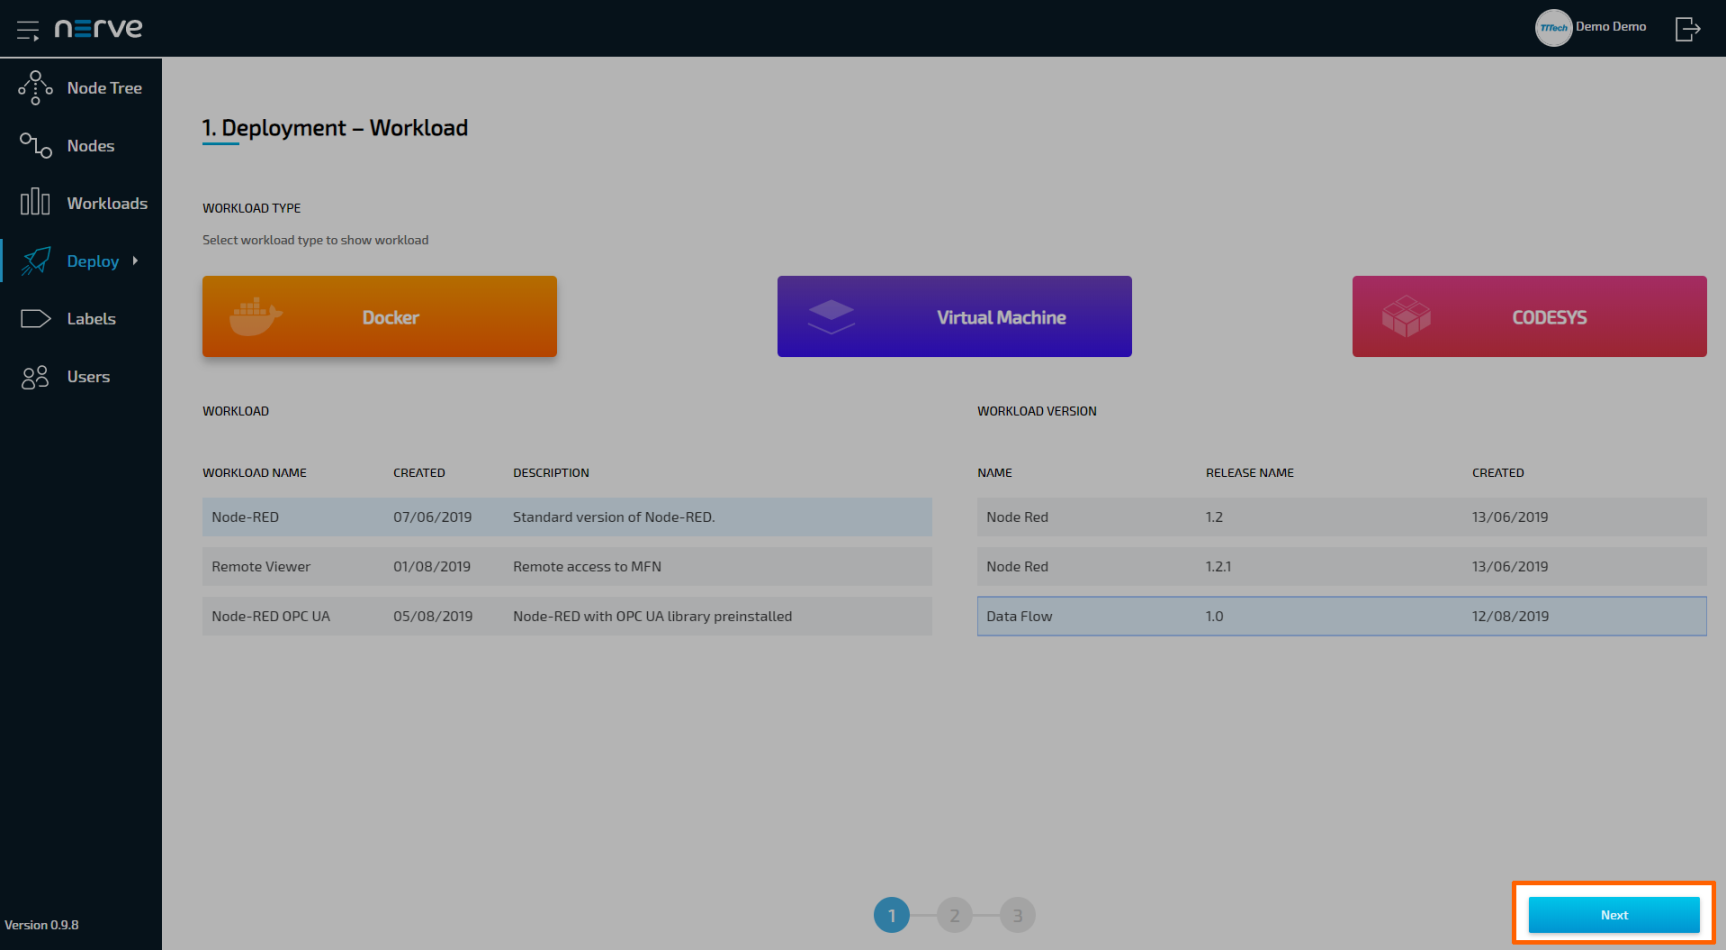
-
Select the version of the workload you would like to deploy. If you have followed this example, there will only be one version of this workload available.
-
Click Next in the bottom-right corner.
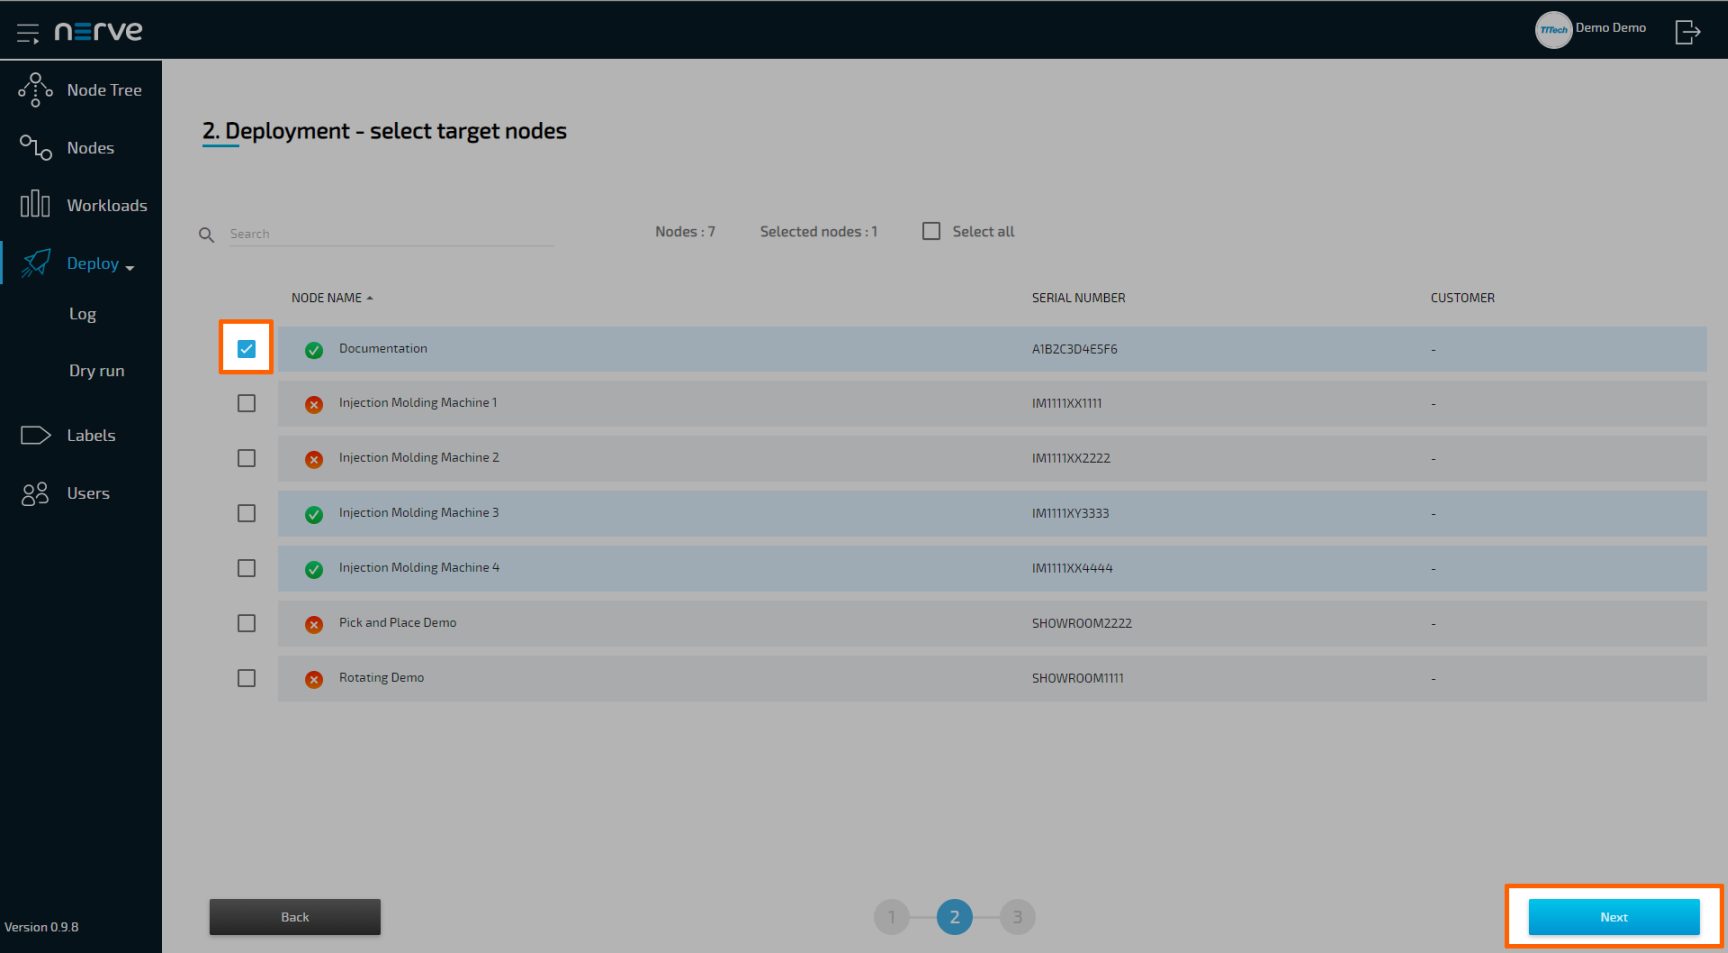
-
In the next window, select one or more nodes from the list for deployment by ticking the checkboxes on the left.
-
Select Next in the bottom-right corner.
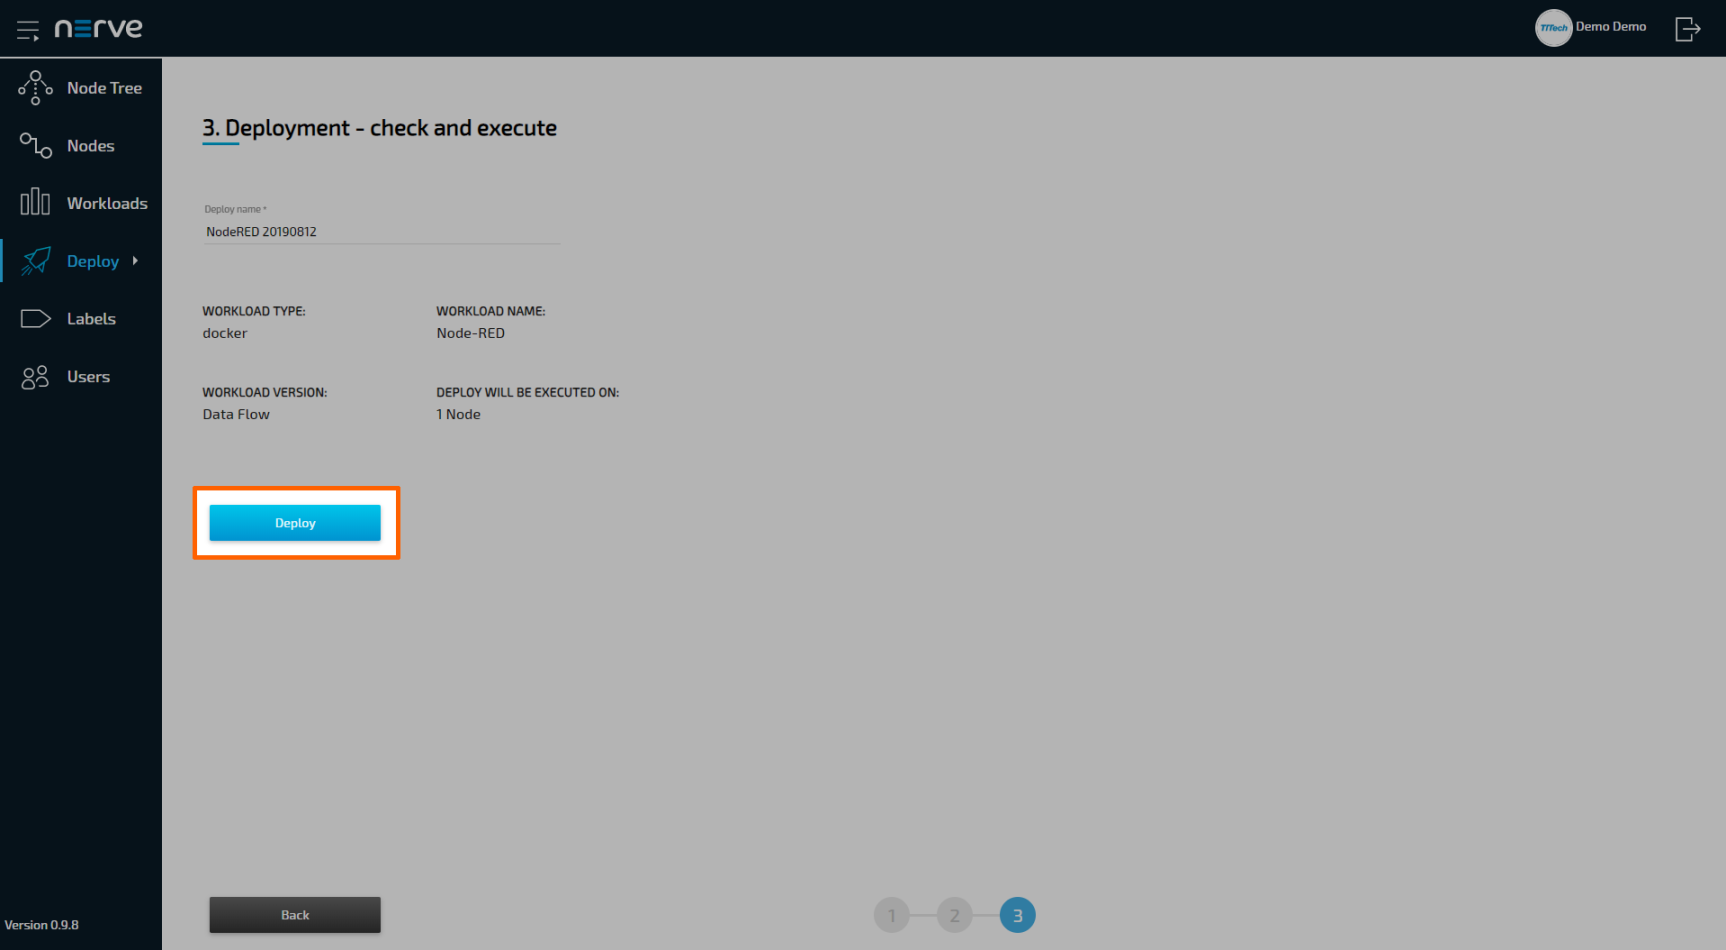
-
In the next window, enter a Deploy name above the Summary of the workload. Choose a name that makes this deployment easy to identify.
-
Select Deploy to execute the deployment.
You will be taken to the log next. Your current deployment is at the top of the list. The Deploy name you have chosen before is the name that identifies the deployment in the log.
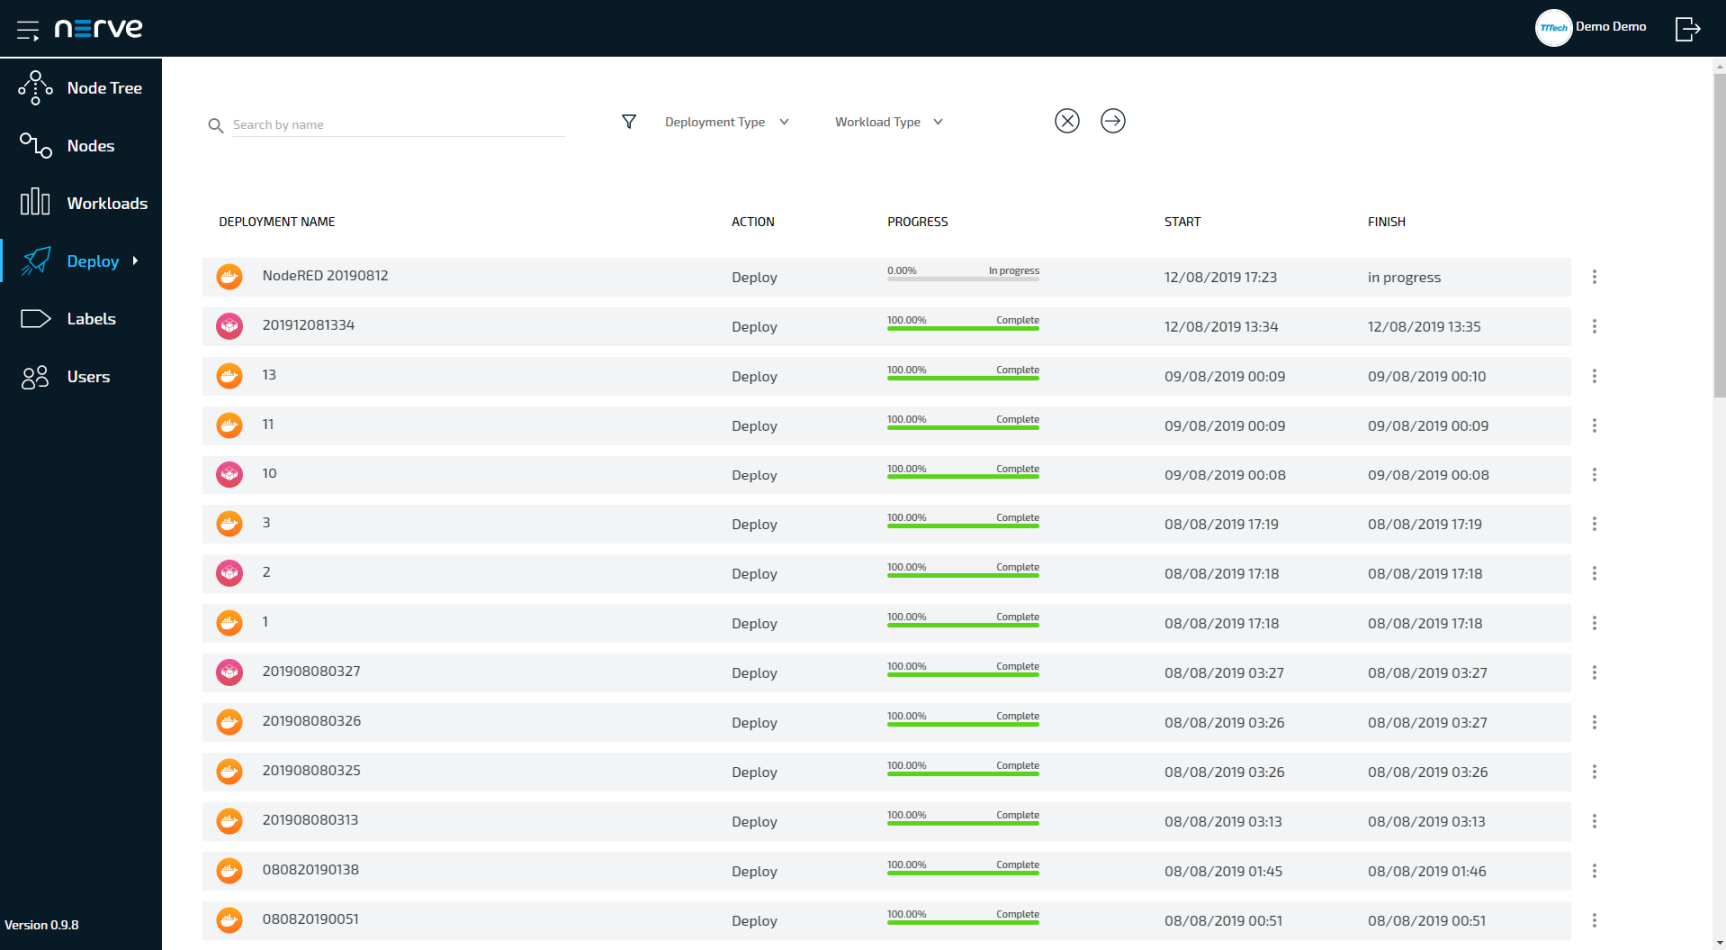
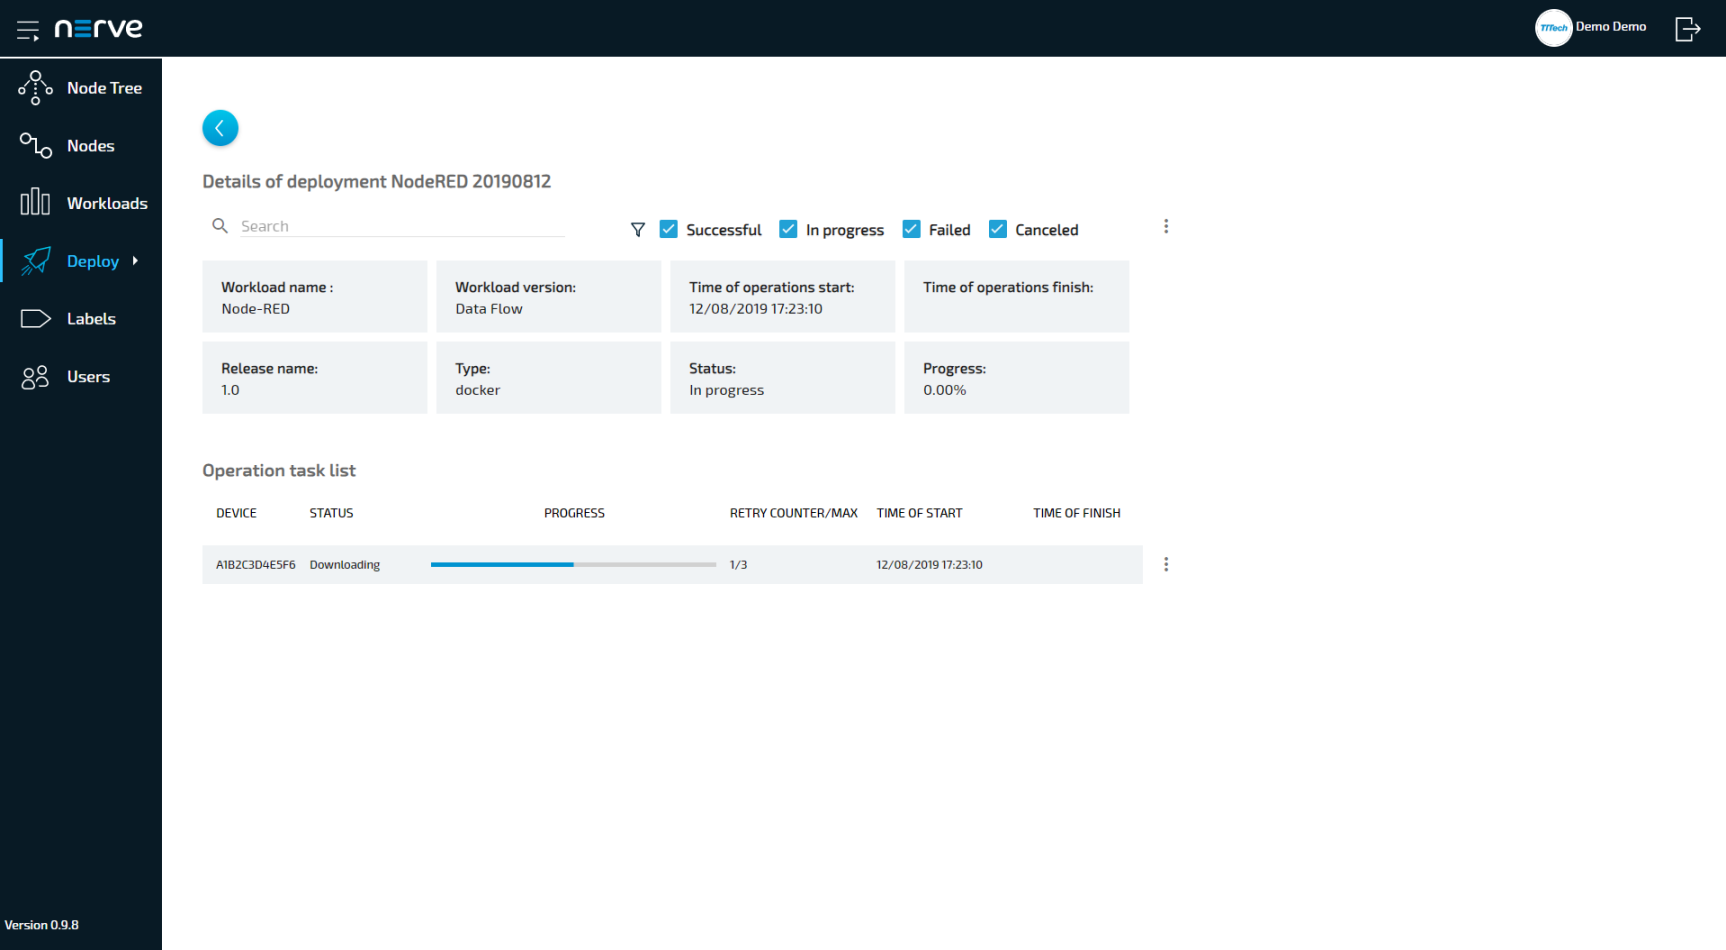
Here you can see the progress of the current deployment and click the progress bar to see a more detailed view.
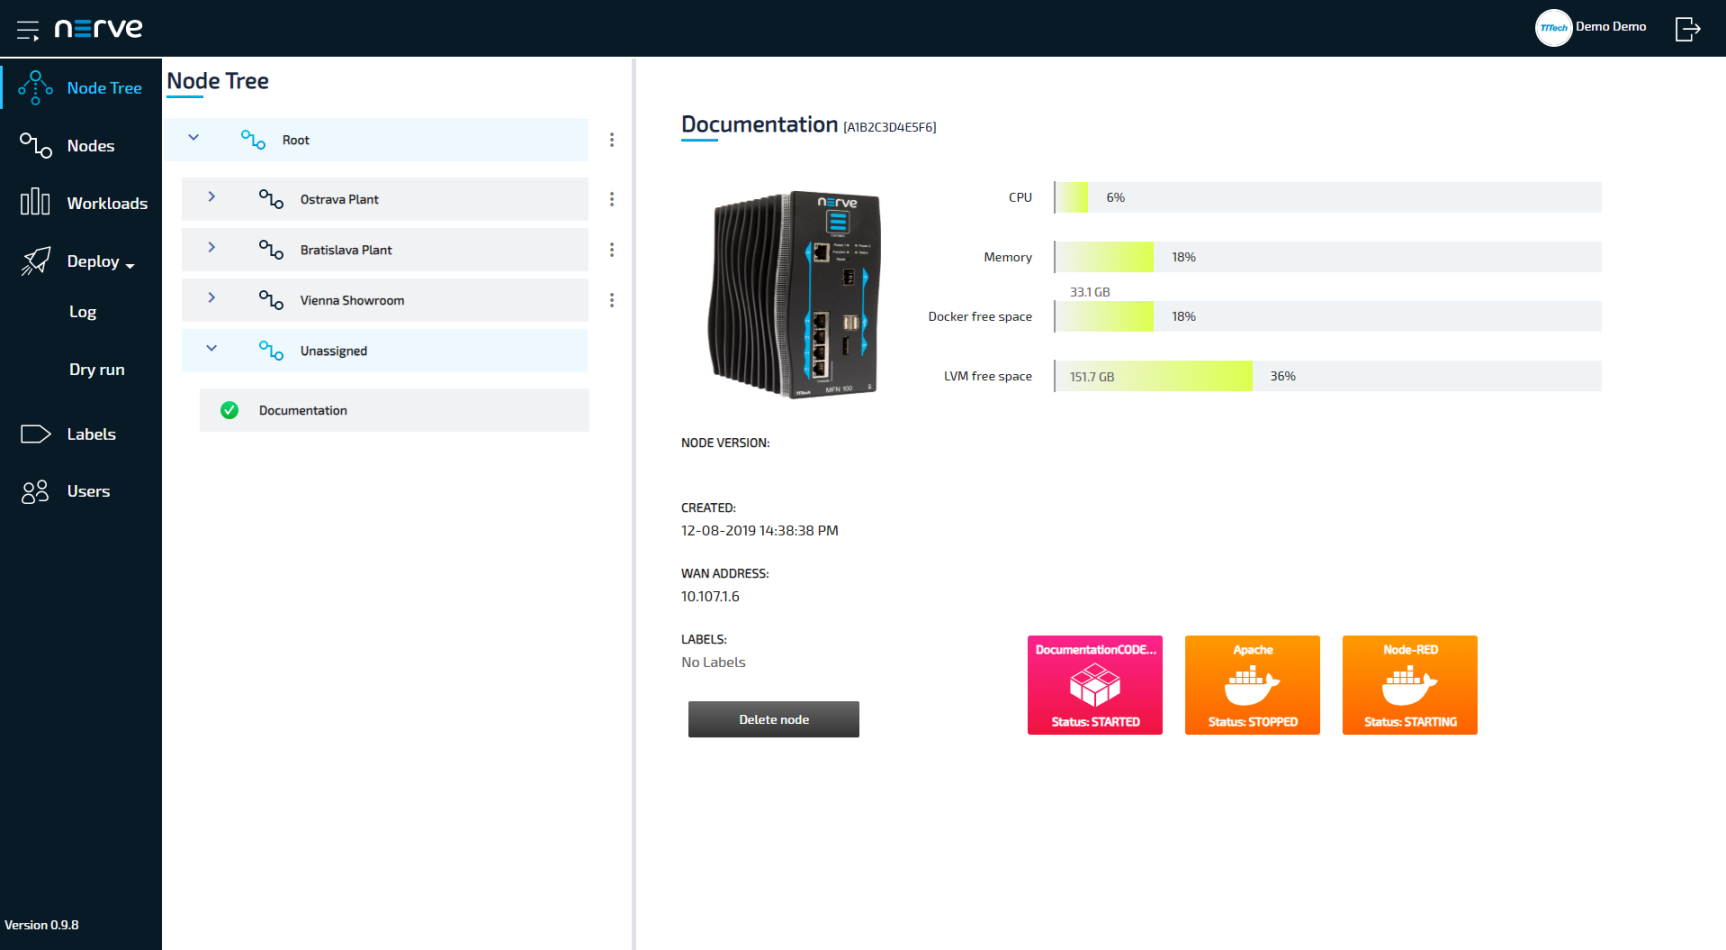
The workload has been deployed and can be controlled in the Node Tree. Select a node to view the node details and choose the workload you would like to control. The Node-RED workload is started right after deployment.
This is the end of the quick start guide. If you have experienced any problems while following this guide or if you would like to give feedback, please contact your sales representative or TTTech Industrial customer support at support@tttech-industrial.com.