Local UI#
The local UI is provided by a web server that is running on the Nerve Device locally. Compared to the Management System, the local UI covers features that only concern the node itself. It serves three main purposes:
- Network configuration
- Control of CODESYS applications
- Password management
Note
The credentials for the local UI are set in the node registration process. If the product has been configured by TTTech Industrial, you can find the credentials in the customer profile that has been sent as part of the delivery.
If you have not received a customer profile, please contact your sales representative or TTTech Industrial customer support at support@tttech-industrial.com.
Connecting to the Local UI#
Connecting to the local UI depends on your Nerve Device and your configuration. See the device guide for details on how to connect to the local UI of your Nerve Device.
Once you have established a connection, log in with the credentials for the local UI.
You will reach the main page of the local UI.
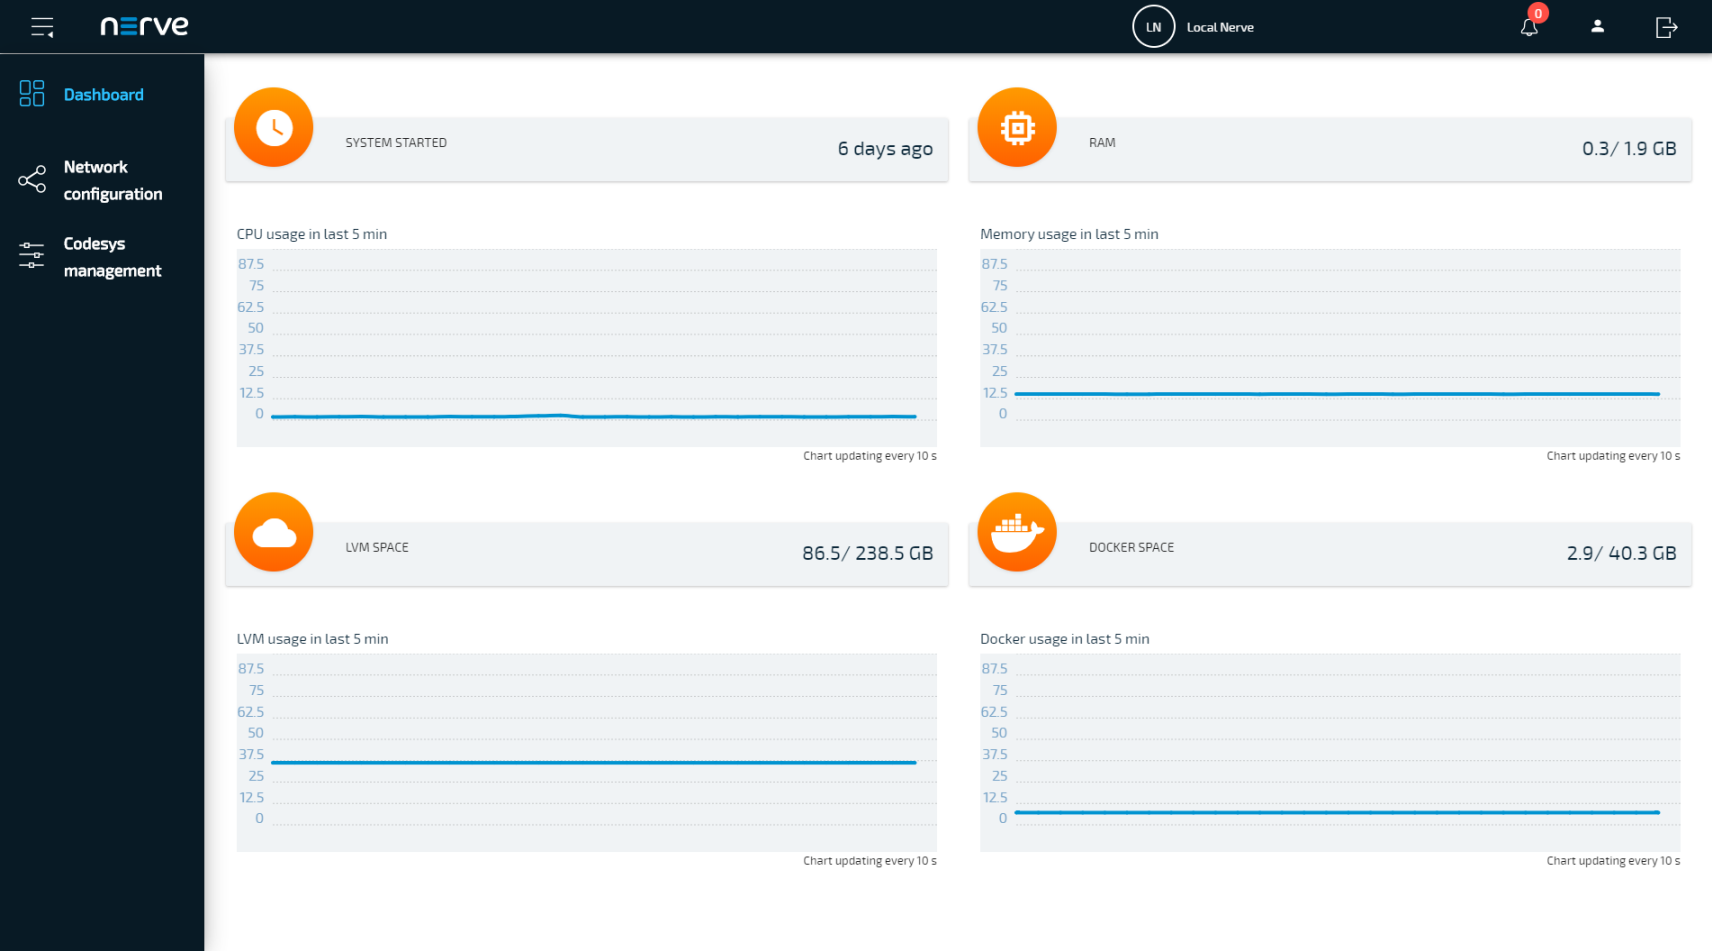
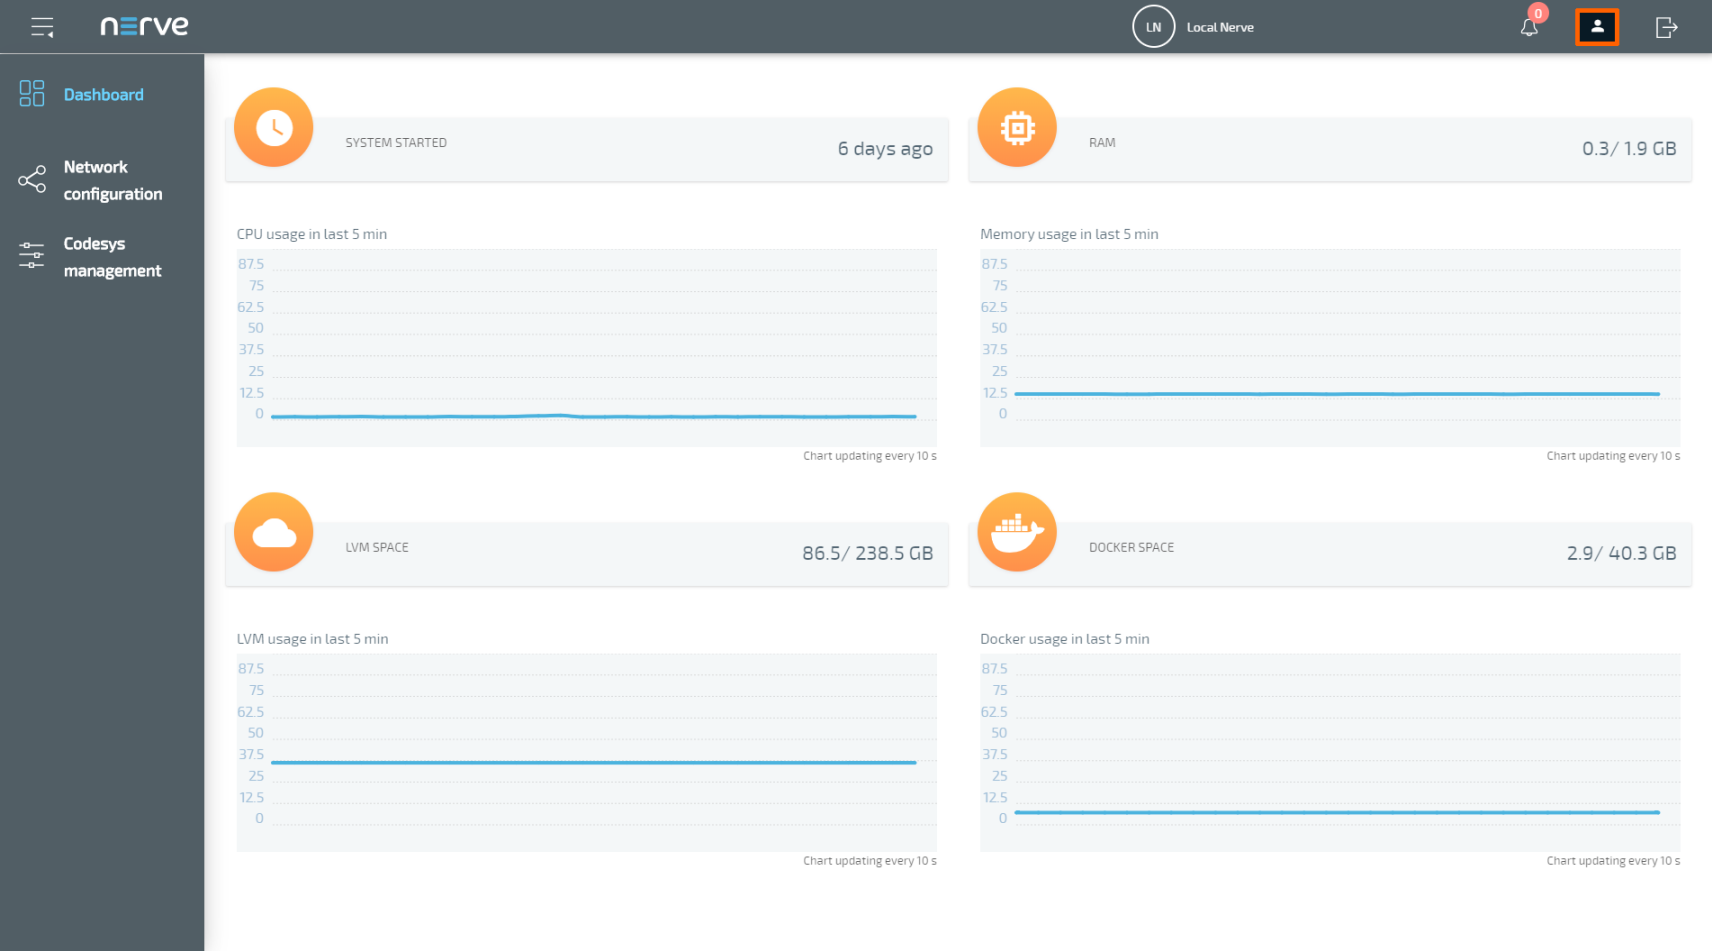
Local UI Dashboard#
The dashboard of the local UI is the default screen after the log in. Here you can find usage statistics of your Nerve Device displayed and more options in the menu on the left side.
| Term | Description |
|---|---|
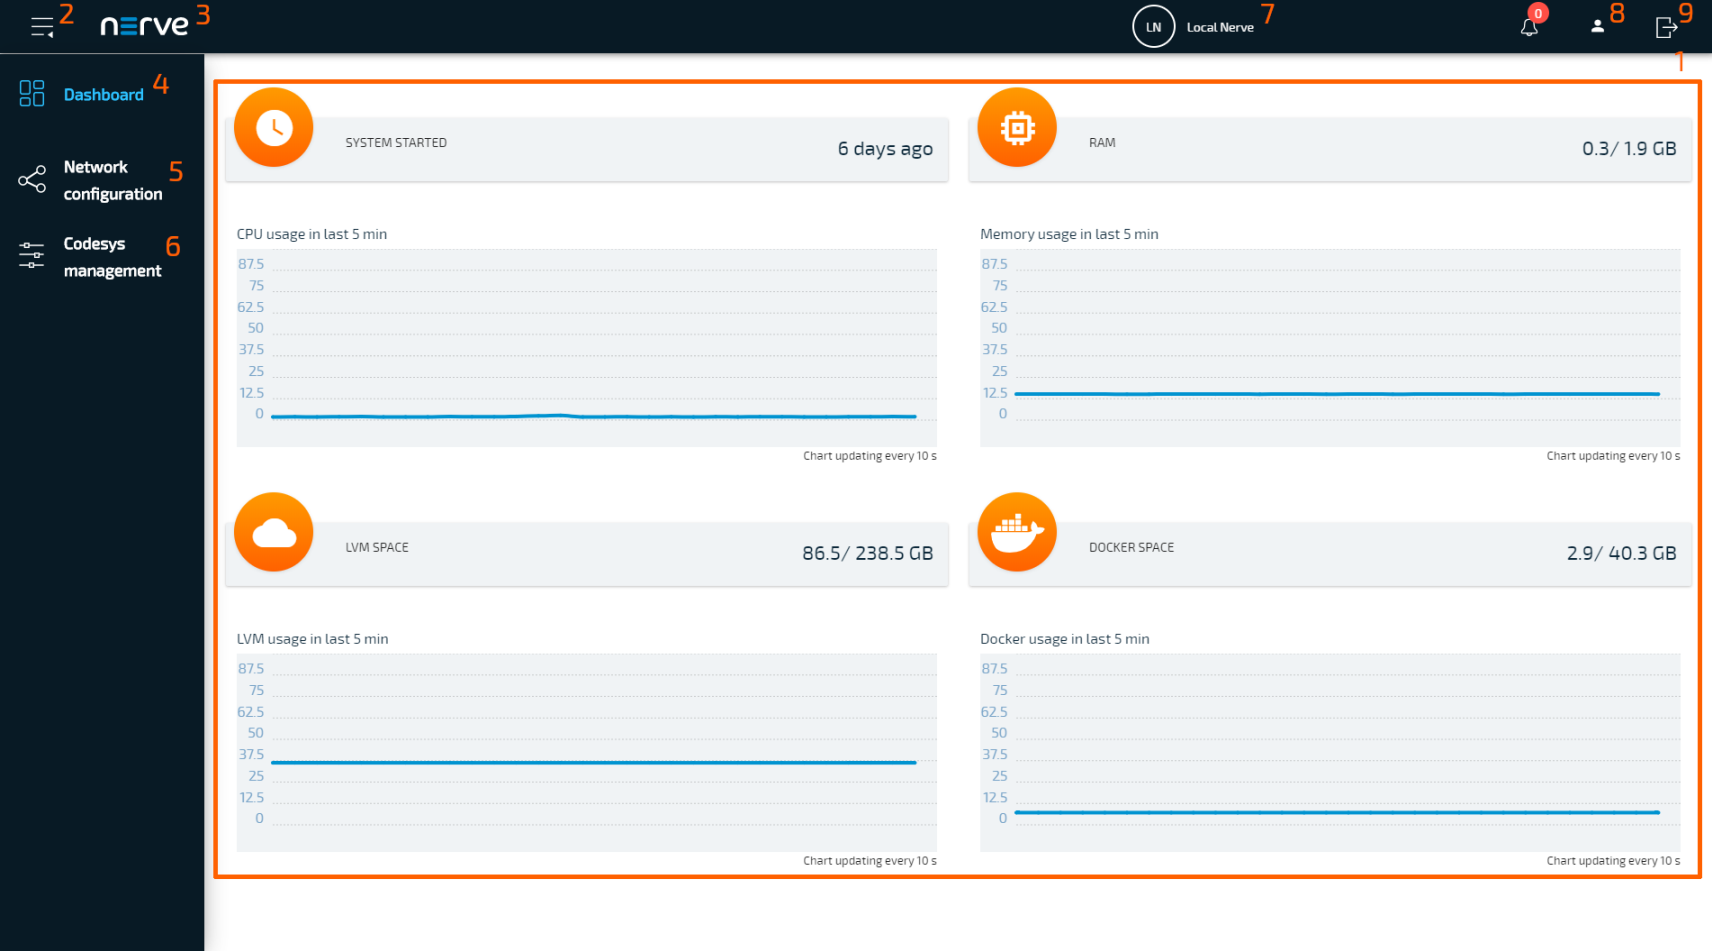
| System metrics (1) | Graphs showing available resources of the Nerve Device and their usage over time. |
| Burger menu (2) | You can expand and collapse the left-hand menu by clicking here. |
| Nerve logo (3) | Click here to return to the dashboard and reload the page. |
| Dashboard (4) | Select this to display the dashboard. |
| Network configuration (5) | This menu allows you to configure the Ethernet ports of the Nerve Device. |
| CODESYS management (6) | Control options for deployed CODESYS workloads are here. |
| User name (7) | This is the username of the signed in user. |
| Change password (8) | Clicking here leads to an area where you can change the password to the local UI. |
| Log out button (9) | Click here to log out of the local UI. |
System Metrics#
The graphs in the local UI dashboard show available resources of the Nerve Device and their usage over time. The y-axis displays percentages and the x-axis is updated every 10 seconds, showing a time span of 5 minutes. The percentages displayed are always in relation to the maximum of the available resource:
| Item | Description |
|---|---|
| SYSTEM STARTED | This shows how long the Nerve Device has been running. If the device is restarted, this value is reset. |
| CPU usage in last 5 min | The graph here shows the percentage of processing power that is being used. This includes CPUs that have been assigned to VMs and Docker Containers. |
| RAM | This shows how much memory is used (left value) and how much memory is available in total (right value). Example: 0.3/1.9 GB Please note that the total amount of memory your Nerve Device offers is not shown here. This is the memory that is available for the host. |
| Memory usage in last 5 min | Similar to CPU usage, the graph shows the percentage of memory used. This includes memory that has been assigned to VMs or Docker Containers. |
| LVM SPACE | Virtual machines have their dedicated virtual partition (Logical Volume Manager). The values show how much of this partition is used (left value) and how much is available in total (right value). Example: 86.5/238.5 GB |
| LVM usage in the last 5 min | This graph shows the percentage of space that is being used by the Logical Volume Manager. |
| DOCKER SPACE | Similar to LVM space, Docker containers have their dedicated virtual partition. The values show how much of this partition is used (left value) and how much is available in total (right value). Example: 2.9/40.3 GB |
| Docker usage in the last 5 min | This graph shows the percentage of space for Docker containers that is being used. |
Local Network Configuration#
From the local UI, you can configure the Ethernet ports of the Nerve Device. Select Network configuration in the navigation on the left to reach this menu. The example below is of the MFN 100. The page is specific to your Nerve Device. The number and names of interfaces may differ.
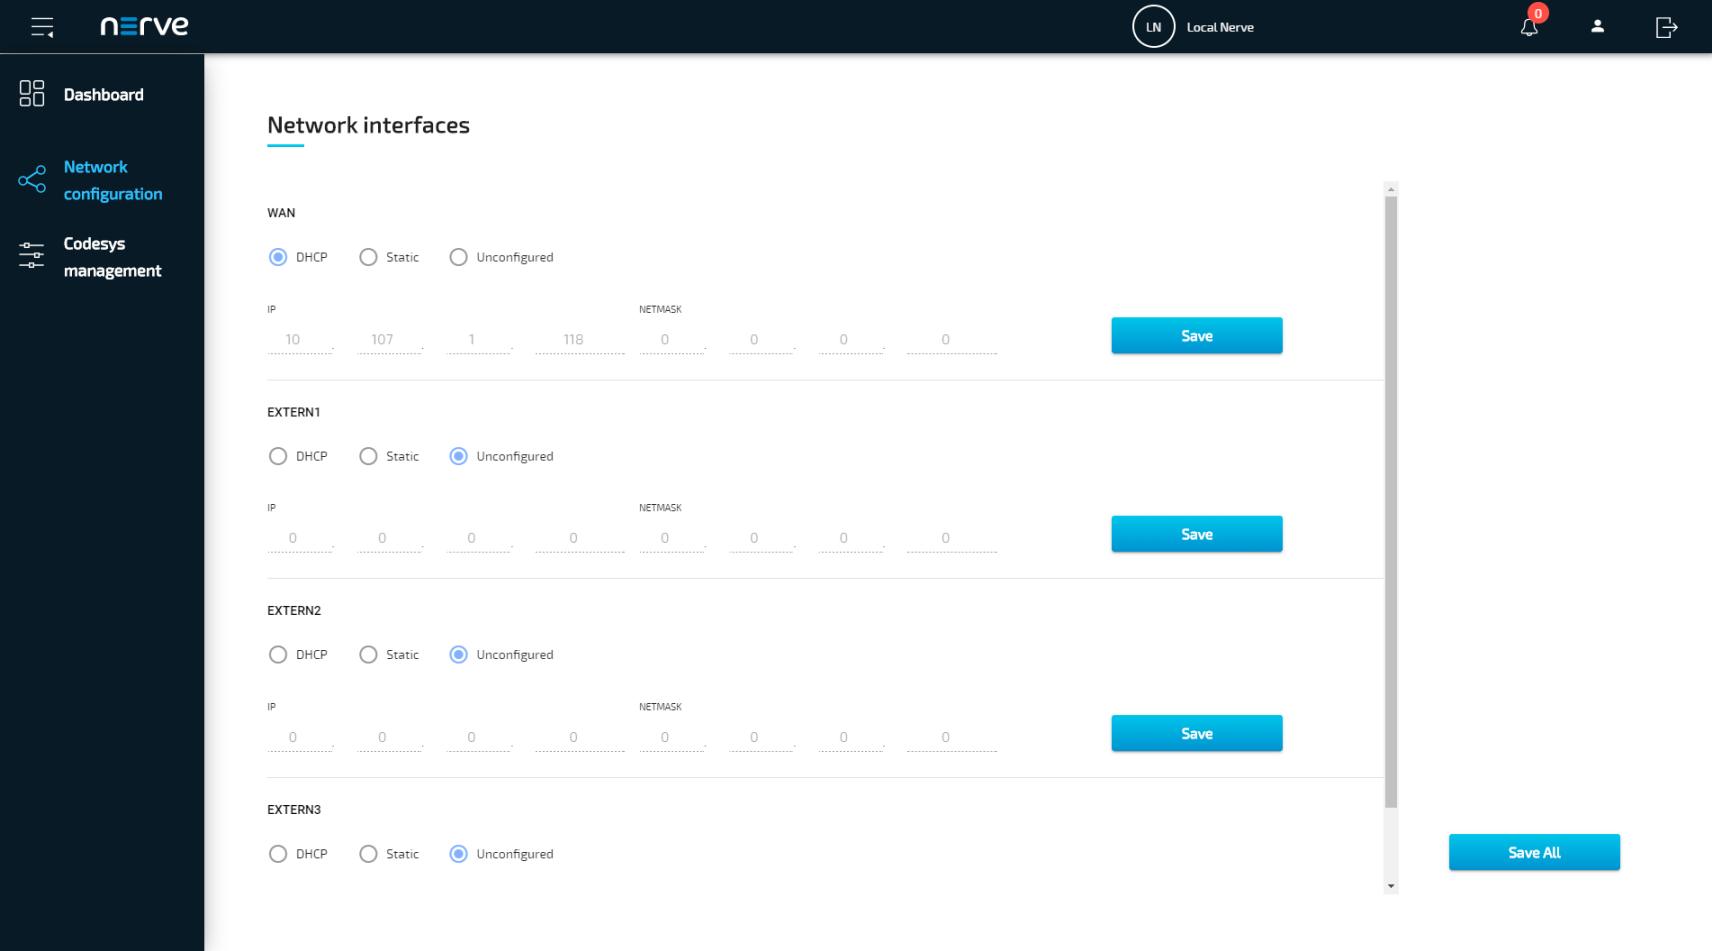
The options below are available for every interface:
| Item | Description |
|---|---|
| DHCP | The IP address of the port will be assigned by the DHCP server. If an IP address has been assigned, it will be displayed here. |
| Static | By selecting Static, you have to define the IP address of the port manually. Enter the IP address here to set a static IP address. |
| Unconfigured | If Unconfigured is checked, the port is disabled for the host but can still be used for virtual machines with bridged interfaces. |
Note
For more information on networking and interfaces please refer to the networking chapter.
Control of CODESYS Applications#
CODESYS workloads can only be controlled in the local UI, as operation of a CODESYS workload may have an impact on your machine operation and therefore should not be controlled remotely. Select CODESYS management in the menu on the left-hand side to reach the interface for controlling a CODESYS application running on the Nerve Device:
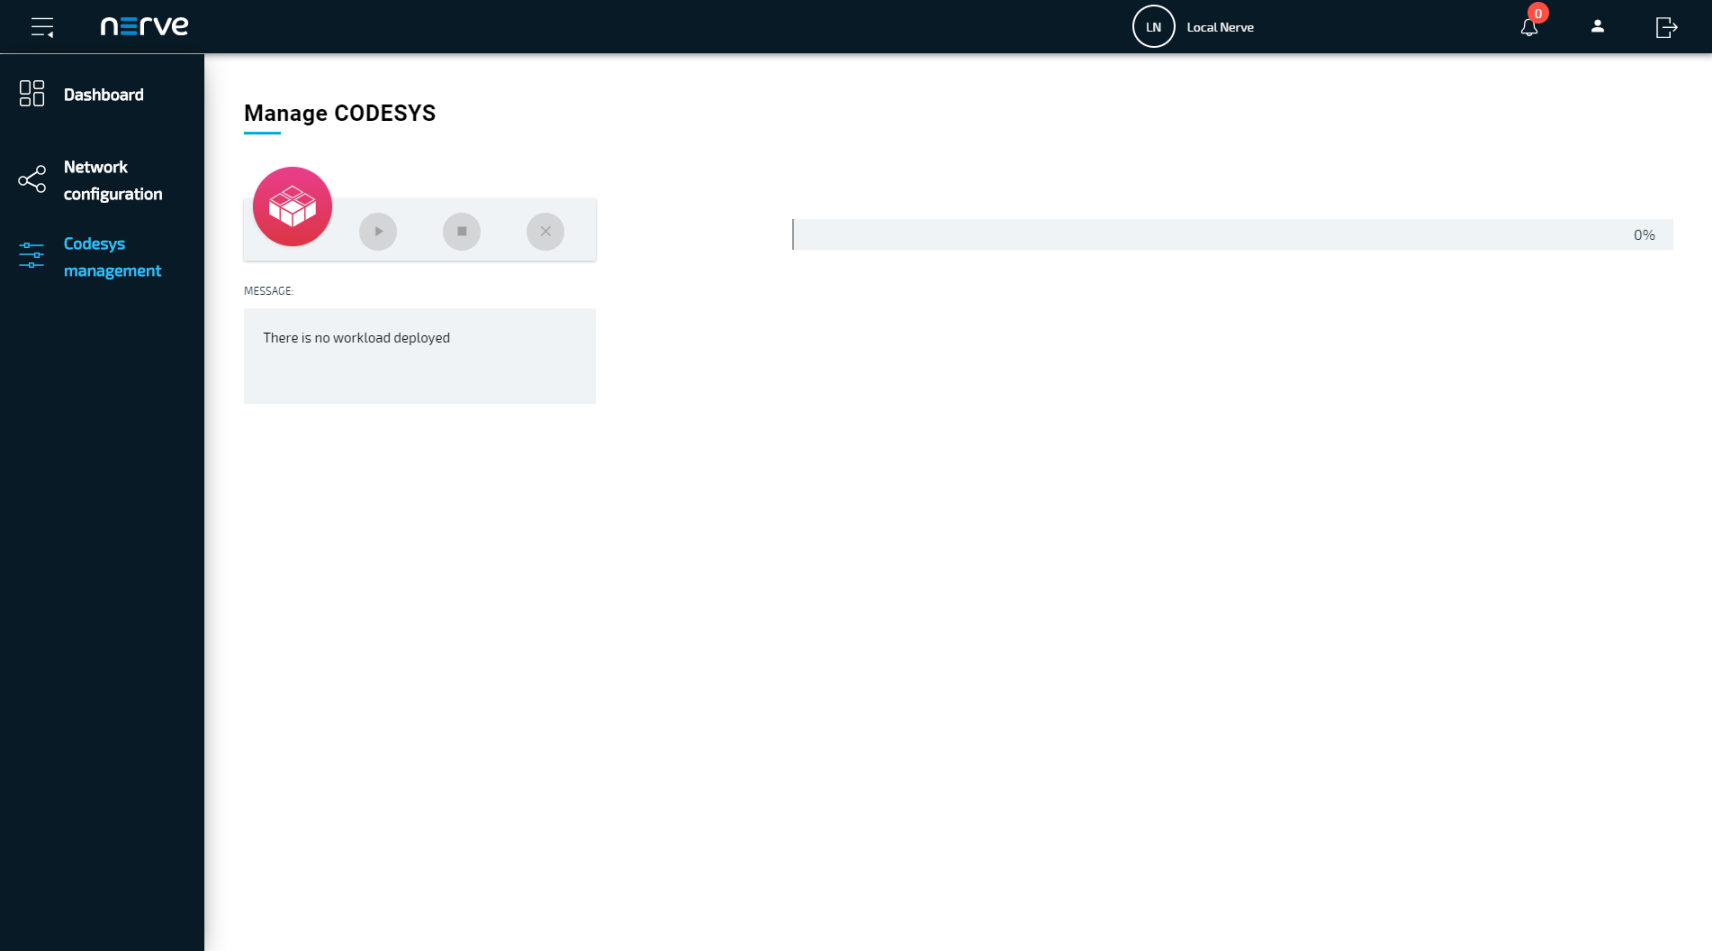
| Function Name | Description |
|---|---|
| Start | This starts the CODESYS application. |
| Stop | This stops the CODESYS application and it is reset to its initial values. |
| Remove | This removes the CODESYS application from the Nerve Device. If you want to deploy the CODESYS application again, you have to do so directly with local access through the CODESYS Development System or through the Management System in the cloud. |
| Message | CODESYS workloads have the following set of messages:
|
Note
It takes a moment before CODESYS applications are actually started, stopped or removed.
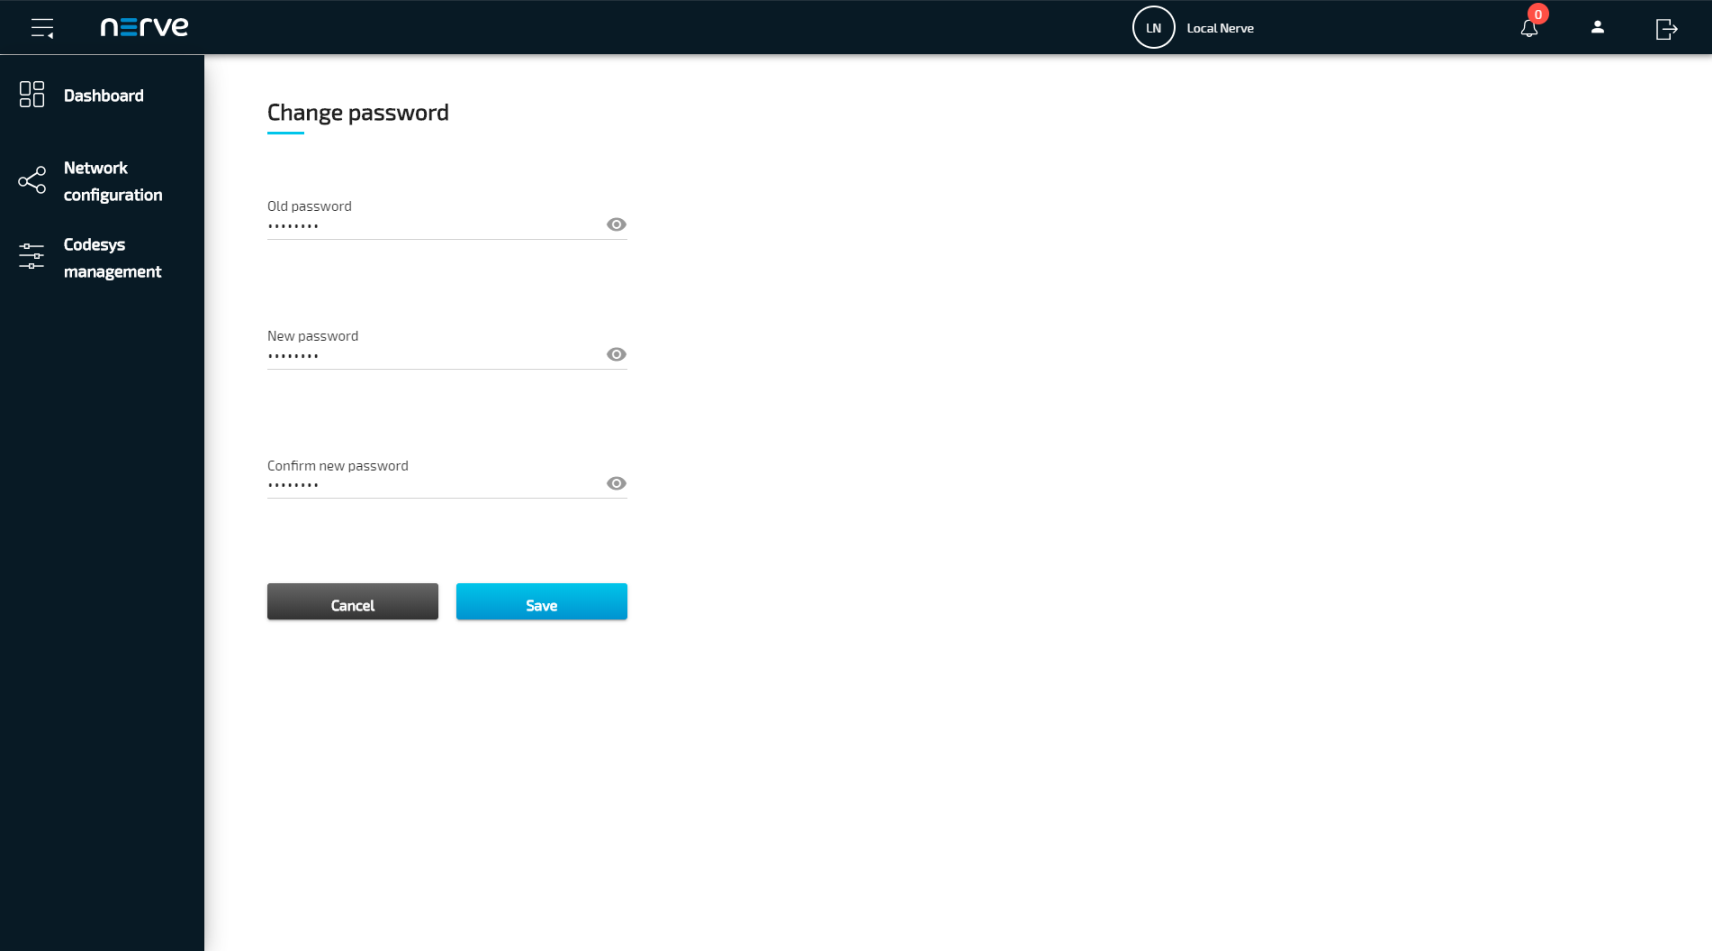
Password Management#
You can change the password to the local UI if you wish.
-
Select the user icon (Change password) in the upper-right.
-
Enter the following information:
Item Description Old password Enter the old password to the local UI. New password Enter the new password here. The new password must be 8 characters or longer and it can only consist of alphanumeric characters. Confirm new password Enter the new password again. Both passwords must match in order to proceed. Note
The password to the local UI can also be set in the node registration process. See the node registration chapter for more information.
Note
The save button will stay grayed out until the fields are filled in correctly.
-
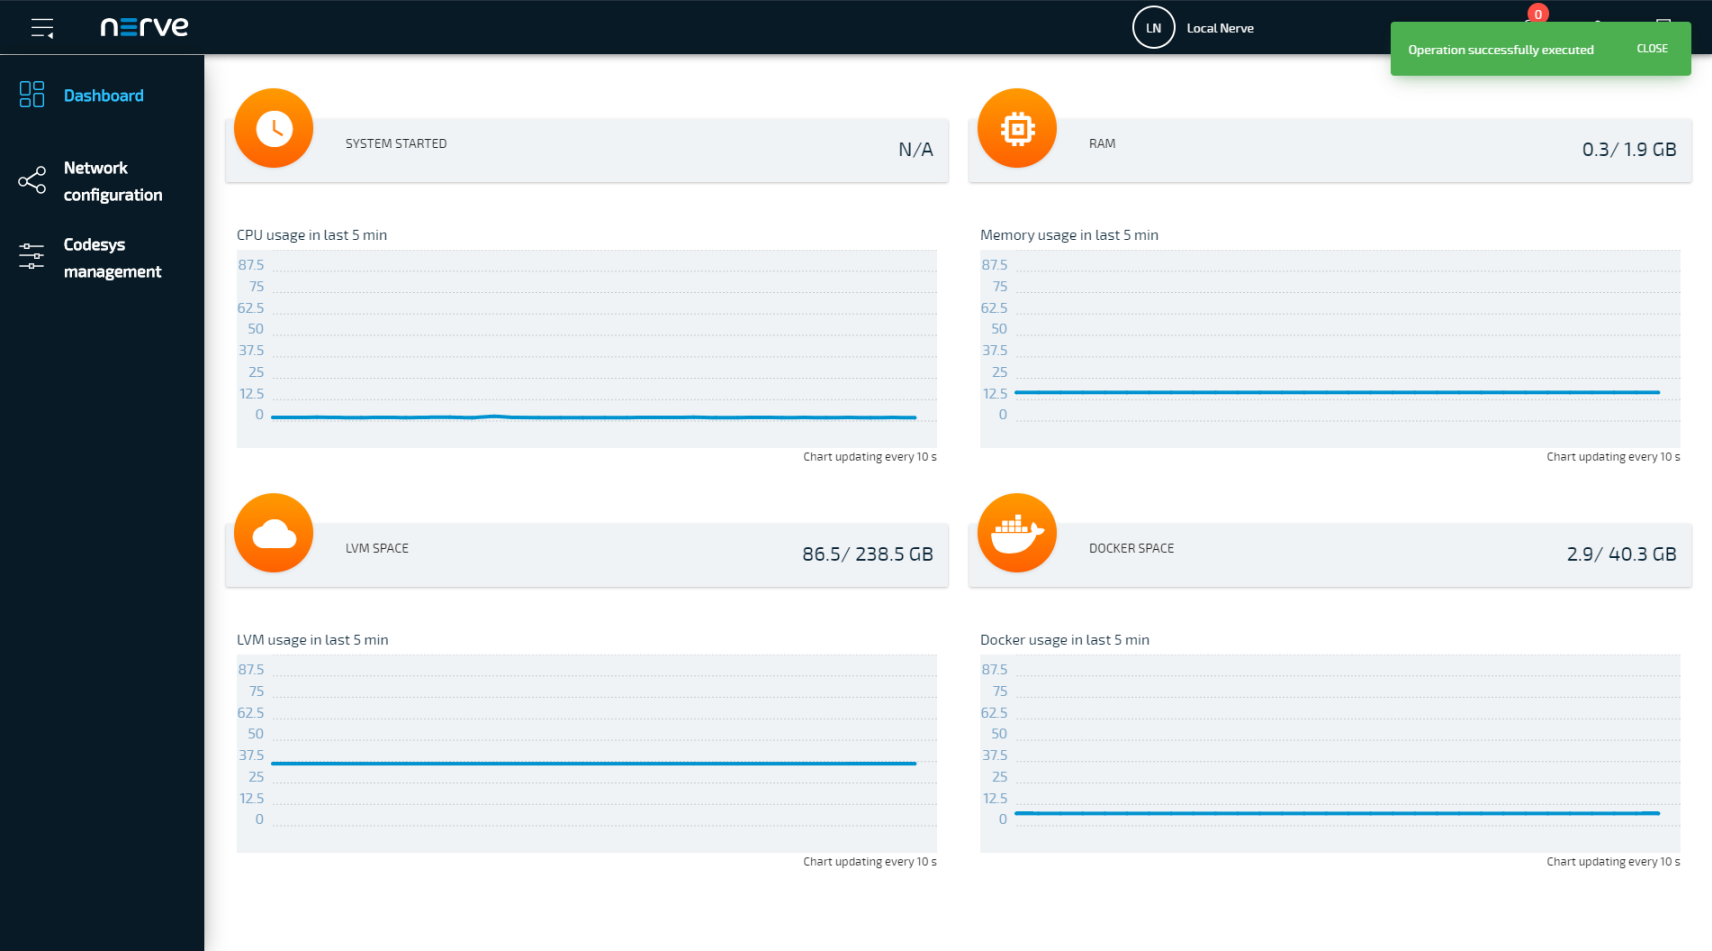
Select Save to set your new password.
If the process was successful, you will be returned to the dashboard with a green notice confirming the change in the upper-right corner.