Crosser
Crosser designs and develops streaming analytics and integration software for edge, on-premise or cloud. The Crosser platform enables real-time processing of streaming or batch data for Industrial IoT, data transformation, analytics, automation and integration. The Crosser platform consists of two core parts.
-
Crosser Cloud is the heart of the platform where all design and orchestration takes place. It is a multi-tenant SaaS service hosted by Crosser but also exists in an on-premise version that customers can run on a private cloud, inside the internal firewall.
-
Crosser Node is the real-time engine that customers install where they need it and anywhere a Docker container can be used.
Refer to the official Crosser homepage for more information on Crosser.
Requirements for usage with Nerve Blue
To use Crosser with Nerve Blue, a Crosser Cloud account is required. Use one of the provided test options or get in touch with Crosser directly:
Getting started
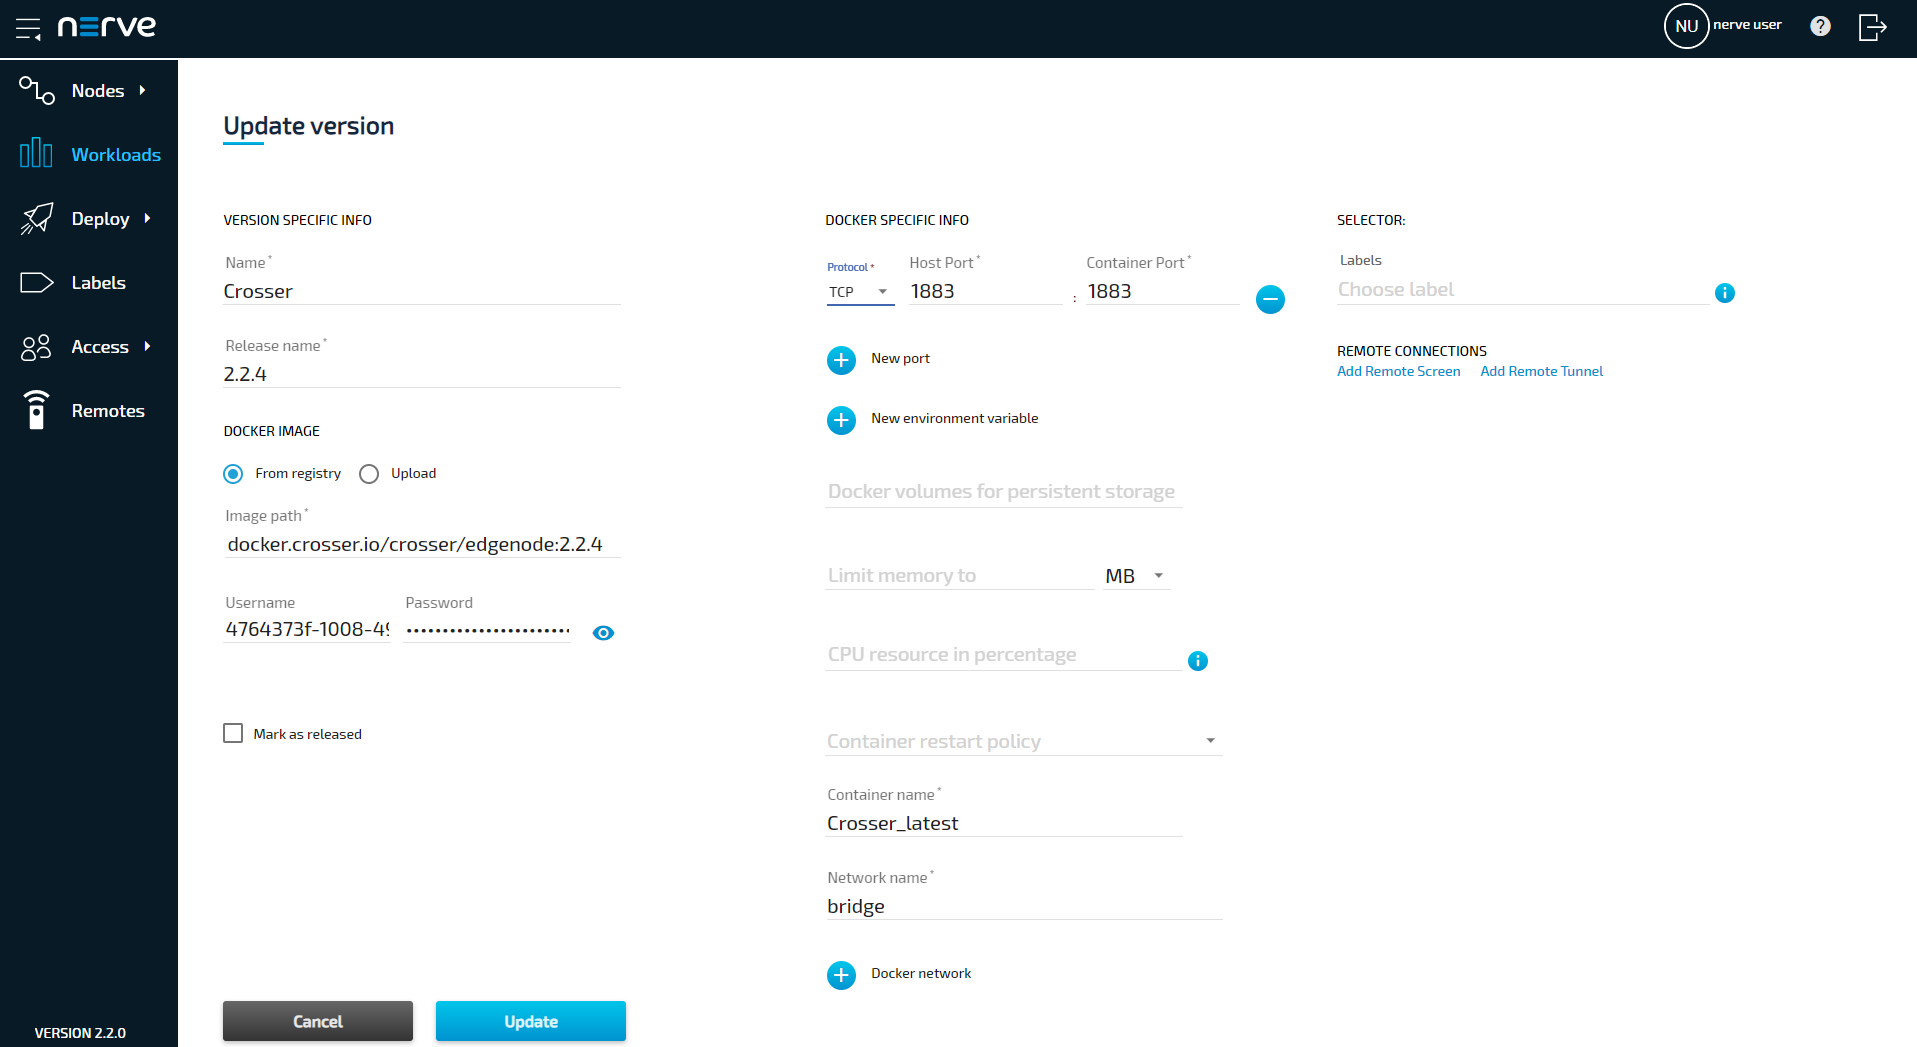
The Crosser workload is pre-configured in the Nerve Management System as part of the delivery so that the application can be used once the account for the Crosser Cloud is set up. Follow the steps below to finalize the configuration. The pre-configured workload is set up with the following settings:
| Setting | Value |
|---|---|
| Name | Crosser |
| Release name | 2.2.4 |
| DOCKER IMAGE | From Registry is selected with an Image path and login credentials to the Docker image. |
| Port settings | Protocol TCP Host Port 1883 Container Port 1883 |
| Container name | Crosser_latest |
| Network name | bridge |
-
Log in to the Nerve Management System. Note that the initial login credentials can be found in the customer profile.
-
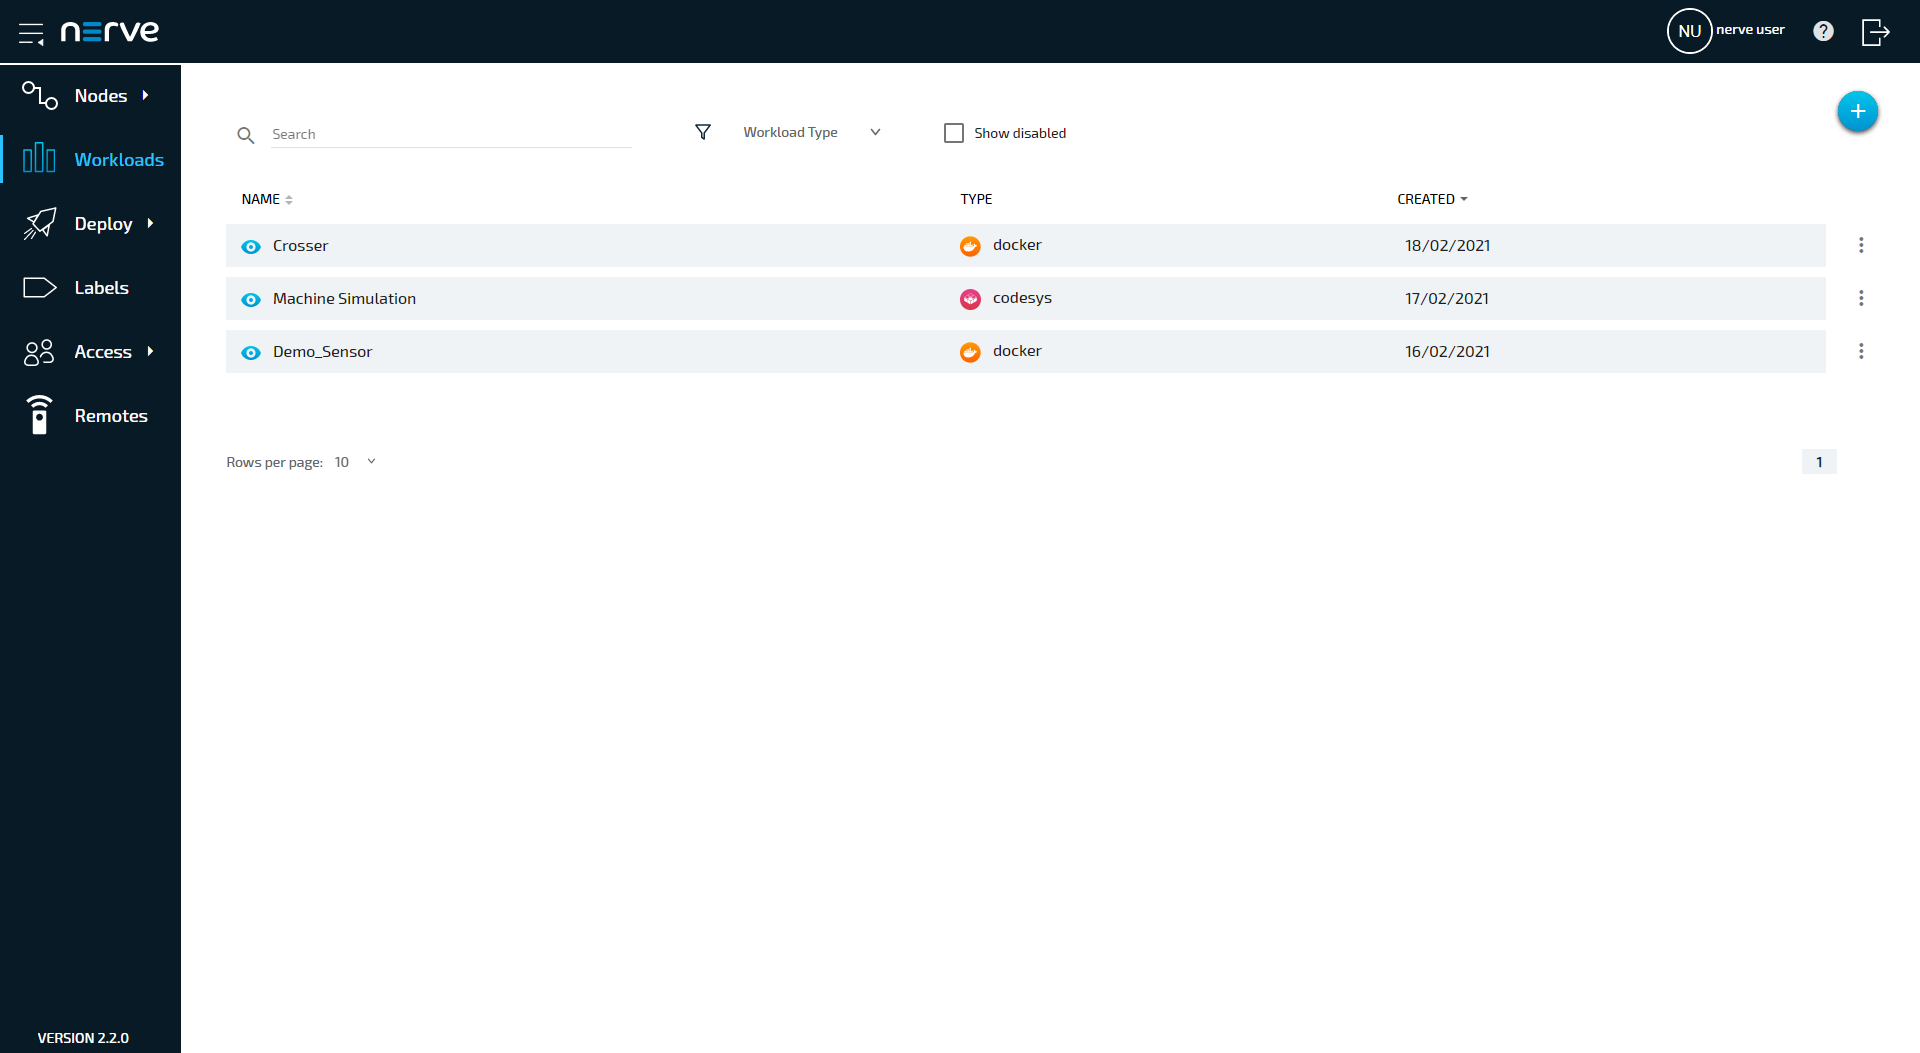
Select Workloads in the navigation on the left.
-
Select the Crosser workload.
-
Select the latest version on the right to edit the settings of the version.
-
Log in to Crosser Cloud.
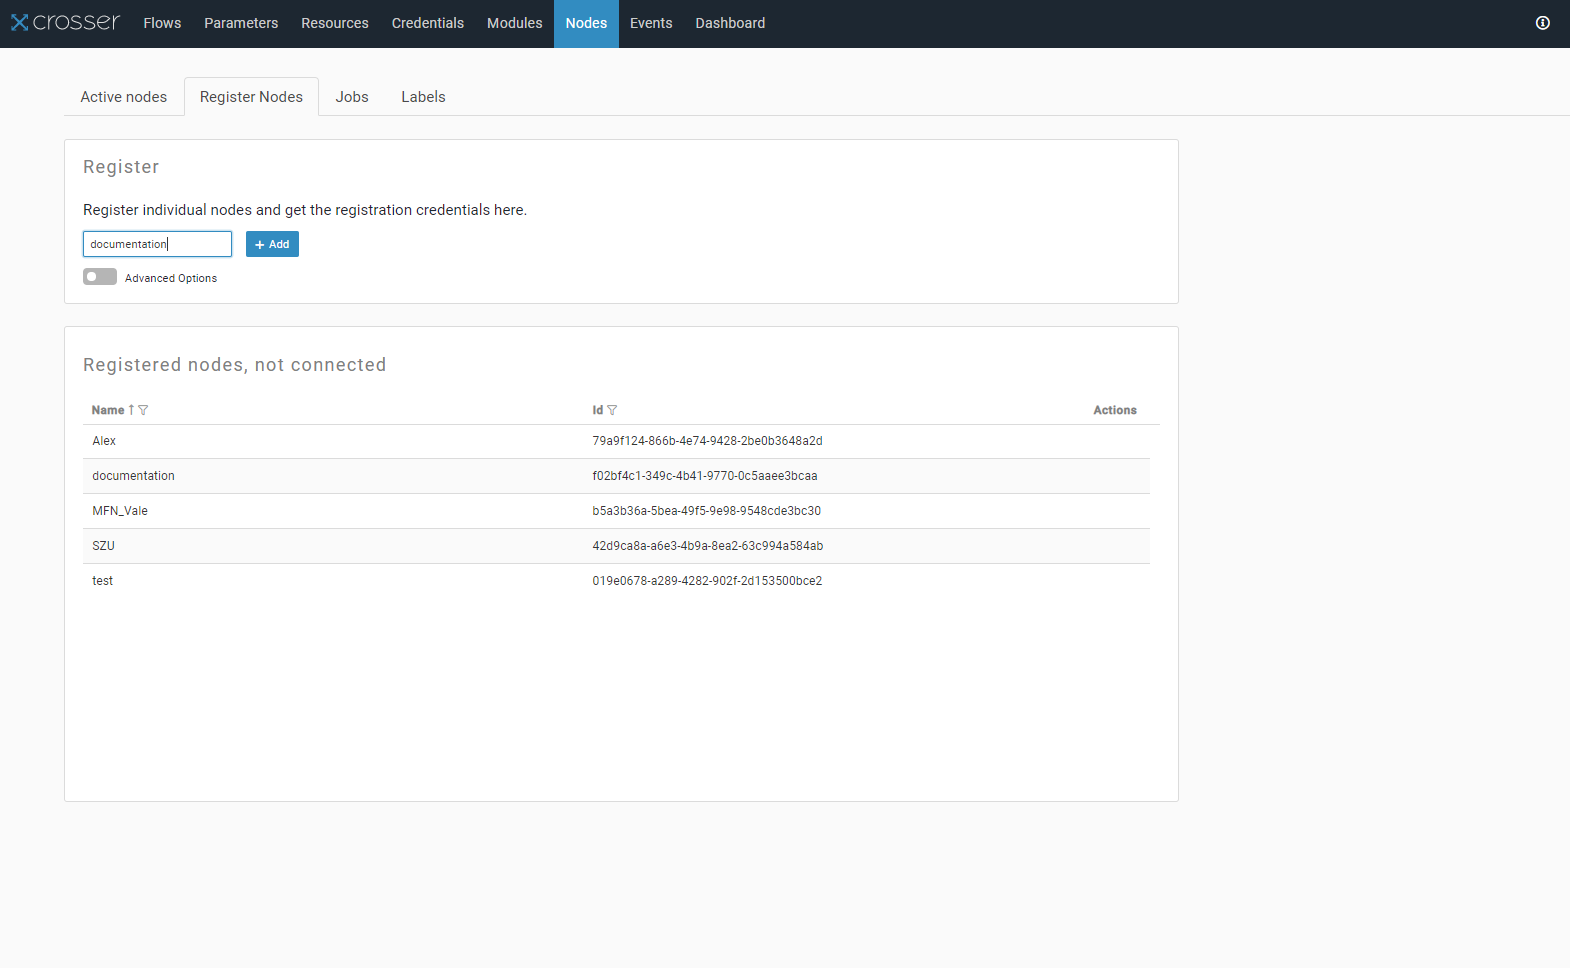
- Select Nodes in the navigation at the top.
- Select the Register Nodes tab.
-
Enter a name for the node in the field.
-
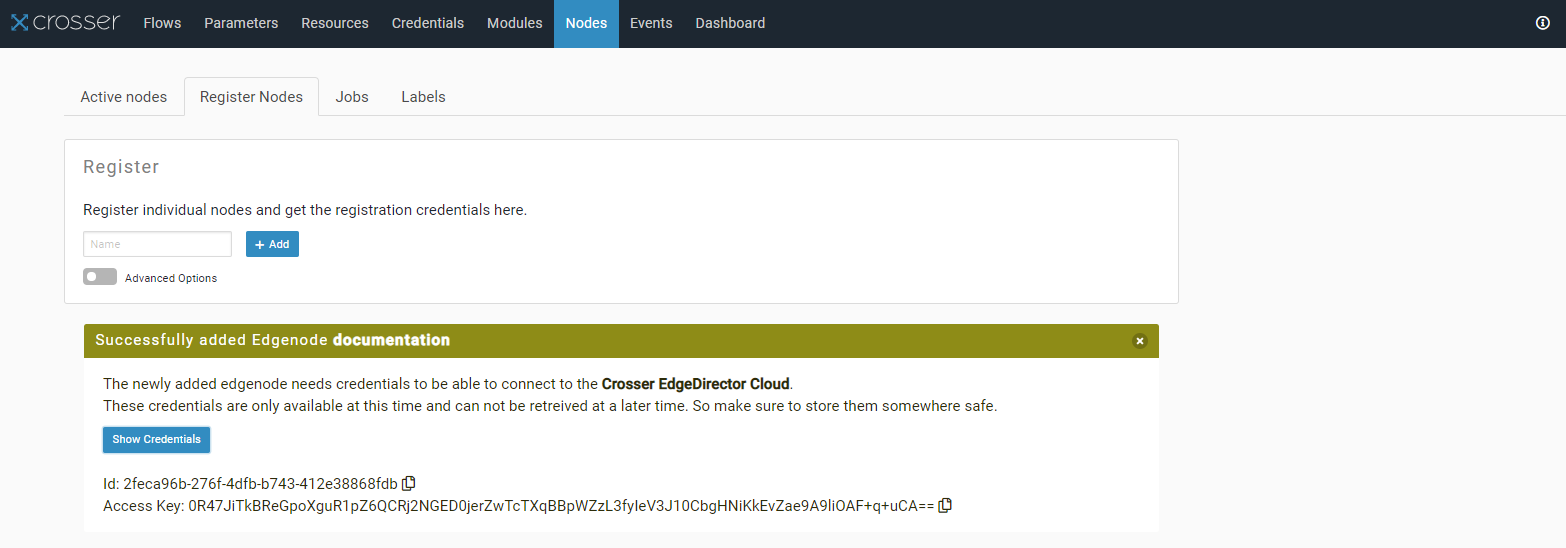
Select + Add. A notification saying Successfully added Edgenode appears below when the registration is successful.
-
Select Show Credentials to display the NodeID and the Access Key. They are needed for the configuration of the Crosser workload.
-
Switch back to the Management System.
- Select + next to New environment variable.
-
Enter the following values:
Field Value Env. variable SecurityConfiguration__Credentials__NodeIdVariable value Enter the value next to Id in the Crosser Cloud credentials window. -
Select + next to New environment variable again.
-
Enter the following values:
Field Value Env. variable SecurityConfiguration__Credentials__AccessKeyVariable value Enter the value next to Access Key in the Crosser Cloud credentials window. 
-
Select Update.
Onboarding more nodes to Crosser Cloud
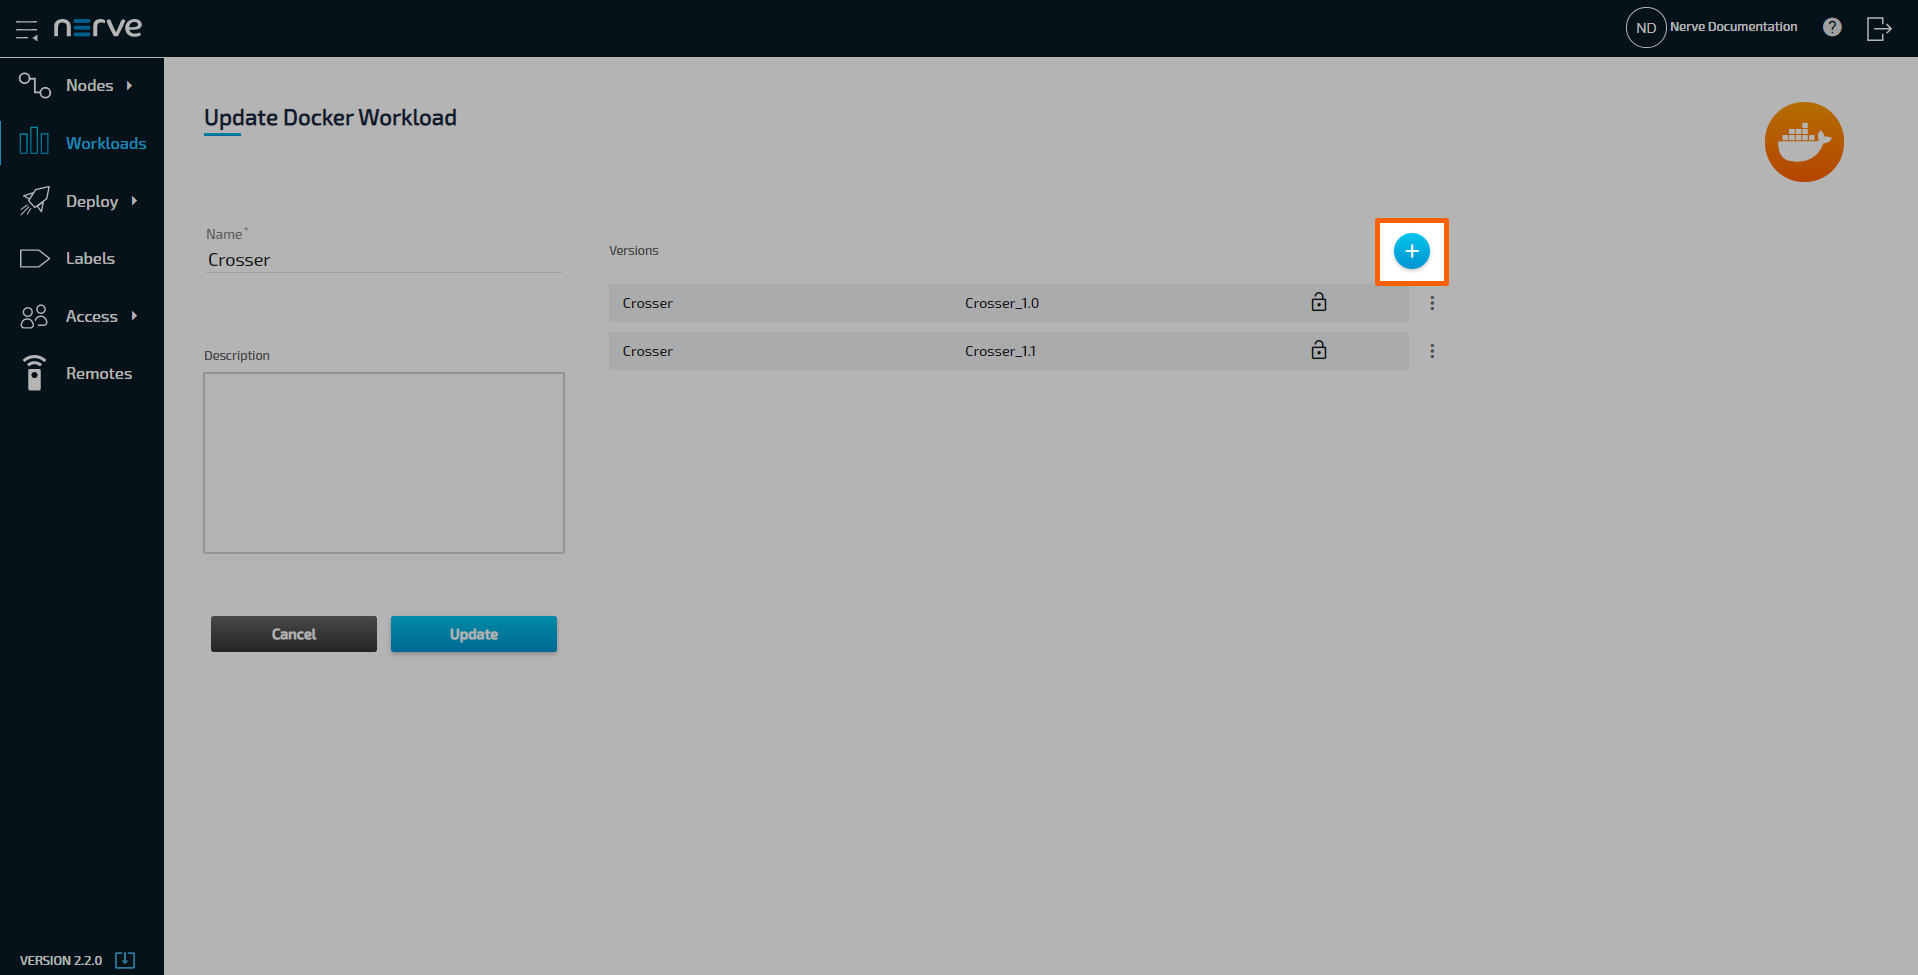
In order to onboard further nodes to Crosser Cloud, a new version of the Crosser workload has to be created in the Management System.
- Select Workloads in the navigation on the left.
- Select the Crosser workload from the list of workloads.
-
Click the plus symbol on the right. The settings from the latest version are automatically filled in.
-
Switch to Crosser Cloud.
- Select Nodes in the navigation at the top.
- Select the Register Nodes tab.
-
Enter a name for the node in the field.
-
Select + Add. A notification saying Successfully added Edgenode appears below when the registration is successful.
-
Select Show Credentials to display the NodeID and the Access Key.
-
Switch back to the Management System.
- Replace the value of the
SecurityConfiguration__Credentials__NodeIdenvironment variable with the new value of Id in the Crosser Cloud credentials window. -
Replace the value of the
SecurityConfiguration__Credentials__AccessKeyenvironment variable with the new value of Access Key in the Crosser Cloud credentials window.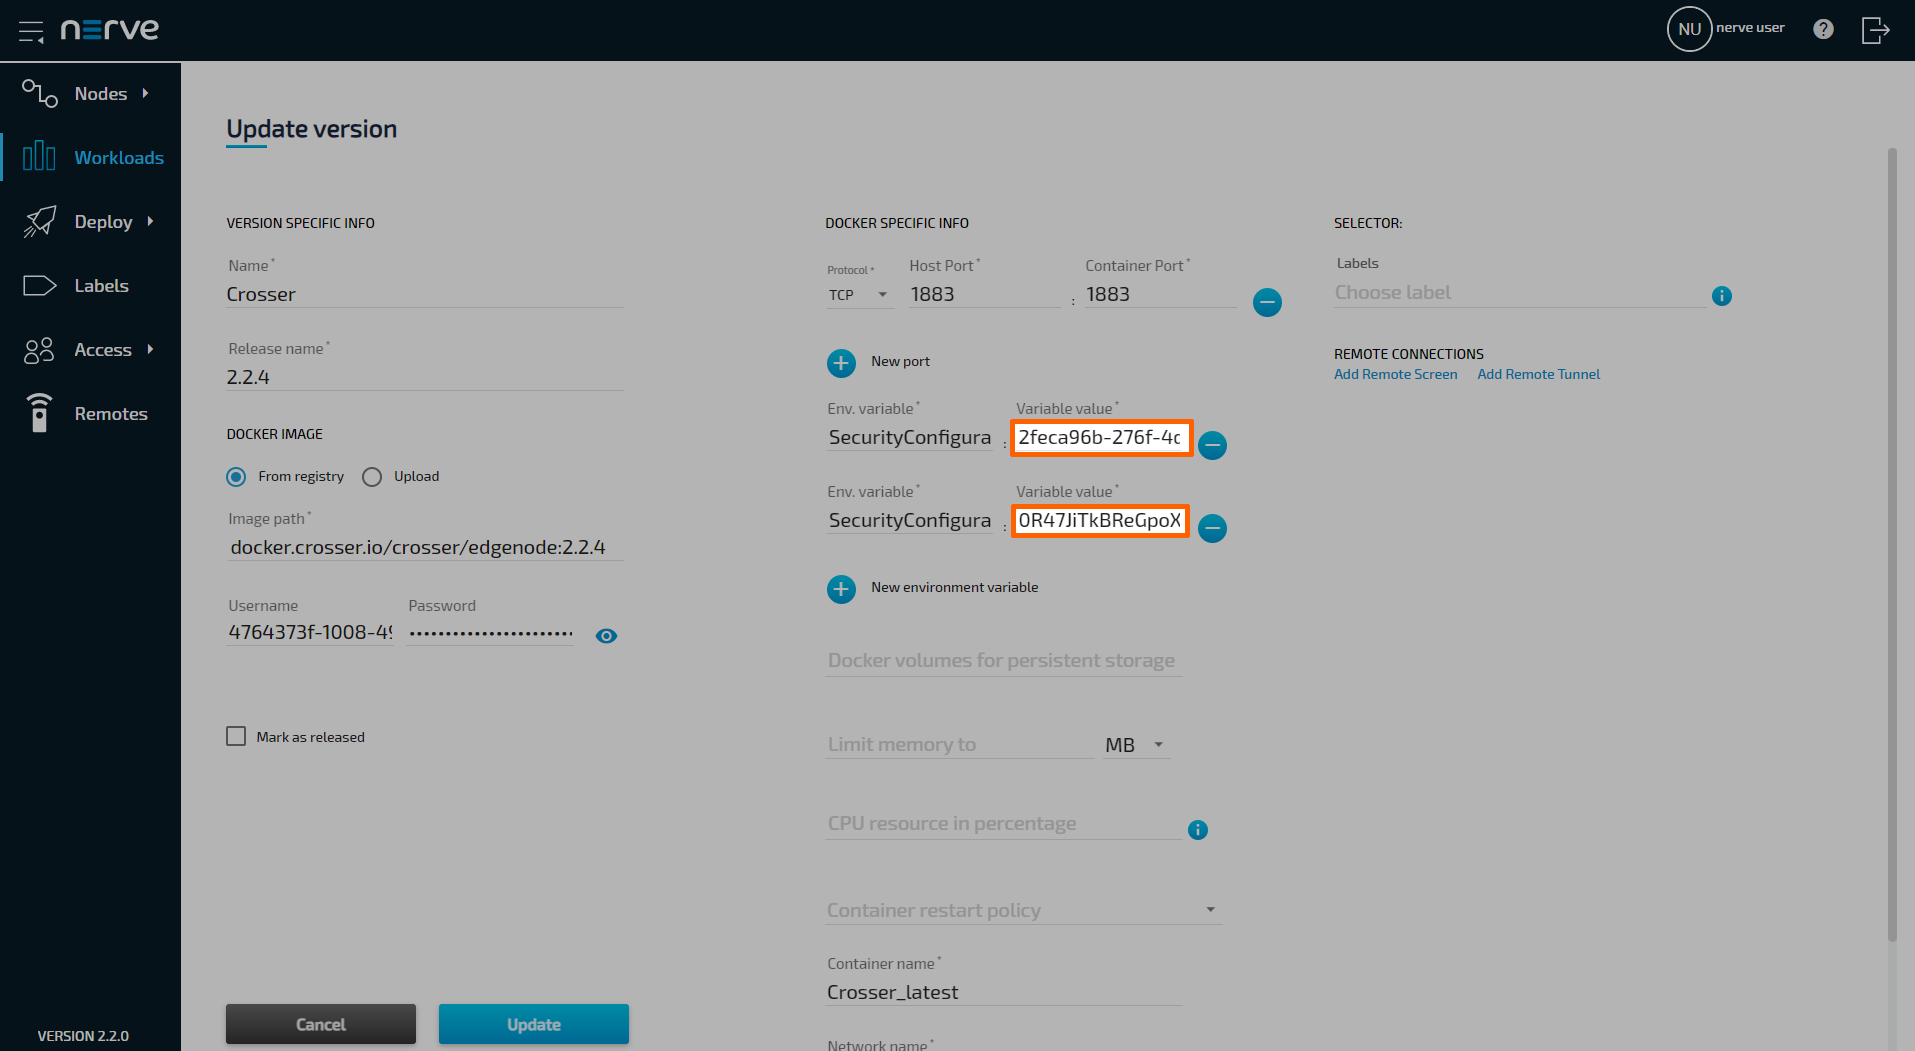
-
Update the Name of the version.
Note
Choose the name of the node in Crosser Cloud for easy identification of the workload version.
-
Click Save to save the new version of the workload.
- Select Update.
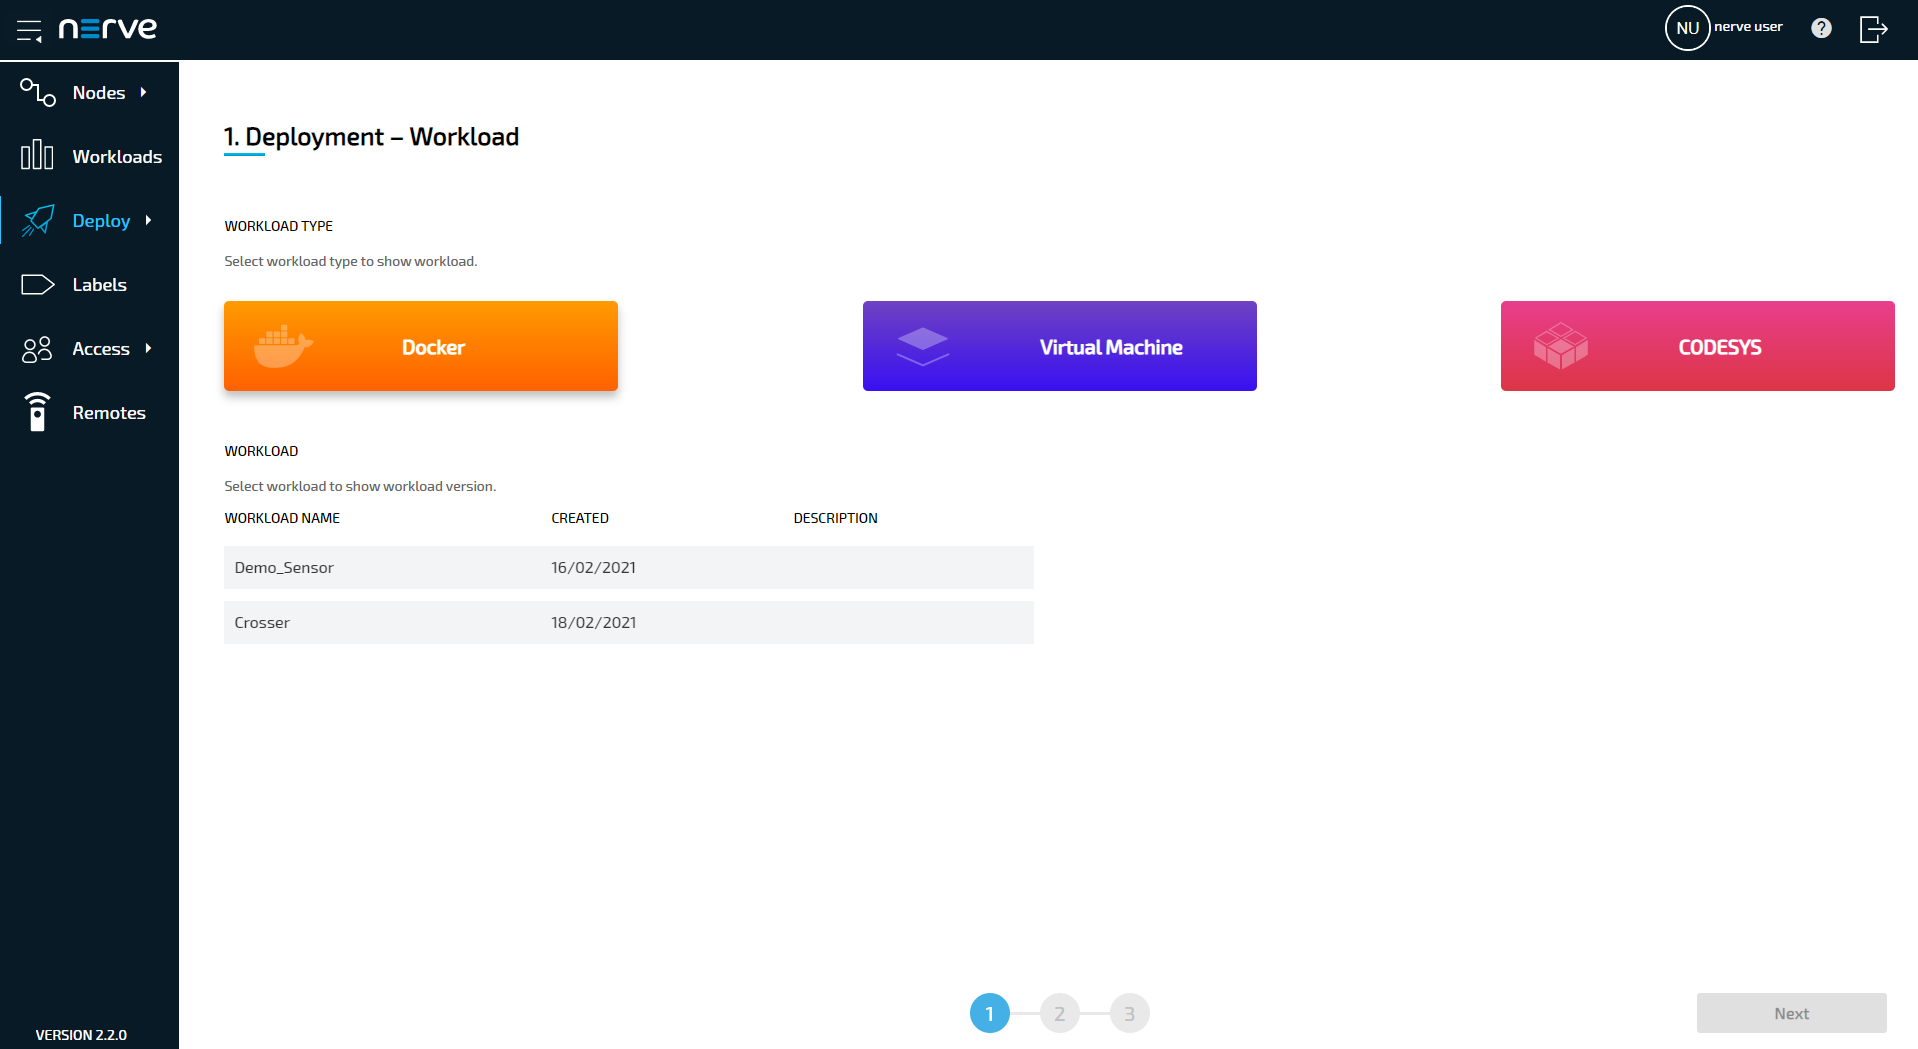
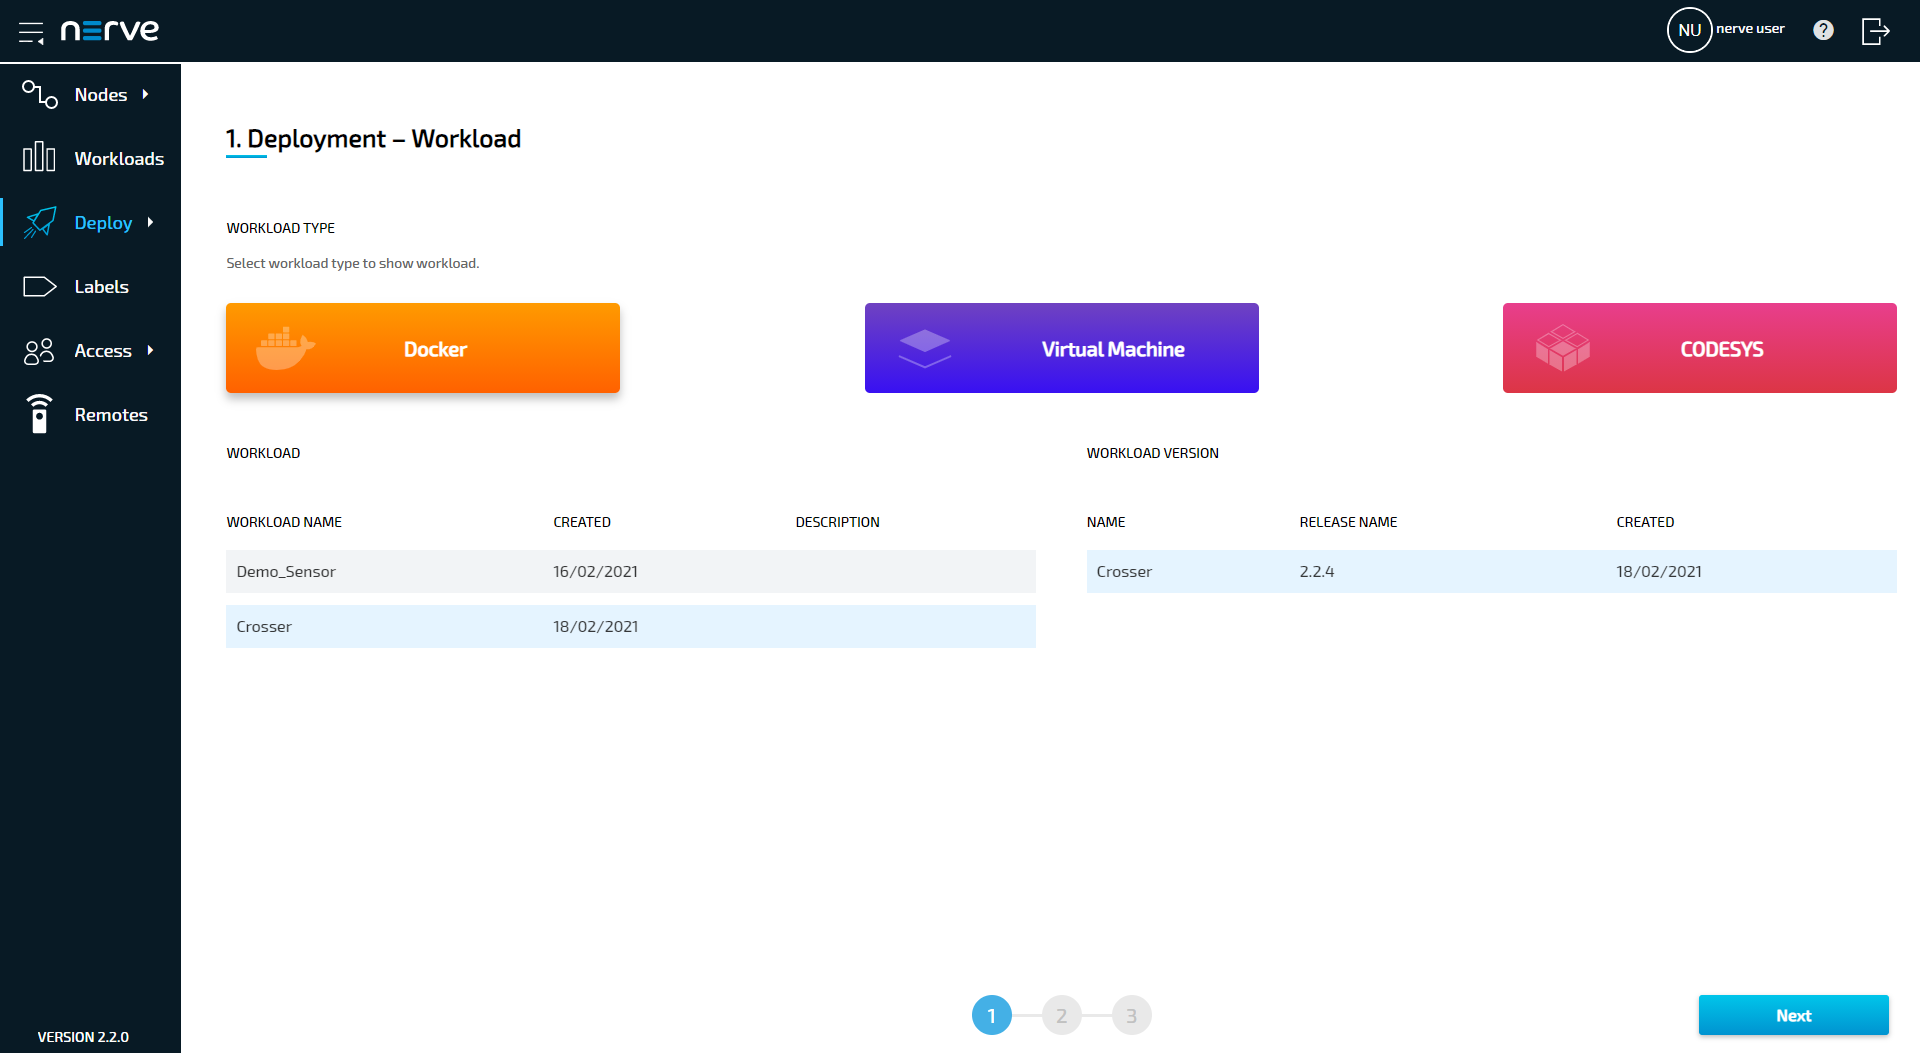
Deploying the Crosser workload
After configuring the Crosser workload in both the Managament System and Crosser cloud, follow the instructions below to deploy the Crosser workload to a Nerve Node in order to start using Crosser with Nerve Blue.
- In the Management System select Deploy in the navigation on the left.
-
Select the orange Docker tab. A list of Docker workloads will appear below.
-
Select Crosser in the list of workloads. A list of versions of this workload will appear to the right.
-
Select the corresponding version of the workload that is connected to a node in the Crosser Cloud.
-
Select Next in the lower-right corner.
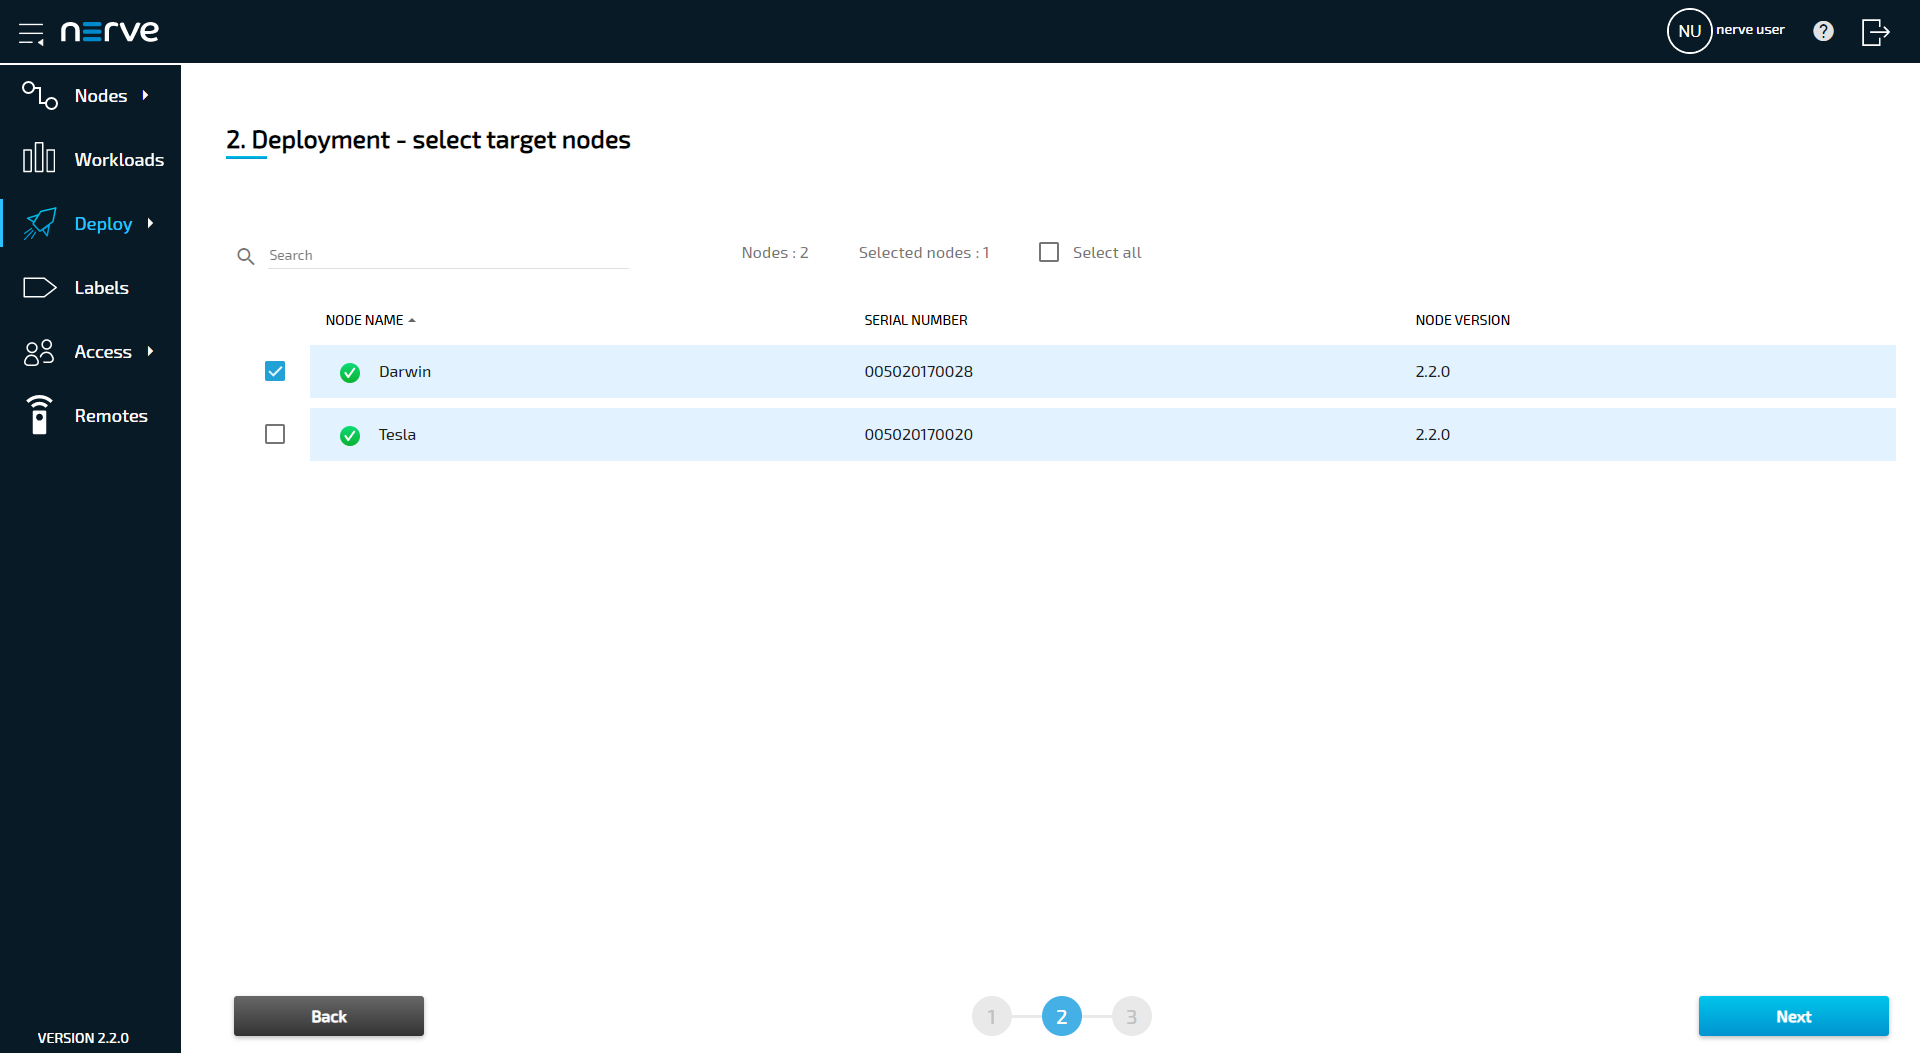
- Tick the checkbox next to the node that Crosser shall be deployed to.
-
Select Next in the lower-right corner.
-
Select Deploy to execute the deployment.
Optional: Enter a Deploy name above the Summary of the workload to make this deployment easy to identify. A timestamp is filled in automatically.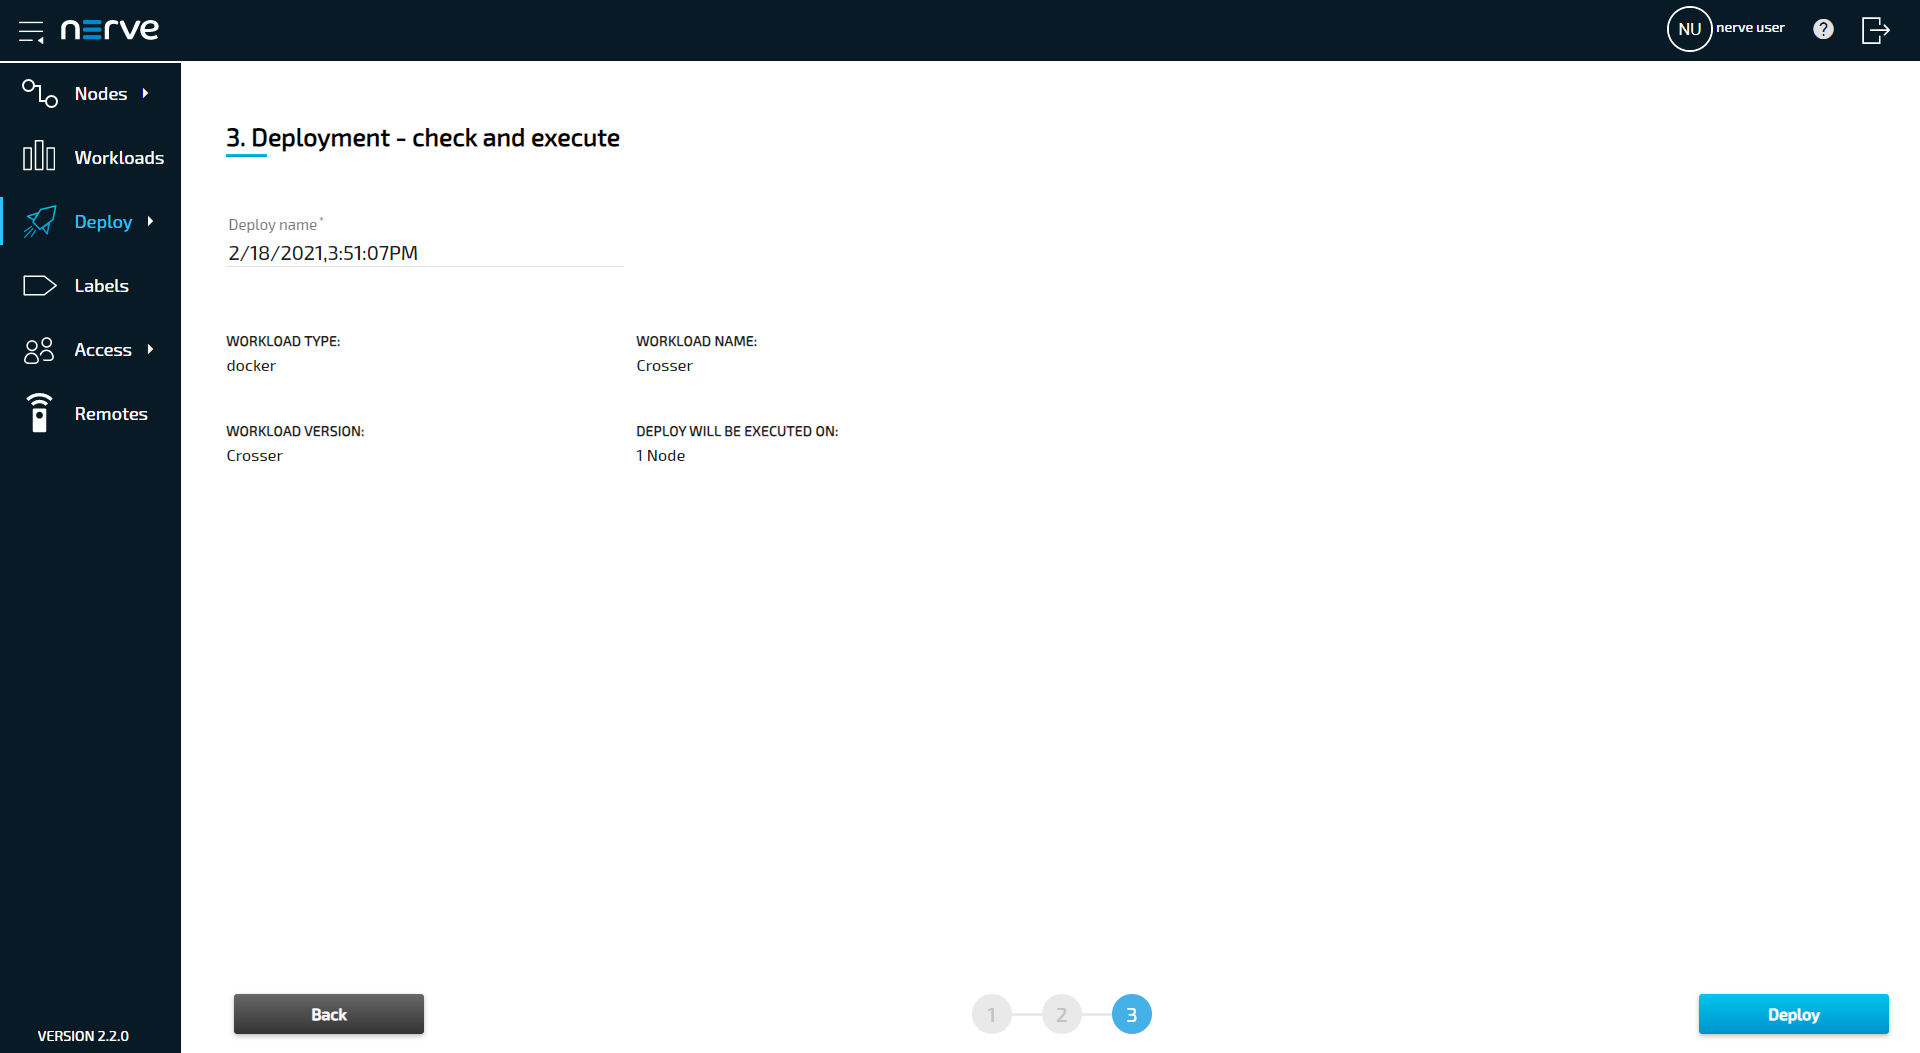
The deployment should now be visible at the top of the deployment log. Click the log entry of the deployment to see a more detailed view.
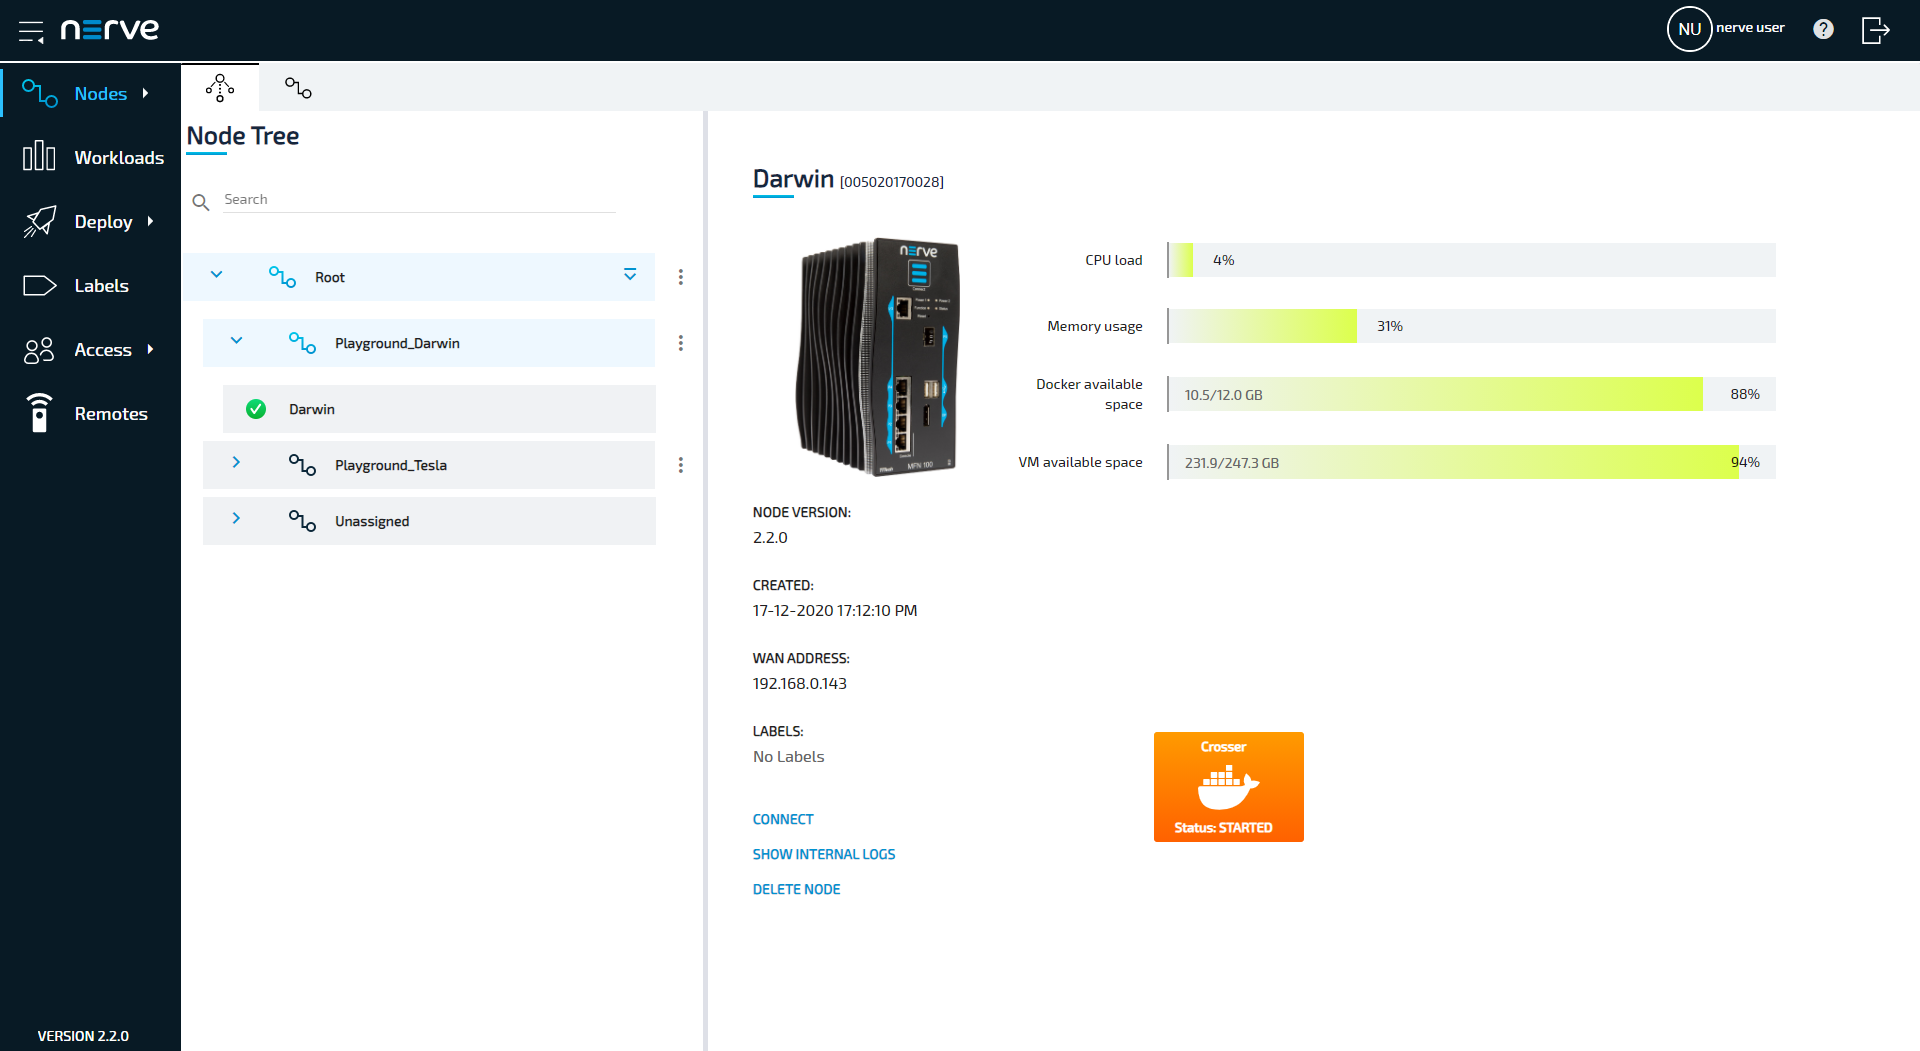
To confirm if the workload has been deployed successfully, select Nodes in the navigation on the left. Select the corresponding node in the node tree and confirm if the orange Crosser workload tile is showing underneath the bar graph. The workload should show the status STARTED.
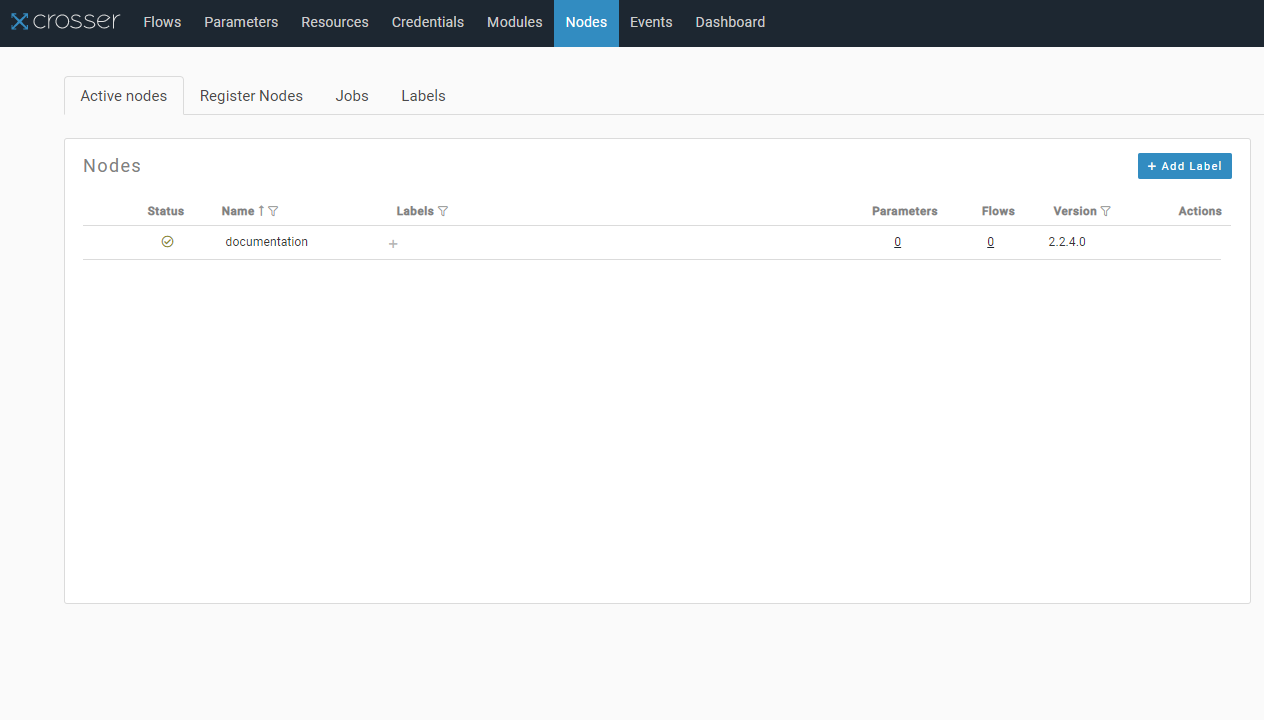
To confirm if the workload has been successfully connected to the Crosser Cloud, select Nodes in the navigation at the top. The node appears in the Active nodes list and is marked with a check mark in the Status column.