License activation
The license for using Nerve Blue has to be activated on the node before the product can be used. A ticket ID that is required for the activation of the license has been sent as part of the delivery, along with a link to a web depot. With this ticket ID and the web depot link, the product can be activated in two ways:
- Online activation
The node must have access to the internet. - Offline activation
The node does not have access to the internet. Note that offline activation requires a workstation with a connection to the internet.
Note
Note down the license serial number on the right side of the license activation UI. It is required to reactivate a license that has been used before.
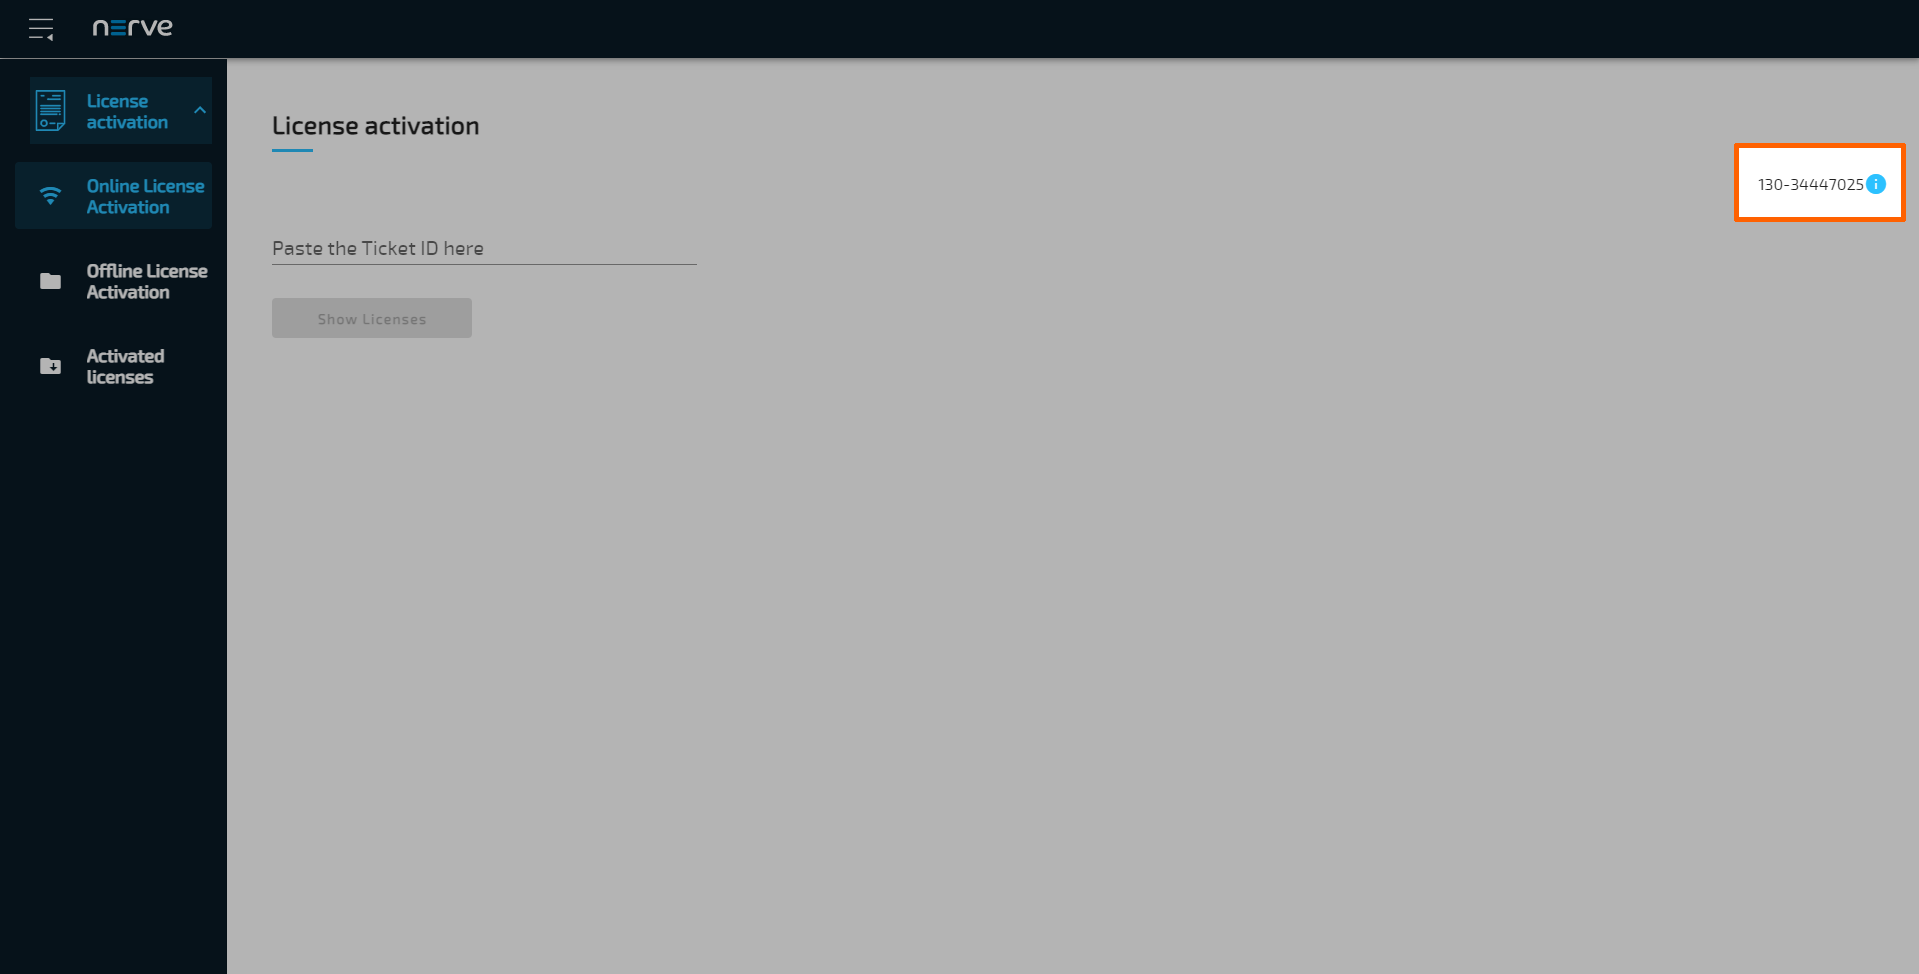
Refer to Reusing activated licenses below for more information on how to activate the product by reusing previously activated licenses.
Make sure to connect a workstation to the physical port of the Nerve Device associated with host access and configure the network adapter of the workstation. The IP address has to be in the same range as the IP address of the host access interface with a 255.255.255.0 subnet mask. Refer to the device guide for more information per Nerve Device.
After connecting a workstation to the Nerve Device, follow the link to reach the UI for activating the license. This link is Nerve Device specific and is listed per Nerve Device in the table below:
| Nerve Device | Physical port | License activation UI |
|---|---|---|
| MFN 100 | P1 | http://172.20.2.1:3333 |
| Kontron KBox A-150-APL | LAN 1 | <wanip>:3333To figure out the IP address of the WAN interface, refer to Finding out the IP address of the device in the Kontron KBox A-150-APL chapter of the device guide. |
| Kontron KBox A-250 | ETH 2 | <wanip>:3333To figure out the IP address of the WAN interface, refer to Finding out the IP address of the device in the Kontron KBox A-250 chapter of the device guide. |
| Maxtang AXWL10 | LAN1 | <wanip>:3333To figure out the IP address of the WAN interface, refer to Finding out the IP address of the device in the Maxtang AXWL10 chapter of the device guide. |
| Siemens SIMATIC IPC127E | X1 P1 | http://172.20.2.1:3333 |
| Siemens SIMATIC IPC427E | X1 P1 | http://172.20.2.1:3333 |
| Supermicro SuperServer E100-9AP-IA | LAN1 | <wanip>:3333To figure out the IP address of the WAN interface, refer to Finding out the IP address of the device in the Supermicro SuperServer E100-9AP-IA chapter of the device guide. |
| Supermicro SuperServer 1019D-16C-FHN13TP | LAN3 | http://172.20.2.1:3333 |
| Supermicro SuperServer 5029C-T | LAN1 | <wanip>:3333To figure out the IP address of the WAN interface, refer to Finding out the IP address of the device in the Supermicro SuperServer 5029C-T chapter of the device guide. |
| Vecow SPC-5600-i5-8500 | LAN 1 | http://172.20.2.1:3333 |
| Winmate EACIL20 | LAN1 | <wanip>:3333To figure out the IP address of the WAN interface, refer to Finding out the IP address of the device in the Winmate EACIL20 chapter of the device guide. |
Online license activation
If the node has internet access, the node will automatically connect to the licensing server. Online license activation is selected in the navigation on the left by default.
-
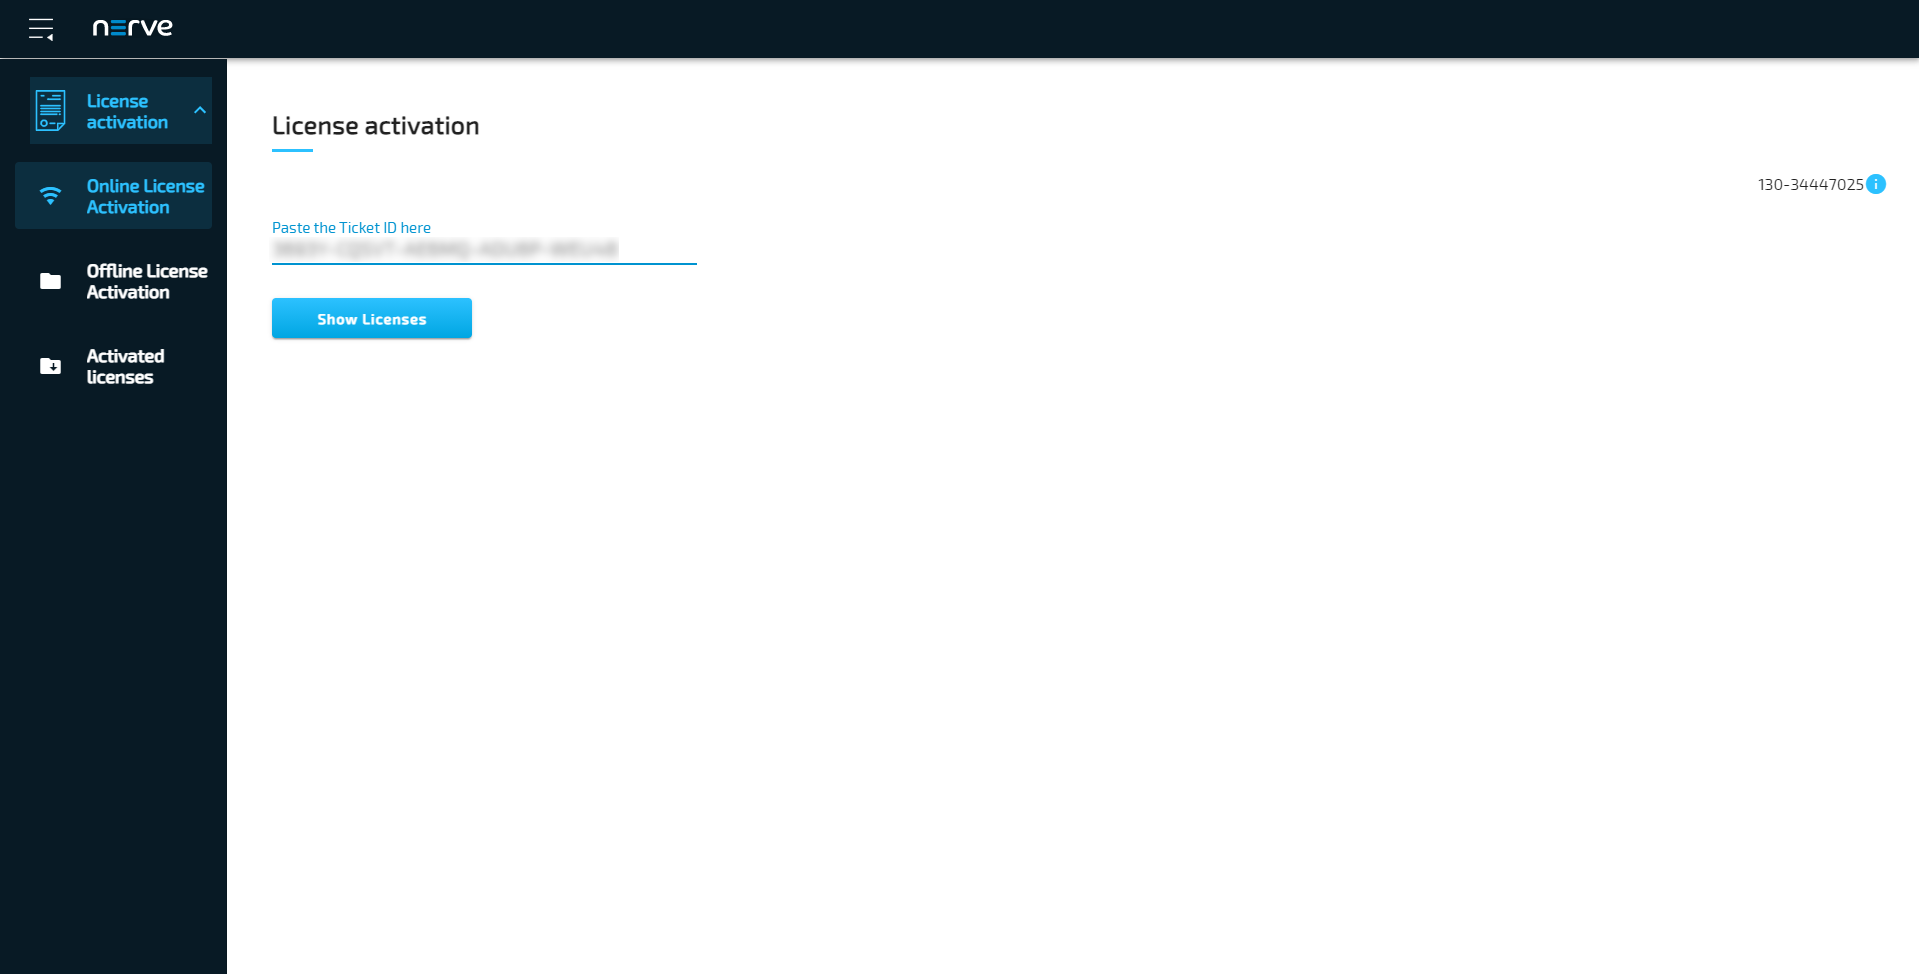
Enter the ticket ID under Paste the Ticket ID here.
-
Select Show Licenses. Available licenses will appear below.

-
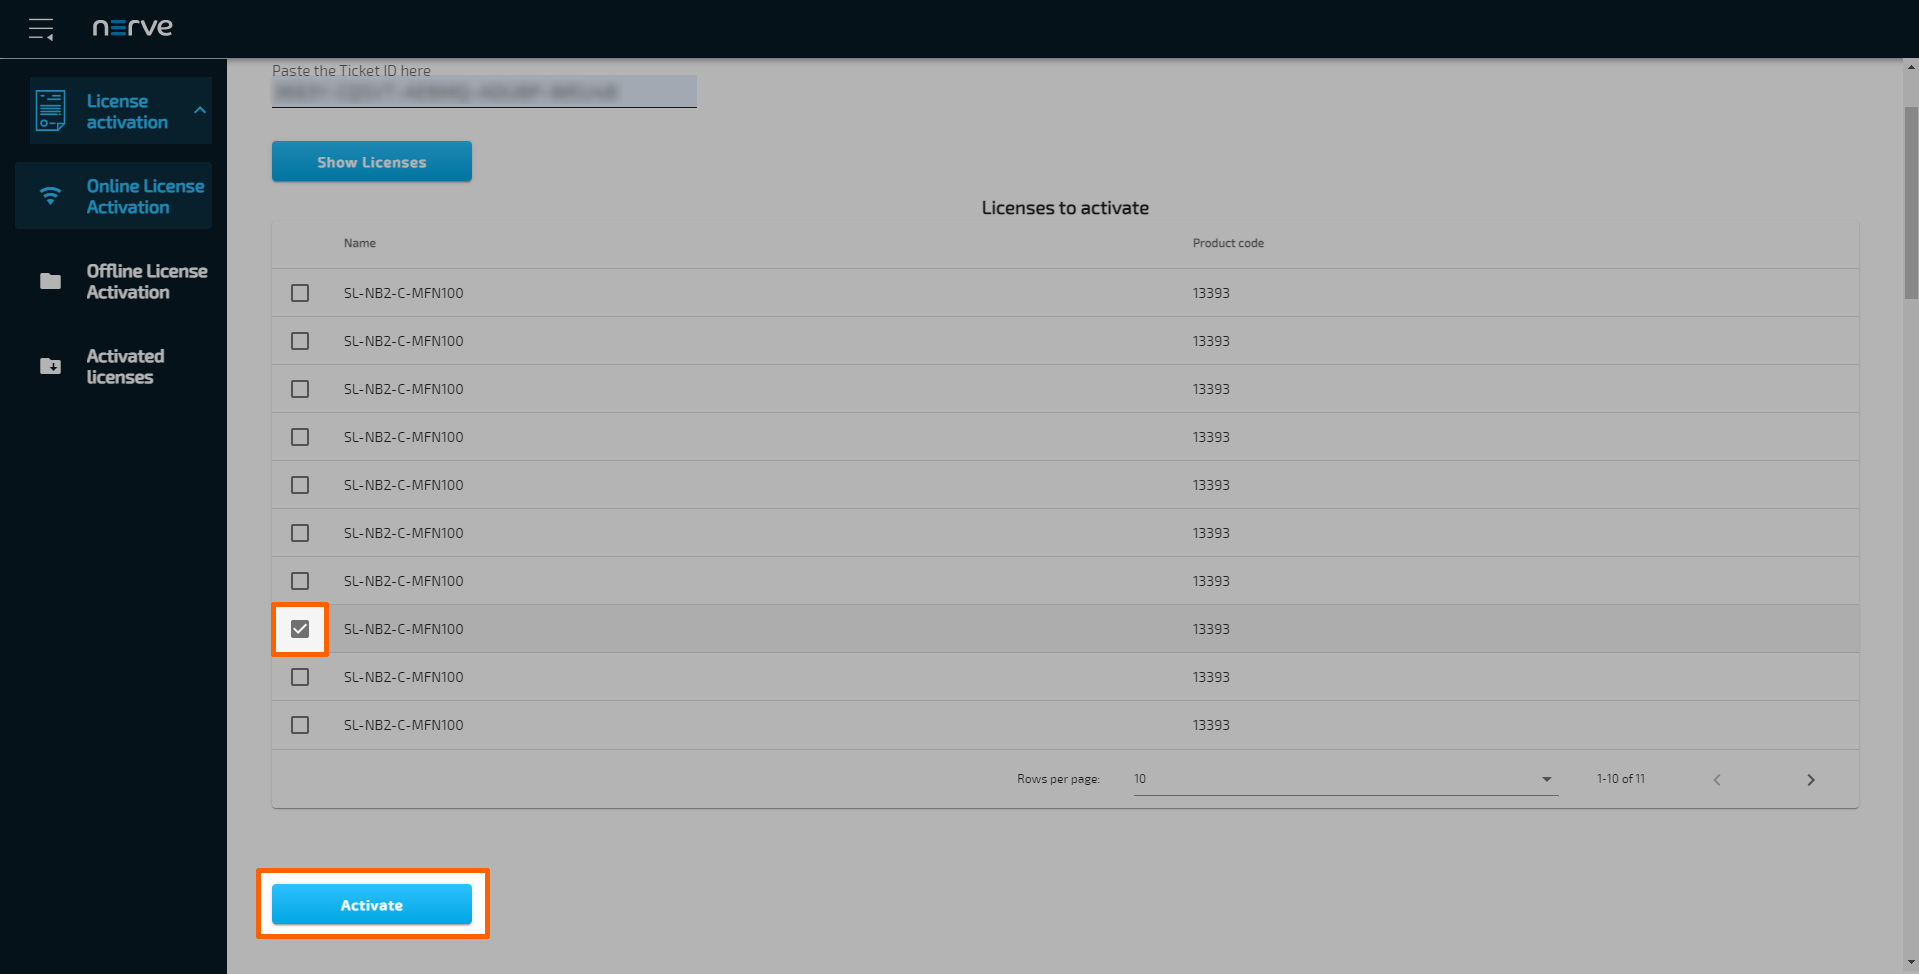
Tick the checkbox next to a license. The list is automatically filtered to only show licenses for the Nerve Device currently used.
-
Select Activate below the list of licenses.
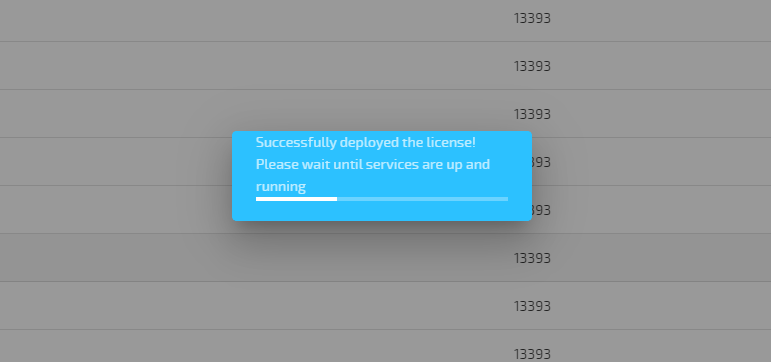
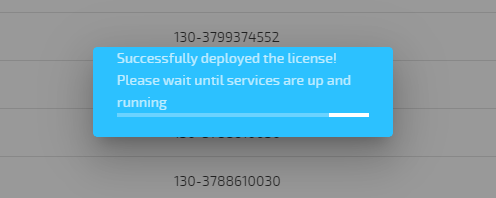
The system will proceed to activate the license and automatically redirect to the Local UI after a successful activation.
Note
When using an MFN 100, the device will light up blue once the license has been activated and the necessary services are up and running.
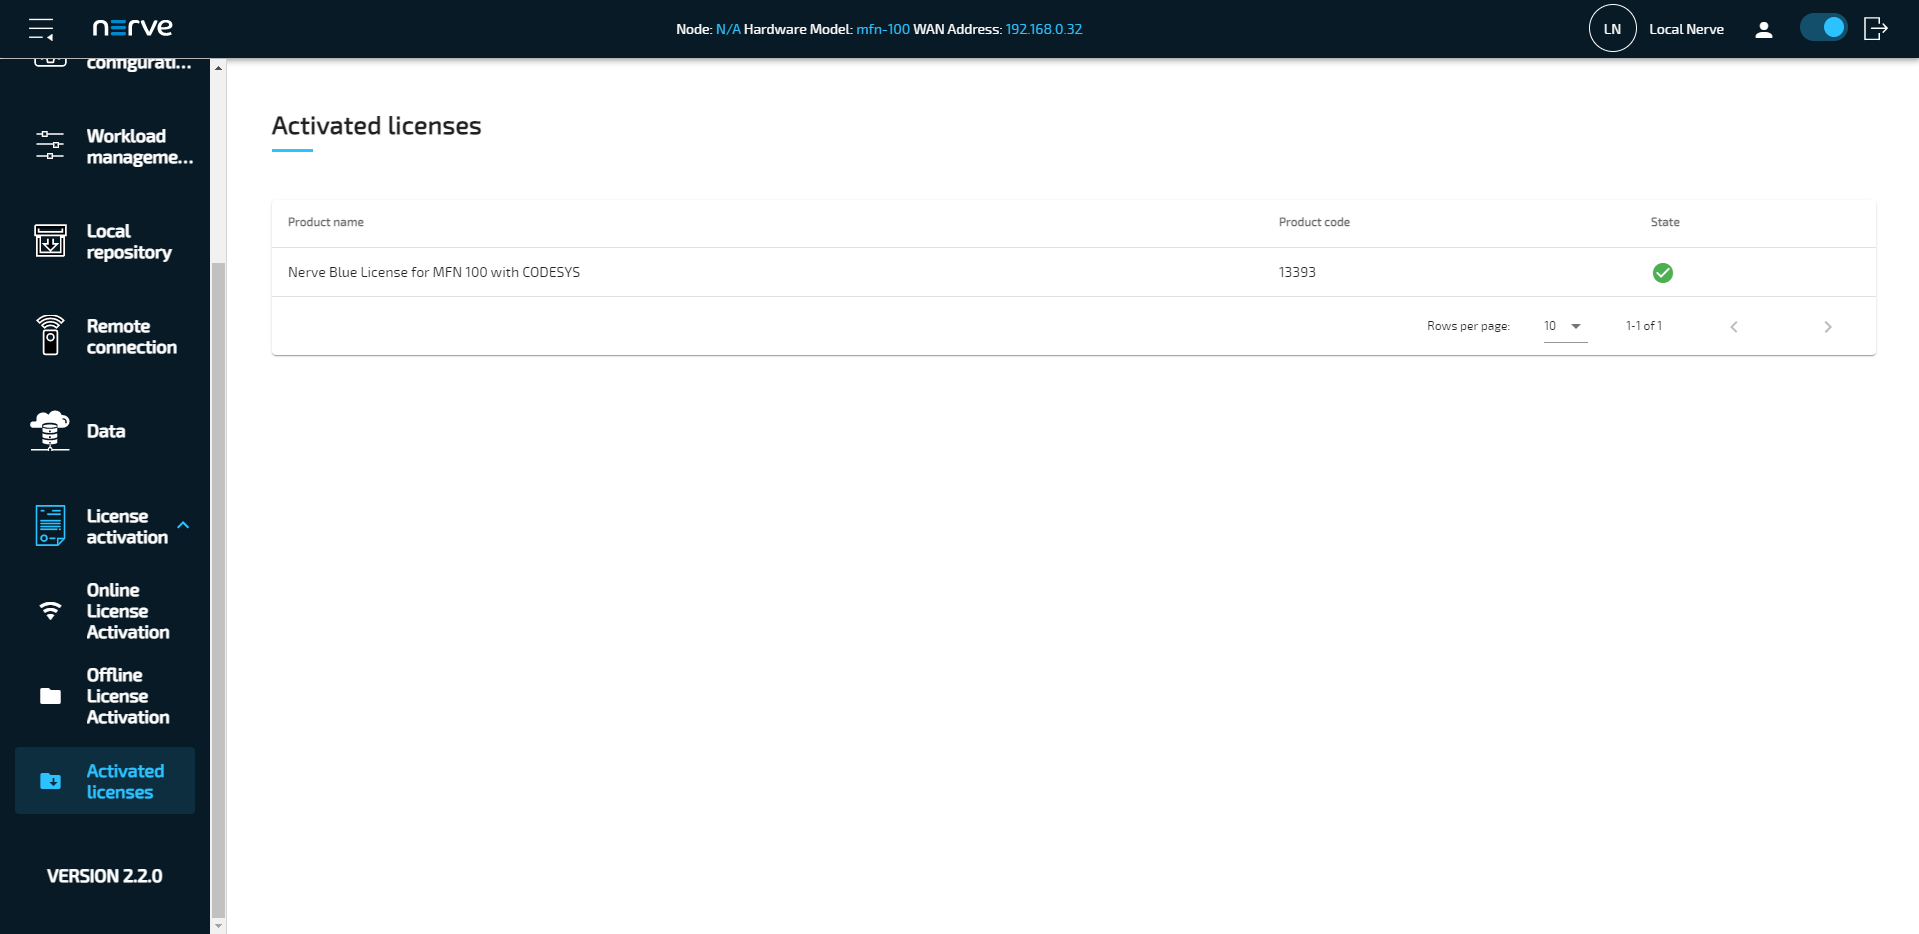
To double-check if the license has been activated properly, expand License activation > Activated licenses in the navigation on the left of the Local UI. An activated license is displayed in the table with a green check mark on the right side, signifying a successful activation on the correct Nerve Device.
With the license activated, return to the previous device guide page and continue with Accessing the Local UI and registering the device.
Offline license activation
In case of the node not having internet access, the license can be activated with a file-based method. However, note that a workstation with an internet connection is required for connecting to the licensing server in order to upload and download files.
Note
In some cases, offline license activation cannot be completed on Windows.
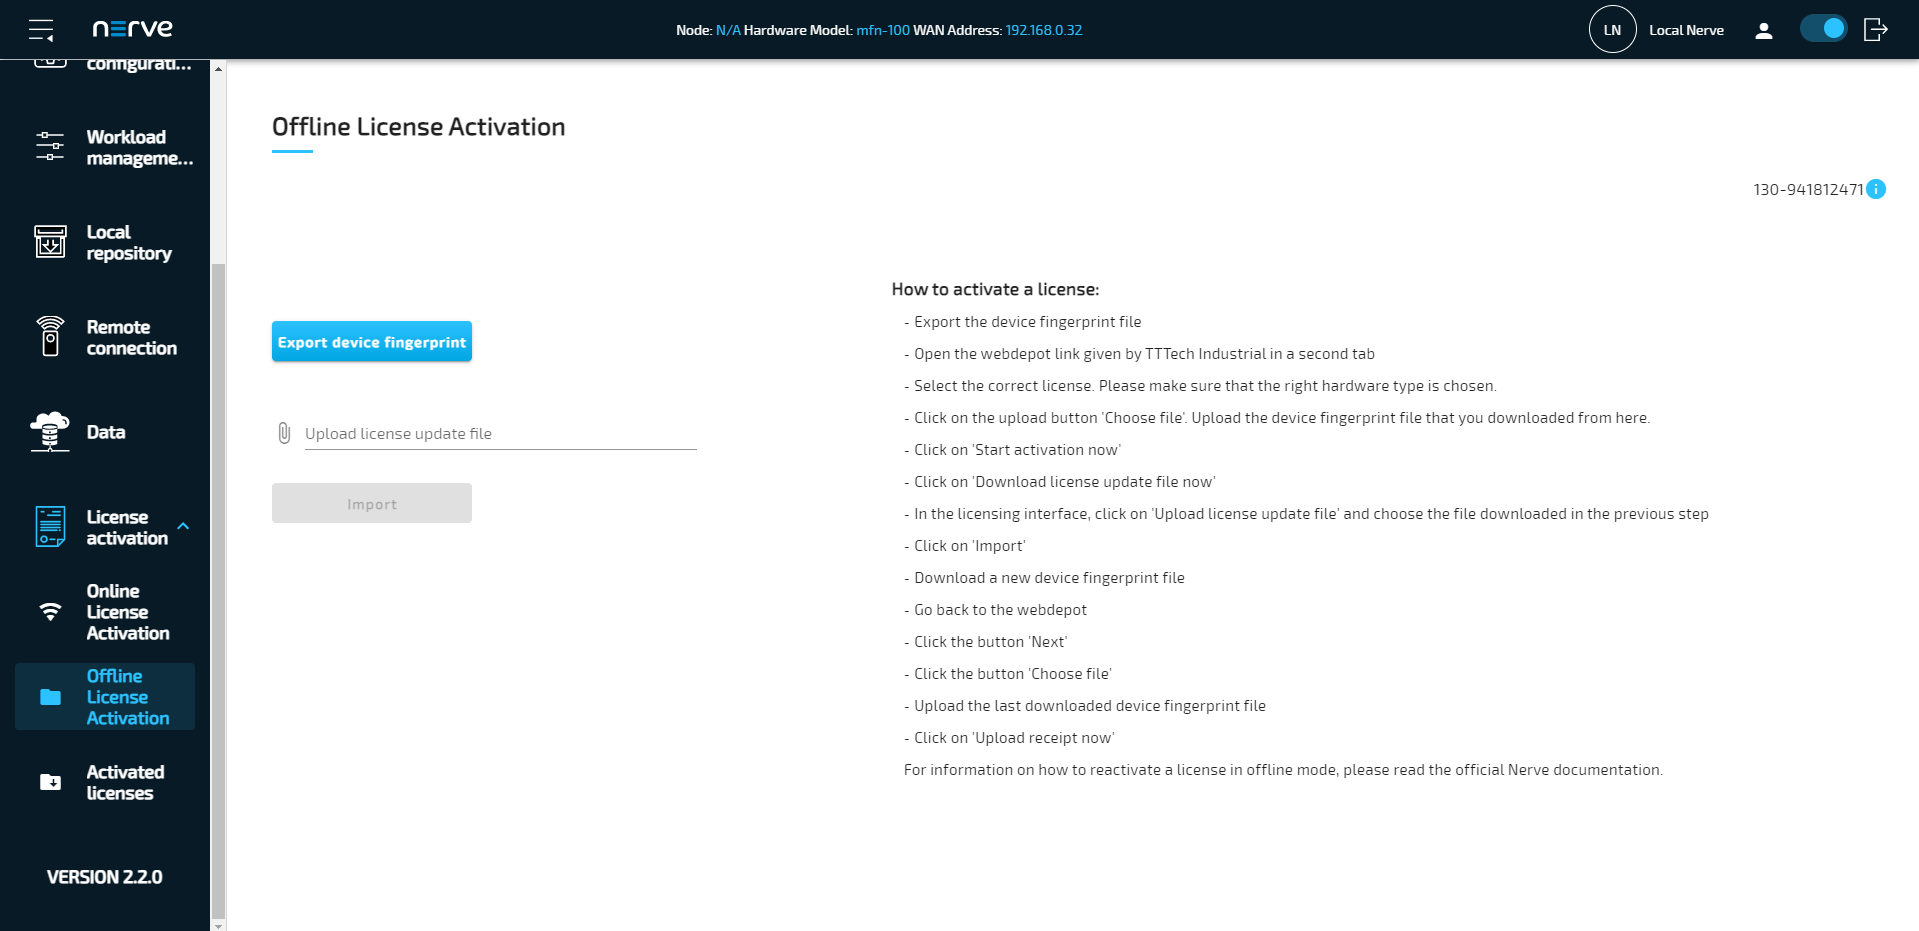
- Select License activation > Offline License Activation in the navigation on the left.
-
Select Export device fingerprint to download the license update file.

-
Open a new browser tab.
-
Enter the link to the web depot. The link has been sent as part of the delivery.
Note
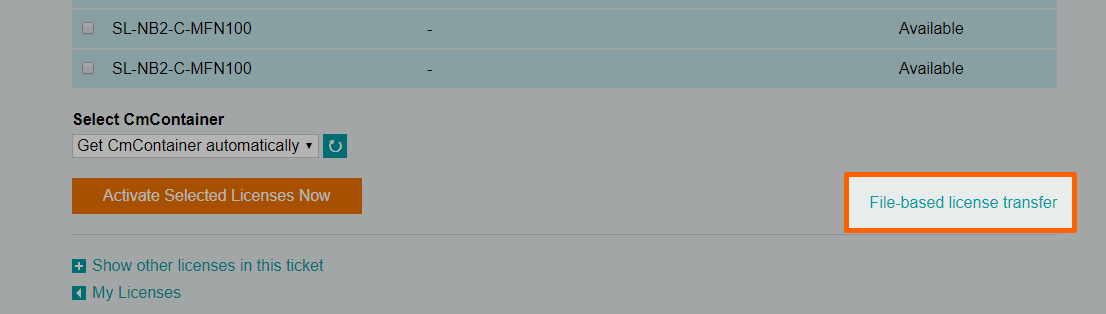
If other applications using licenses from Wibu Systems (e.g. CODESYS) are present on the workstation, the web depot will suggest activating licenses in a different way. In order to properly activate Nerve Blue following the instructions here, select File-based license transfer at the bottom of the page.
-
Select a license for the appropriate Nerve Device. The license will have the device name in its name.
Note
Make sure to always select a single license per device. Selecting multiple licenses when activating one device will waste purchased licenses.
-
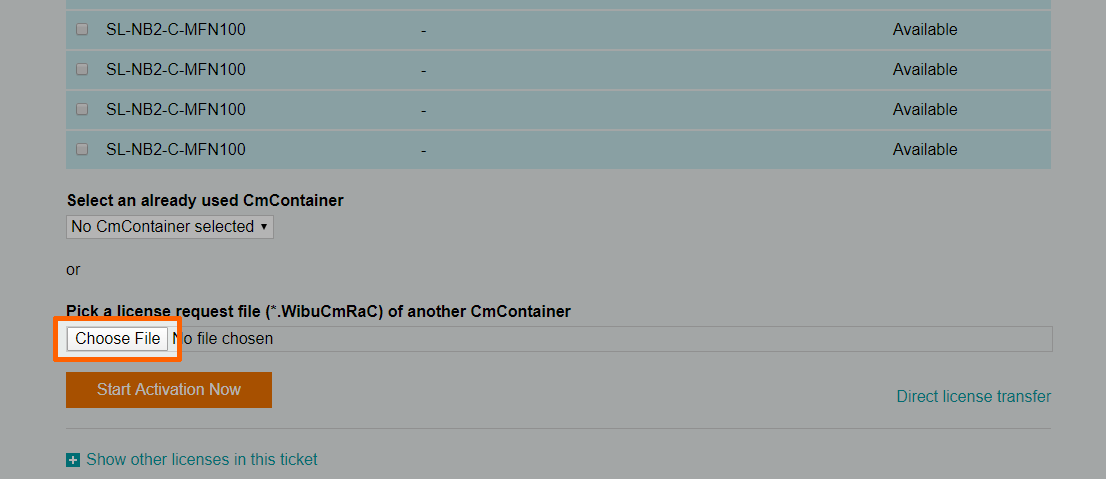
Select Choose File below the list of licenses under Pick a license request file (*.WibuCmRaC) of another CmContainer to open the file browser.
-
Upload the device fingerprint file that was download before.
-
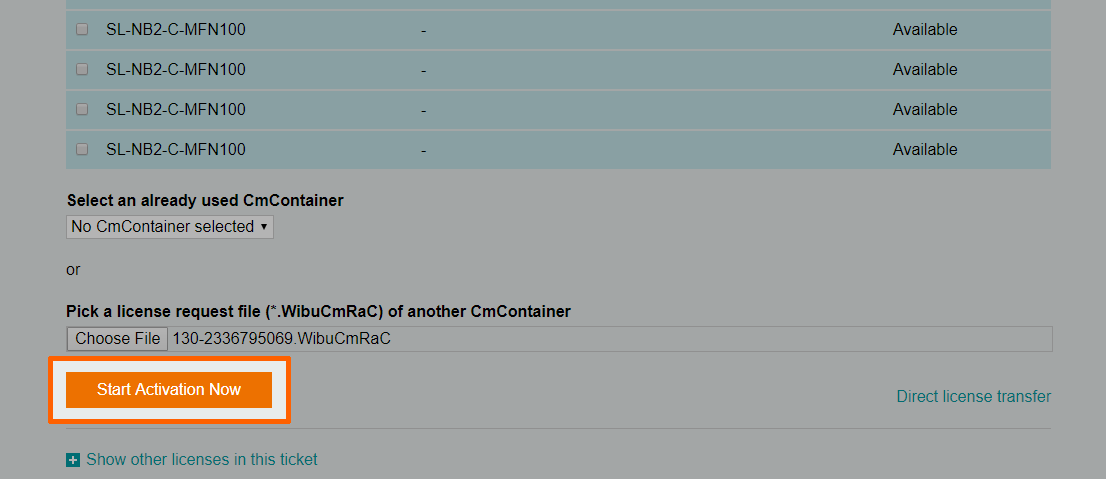
Select Start Activation Now.
-
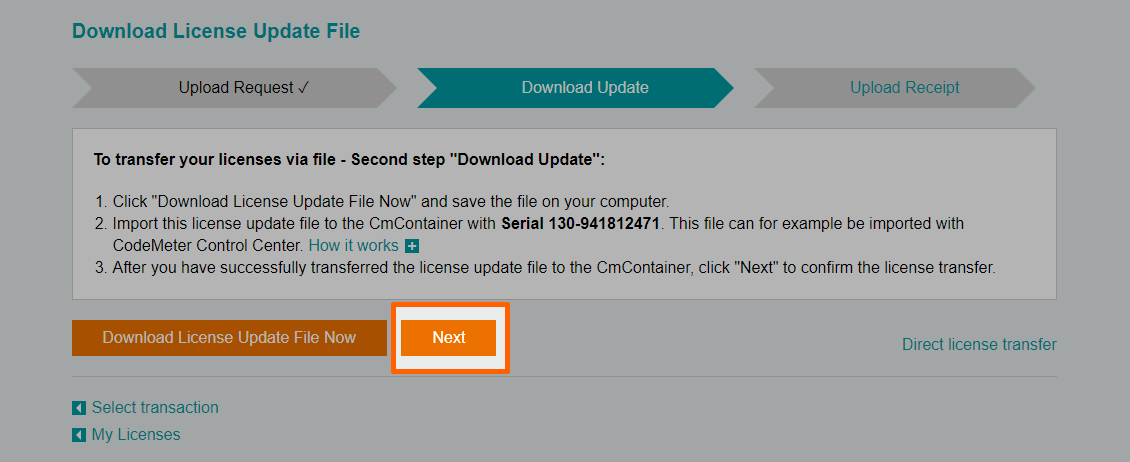
Select Download License Update File now in the next window to download the license update file named
<licensenumber>.WibuCmRaU.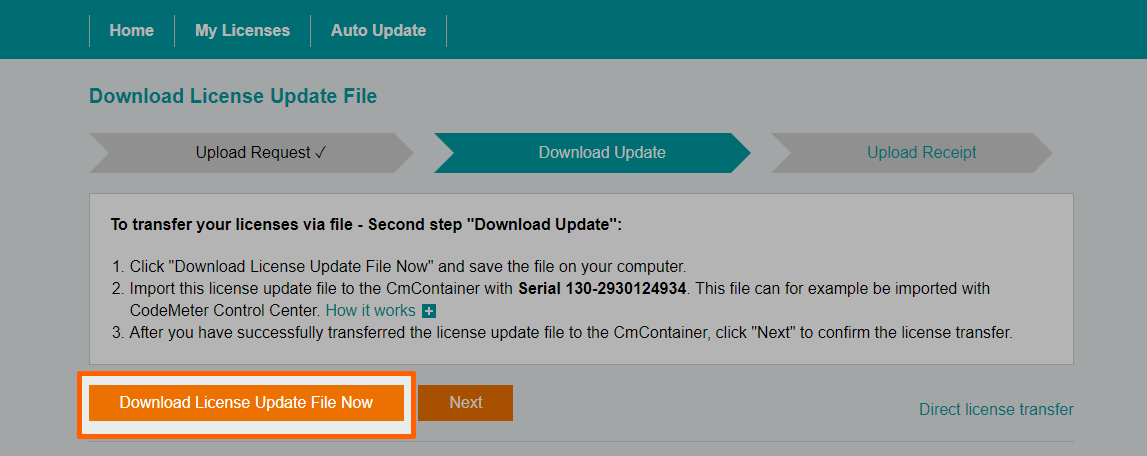
-
Switch back to the license activation UI.
-
Select the Upload license update file field to open the file browser.
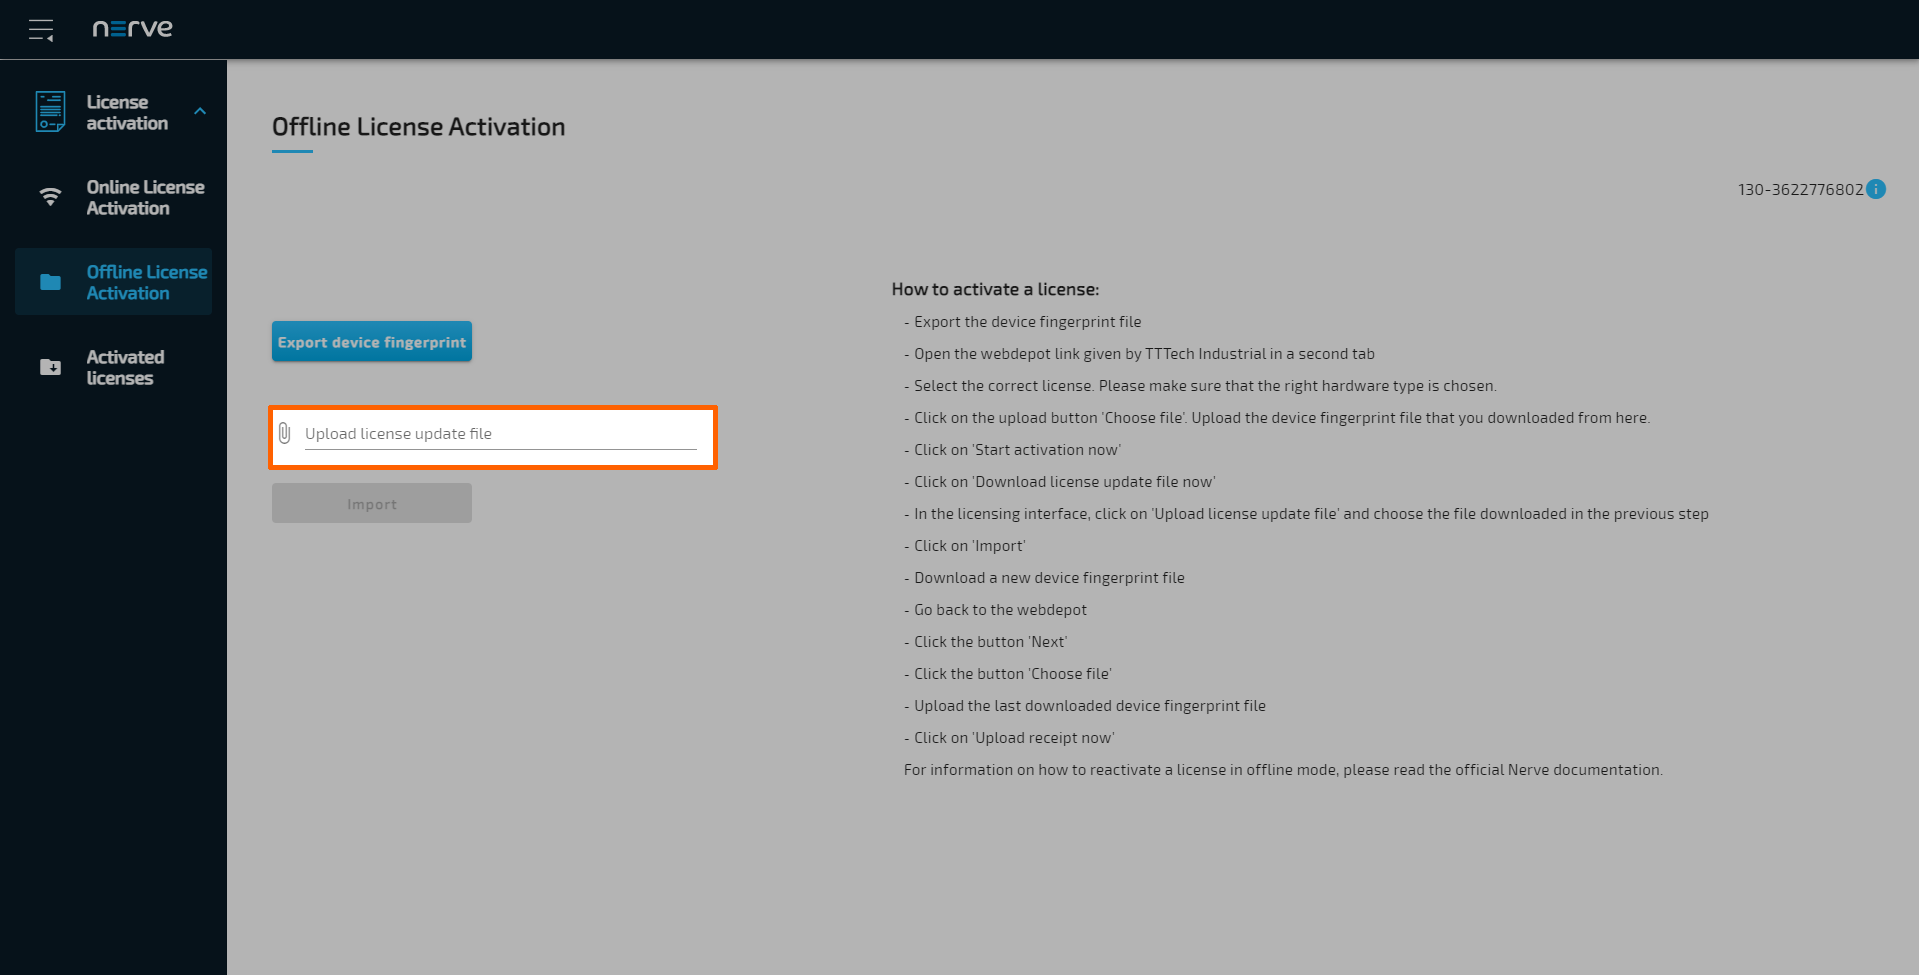
-
Navigate to where the
<licensenumber>.WibuCmRaUfile is saved and select it. -
Select Import to import the license.
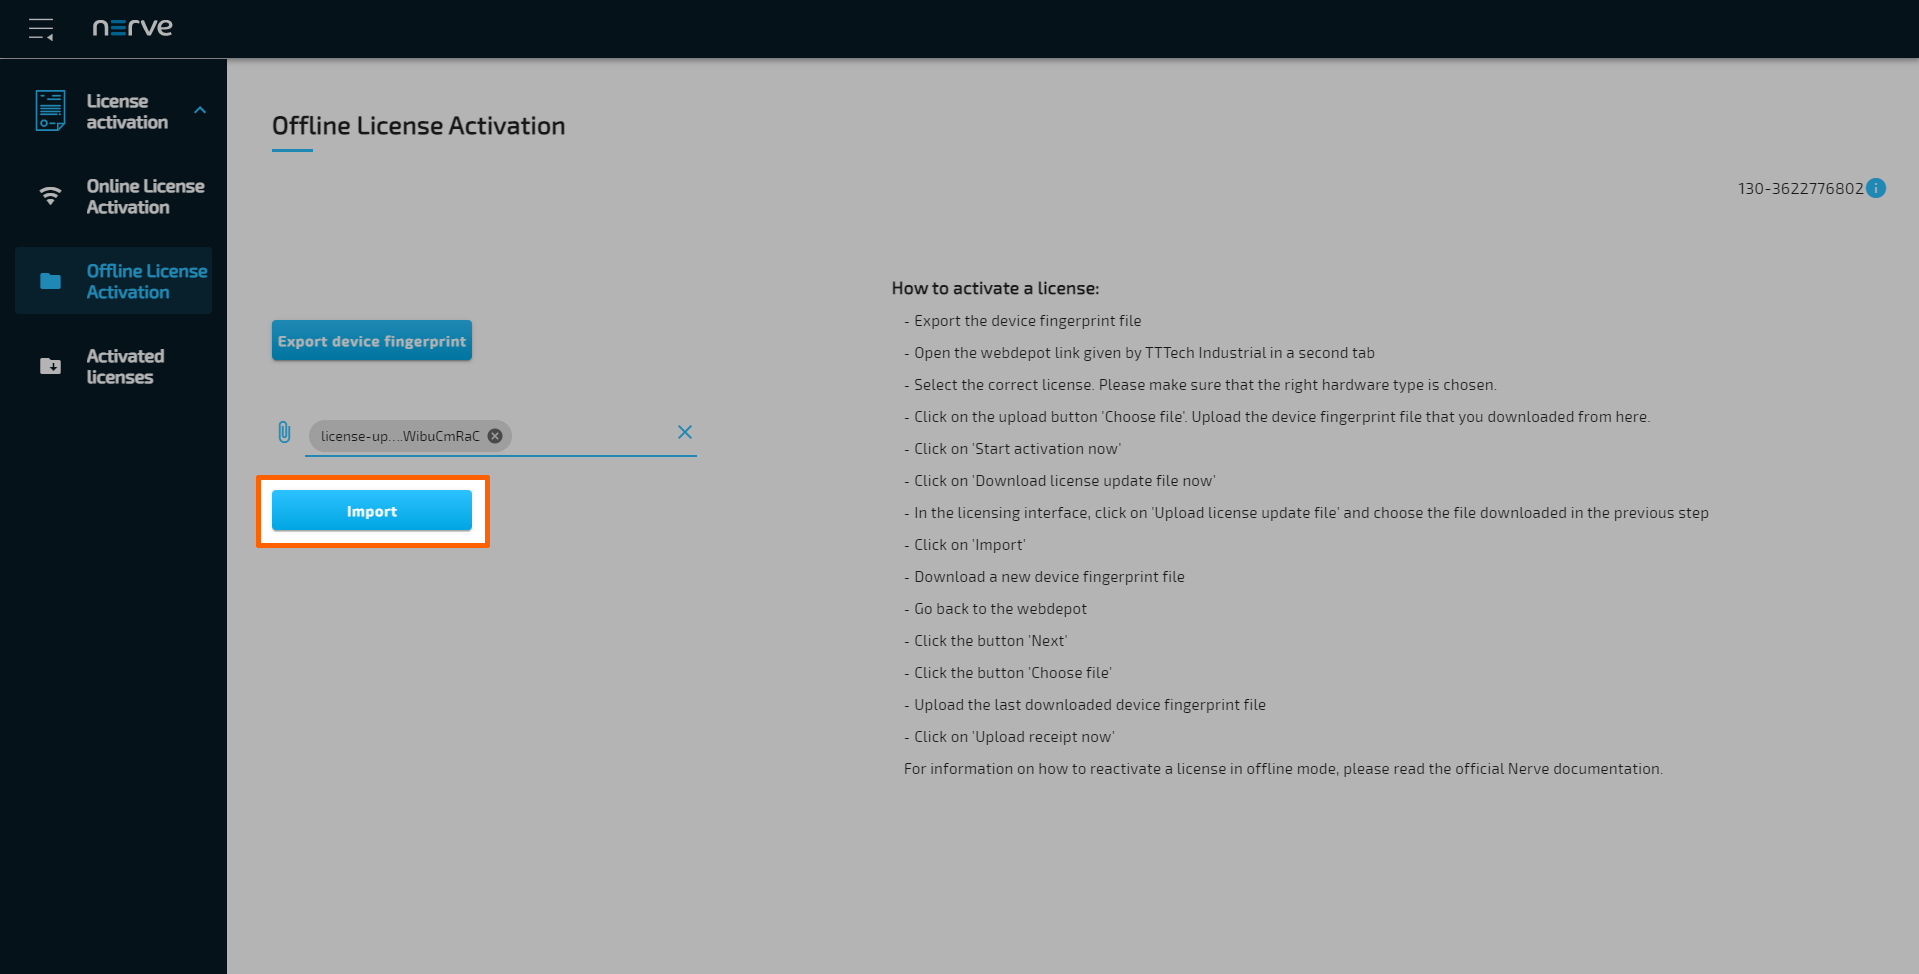
The system will proceed to activate the license and automatically redirect to the Local UI after a successful activation.
Note
When using an MFN 100, the device will light up blue once the license has been activated and the necessary services are up and running.
-
Log in to the Local UI with the credentials from the customer profile.
- Select License activation > Offline License Activation in the navigation on the left.
-
Select Export device fingerprint to download the updated device fingerprint.
-
Switch back to the web depot.
-
Select Next.
-
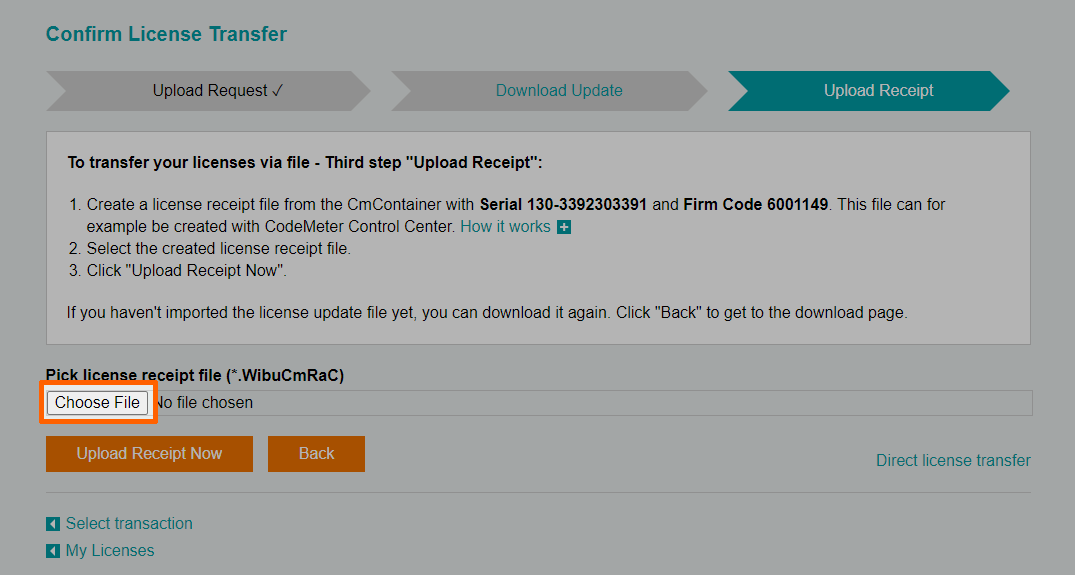
Select Choose file.
-
Add the device fingerprint that was downloaded a few steps before.
-
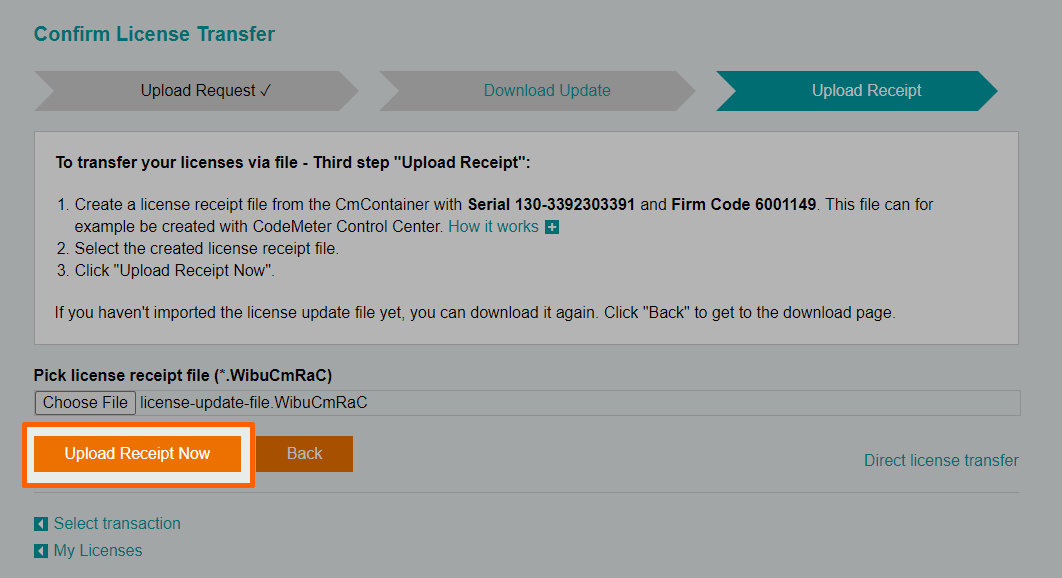
Select Upload receipt now.
The web depot confirms a successful activation.

To double-check if the license has been activated properly, expand License activation > Activated licenses in the navigation on the left of the Local UI. An activated license is displayed in the table with a green check mark on the right side, signifying a successful activation on the correct Nerve Device.
With the license activated, return to the previous device guide page and continue with Accessing the Local UI and registering the device.
Reusing activated licenses
Previously activated licenses can be reactivated. This is useful in cases when Nerve Blue is reinstalled in order to wipe the disk or disk failure. However, licenses can only be reused for the same Nerve Device. In addition, the license serial number is required from the time the license was activated first. Without the license serial number from the previous installation, a new license has to be used.
Online reactivation
If the node has internet access, the node will automatically connect to the licensing server. The process is virtually identical to regular online license activation. Online license activation is selected in the navigation on the left by default.
-
Enter the ticket ID under Paste the Ticket ID here.
-
Select Show Licenses. Available licenses will appear below.
-
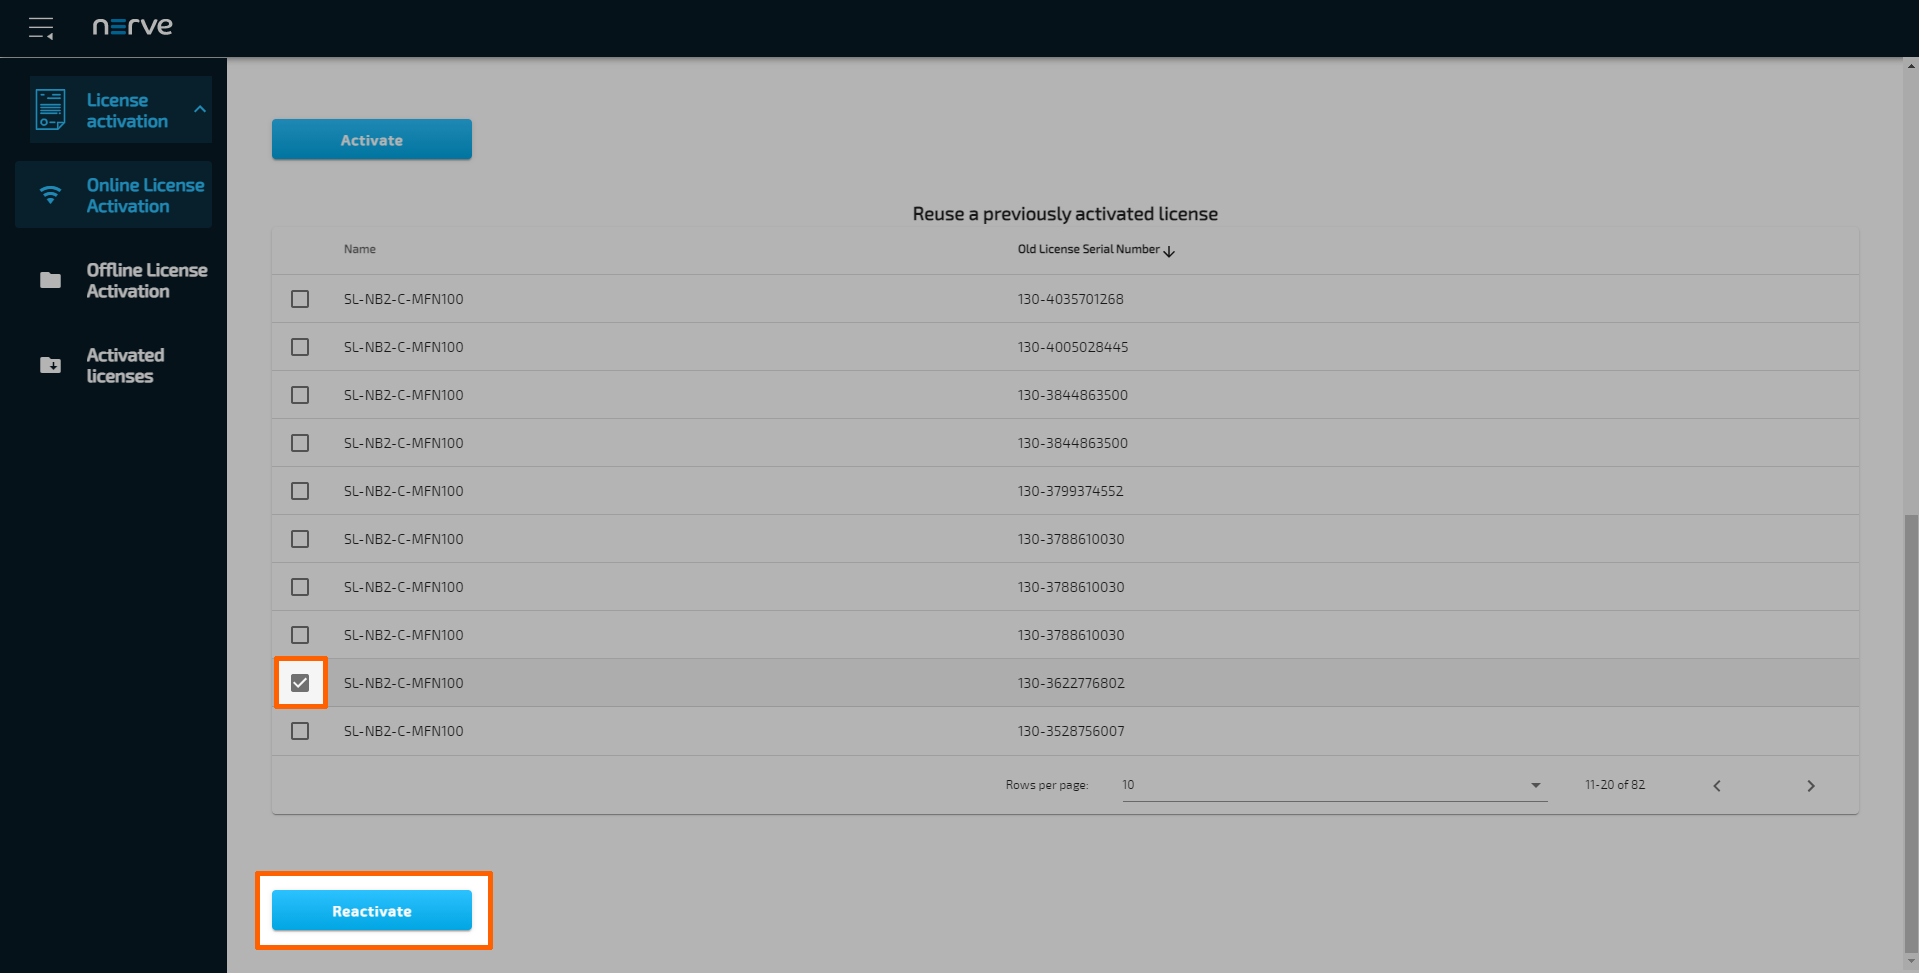
Scroll down to reach Reuse a previously activated license.
- Tick the checkbox next to the appropriate license. Look for the license that matches the license serial number of the previous installation in the Old License Serial Number column.
-
Select Reactivate below the list of licenses.
The system will proceed to activate the license and automatically redirect to the Local UI after a successful activation.
Note
When using an MFN 100, the device will light up blue once the license has been activated and the necessary services are up and running.
To double-check if the license has been activated properly, expand License activation > Activated licenses in the navigation on the left of the Local UI. An activated license is displayed in the table with a green check mark on the right side, signifying a successful activation on the correct Nerve Device.
Offline reactivation
In case of the node not having internet access, the license can be reactivated with a file-based method. However, note that a workstation with an internet connection is required for connecting to the licensing server in order to upload and download files.
Note
In some cases, offline license activation cannot be completed on Windows.
- Select License activation > Offline License Activation in the navigation on the left.
-
Select Export device fingerprint to download the license update file.
-
Open a new browser tab.
- Enter the link to the web depot. The link has been sent as part of the delivery.
-
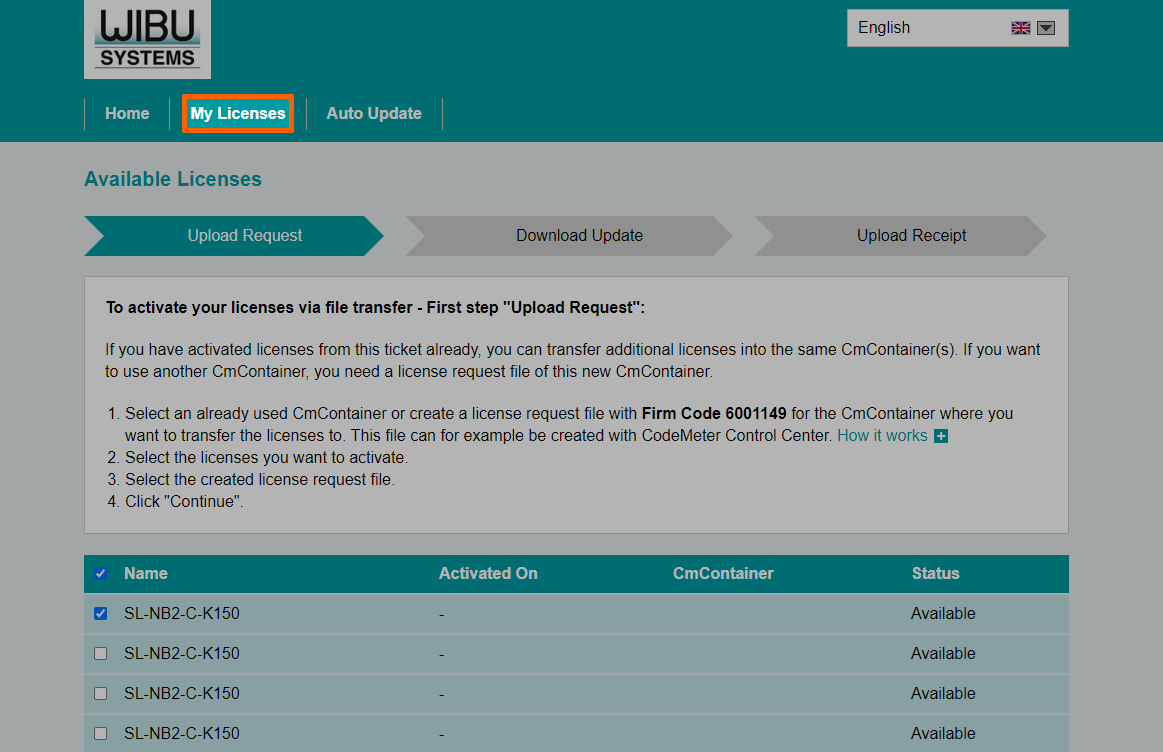
Select My Licenses.
-
Select Restore licenses at the bottom of the page.
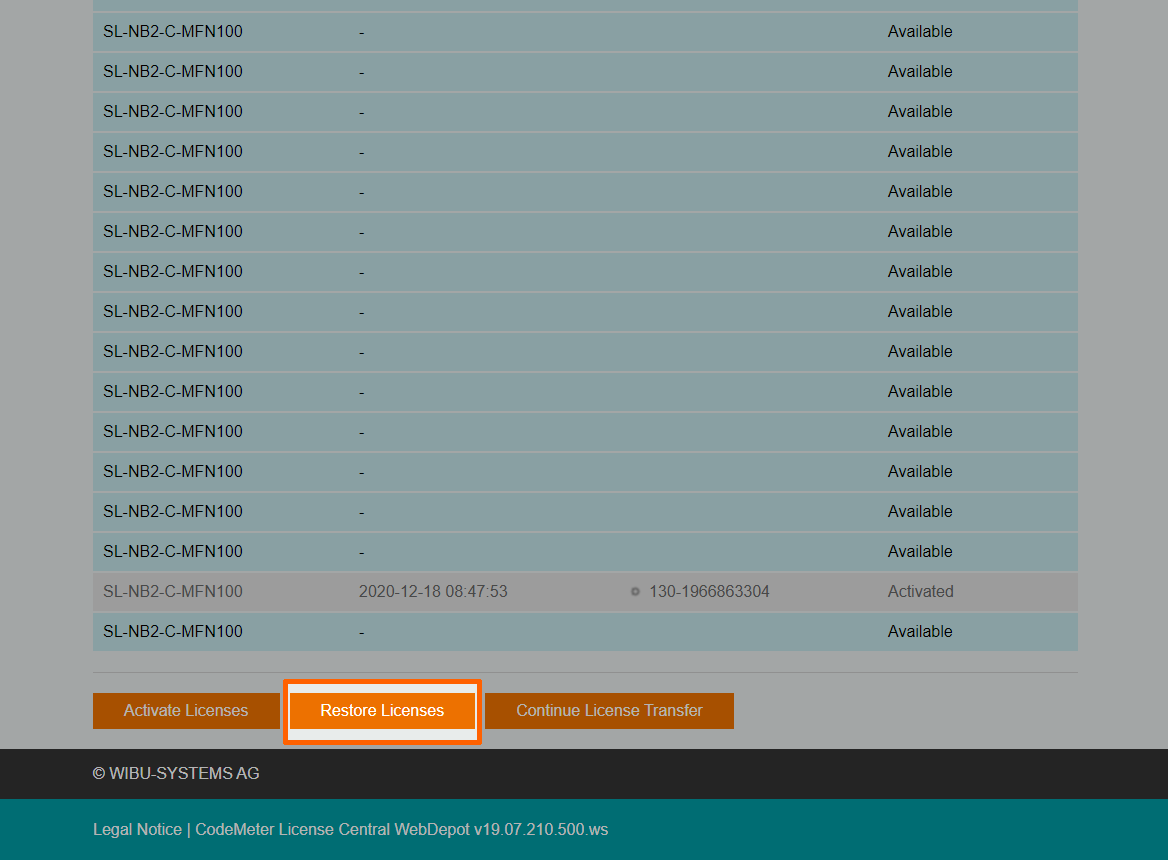
-
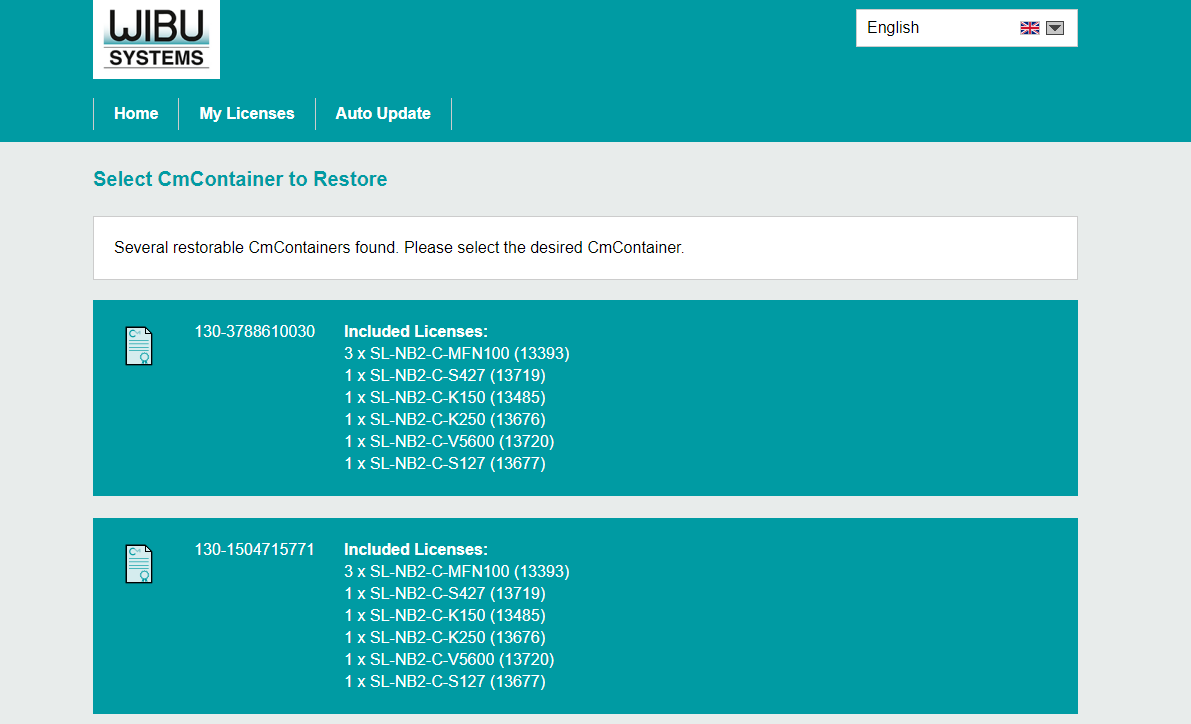
Select the appropriate license. Look for the license that matches the license serial number of the previous installation.
-
Select Choose file under Pick license request file (*.WibuCmRaC).
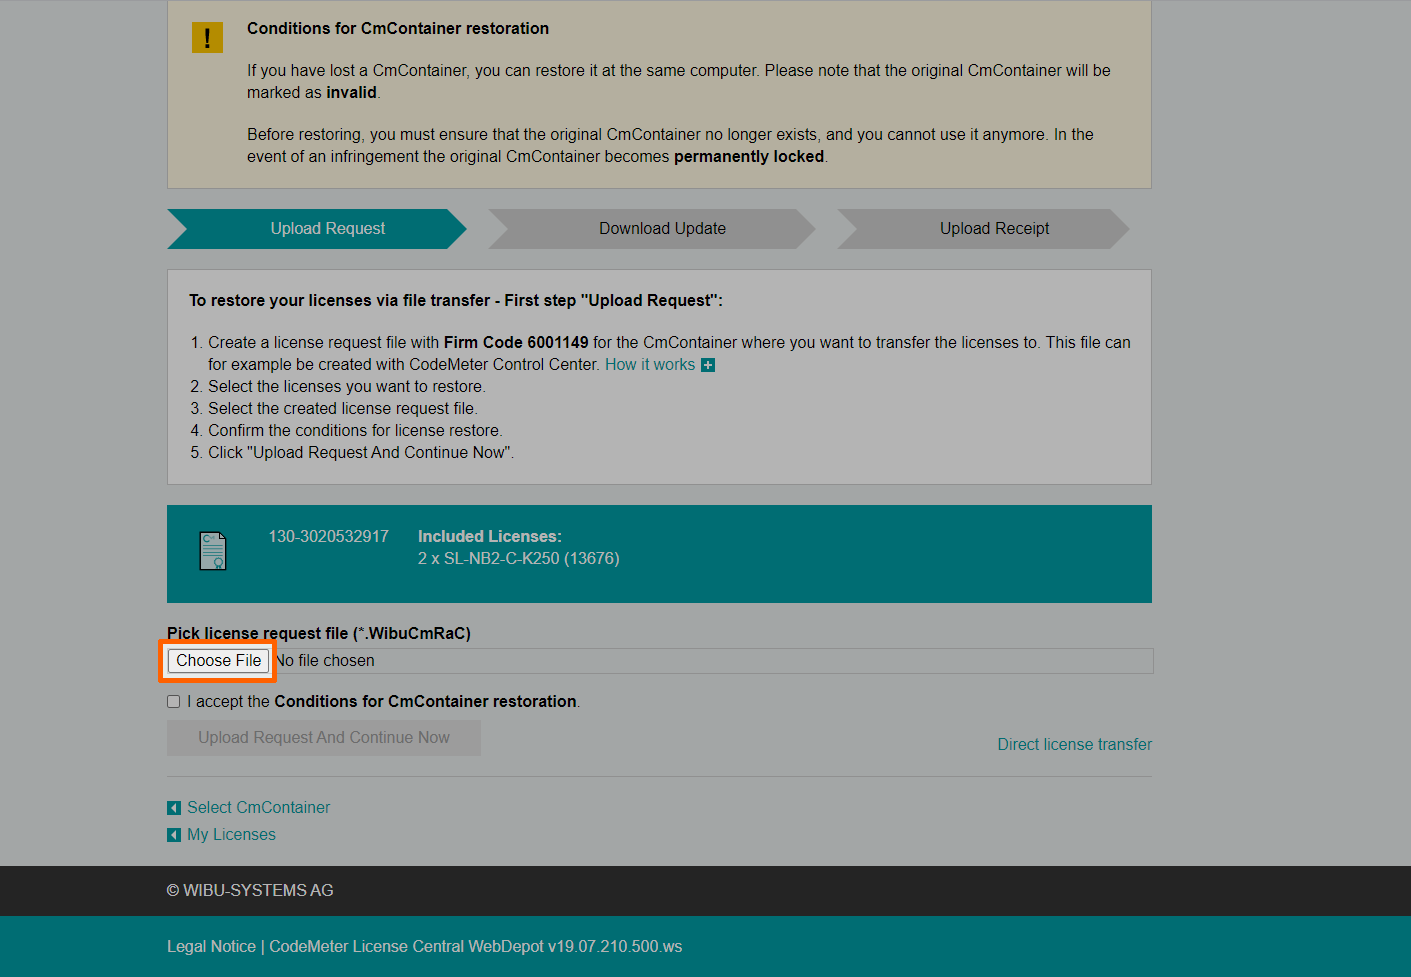
-
Navigate to where the device fingerprint file is saved and select it.
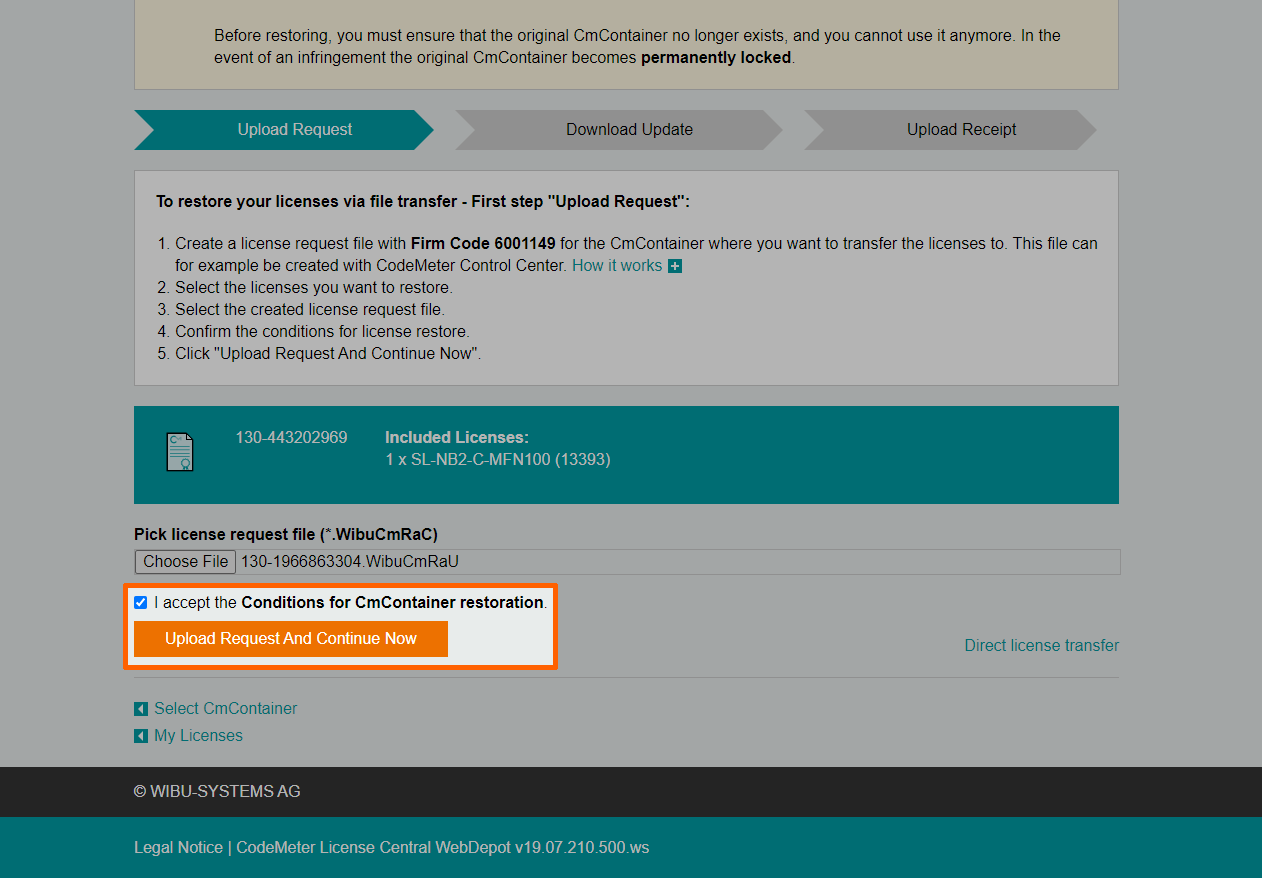
- Tick the checkbox next to I accept the Conditions for CmContainer restoration.
-
Select Upload Request And Continue Now.
-
Select Download License Update File now in the next window to download the license update file named
<licensenumber>.WibuCmRaU.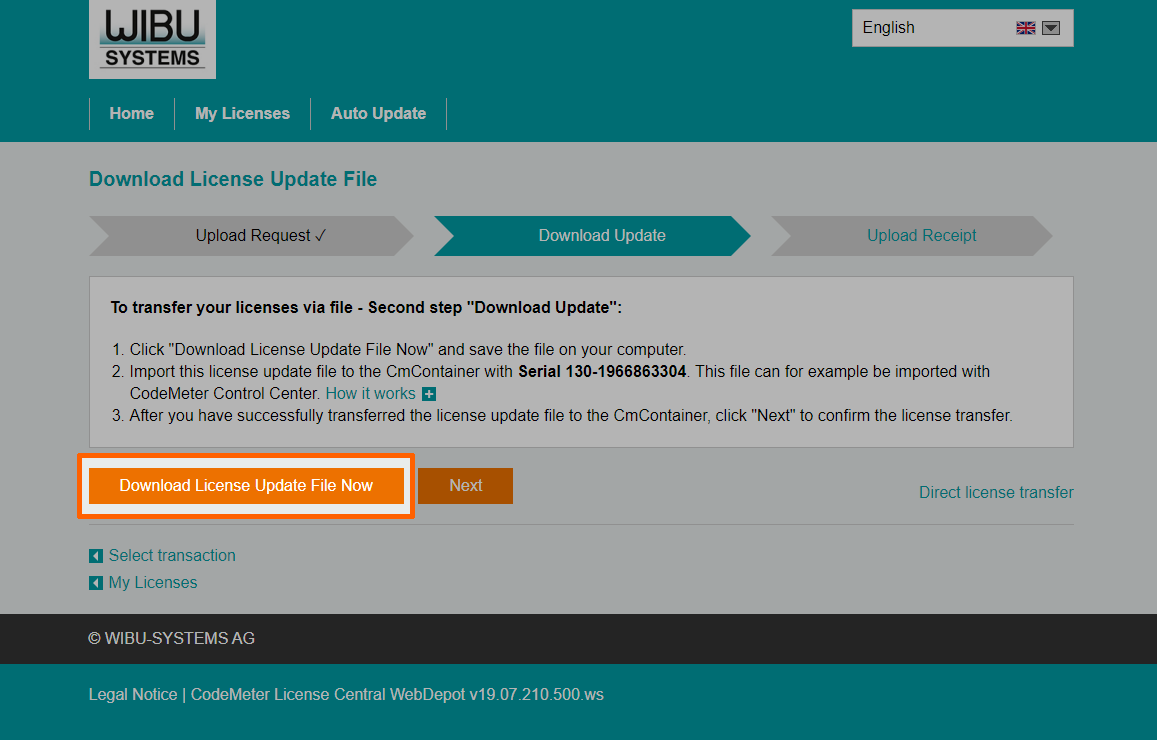
-
Switch back to the license activation UI.
-
Select the Upload license update file field to open the file browser.
-
Navigate to where the
<licensenumber>.WibuCmRaUfile is saved and select it. -
Select Import to import the license.
The system will proceed to activate the license and automatically redirect to the Local UI after a successful activation.
Note
When using an MFN 100, the device will light up blue once the license has been activated and the necessary services are up and running.
-
Log in to the Local UI with the credentials from the customer profile.
- Select License activation > Offline License Activation in the navigation on the left.
-
Select Export device fingerprint to download the updated device fingerprint.
-
Switch back to the web depot.
-
Select Next.
-
Select Choose file.
-
Add the device fingerprint that was downloaded a few steps before.
-
Select Upload receipt now.
The web depot confirms a successful activation.
To double-check if the license has been activated properly, expand License activation > Activated licenses in the navigation on the left of the Local UI. An activated license is displayed in the table with a green check mark on the right side, signifying a successful activation on the correct Nerve Device.
With the license activated, return to the previous device guide page and continue with Accessing the Local UI and registering the device.