Downloading & uploading CODESYS applications from the Management System
With the kit CODESYS applications can be deployed from the Management System to the MFN 100. The two default CODESYS applications are already available in the Management System. Own applications can also be uploaded to the repository in the Management System and made ready for deployment.
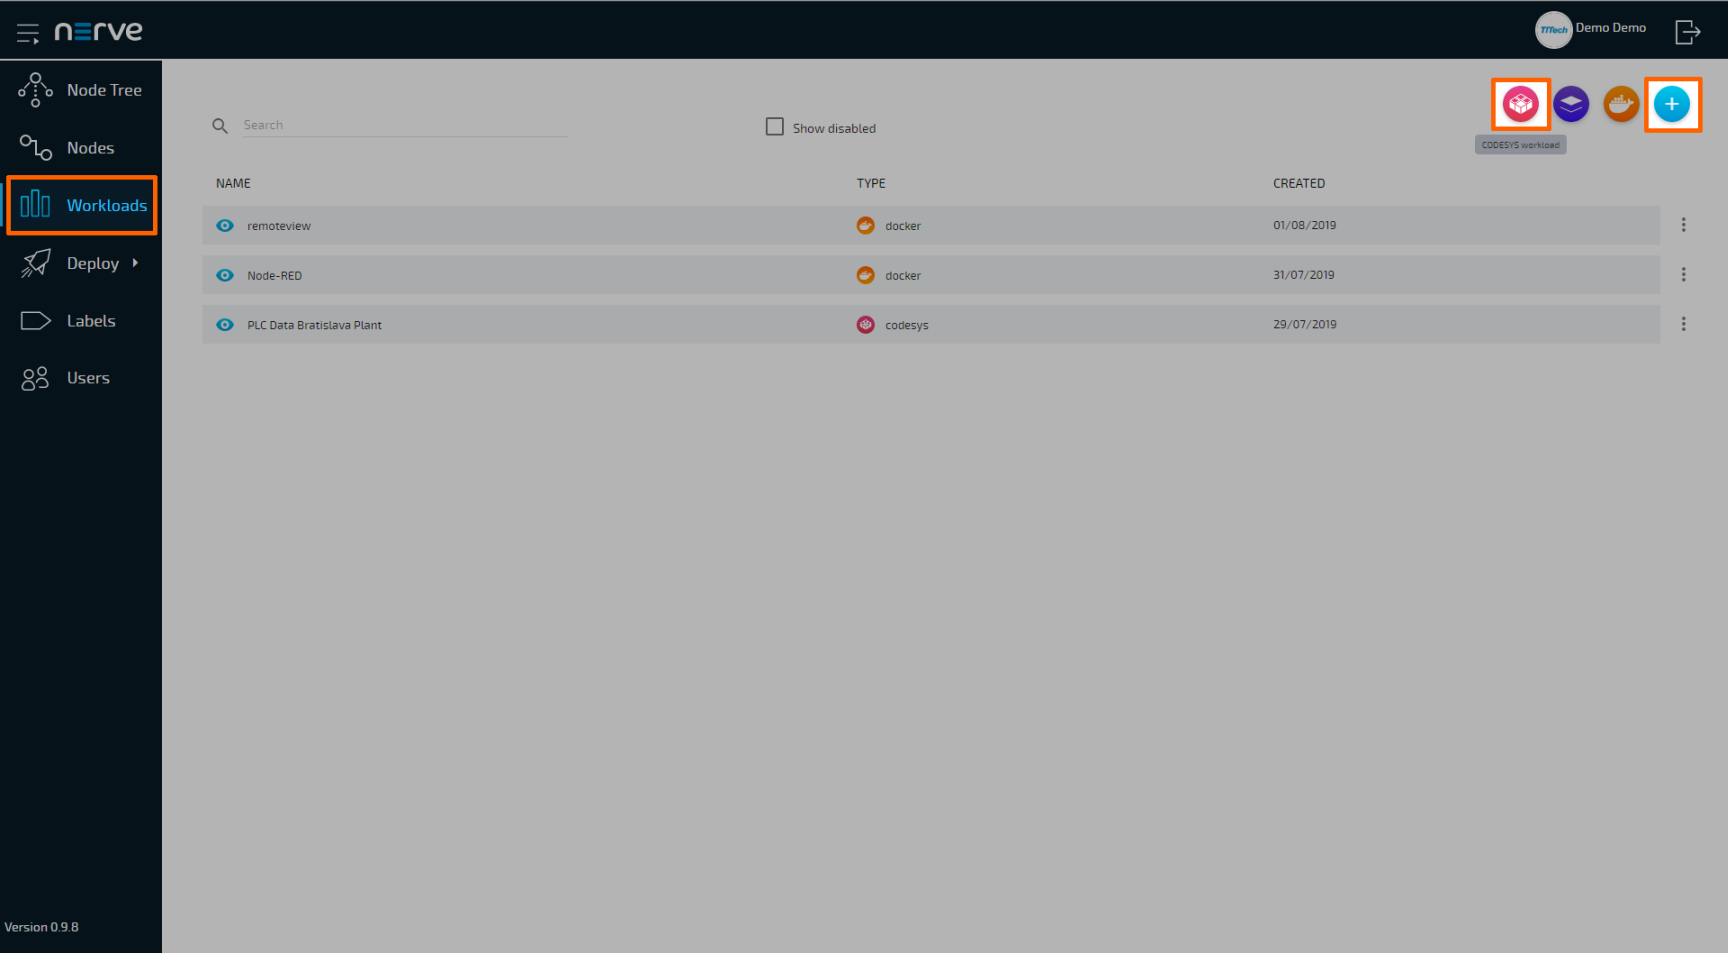
Deploying a CODESYS workload
One CODESYS workload is available with first login that can be used with the kit immediately. The workload is named Nerve Blue Kit and it has two versions: Nerve Blue Starter Kit App1 and Nerve Blue Starter Kit App2. For more information on the deployment process for all workload types refer to the user guide.
-
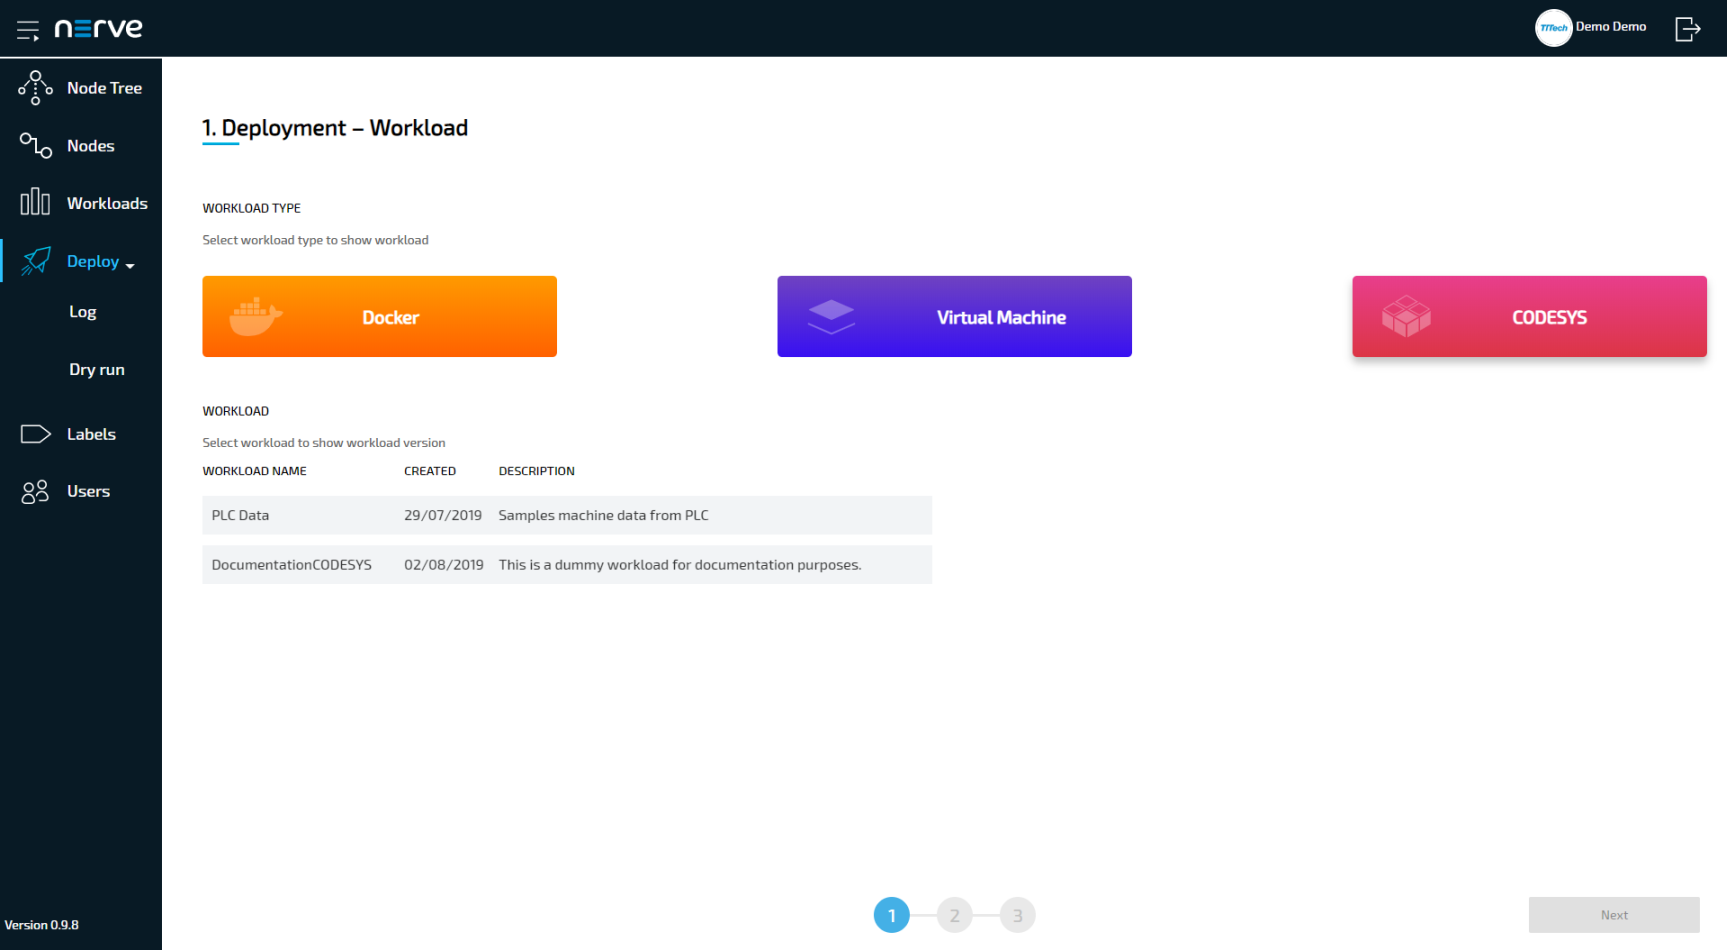
Select Deploy in the left-hand menu.

-
Select the CODESYS workload icon on the right. A list of CODESYS workloads will appear below.
-
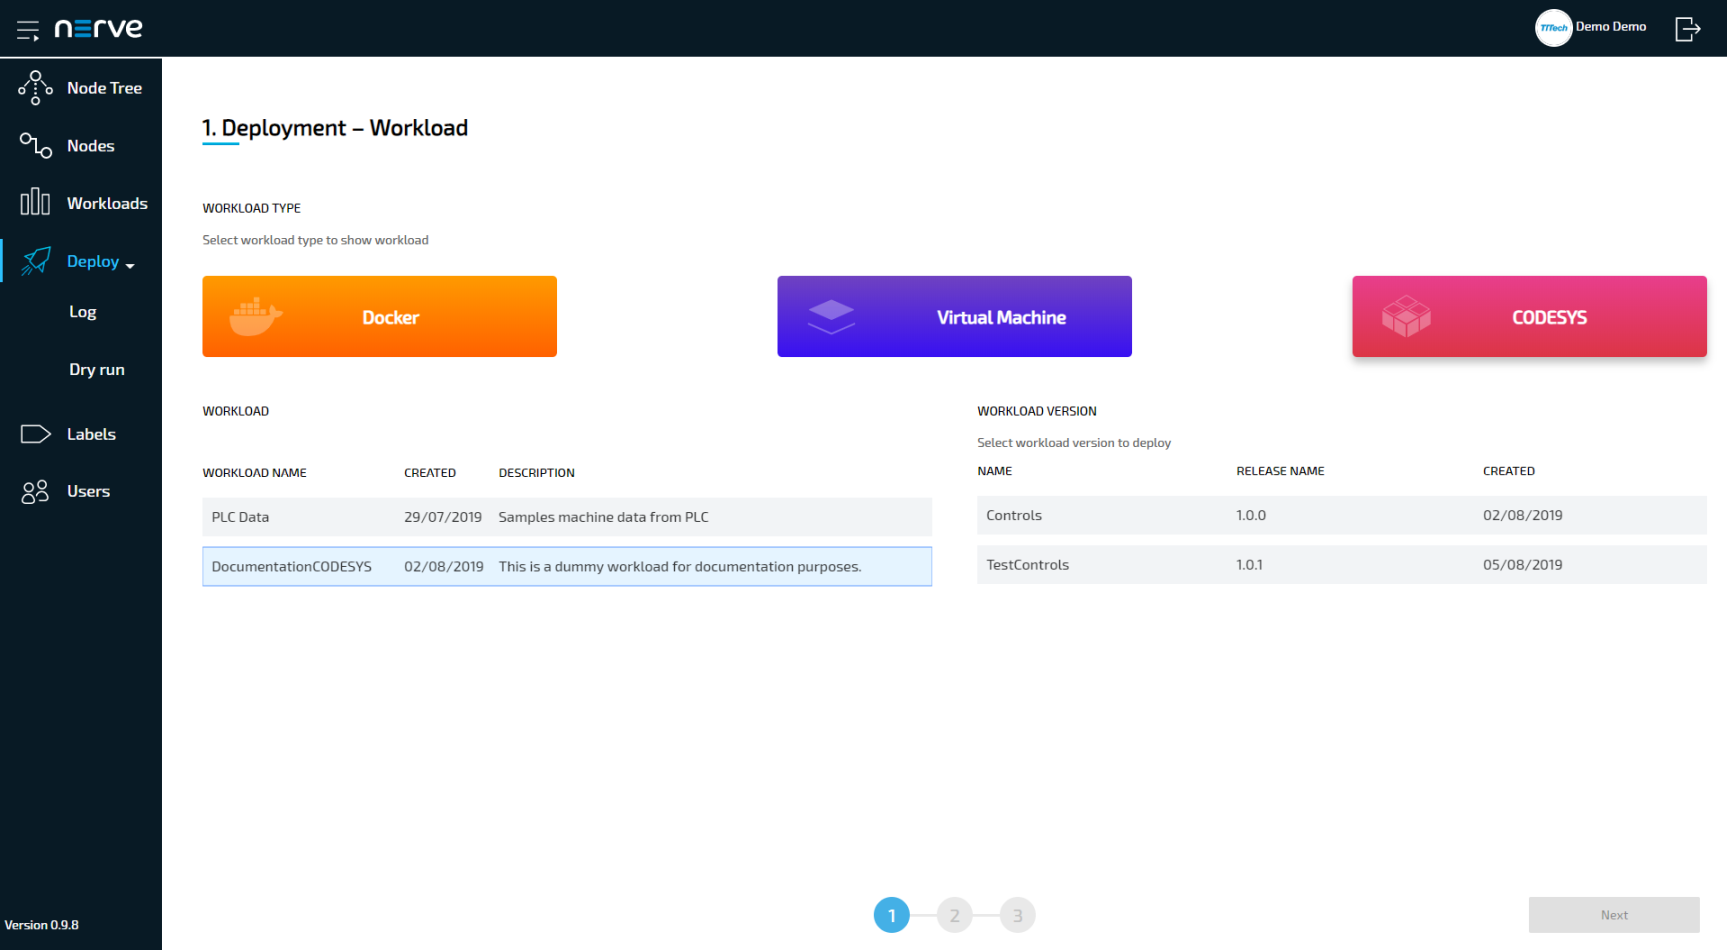
Select a workload from the list. A list of versions of this workload will appear to the right.
-
Select the version of the workload.
-
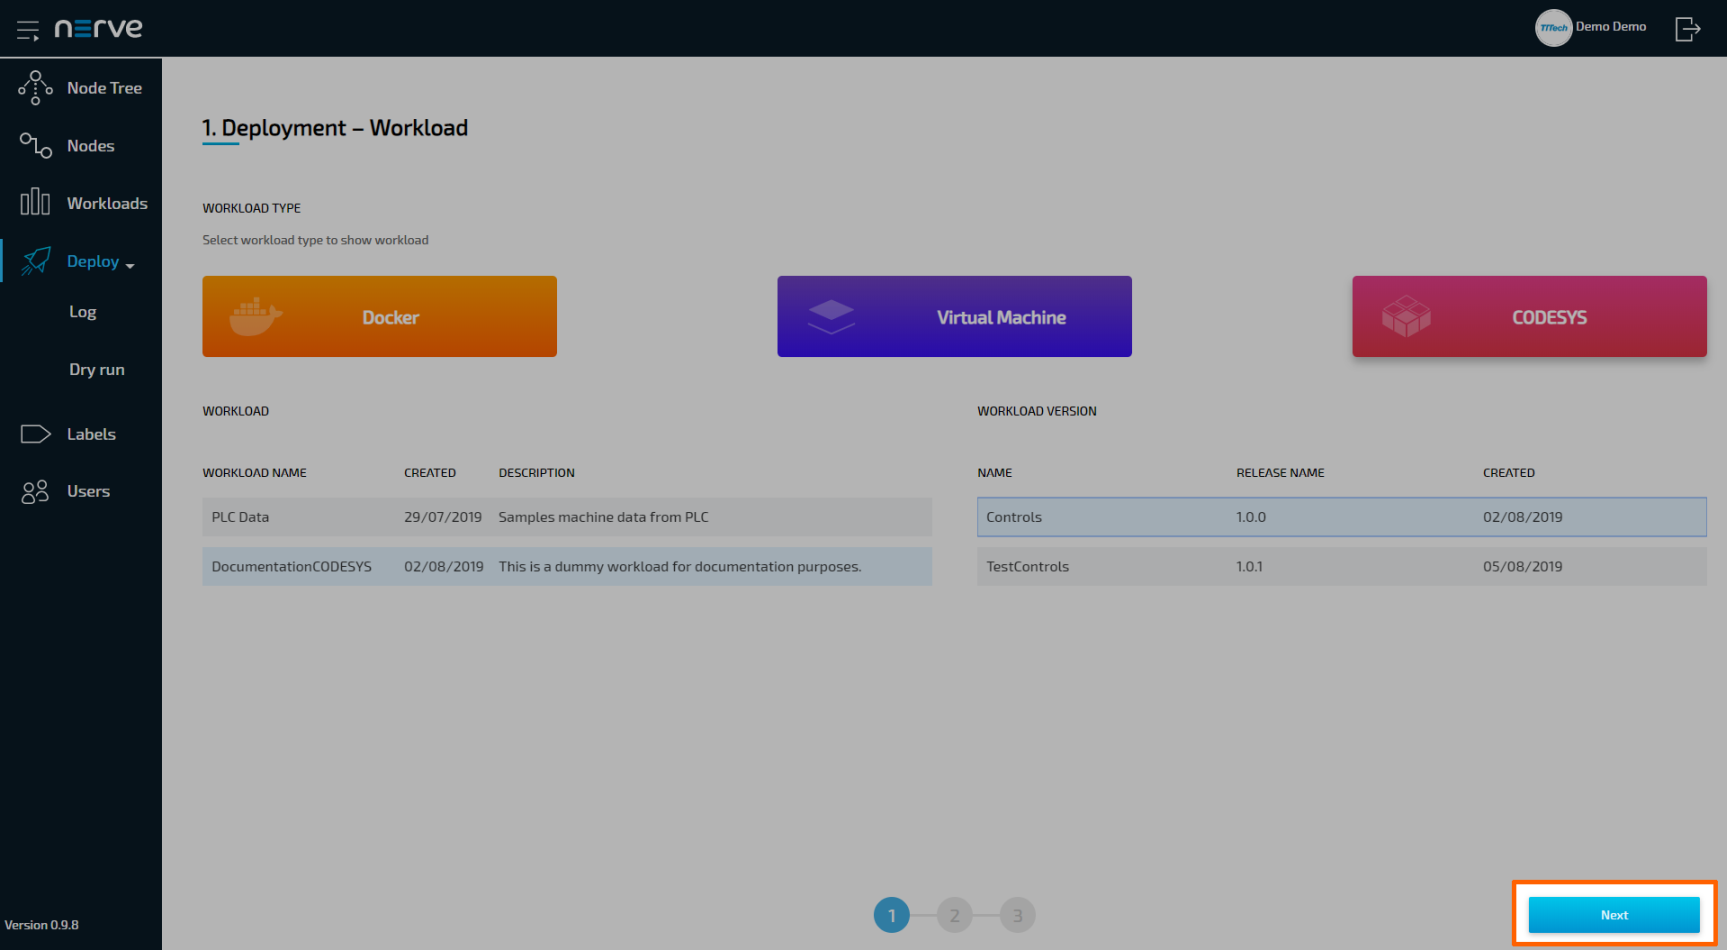
Click Next in the bottom-right corner.
-
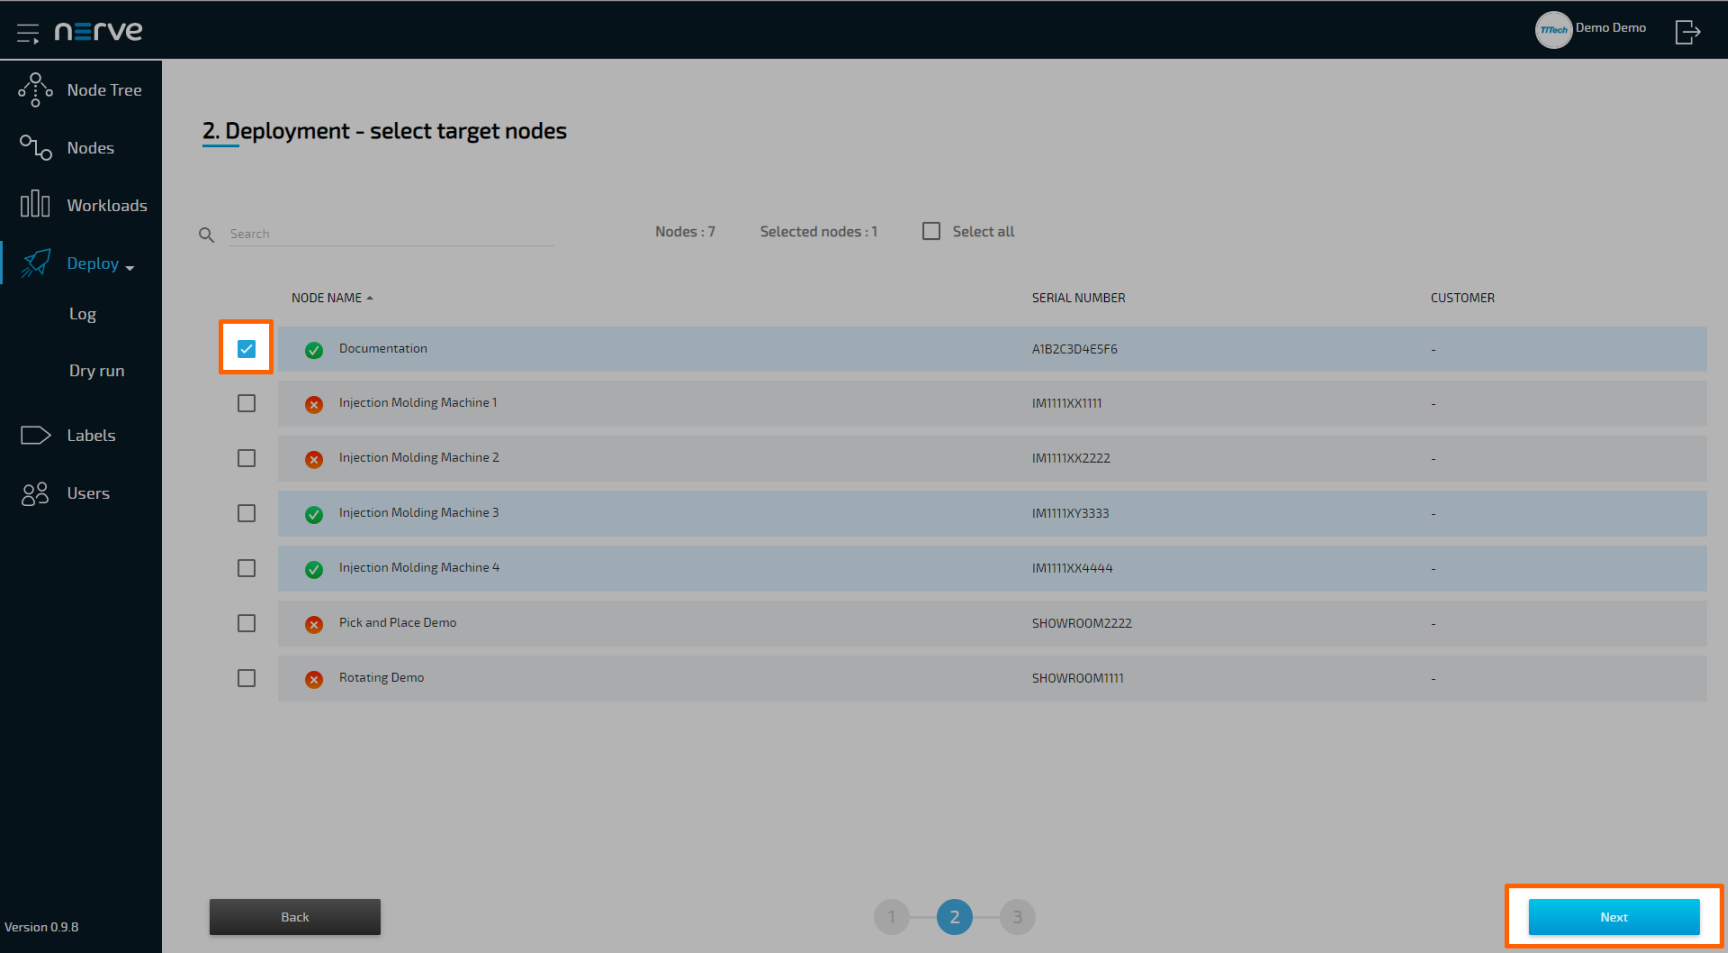
In the next window, select one or more nodes from the list for deployment by ticking the checkboxes on the left.
-
Select Next in the lower-right corner.
-
Select Deploy to execute the deployment.
Optional: Enter a Deploy name above the Summary of the workload to make this deployment easy to identify. A timestamp is filled in automatically.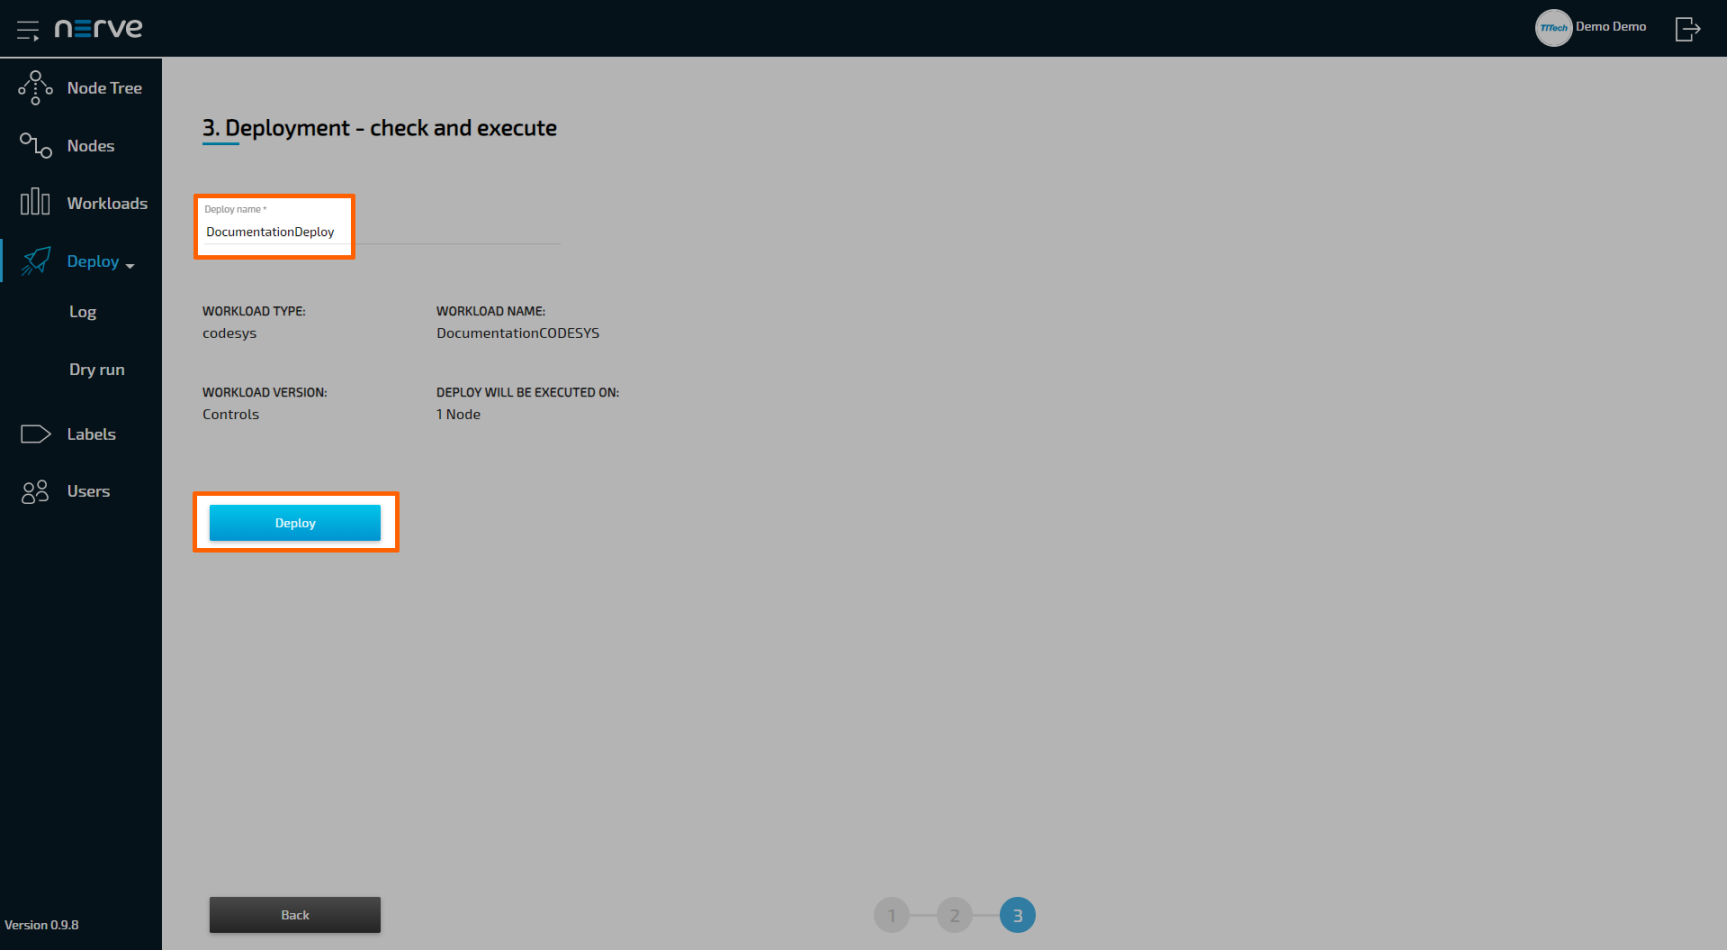
The Management System will deploy the log next. The current deployment is at the top of the list. The Deploy name chosen before is the name that identifies the deployment in the log.
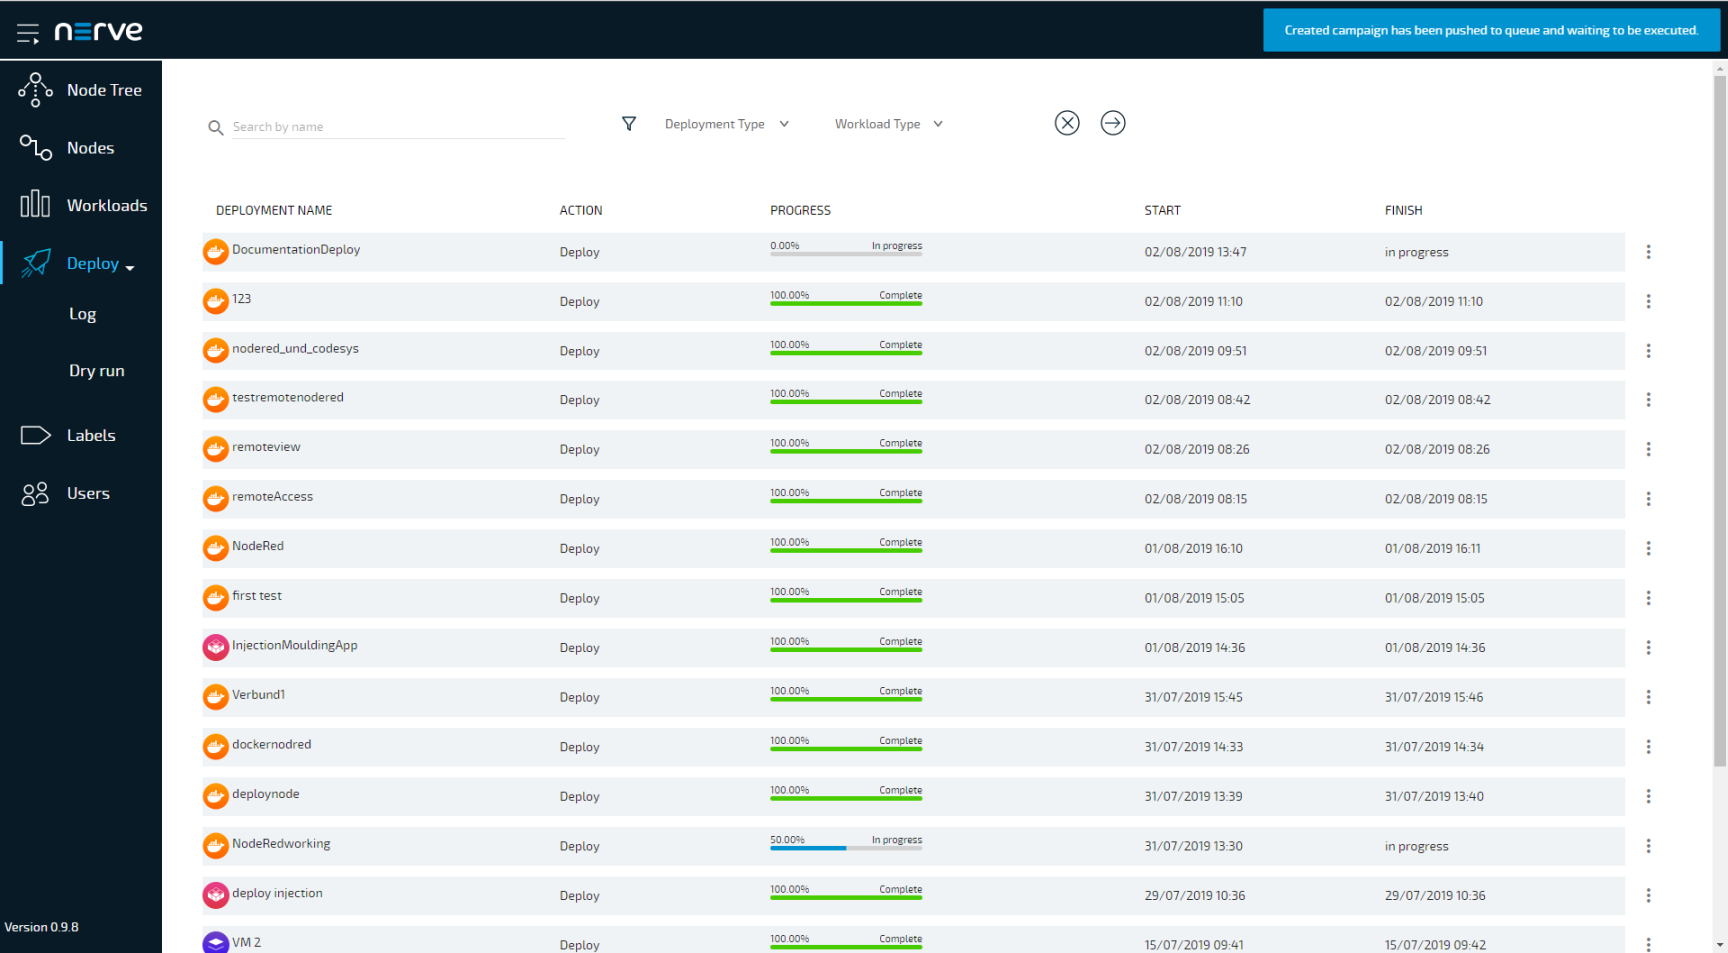
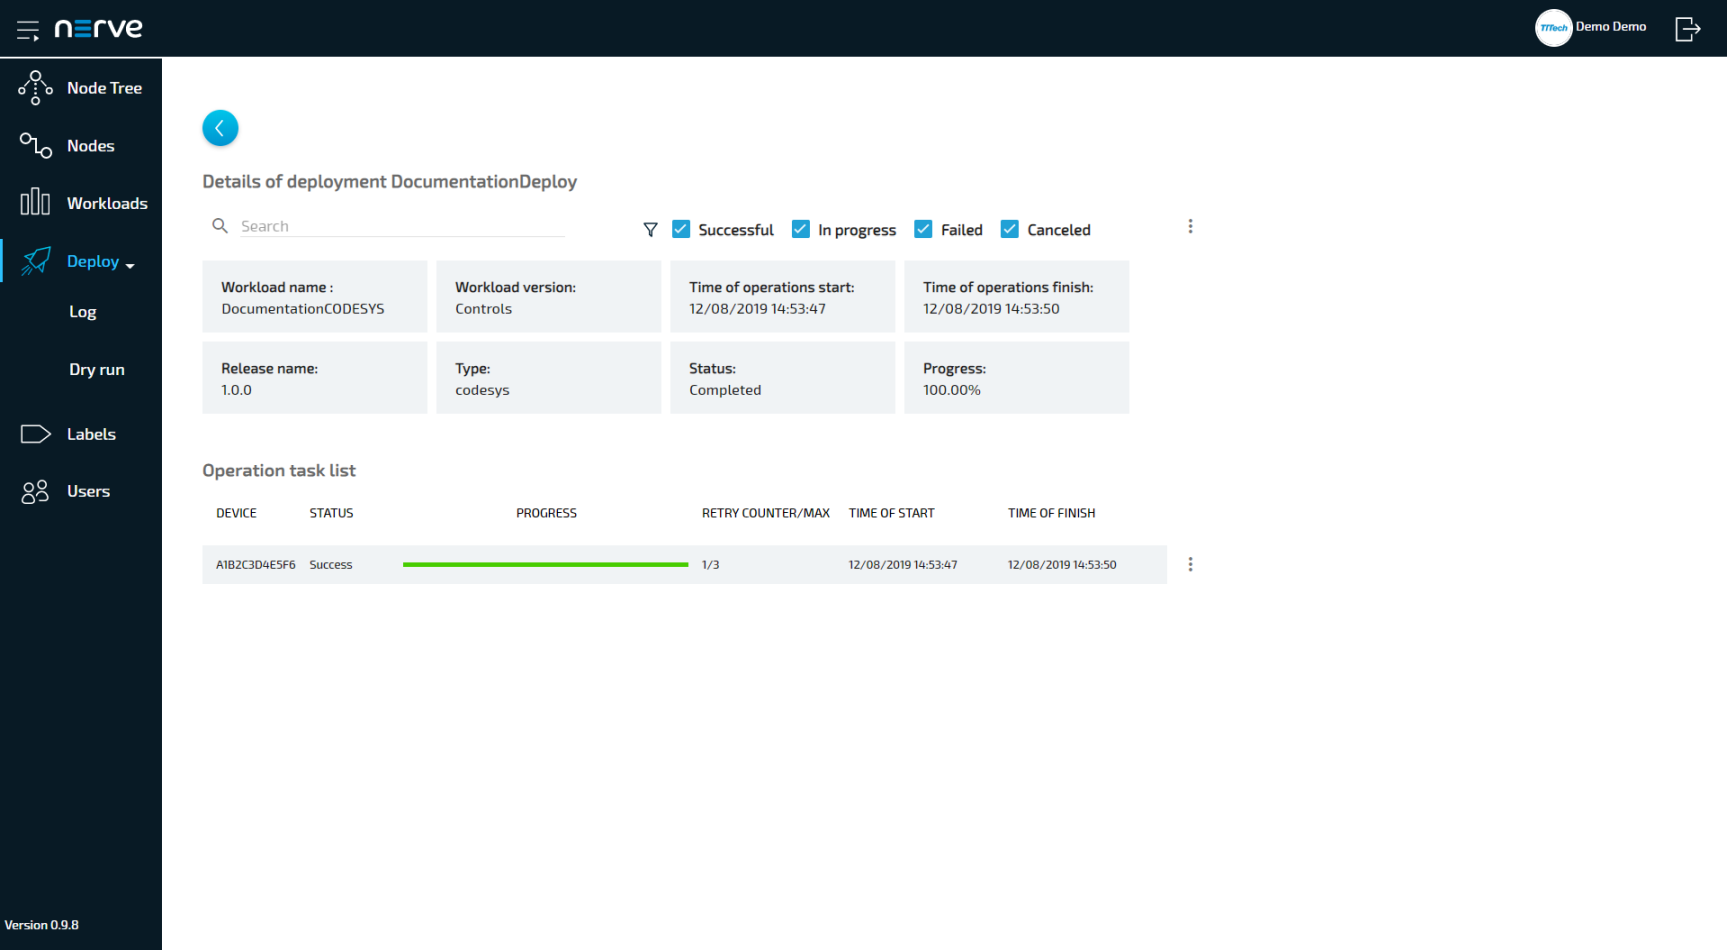
Check the progress of the current deployment and click the workload to see a more detailed view.
Confirm the deployment by viewing the workload in the node details view in the node tree. Select Nodes in the navigation on the left and select the node tree tab  on the right. Select the node that has workloads deployed.
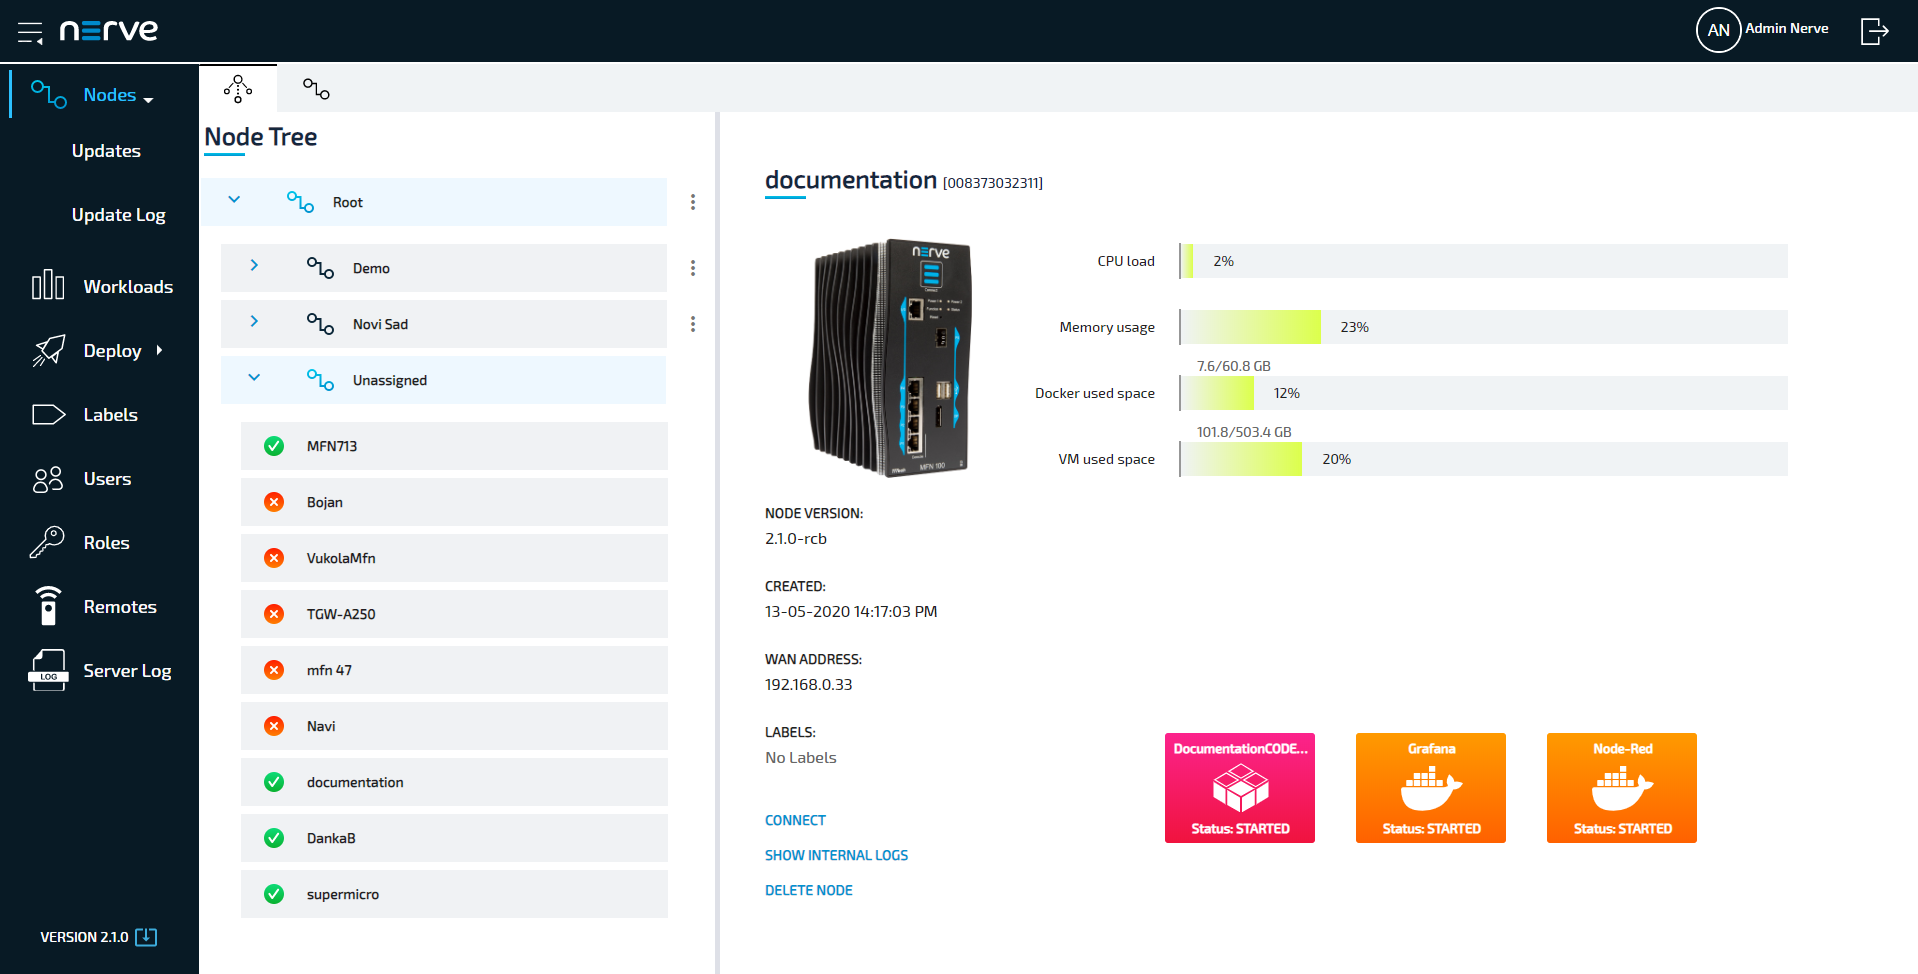
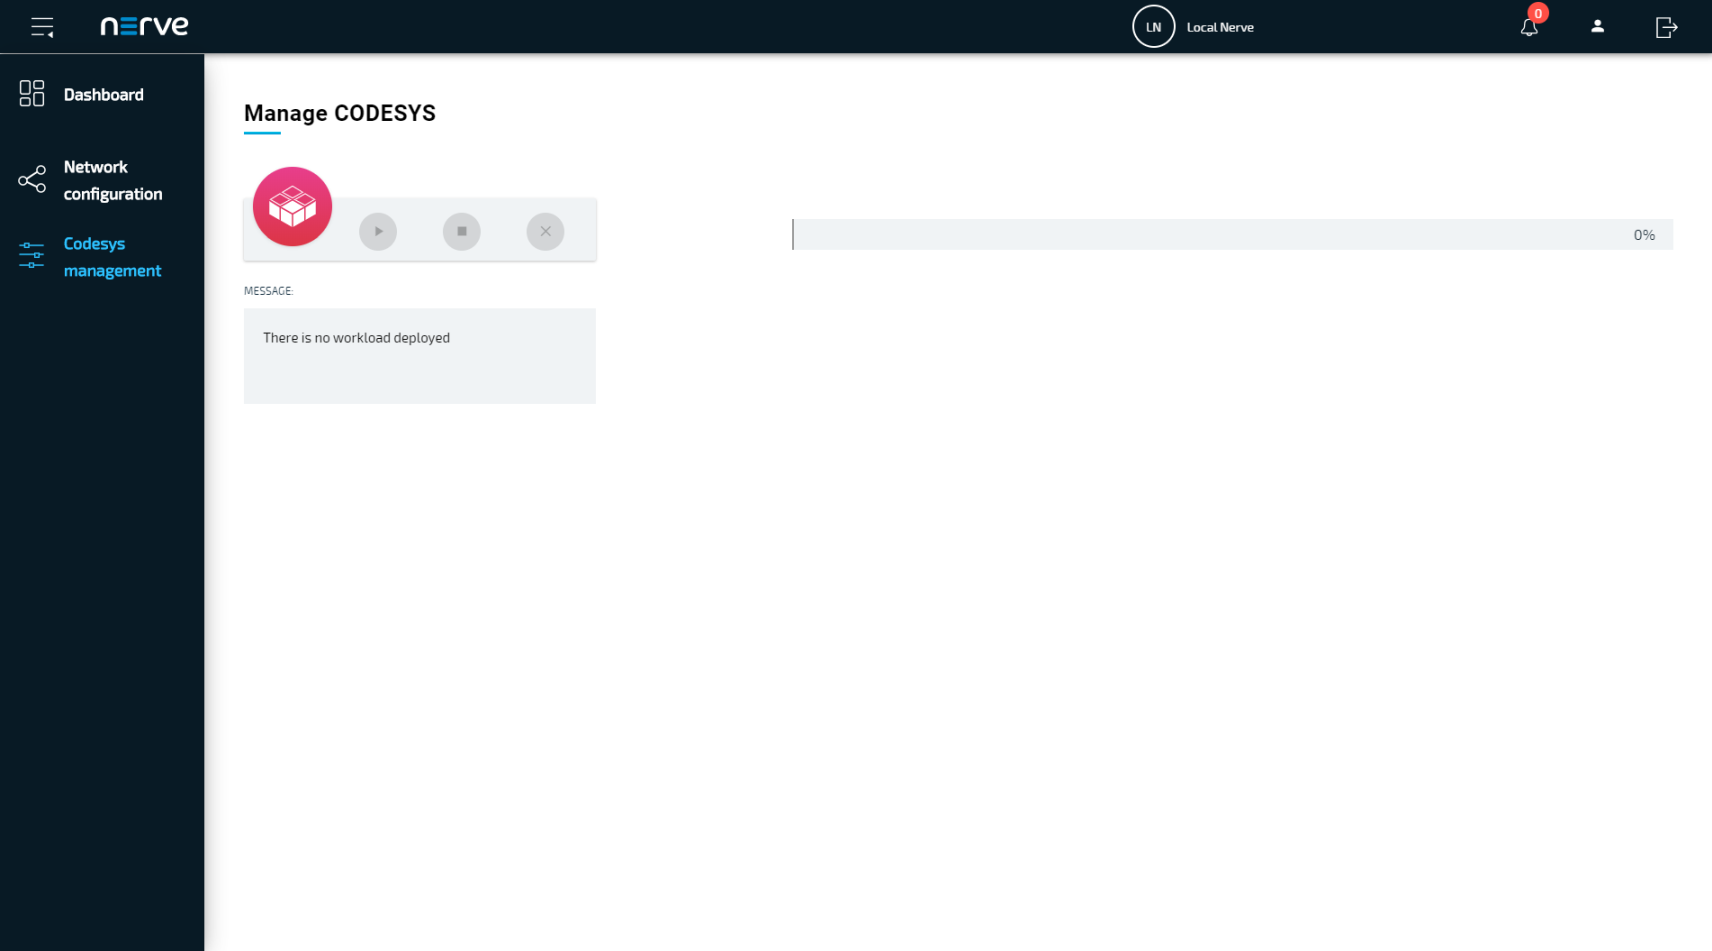
Clicking a workload tile leads to the workload control screen. This is where workloads can be controlled. However, CODESYS workloads can only be controlled through the Local UI.
All workloads are started as soon as they are deployed.
Connecting to the Local UI
In order to access the Local UI, connect a workstation to the console port P1 of the MFN 100 and configure the network adapter of the workstation. The IP address of the network adapter has to be in the range from 172.20.2.5 to 172.20.2.254 with a 255.255.255.0 subnet mask. The credentials for the Local UI found in the customer profile are also required.
- Follow this link to connect to the Local UI: http://172.20.2.1:3333/
-
Log in with the credentials from the customer profile to reach the main page of the Local UI.
Control of CODESYS applications
CODESYS workloads can only be controlled in the Local UI, as operation of a CODESYS workload may have an impact on machine operation and therefore should not be controlled remotely. Select Workload management in the menu on the left-hand side to reach the interface for controlling a CODESYS application running on the Nerve Device:
| Function Name | Description |
|---|---|
| Start | This starts the CODESYS application. |
| Stop | This stops the CODESYS application and it is reset to its initial values. |
| Remove | This removes the CODESYS application from the Nerve Device. To deploy the CODESYS application again, do so through the Management System. |
| Message | CODESYS workloads have the following set of messages:
|
Note
It takes a moment before CODESYS applications are actually started, stopped or removed.
Uploading new CODESYS applications
In order to work with new CODESYS applications on the MFN 100, new CODESYS workloads need to be provisioned in the Management System. Here, provisioning is the creation of a workload and its storage in the workload repository of the Management System so that it can be deployed to nodes. This requires configuration of the workload and the upload of the required files to the Management System. After that, the workload can be deployed to nodes.
Before the workload can be provisioned, however, a CODESYS application has to be loaded into the CODESYS runtime first. Refer to the introduction to working with CODESYS and the MFN 100 first before continuing.
Note
Note that app1 is already loaded into the CODESYS runtime by default.
Once a CODESYS application has been loaded into the MFN 100, the following steps have to be taken before provisioning a CODESYS workload:
- Creating the ZIP file of the CODESYS application
- Transferring the ZIP file to a local workstation
Also the workstation needs to be connected to the console port P1 of the MFN 100 and the network adapter of the workstation needs to be configured. The IP address of the network adapter has to be in the range from 172.20.2.5 to 172.20.2.254.
Creating the ZIP file on the Nerve Device
First, the CODESYS project needs to be zipped on the Nerve Device before it can be copied from the CODESYS runtime. This is done through the Local UI.
- Connect to the Local UI as described above.
- Select Workload management in the navigation on the left.
- Click Download CODESYS app archive.
- Select YES in the pop-up. Note that the CODESYS application will be stopped.
The ZIP file is automatically downloaded to the workstation and a CODESYS workload can now be provisioned in the Management System.
Provisioning a CODESYS workload
The following instructions cover the basic requirements for provisioning a CODESYS workload. Optional settings will be left out. Extended options are addressed in the user guide.
- Log in to the Management System.
- Select Workloads in the left-hand menu.
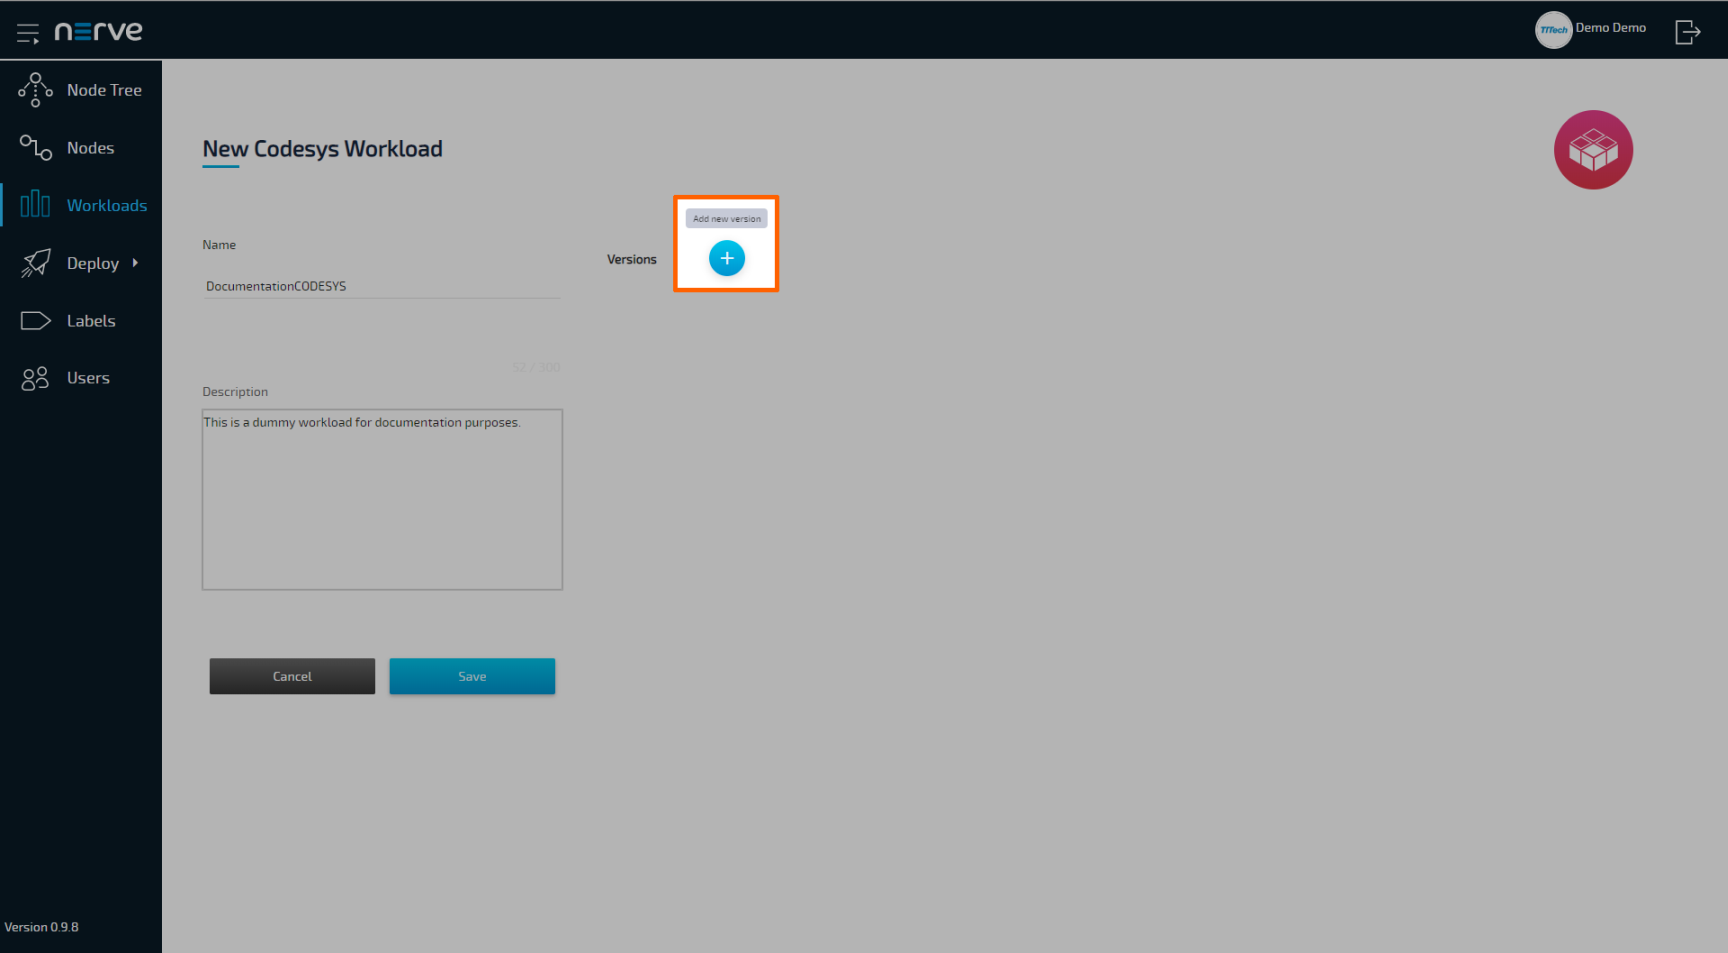
- Select the plus symbol in the upper-right corner.
-
Select the CODESYS symbol (CODESYS workload) on the left of the three symbols that expanded.
-
Enter a name for the workload in the new window.
-
Select the plus symbol next to Versions to add a new version of the workload.
-
Enter the following information in the new window:
Item Description Name Enter a Name for the version of this workload. Release name Enter a Release name for the version of this workload. CODESYS project file Click the upward arrow symbol to open the file browser and add the CODESYS application ZIP file.
This is the ZIP file that has been created before.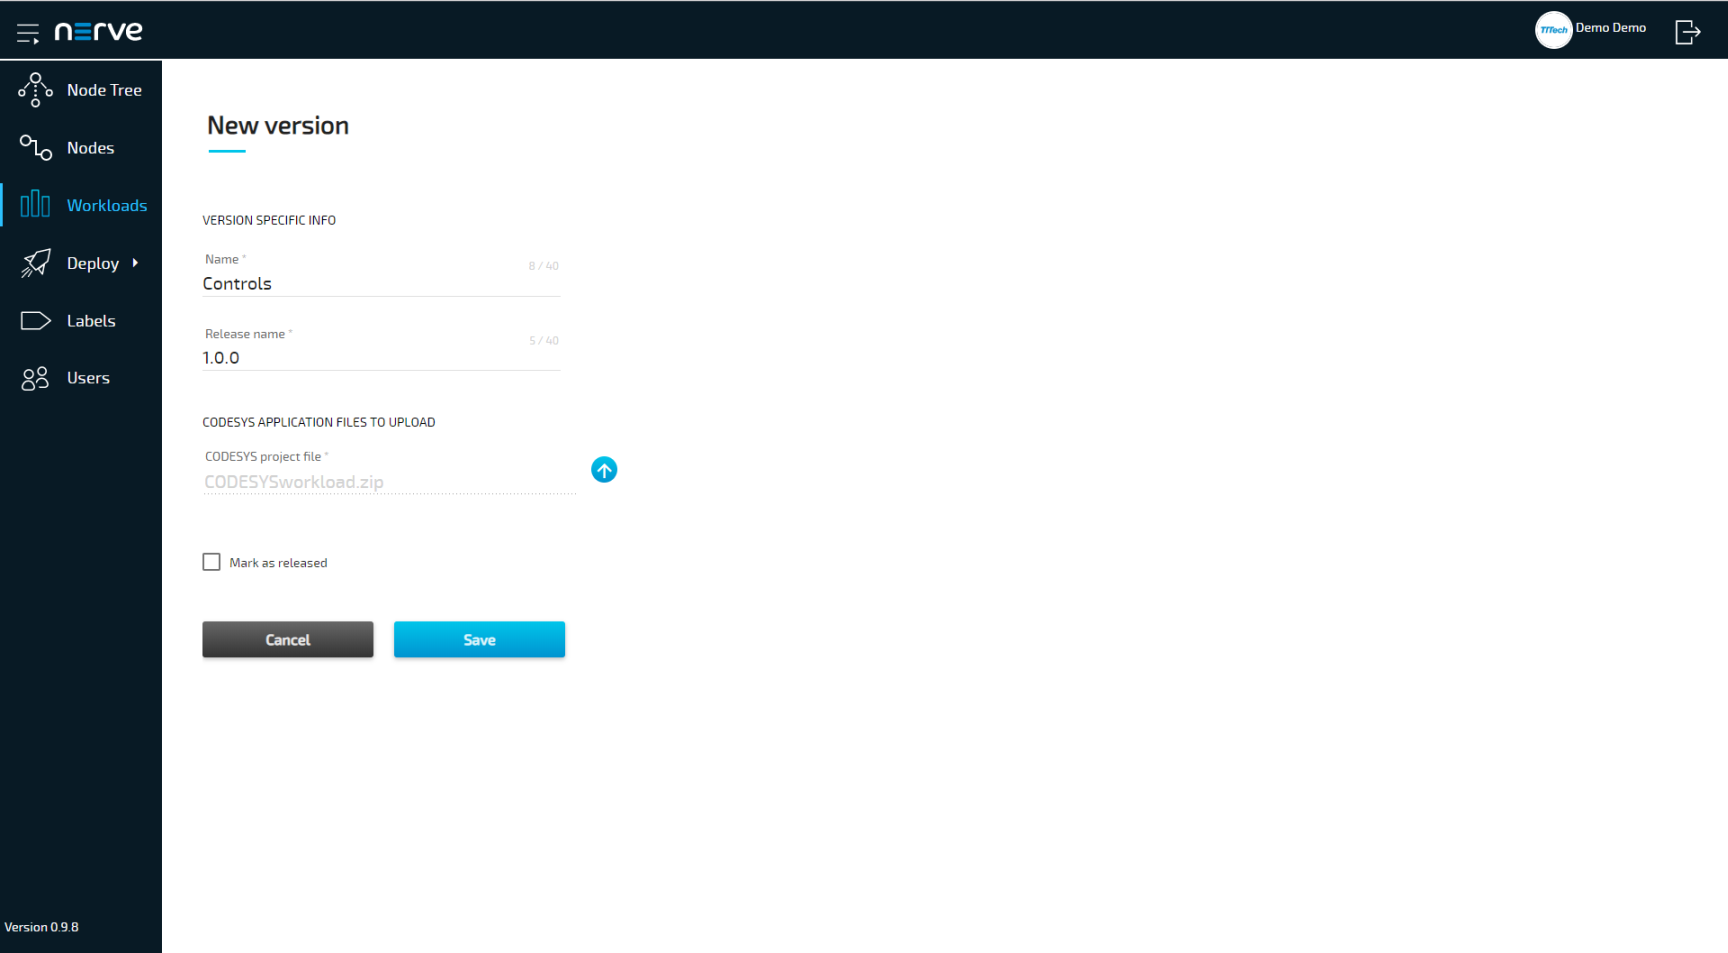
-
Click Save.
The workload has now been provisioned and is ready to be deployed in the Deploy menu.