Deploy menu
Workloads that have been provisioned in the Management System are ready to be deployed to nodes through the Deploy menu. It expands into three menus:
| Item | Description |
|---|---|
| Deploy | This is the landing page of the deployment menu. Deploy workloads to nodes from here. |
| Log | This is the history of deployments and dry runs. |
| Dry run | Structurally the same as the deployment process for workloads, simulate the deployment of a workload from this menu. |
Log
The log is the history of deployments and dry runs. This includes:
- deployments in progress
- dry runs in progress
- failed deployments
- failed dry runs
- successful deployments
- successful dry runs
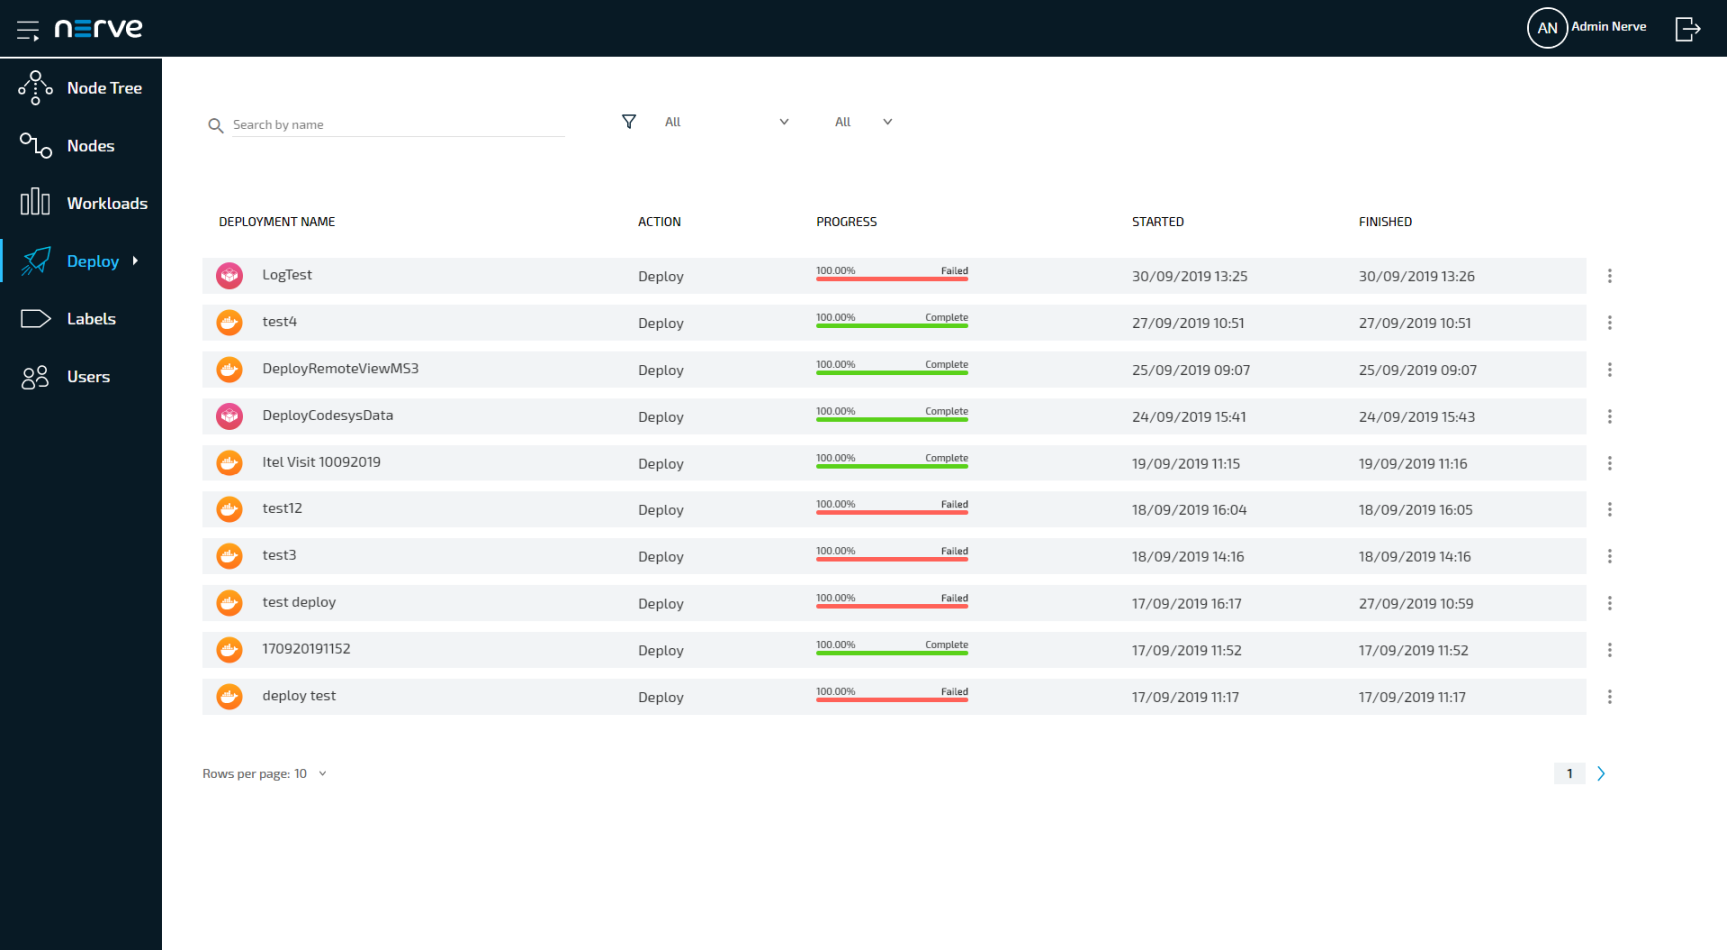
It is displayed in reverse chronological order and can be filtered according to search criteria. It also offers some control functionality for active and failed deployments.
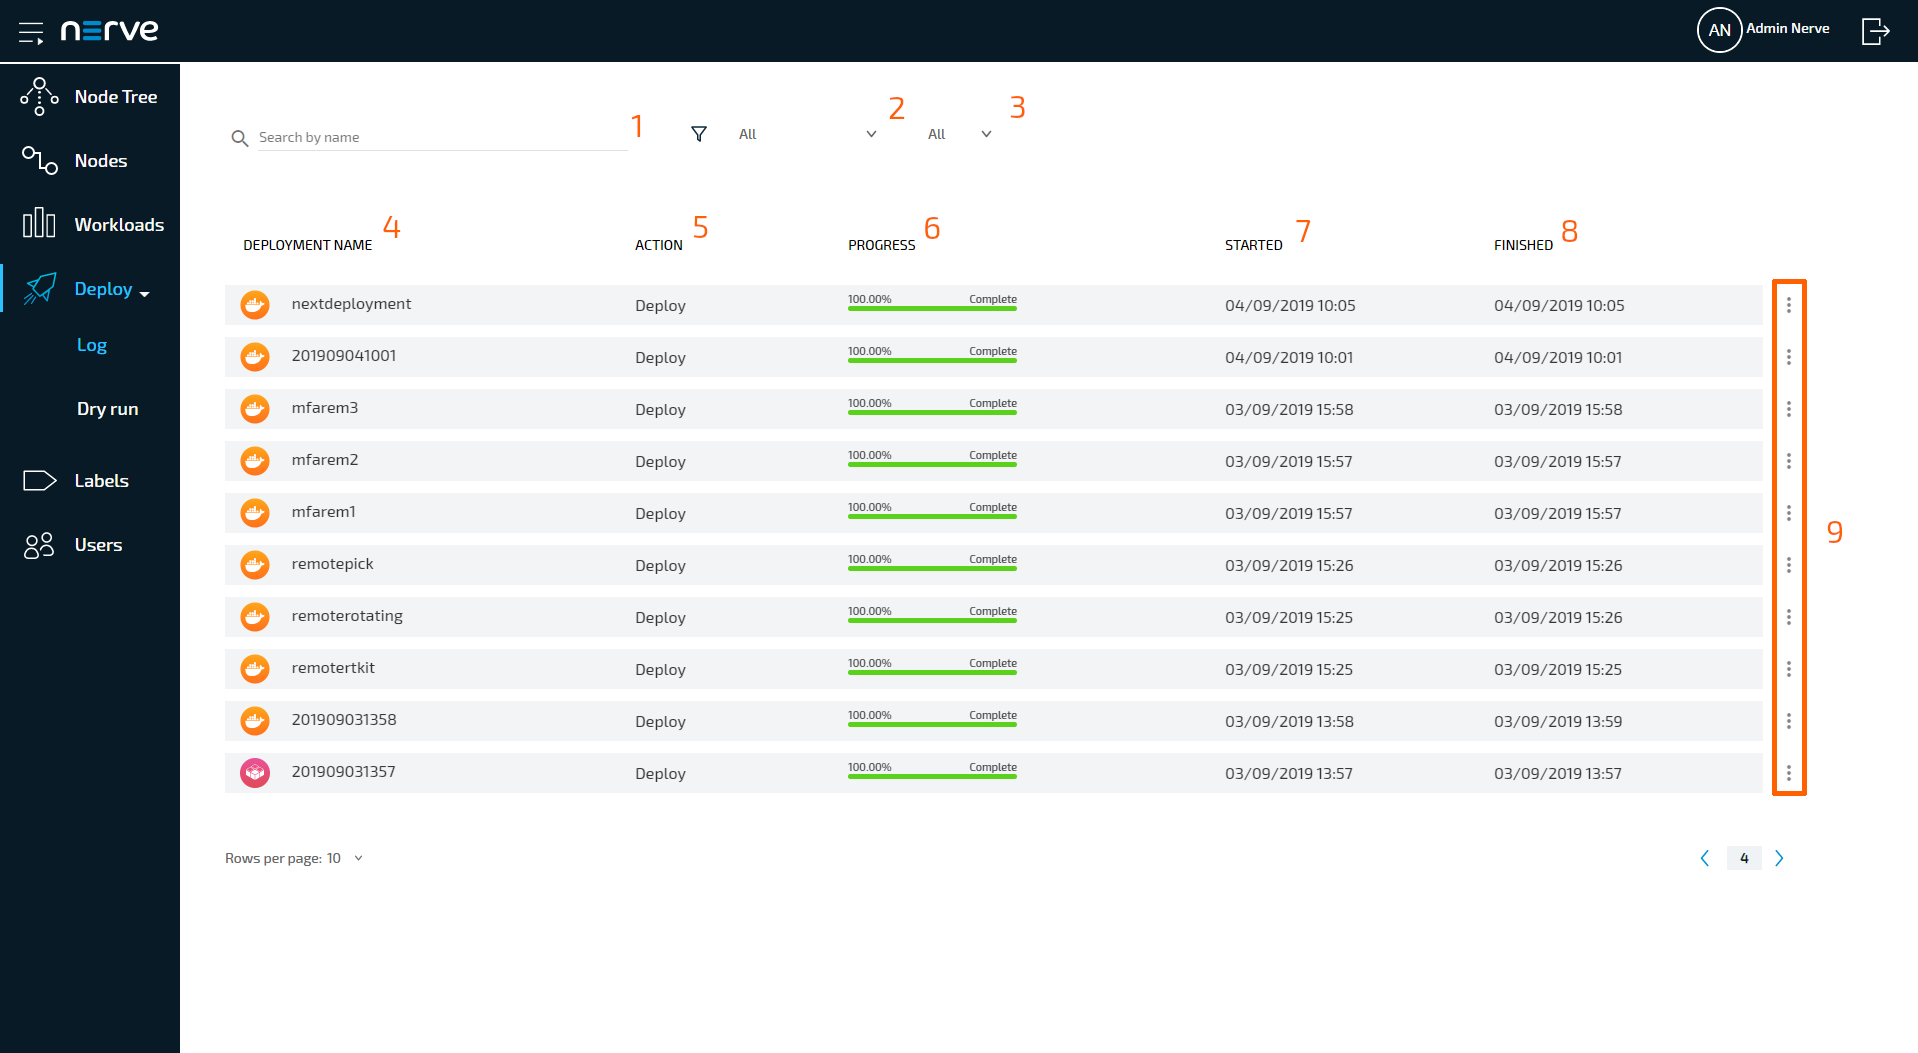
| Item | Description |
|---|---|
| Search by name (1) | Enter text here to filter the list by deployment name. |
| Deployment Type (2) | Select an option from the drop-down menu to filter the list for Deploys or Dry runs. |
| Workload Type (3) | Select an option from the drop-down menu to filter the list for a specific workload type: VM, Docker or CODESYS. |
| DEPLOYMENT NAME (4) | This is the name of the deployment with the workload type displayed as a symbol. The default is the time of deployment unless a deployment name has been entered during the deployment process. Note that this is not the name of the workload. |
| ACTION (5) | Here the deployment type is displayed: Deploy or Dry run. |
| PROGRESS (6) | The progress bar is an indicator for both progress and status. Depending on the status of the deployment it changes its color:
|
| STARTED (7) | This is the date and time the workload deployment was started. The date format is DD/MM/YYYY. |
| FINISHED (8) | This is the date and time the workload deployment was completed. The date format is DD/MM/YYYY. This field will display In progress if a workload is in progress of being deployed. |
| Ellipsis menu (9) | Select the ellipsis menu to trigger an overlay with the DELETE option. Selecting DELETE will remove the entry from the log. When a workload is in progress, this entry is grayed out. |
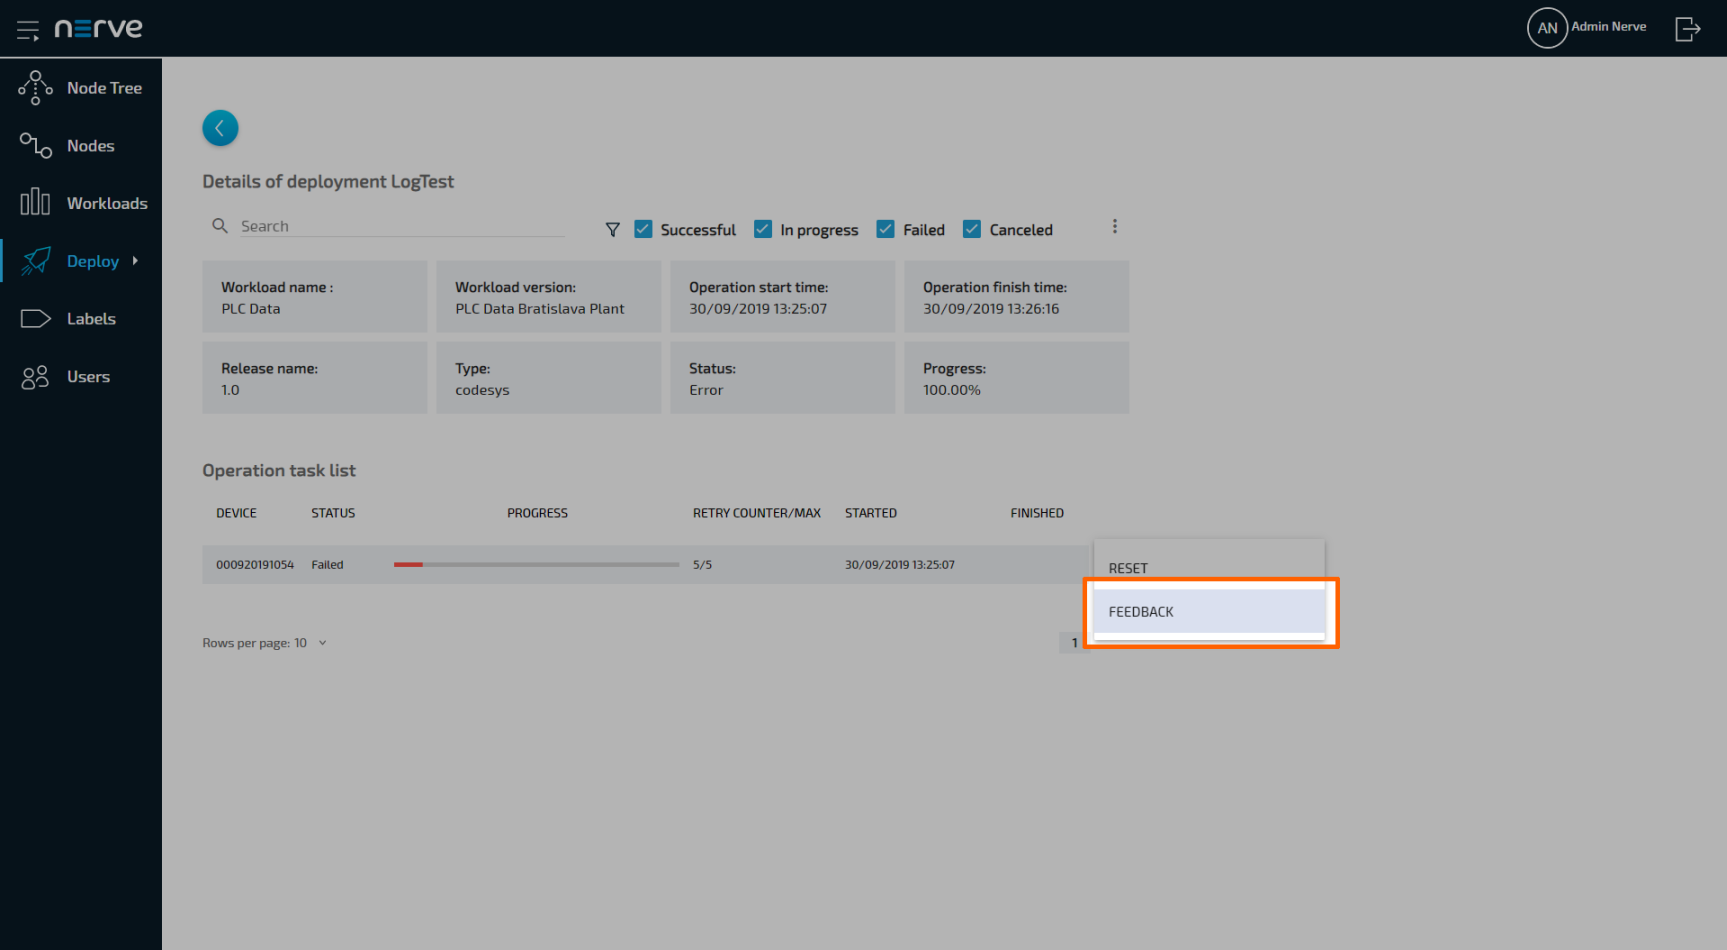
Deployment details
Clicking an entry in the log will show the details of the deployment.

| Item | Description |
|---|---|
| Back button (1) | Click here to return to the log. |
| Header (2) | The header states the name of the deployment in the format Details of deployment <deploymentname>. |
| Search (3) | Enter text here to filter the Operation task list by device name. The search function can be combined with the status checkboxes to the right of the search bar. |
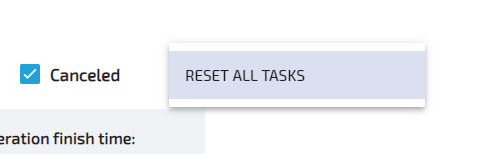
| Status checkboxes (4) | The checkboxes to the right of the search bar filter the Operation task list by status:
|
| Deployment information (5) | This is information about the deployment.
|
| Operation task list (6) | The operation task list displays details for single deployments that are part of the deployment campaign. The list displays information in six columns:
In case of failure, the Management System will attempt the deployment of a workload up to three times automatically. The left number of the counter shows the number of the current attempt. The right number is the maximum number of attempts. This is the date and time the workload deployment was started. The date format is DD/MM/YYYY. This is the date and time the workload deployment was finished. The date format is DD/MM/YYYY. |
Restarting a failed deployment
In case a deployment fails, the Management System will attempt the deployment of a workload up to three times automatically. After that, the deployment can be restarted manually through the ellipsis menu in the operation task list.
- Select Deploy > Log from the menu on the left.
-
Select the failed deployment from the log.
-
Choose the failed deployment from the operation task list.
- Select the ellipsis menu to the right of the deployment entry.
-
Select RESET in the overlay that appeared.
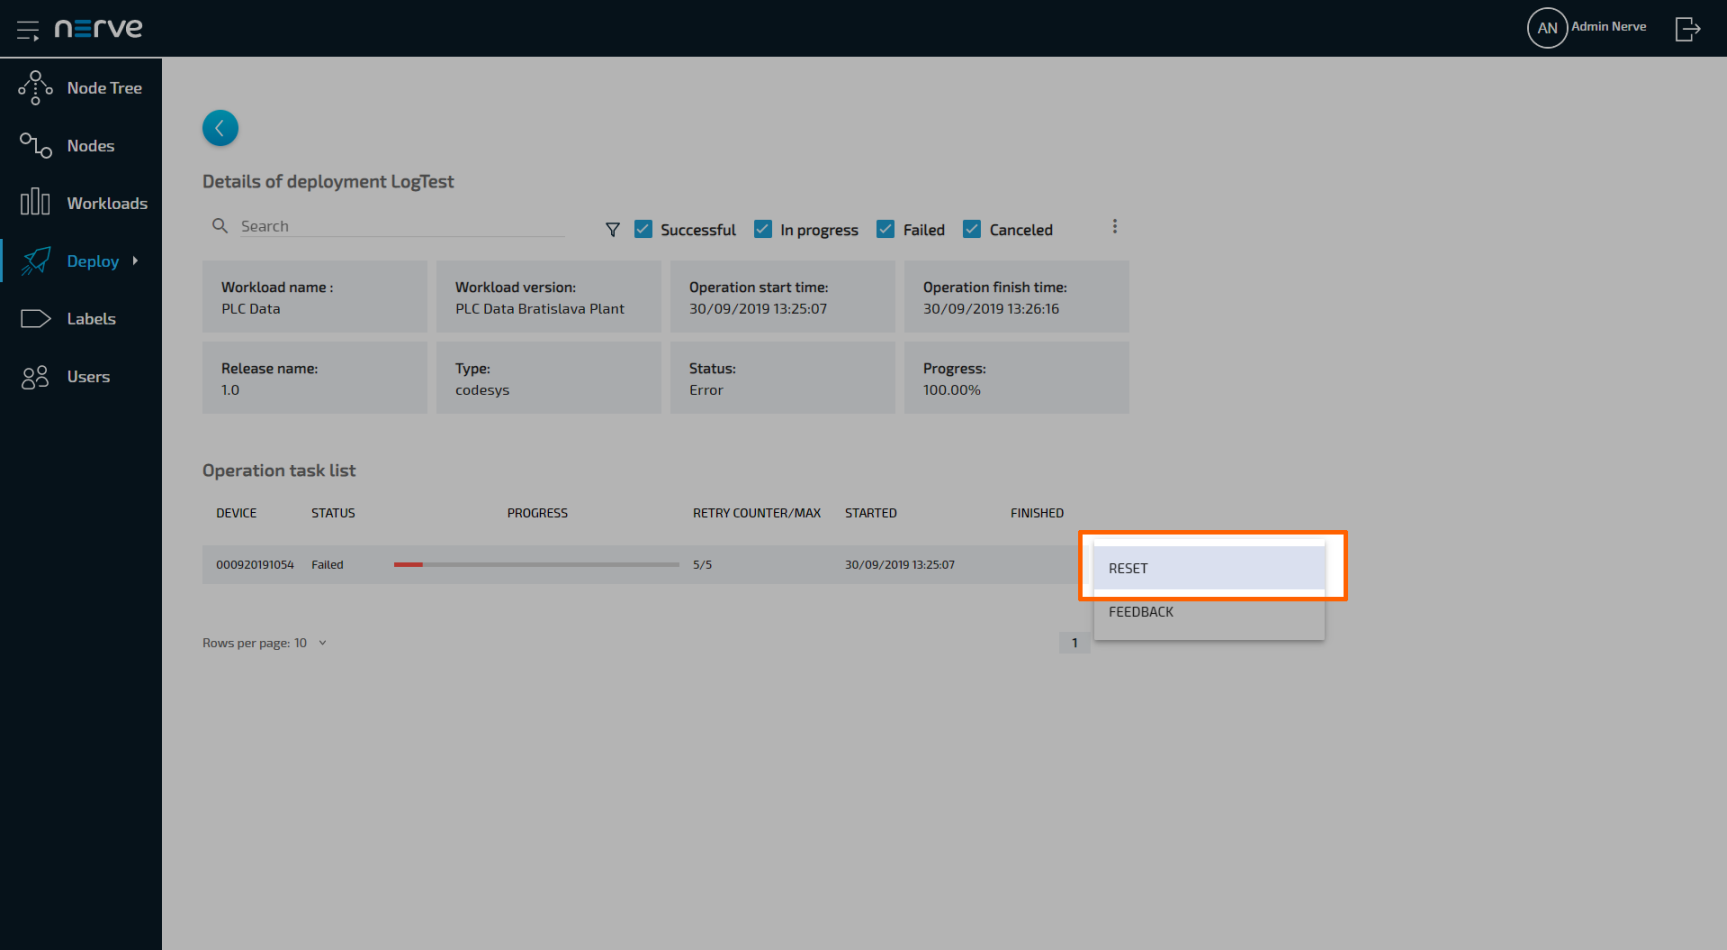
The deployment is restarted immediately. To see the error information of the deployment, select FEEDBACK in the overlay of the ellipsis menu instead.
This opens a window giving information on the type of error in a message, a short troubleshooting hint and the time the error occurred. Note that troubleshooting hints are not available for every error case.

Note
To restart all deployments at once, click the ellipsis menu next to the status checkboxes and select RESET ALL TASKS from the overlay that appears.
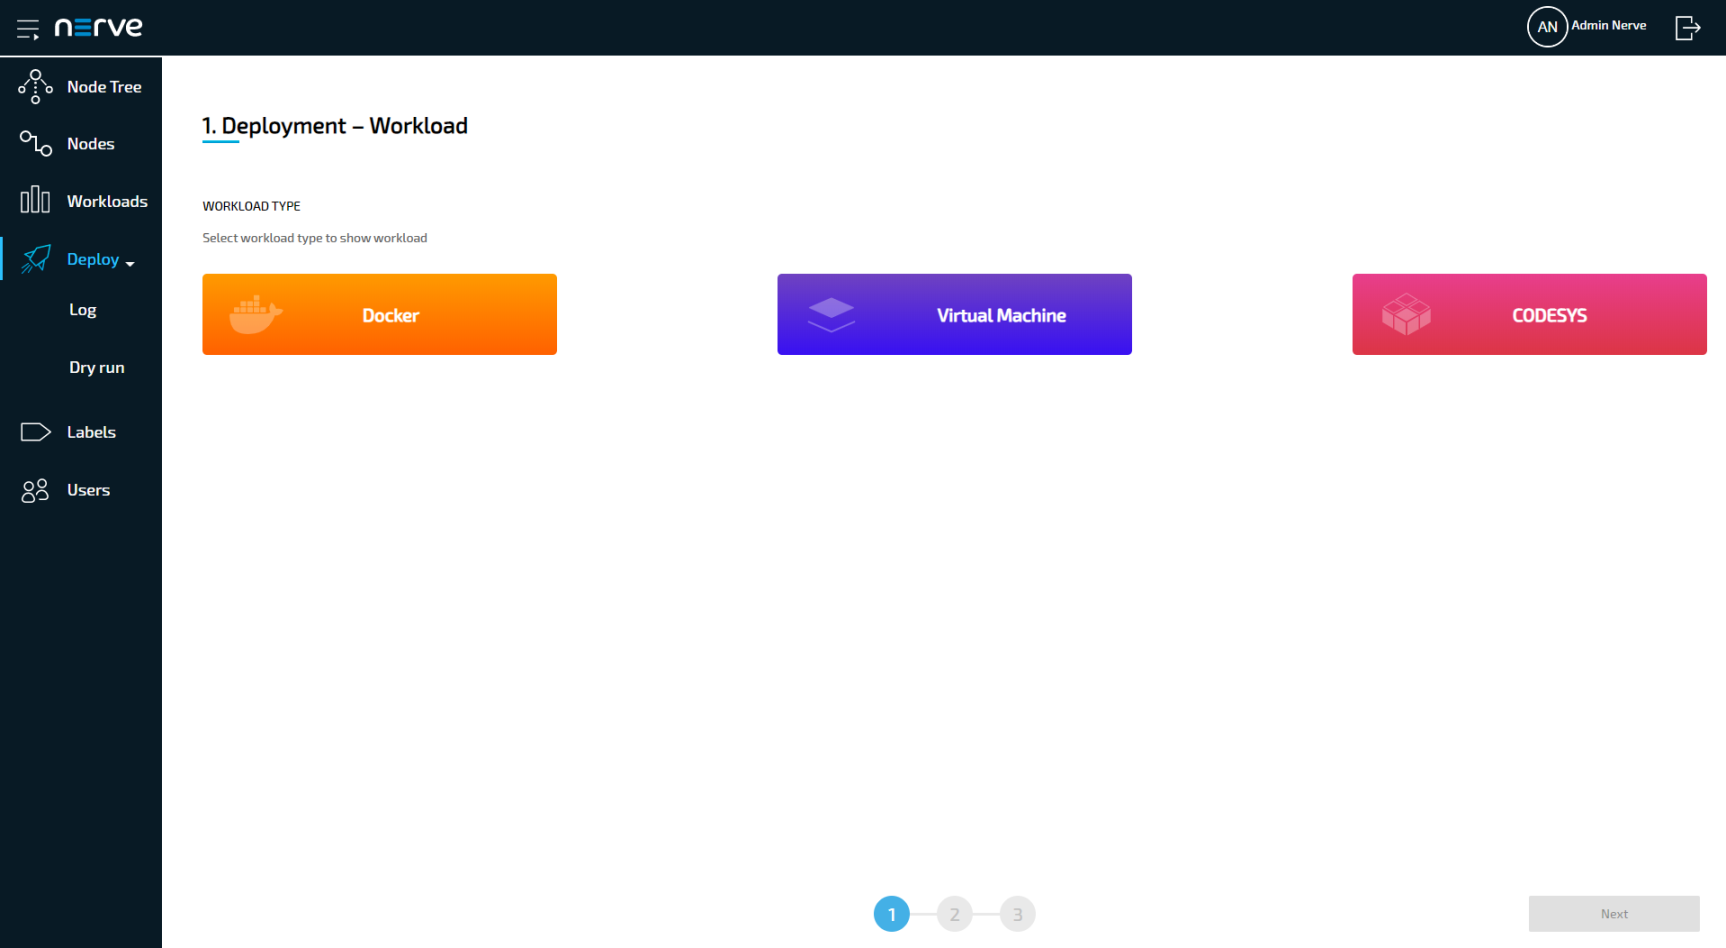
Deploying workloads and dry runs
Deployment of workloads and dry runs are covered in a separate chapter: Deploying a Workload.