Provisioning a Docker workload
The following instructions cover the basic requirements for provisioning a Docker workload. Optional settings will be left out. Extended options are addressed in the last section of this chapter.
There are two further types of workloads that can be provisioned: CODESYS workloads and Virtual Machine workloads. The process for each workload is highlighted in its respective chapter.
Note
A Docker image is required for the following instructions. Refer to the Docker documentation for help on creating a Docker image. Note that Docker images in TAR.GZ format are not supported.
- Log in to the Management System.
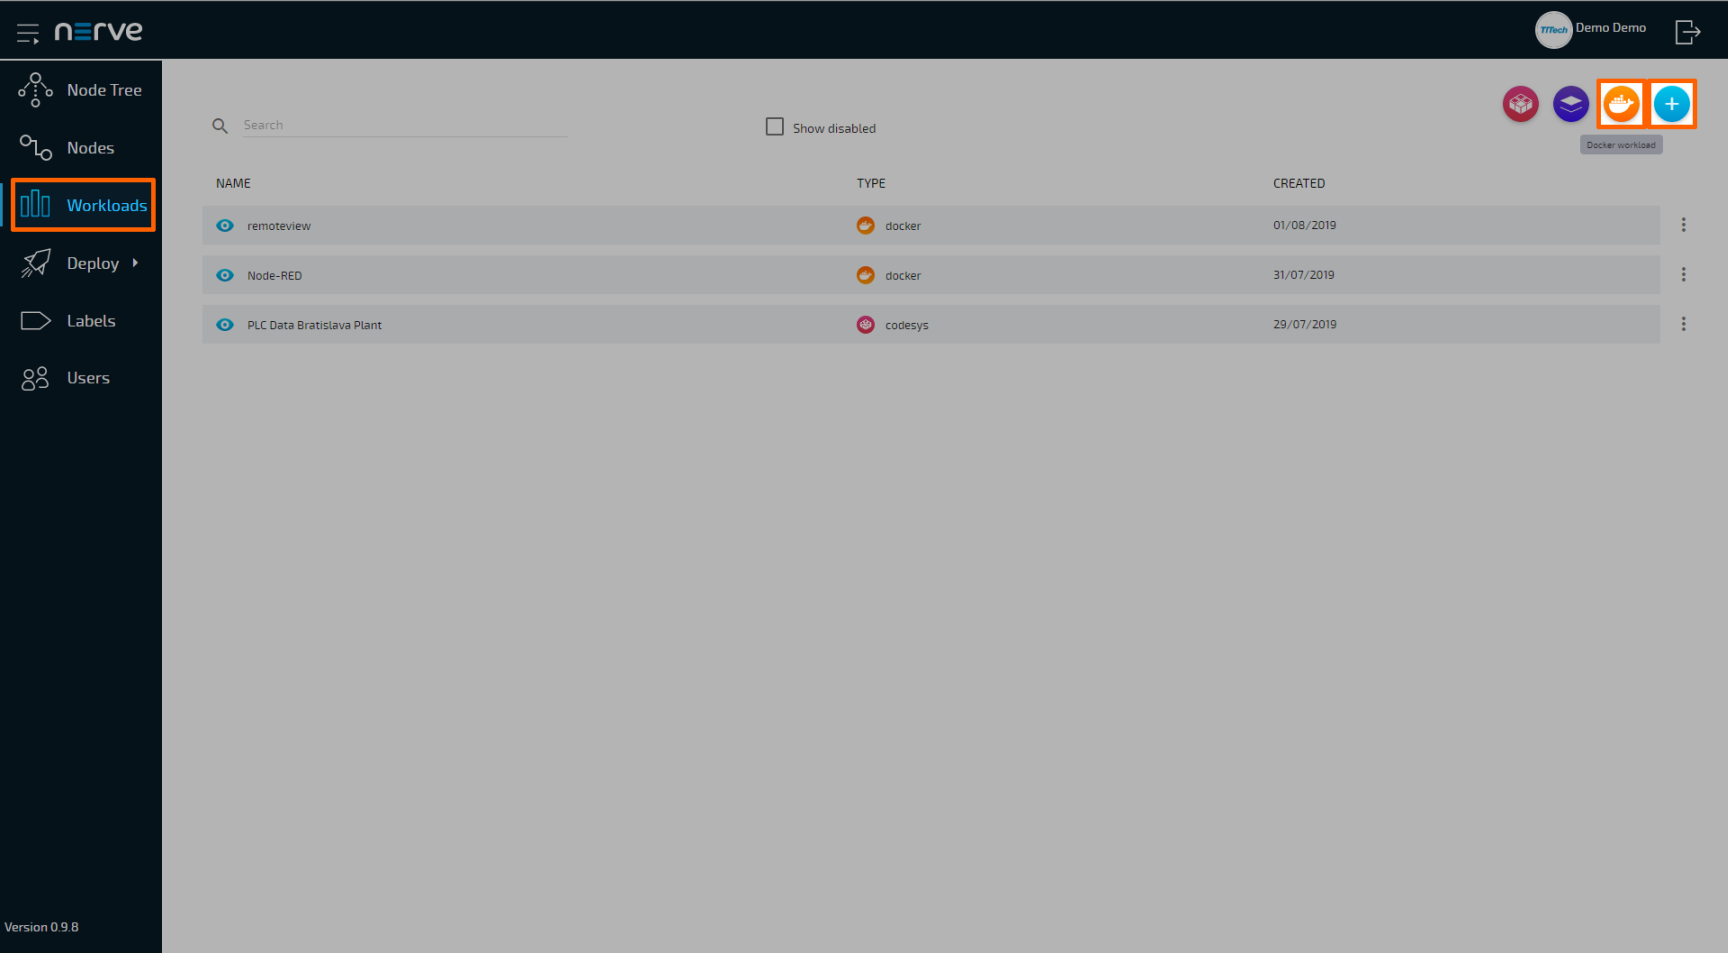
- Select Workloads in the left-hand menu.
- Select the plus symbol in the upper-right corner.
-
Select the Docker symbol (Docker workload) on the right of the three symbols that expanded.
-
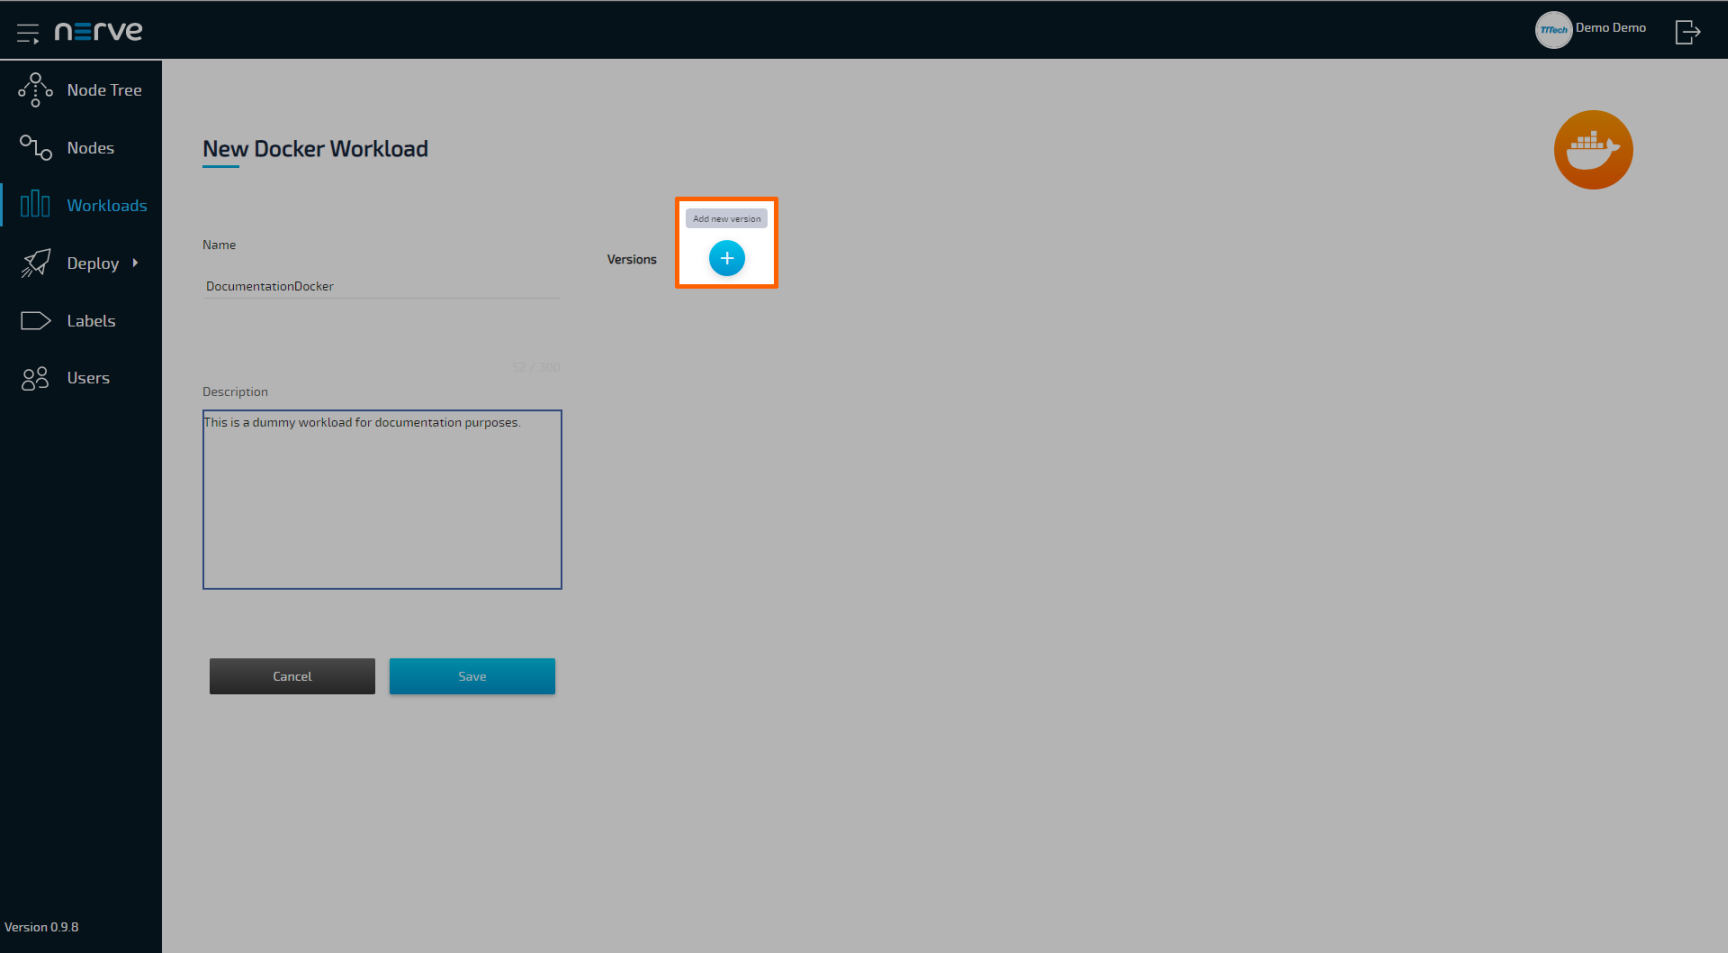
In the new window, enter a name for the workload.
-
Select the plus symbol next to Versions to add a new version of the workload.
-
In the next window, enter the following information:
Item Description Name Enter a Name for the version of this workload. Release name Enter a Release name for the version of this workload. DOCKER IMAGE Select From registry or Upload. Note that Docker images in TAR.GZ format are not supported.
From registry:
Enter the Docker registry to the Docker container image under Image path.Upload: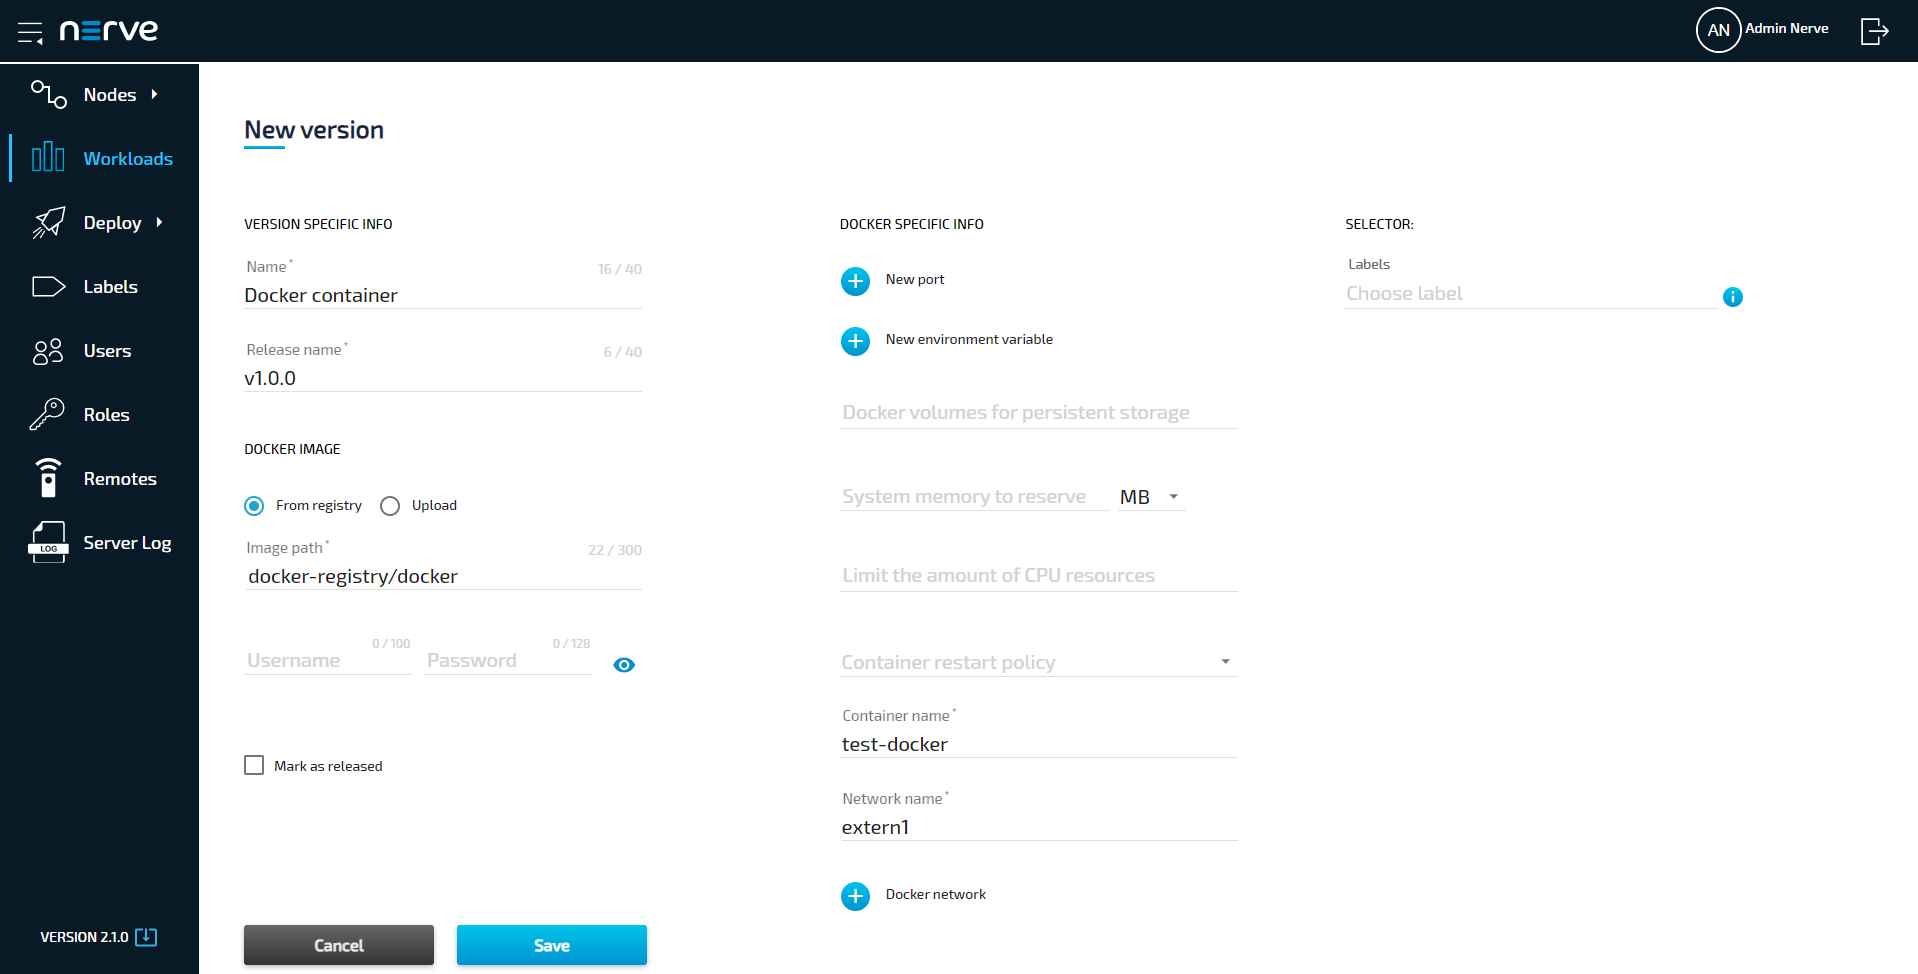
Click the upward arrow symbol to open the file browser and upload the Docker container image.
Container name Enter a name for the Docker container. This will be the name of the Docker container on the node. Network name Enter the network interface name through which the Docker container can be reached. Refer to Node internal networking for more information.
Note that in this version the bridge network is automatically assigned to a Docker workload when any Docker network (mgmt, wan or extern1 to extern3) is assigned. -
Select Save in the lower-left corner.
The workload has now been provisioned and is ready to be deployed in the Deploy menu.
Note
While certain settings are not required to provision a Docker workload in the Management System, additional settings have to be filled in for the workload to perform as desired. Depending on the Docker container that will be deployed, ports need to be defined and environment variables need to be configured. Keep this in mind and make sure to learn the details about the Docker container. Refer to the description of Docker workload settings below for more information.
Settings for Docker workloads
In the instructions above, all optional settings have been left out. Below is an overview of all the options with an explanation to each option.
| Setting | Description |
|---|---|
| VERSION SPECIFIC INFO | Name A name for the workload version. This could be a reminder for a certain configuration. Example: "Unlimited" as a name for a Node-RED version that has unlimited access to CPU resources. Release name A release name for the workload version. This could be a version number. Example: 1.0.1 |
| DOCKER IMAGE | Select between two options here and either use a Docker registry URL to link to an online repository or upload the Docker container image from the workstation. Note that Docker images in TAR.GZ format are not supported. From registry Specify a URL pointing to the Docker container image under Image path. Note the differences between public Docker Hub registries and private registries. Private registries require the full URL to be specified, as well as a username and password if they require authentication. Public Docker Hub registries can be specified in their short form. Examples:
Upload the Docker container image from the workstation. Obtain a Docker image for the upload by executing a command on the workstation where the Docker image for provisioning is located. Enter docker save <image_name> -o <filename>. Then in the Management System click the upward arrow symbol to open the file browser and upload the resulting <filename> Docker image. |
| Mark as released | Tick this checkbox to mark this workload as released. Once marked as released, the workload cannot be edited anymore. |
| DOCKER SPECIFIC INFO | New port Click the plus symbol to define Host port, Container port, and Protocol.
Click the plus symbol to add an environment variable (Env. variable) and its Variable value. Make sure to define the appropriate variables and values as they depend on the Docker container that will be deployed. Docker volumes for persistent storage Persistent storage for a Docker workload can be defined using named volumes. Enter a path in the following format to define a Docker volume for persistent storage: <volumename>:<containerpath>opt/data/var/lib/docker/volumes by default. Multiple volumes can also be defined separated by , or ;, i.e. <volumename1>:<containerpath1>, <volumename2>:<containerpath2> or <volumename1>:<containerpath1>; <volumename2>:<containerpath2>.Limit memory to Assign how much system memory this workload is allowed to use. The memory assigned here is an upper limit that the Docker workload can use and is not exclusively reserved for the Docker workload. Other processes can use these resources as well. CPU resource in percentage Specify here the percentage of CPU resources the workload is allowed to use. If this field is left blank, the workload is allowed to use all available resources. Container restart policy Choose the container restart policy here to determine when the Docker container can be restarted. Enter a name for the Docker container. This will be the name of the Docker container on the node. Network name Enter the network interface name through which the Docker container can be reached. Note that IP addresses for network interfaces connected to physical interfaces are configured in the Local UI. If no network is defined, then the Docker workload can be reached through http://172.20.2.1:<hostport> for Nerve Devices having a physical interface associated with host access.Also, note that in this version the bridge network is automatically assigned to a Docker workload when any Docker network (mgmt, wan or extern1 to extern3) is assigned For more information on node internal networking, refer to Node Internal Networking. |
| SELECTOR | Labels If labels have been defined and assigned to nodes, add them as selectors to the workload. When deploying a workload, the list of nodes will be filtered automatically to the specified label. |