First steps with CODESYS
Note
This chapter uses the MFN 100 as an example.
This chapter will give an introduction on how to start working with the integrated soft PLC in the MFN 100. First, some configuration and installation of files and libraries are required.
Note
- Download the CODESYS Development System V3 from store.codesys.com for this chapter.
We recommend version 3.5 SP14 (32 bit) or newer. - Connect the workstation to the console port P1 of the MFN 100.
Installing the device descriptions
After downloading and installing the CODESYS Development System on the workstation, install the device description of the MFN 100 in the CODESYS Development System. The device description has the following filename:
- Nerve_MFN_100_V3.5.XX.X.devdesc.xml
Note
XX.X stands for the current version of the CODESYS Development System
The device description of the MFN 100 is available at the Nerve Software Center. Remember where the device description is saved for the following steps.
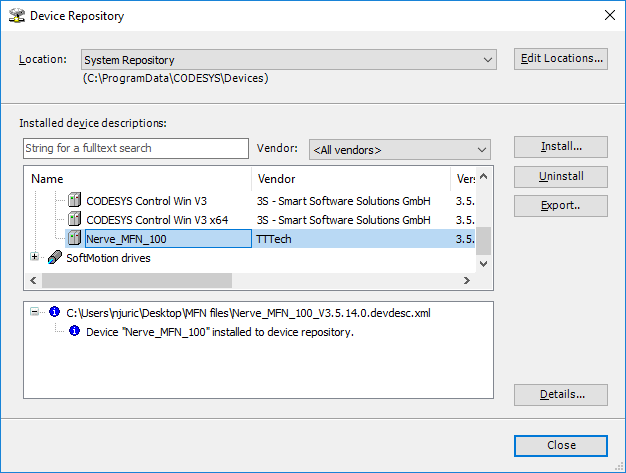
- Start the CODESYS Development System.
-
Go to Tools > Device Repository.

-
Click Install.

-
Go to the directory of the previously downloaded device description.
-
Select the device description of the MFN 100.
The device description will look like this:
Nerve_MFN_100_V3.5.XX.X.devdesc.xml -
Click Open.
When the installation was successful, the MFN 100 will appear in the list of device descriptions in the middle of the window.
After installing the device description, work with the CODESYS Development System can be started. However, libraries and device descriptions of generic devices might be missing so that the CODESYS Development System can work properly. The following chapters cover the download process.
Note
The device description might need to be updated if this is not the first time working with MFN 100 and the CODESYS Development System:
- Follow the steps above to install the newest device description.
- Right-click Device (Nerve_MFN_100) on the left side.
- Select Update Device....
- Select the current device description in the new window.
- Click Update Device in the lower-right.
Downloading missing libraries
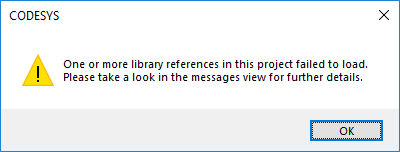
The error message for missing libraries might appear when opening or creating a CODESYS project. The CODESYS Development System identifies the missing libraries automatically but the following process might need to be repeated a few times.
- Open or create a CODESYS project.
- If the error message about missing libraries appears, click OK.
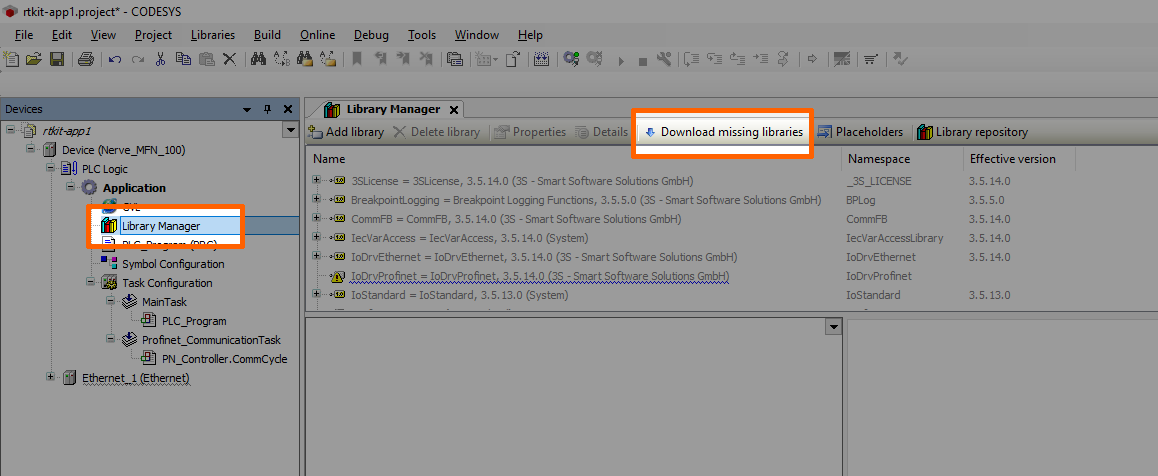
- Double-click Library Manager in the tree view on the left.
-
Click Download missing libraries.
-
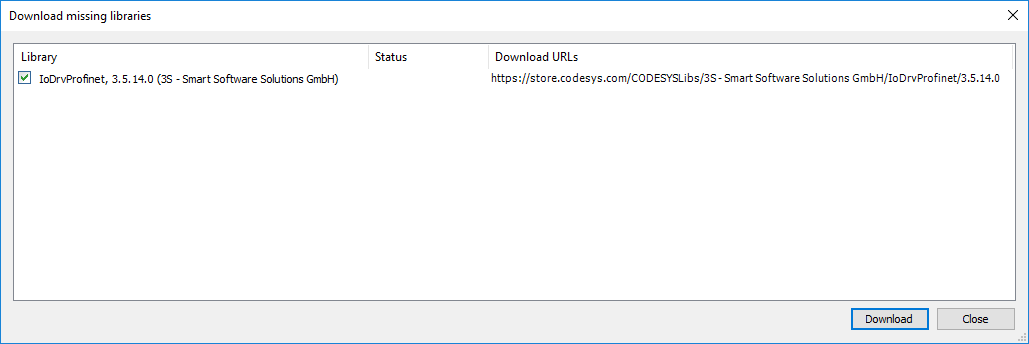
Click Download in the new window.
-
Click Close when the download is finished.
- Repeat steps 3 to 5 until no more libraries appear in the download window.
Downloading missing device descriptions
Apart from the device description for the MFN 100 that have been installed manually before, device descriptions of generic devices may be missing for the CODESYS Development System to function as intended. The CODESYS Development System will identify the missing device descriptions automatically but this time it will not generate an error message unless a CODESYS application is being loaded into the MFN 100.
- Click Tools > Device Repository.
-
Click Download missing descriptions.

Note
The button for downloading missing descriptions will not appear if no device descriptions of generic devices are missing. Close the window and continue if that is the case.
-
Click Download in the new window.
- Click Close when the download is finished.
Creating a new CODESYS project
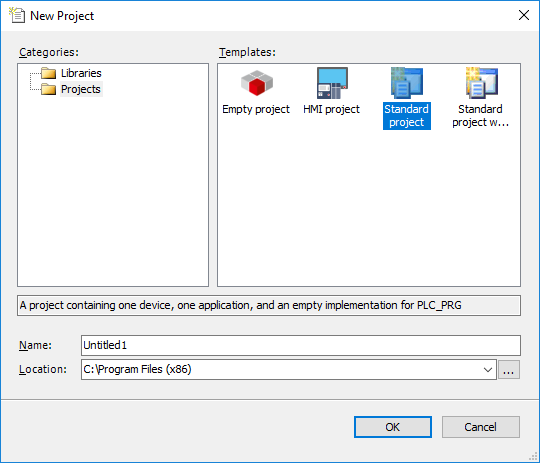
This example shows how to create a new project in the CODESYS Development System. The easiest way to get started is to create a Standard project.
- Start CODESYS
- Go to File > New Project.
- Click Standard project on the right side among the templates.
- Enter a name for the project.
- Choose a Location where the project will be saved.
-
Click OK to save the project.
-
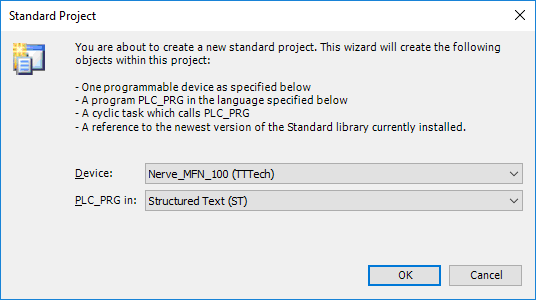
Select Nerve_MFN_100 (TTTech) as the device.
-
Click OK.
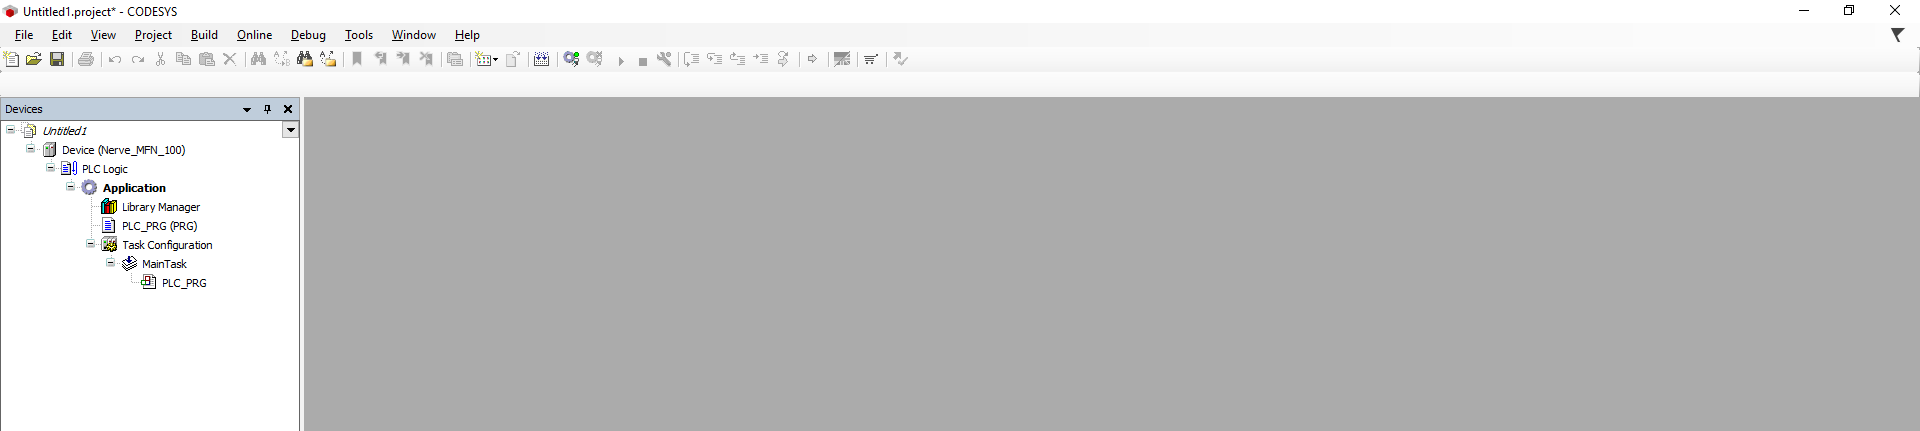
The result is an empty project that is open in the main view of CODESYS.
Working with the default applications
To work with existing applications first, modify the default applications app1.project and app2.project. They have been sent as part of the delivery.
- Start CODESYS.
- Go to File > Open Project.
- Select the location where the default applications are saved.
-
Select the application to work with.

-
Click Open.
If the default applications are opened for the first time, some libraries and device descriptions will be missing. Follow the instructions above to see how to download the missing files.
Connecting to the MFN 100
Before downloading CODESYS applications to the MFN 100, make sure that the device description of the MFN 100 is installed in the CODESYS Development System.
- Open or create a CODESYS project.
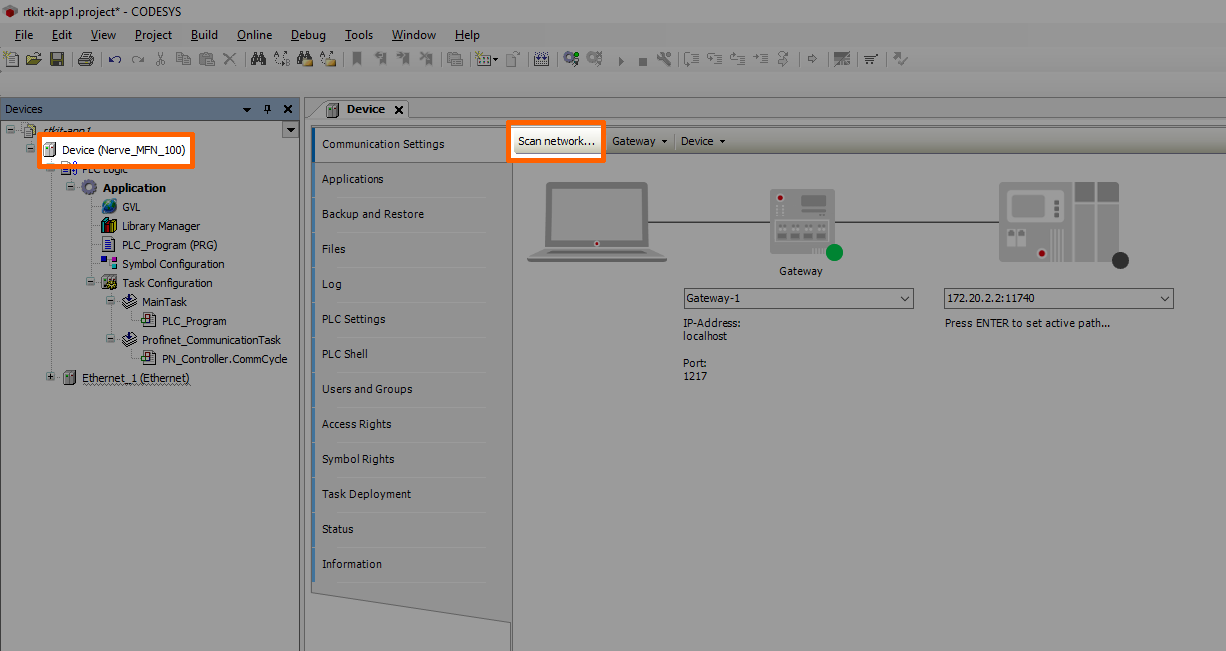
- Double-click Device (Nerve_MFN_100) in the tree view on the left.
-
Go to Communication Settings > Scan network....
-
Select the MFN 100 (here nerve-rtvm [XXXX.XXXX]) in this window.
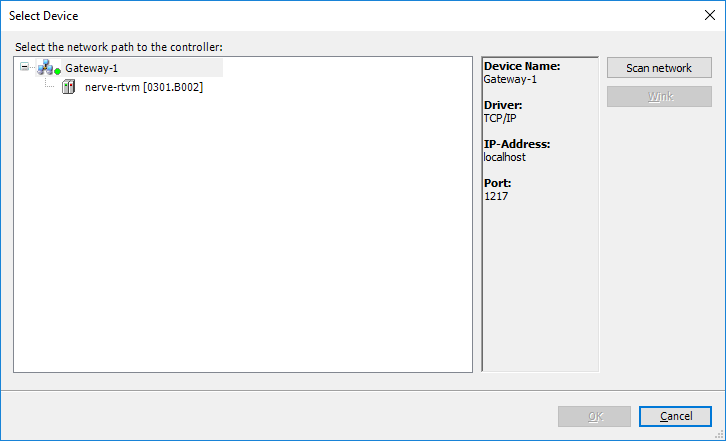
Note
When more than one network is active on the workstation, it sometimes happens that the MFN 100 cannot be found. Continue reading if the MFN 100 does not appear in this window.
-
Click OK.
Typically the MFN 100 will be found automatically. If the MFN 100 cannot be found, enter the IP address and port of the CODESYS runtime manually.
- Double-click Device (Nerve_MFN_100) in the tree view on the left.
- Go to Communication Settings in the middle of the window.
-
Enter
172.20.2.2:11740in the text box under the device on the right.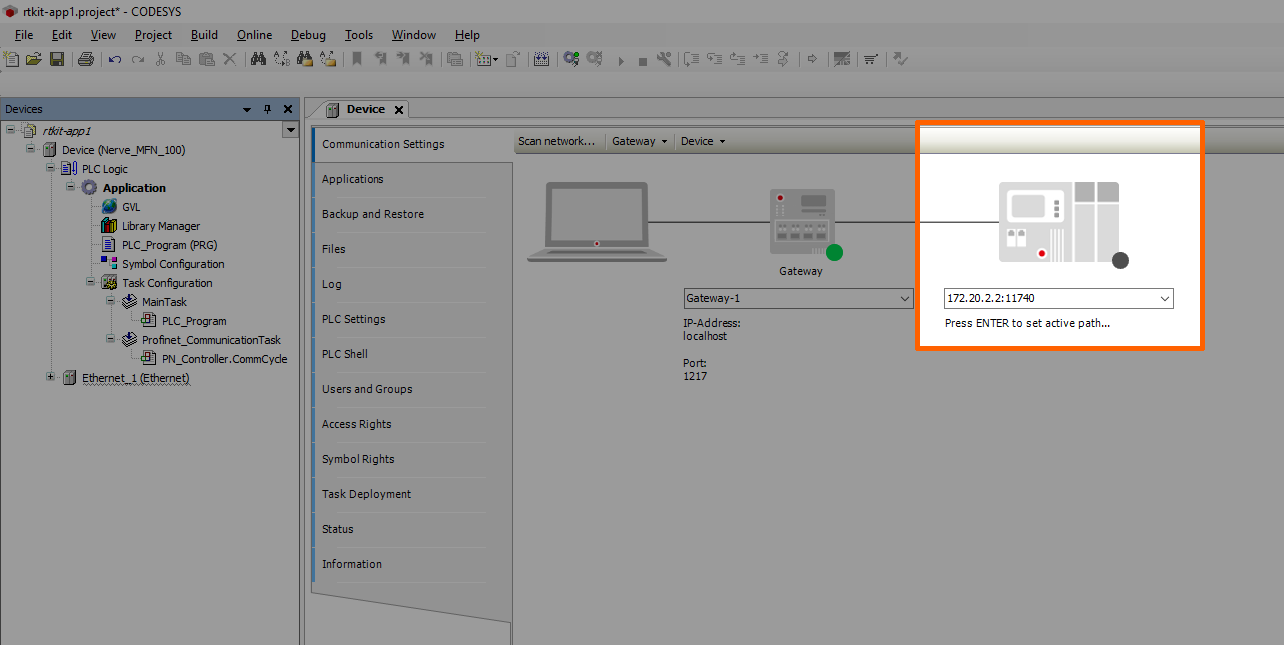
-
Press Enter.
The CODESYS Development System is now connected to the MFN 100 and applications can be downdloaded into the CODESYS runtime.
Downloading an application to the MFN 100
CODESYS applications can be loaded directly into the MFN 100. However, before downloading an application into the MFN 100 it needs to be free of errors.
The process of downloading an application is slightly different if an entirely new application is downloaded into the MFN 100 or if an application is being updated that has already been downloaded into the MFN 100. If updating an application that has been downloaded to the MFN 100 before, continue with Downloading an Updated Application to the MFN 100 further down below.
Downloading a new application to the MFN 100
Once a project has been created and programming is finished, the CODESYS application can be downloaded to the MFN 100 directly.
- Open the CODESYS project to load into the MFN 100.
-
Click the Login symbol in the CODESYS menu bar.

-
Click Yes in the pop-up window.

-
The application is stopped now. Click the Play symbol in the CODESYS menu bar.

The application is now loaded to the MFN 100.
Downloading an updated application to the MFN 100
If updating an application after loading it into the MFN 100, it needs to be downloaded into the MFN 100 again. The download process is slightly different from downloading a new application into the MFN 100.
- Stop the CODESYS application that has been loaded into the MFN 100 through the Local UI.
-
Click the Logout button in the CODESYS toolbar.

-
Expand Device (Nerve_MFN_100) > PLC Logic > Application.
- Double-click PLC_Program (PRG).
- Perform changes.
-
Click the Login symbol in the CODESYS menu bar.
-
In the pop-up window, select one of the options.
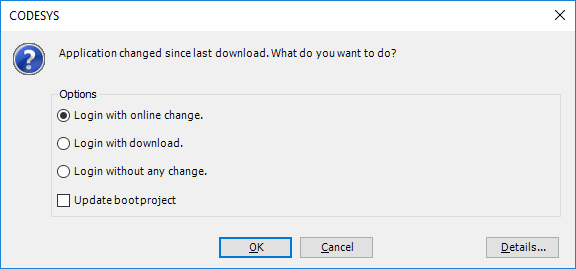
Item Description Login with online change. The updated application will be loaded into the MFN 100. Variable values will not be reset. If the application was running before, it will be running after the download. Login with download. The updated application will be loaded into the MFN 100. Variable values will be reset. The application is stopped. Login without any change. The updated application will not be loaded into the MFN 100 but the code will keep the changes. -
Click OK.
The application is now loaded to the MFN 100.
Note
For more help with programming PLC applications in the CODESYS Development System go to help.codesys.com.
Allocating variables to inputs or outputs
After connecting new sensors and actuators, assign variables to the I/O channel in CODESYS.
- Open a CODESYS project.
- Expand Device (Nerve_MFN_100) > PLC Logic > Ethernet_1 > PN_Controller > siemenset200 (IM 155-6 PN ST V4.1) in the tree structure on the left.
- Double-click DI_8x24VDC_ST_V0_0_QI (...) for digital inputs.
Double-click DQ_8x24VDC_0_5A_ST_V0_0_QI (...) for digital outputs. -
Select PNIO Module I/O Mapping.

-
Fully expand the tree view.
-
Double-click the variable slot to assign.
Note
The inputs in this view do not match the physical inputs of the I/O module on the kit. The inputs here go from 0 to 7. The physical inputs go from 1 to 8. Therefore input 0 in this view represents the physical input 1 on the I/O module. This also applies to outputs.
-
Click the three dots next to the variable slot.

-
Expand Application > GVL in the new window.

-
Select the variable to assign.
Note
Make sure to select a variable of the same type as the input, i.e., a BOOL variable for a BOOL input or output.
-
Click OK.
Use the assigned variables to read data from connected sensors or to control actuator functionality.
Note
For more help with programming PLC applications in the CODESYS Development System go to help.codesys.com.
Enabling retain variables
NerveCodesysRetainVar is a library for storage and restoration of retain variables with prevention of data loss in case of system crash (e.g. power outage). To prevent data loss, the retain variables are stored in two file copies under /opt/data/var/lib/nerve-codesys/PlcLogic/.
The retain variables library (NerveCodesysRetainVar.compiled-library) and an example project showcasing typical use (demo.project) are available at the Nerve Software Center. Follow the instructions below to install and import the retain variables library into a project.
Installing and importing the NerveCodesysRetainVar library
Download the retain variables library (NerveCodesysRetainVar.compiled-library) from the Nerve Software Center first before following the instructions below.
- Open or create a CODESYS project.
- Select Tools > Library Repository in the toolbar.
- Click Install... in the new window.
- Navigate to the folder containing the retain variables library and select the
NerveCodesysRetainVar.compiled-libraryfile. - Select OK.
The library will appear in the Application element after it has been installed. Close the library repository window by selecting Close in the lower right. Next the library needs to import into the project.
- Double-click Library Manager in the tree view on the left.
- Select Add library in the Library Manager tab that opened on the right.
- Enter
NERVE Retainin the search field to search for the library. - Select the NERVE Retain Variables Library.
- Select OK.
The Nerve Retain Variables Library now appears in the Library Manager tab.
Example project and use
The example project (demo.project) is meant to show how the library functions can be used. It includes two variants of a simple program counting up multiple counters stored as permanent variables:
- PLC_PRG1 stores and restores the retain variables just once based on a trigger activated by boolean flags (
storeandrestore). - PLC_PRG2 shows a typical use case, where the retain variables are restored once during the initialization phase and then periodically stored every cycle after all the counters are updated.
The NerveCodesysRetainVar library provides two functions:
StoreRetainsto store retain variablesRestoreRetainsto restore retain variables
The namespace of the library is NerveCodesysRetainVar.
Functions have a return value of type RTS_IEC_RESULT defined in the SysTypes Interfaces library. It is required to either include this library or define the return variables as type NerveCodesysRetainVar.RTS_IEC_RESULT. The possible error codes are defined by CmpErrors2 Interfaces.
Note that RestoreRetains may fail with error code 0x32 when the application runs for the first time, before any retain variables were stored. This is because the files with stored retain variables do not exist yet.
During the startup of the device, the CODESYS application uses the function RestoreRetains. This loads the last stored state of retain variables.
During execution, the CODESYS application periodically saves the current state of retain variables with the function StoreRetains. This could be done in a periodically executed task or at certain points during calculations, when it is meaningful to store the current state.
In case of a sudden crash of the CODESYS application (e.g. power failure), the last saved state of the retain variables will be restored.
Note
The type of memory must be taken into consideration for periodical storing of retain variables. Writing too often for longer periods of time may result in damage to disks.