Deploying a workload
This chapter covers the deployment process of the available workloads: CODESYS workloads, Virtual Machine workloads and Docker workloads. The process of deploying workloads is identical for all three types of workloads. Therefore, the instructions below contain no specific information.
Note
To test a deployment first, select Deploy > Dry run in the left-hand menu and follow the steps below starting from step 3.
However, note that a successful dry run does not guarantee a successful deployment as it is only a simulation.
-
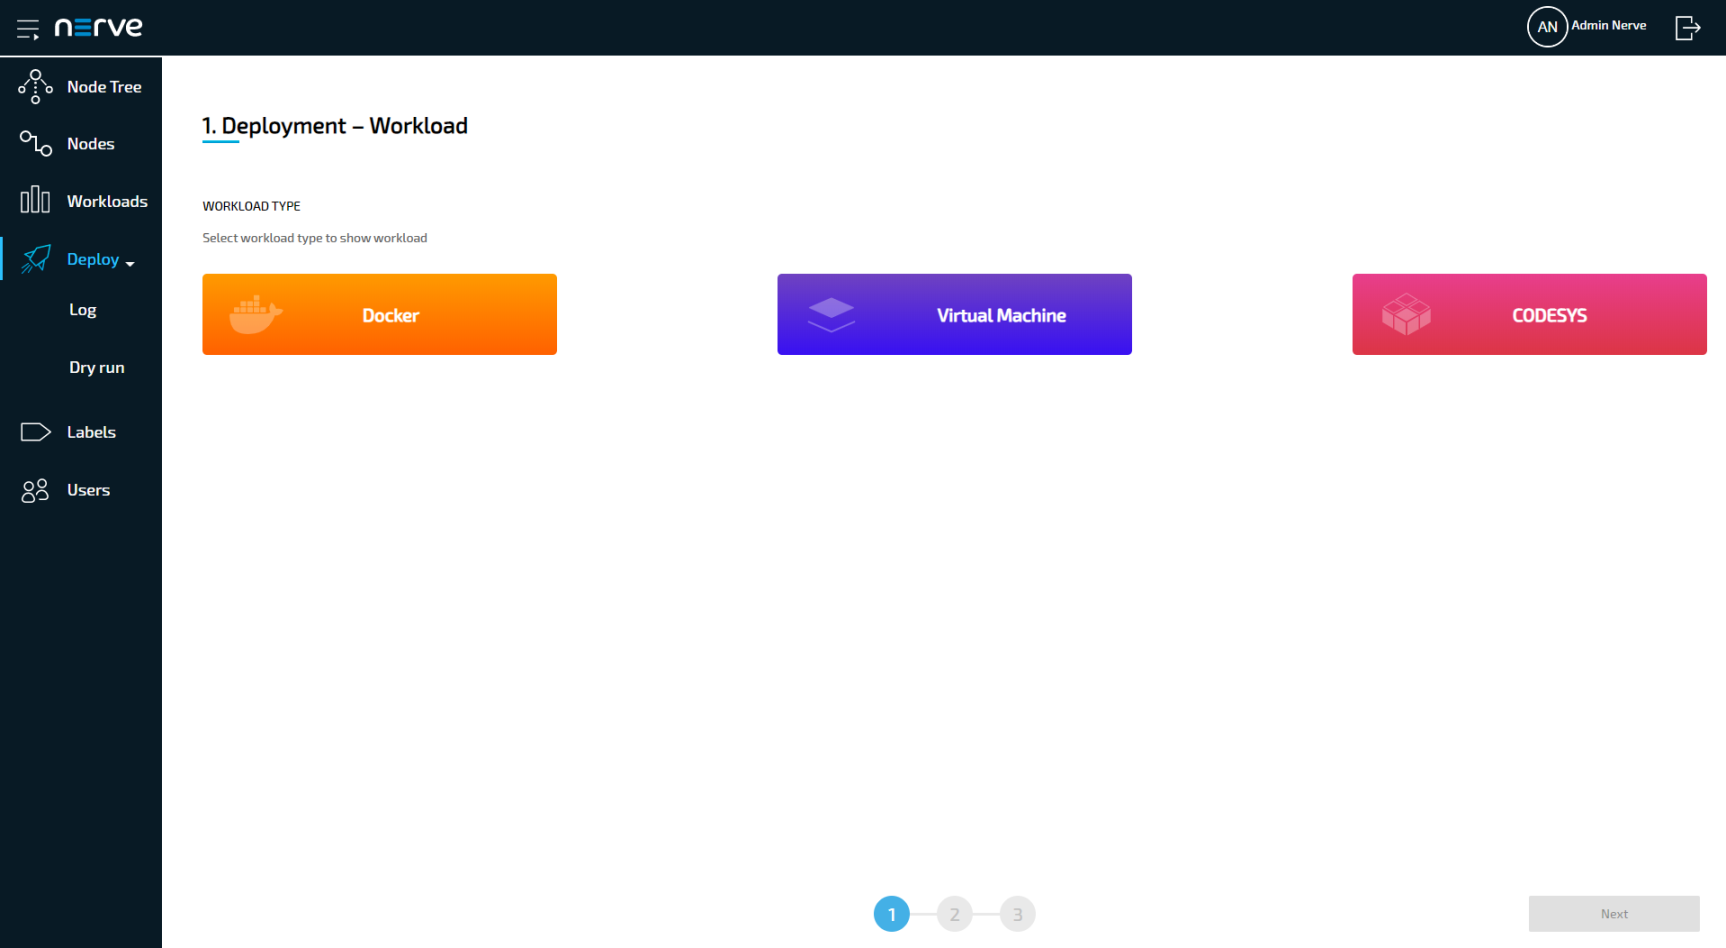
Select Deploy in the left-hand menu.
-
Select one of the three icons for workload types. A list of corresponding workloads will appear below.
-
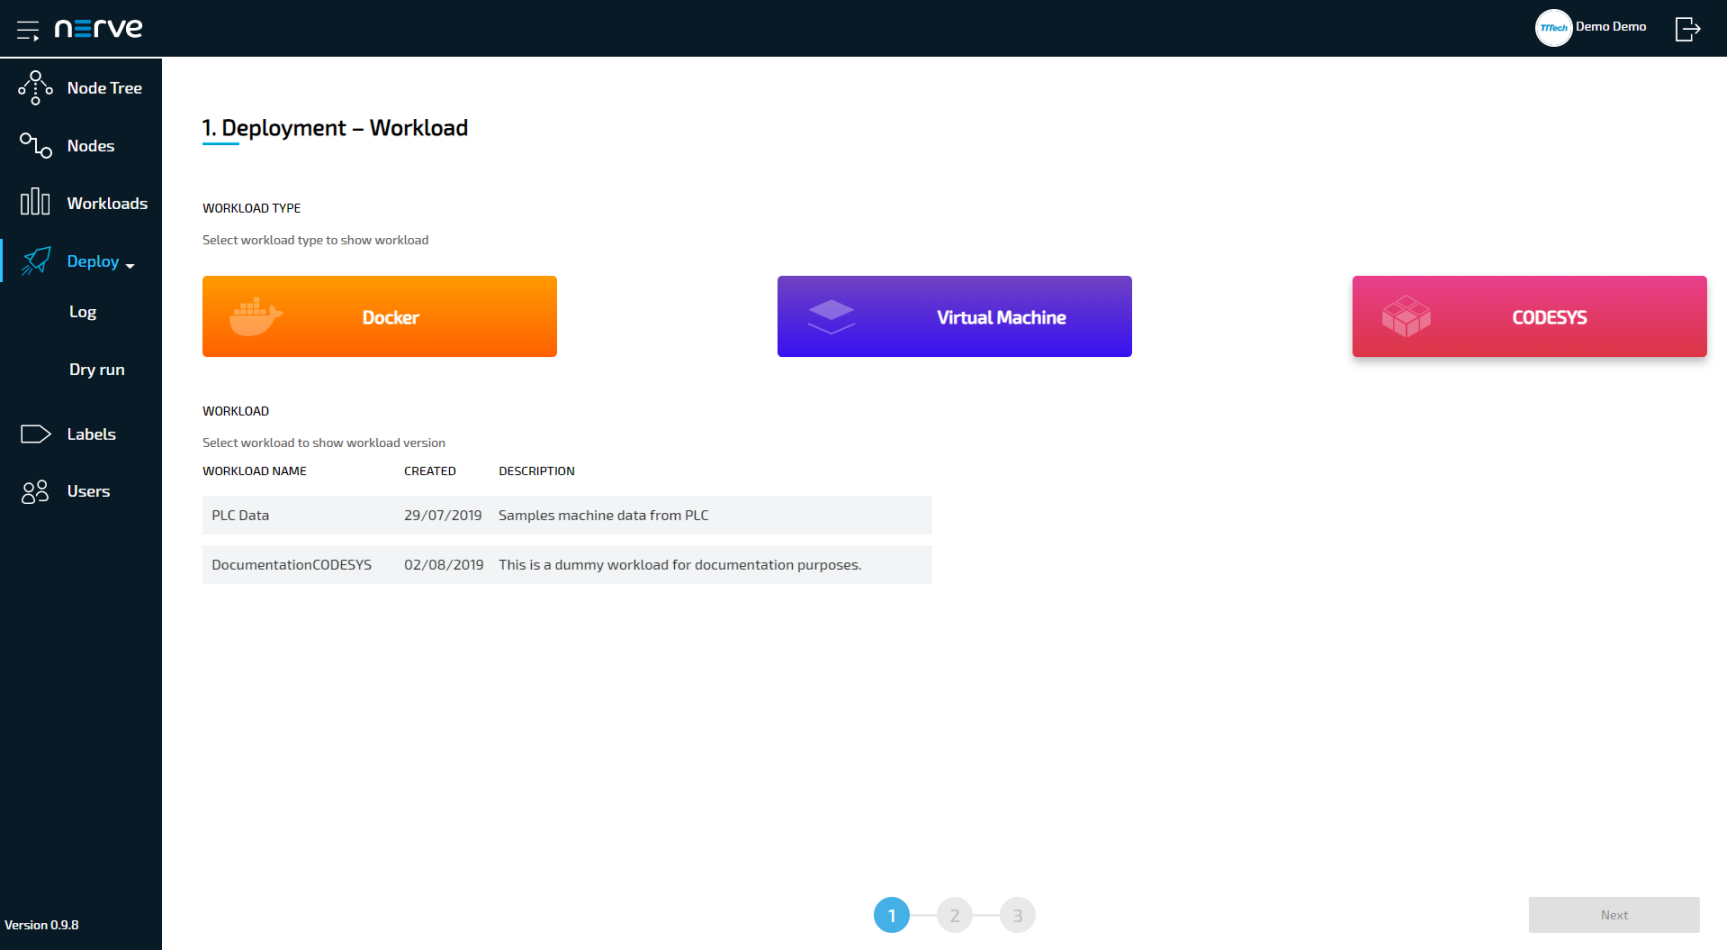
Select a workload from the list. A list of versions of this workload will appear to the right.
-
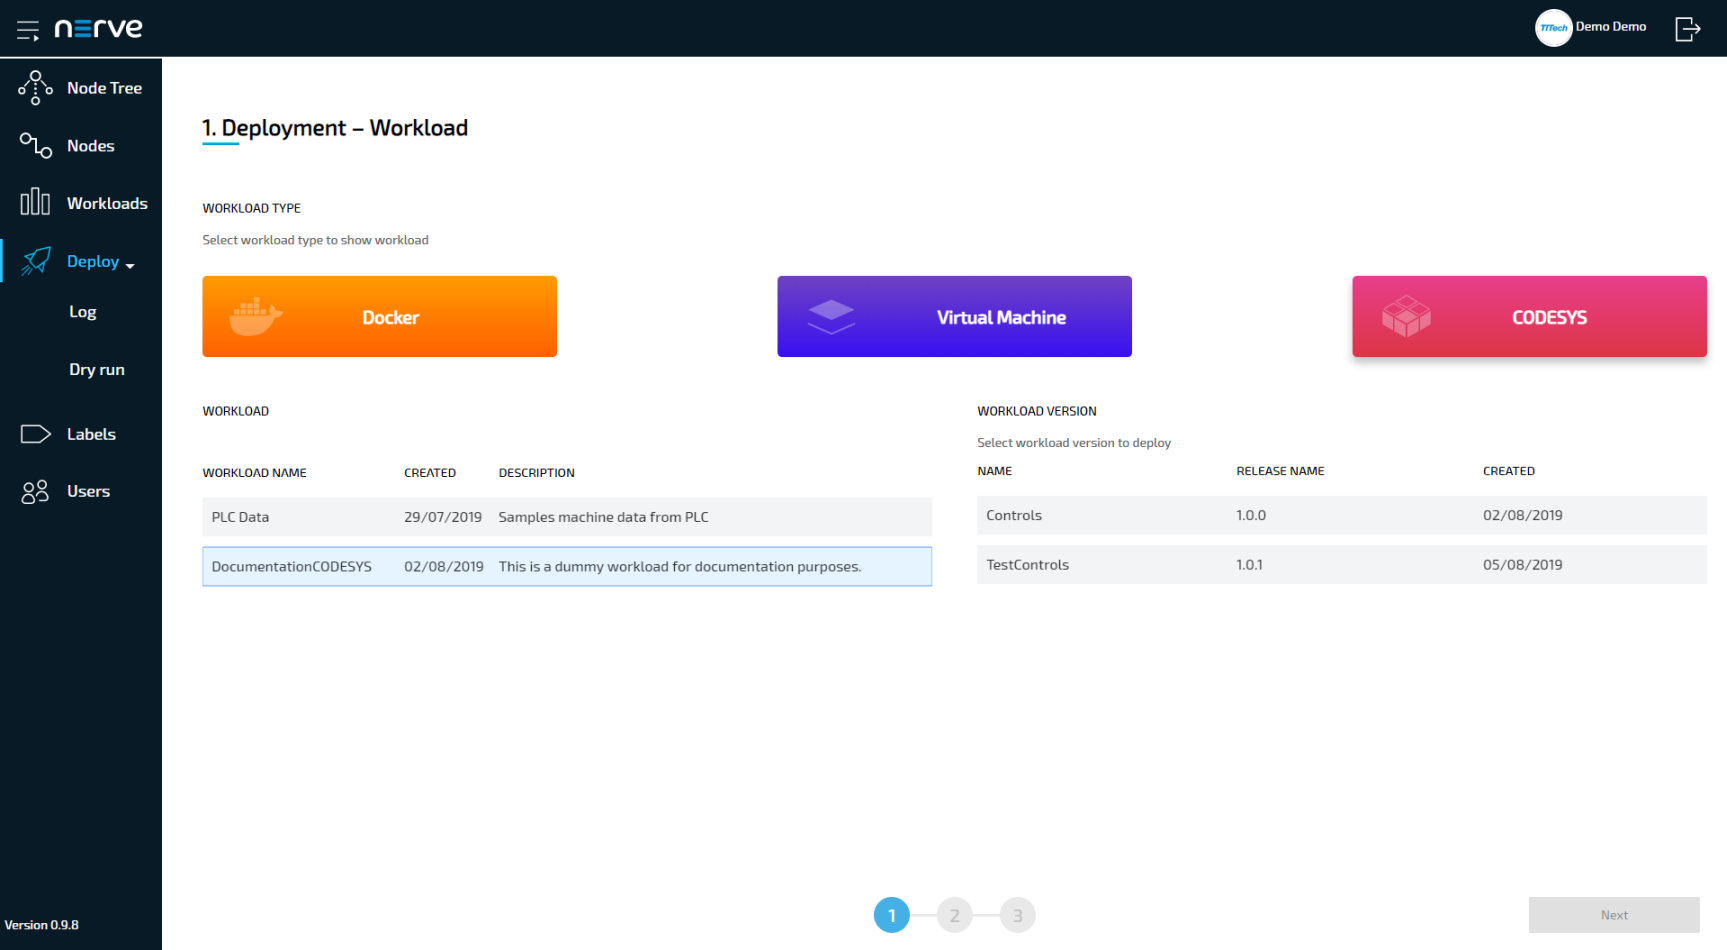
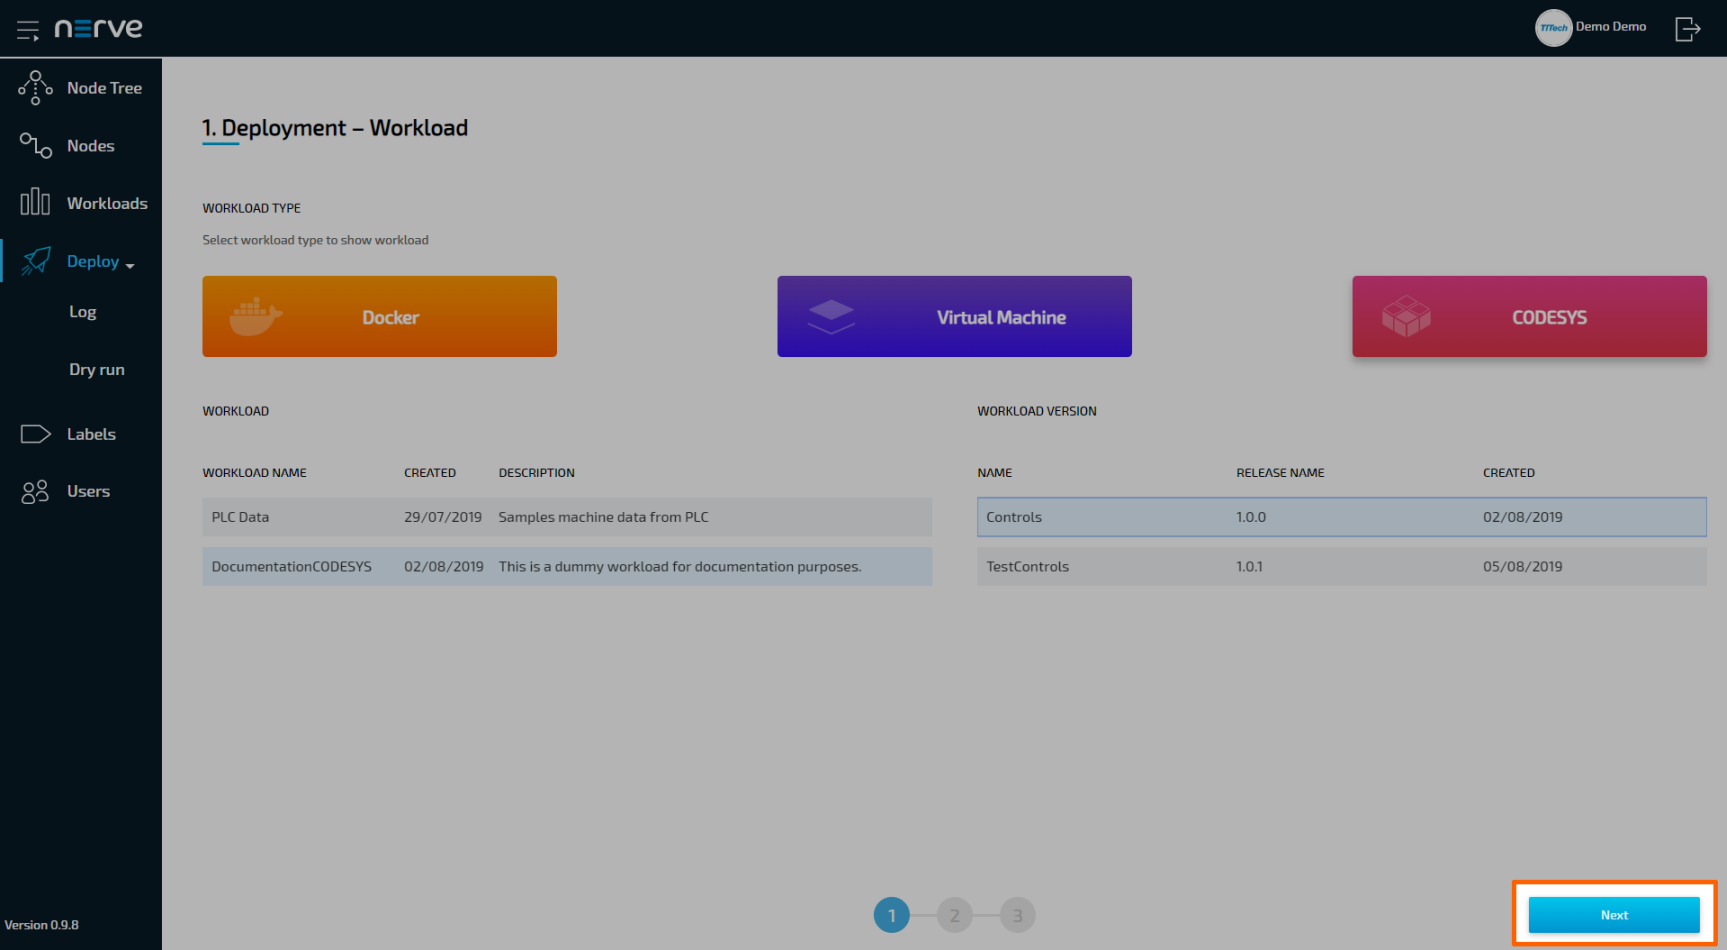
Select the version of the workload to deploy.
-
Click Next in the bottom-right corner.
-
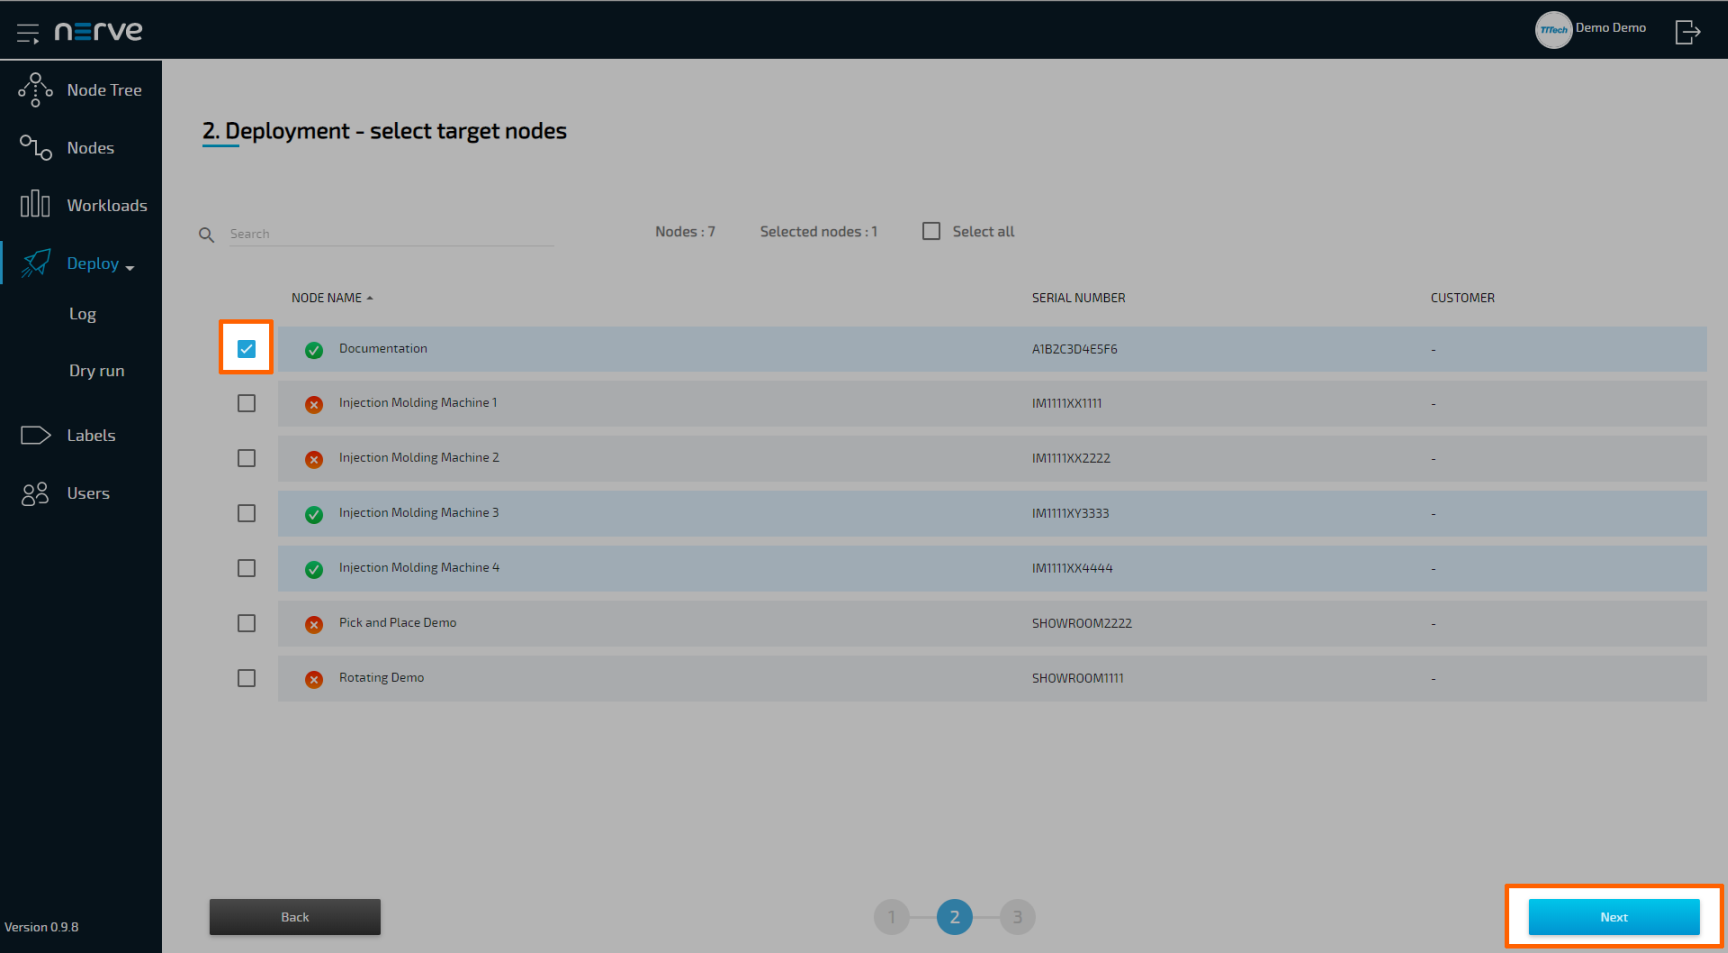
In the next window, select one or more nodes from the list for deployment by ticking the checkboxes on the left.
Note
This list of nodes might not include all nodes that are registered in the Management System. It is automatically filtered depending on the labels the workload has assigned.
-
Select Next in the lower-right corner.
-
Select Deploy to execute the deployment.
Optional: Enter a Deploy name above the Summary of the workload to make this deployment easy to identify. A timestamp is filled in automatically.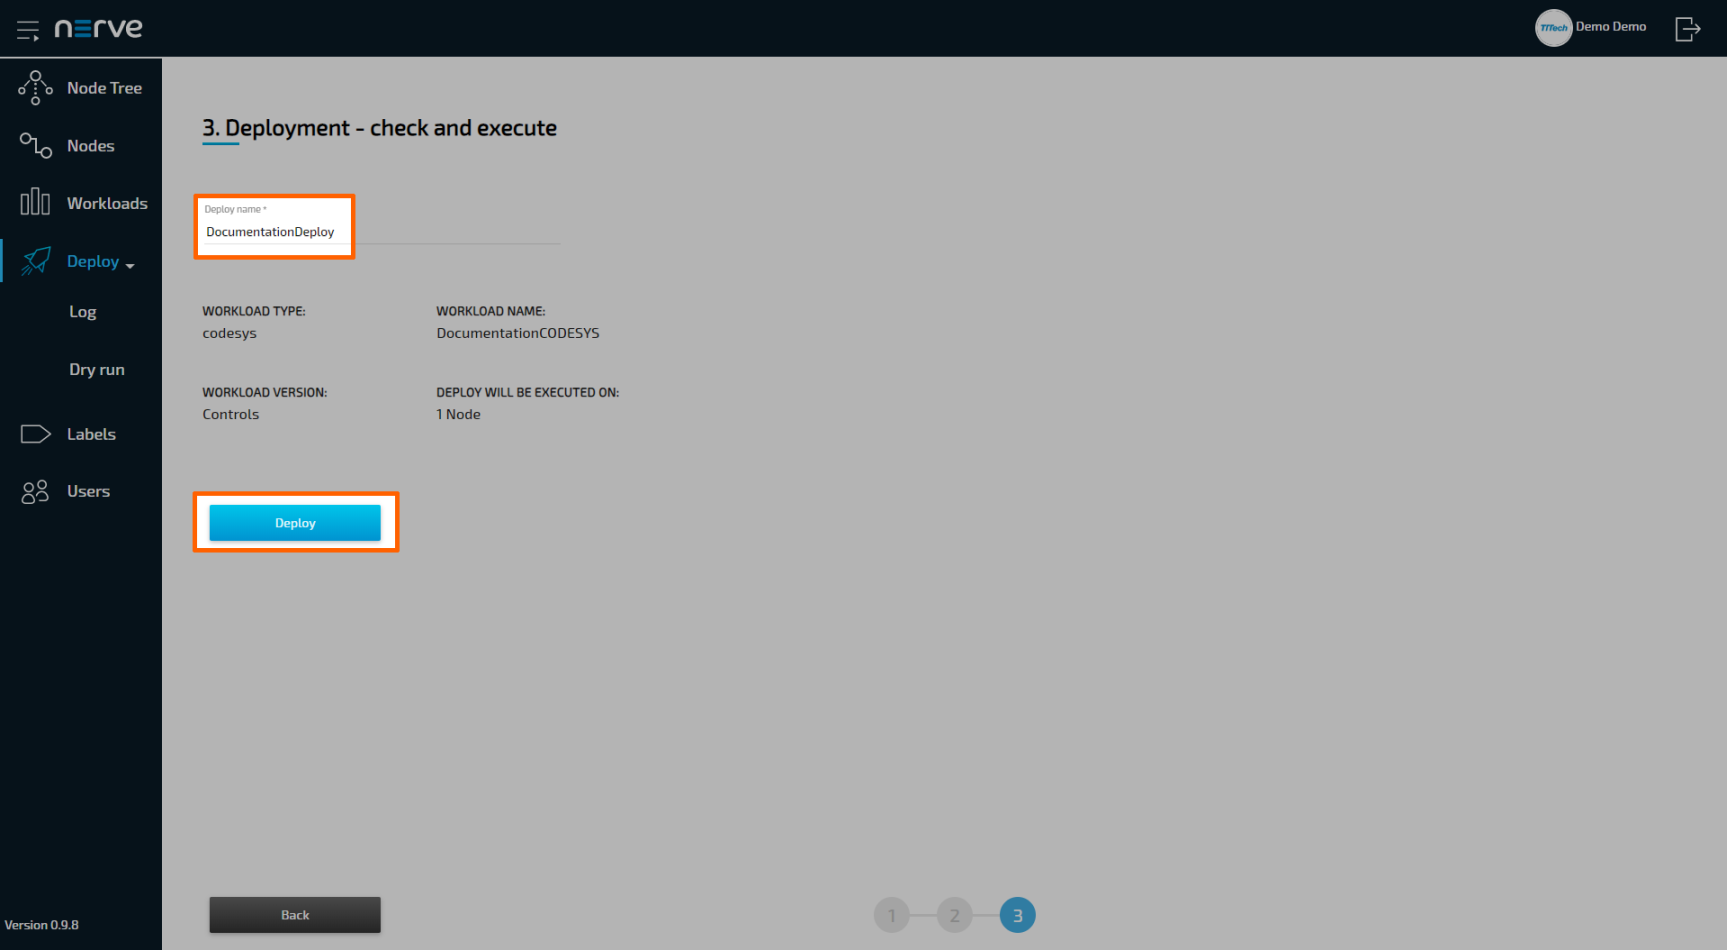
The Management System will continue to the log next. The current deployment is at the top of the list. The Deploy name chosen before is the name that identifies the deployment in the log.
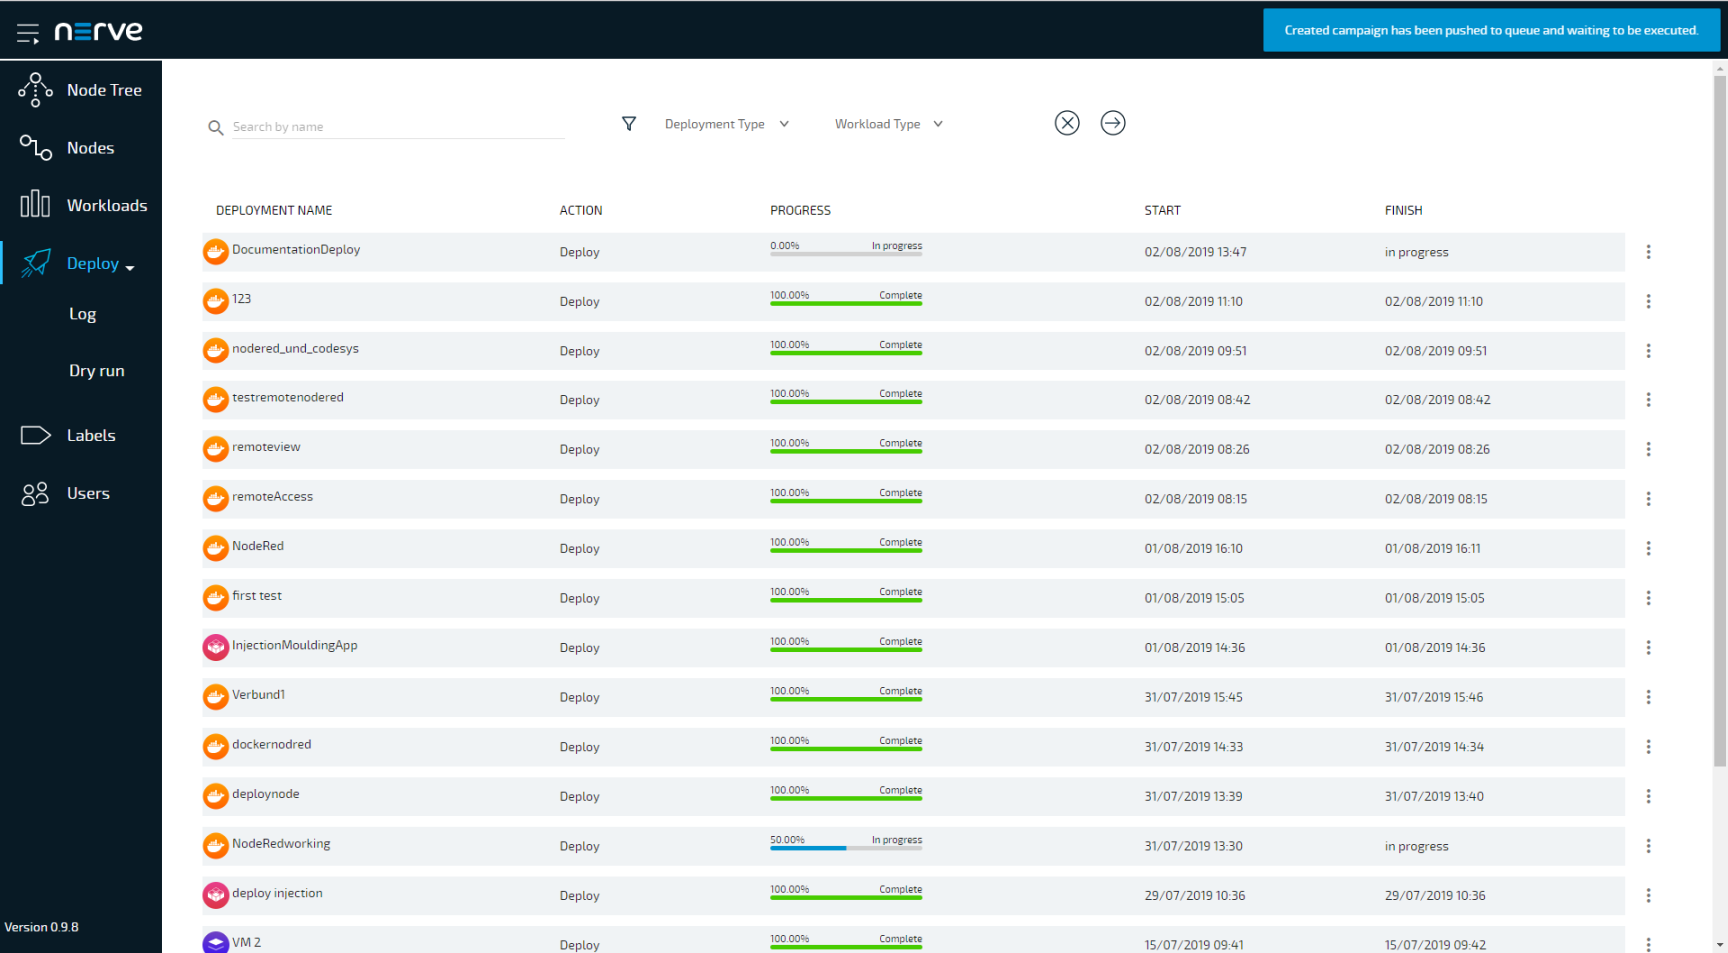
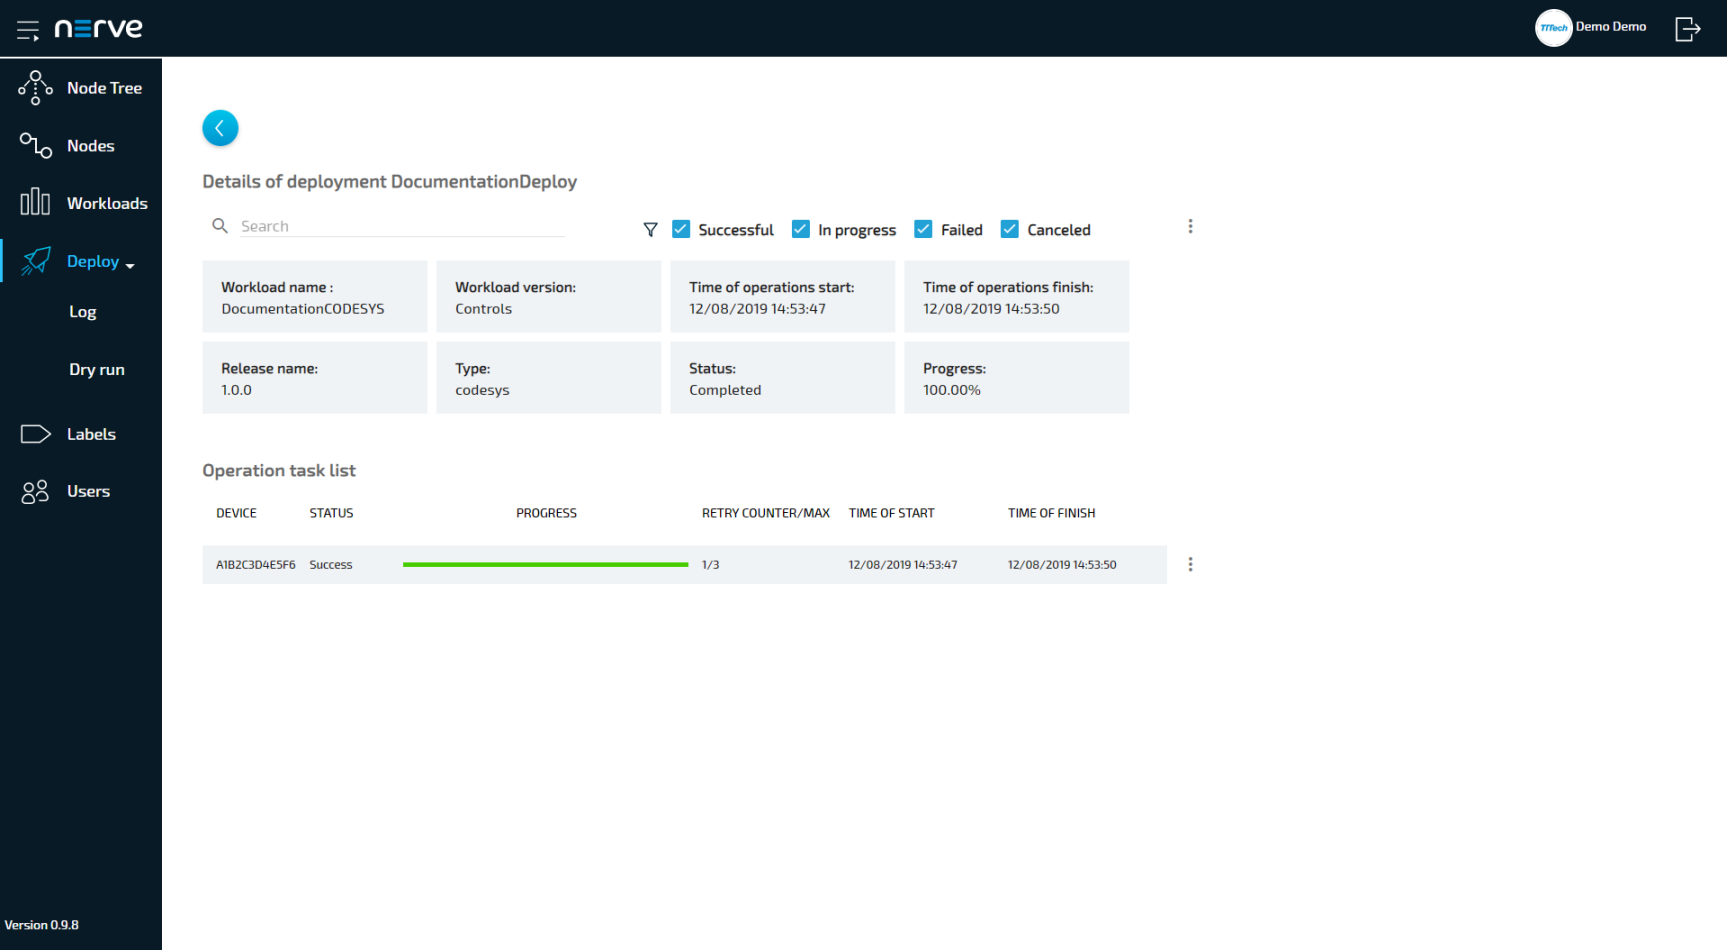
The progress of the current deployment is displayed here. Select the log entry of the deployment to see a more detailed view.
The workload has been deployed and can be controlled in the node tree. Select Nodes in the navigation on the left and select the node tree tab  on the right. Select the node with the deployed workload to find the tile of the deployed workload.
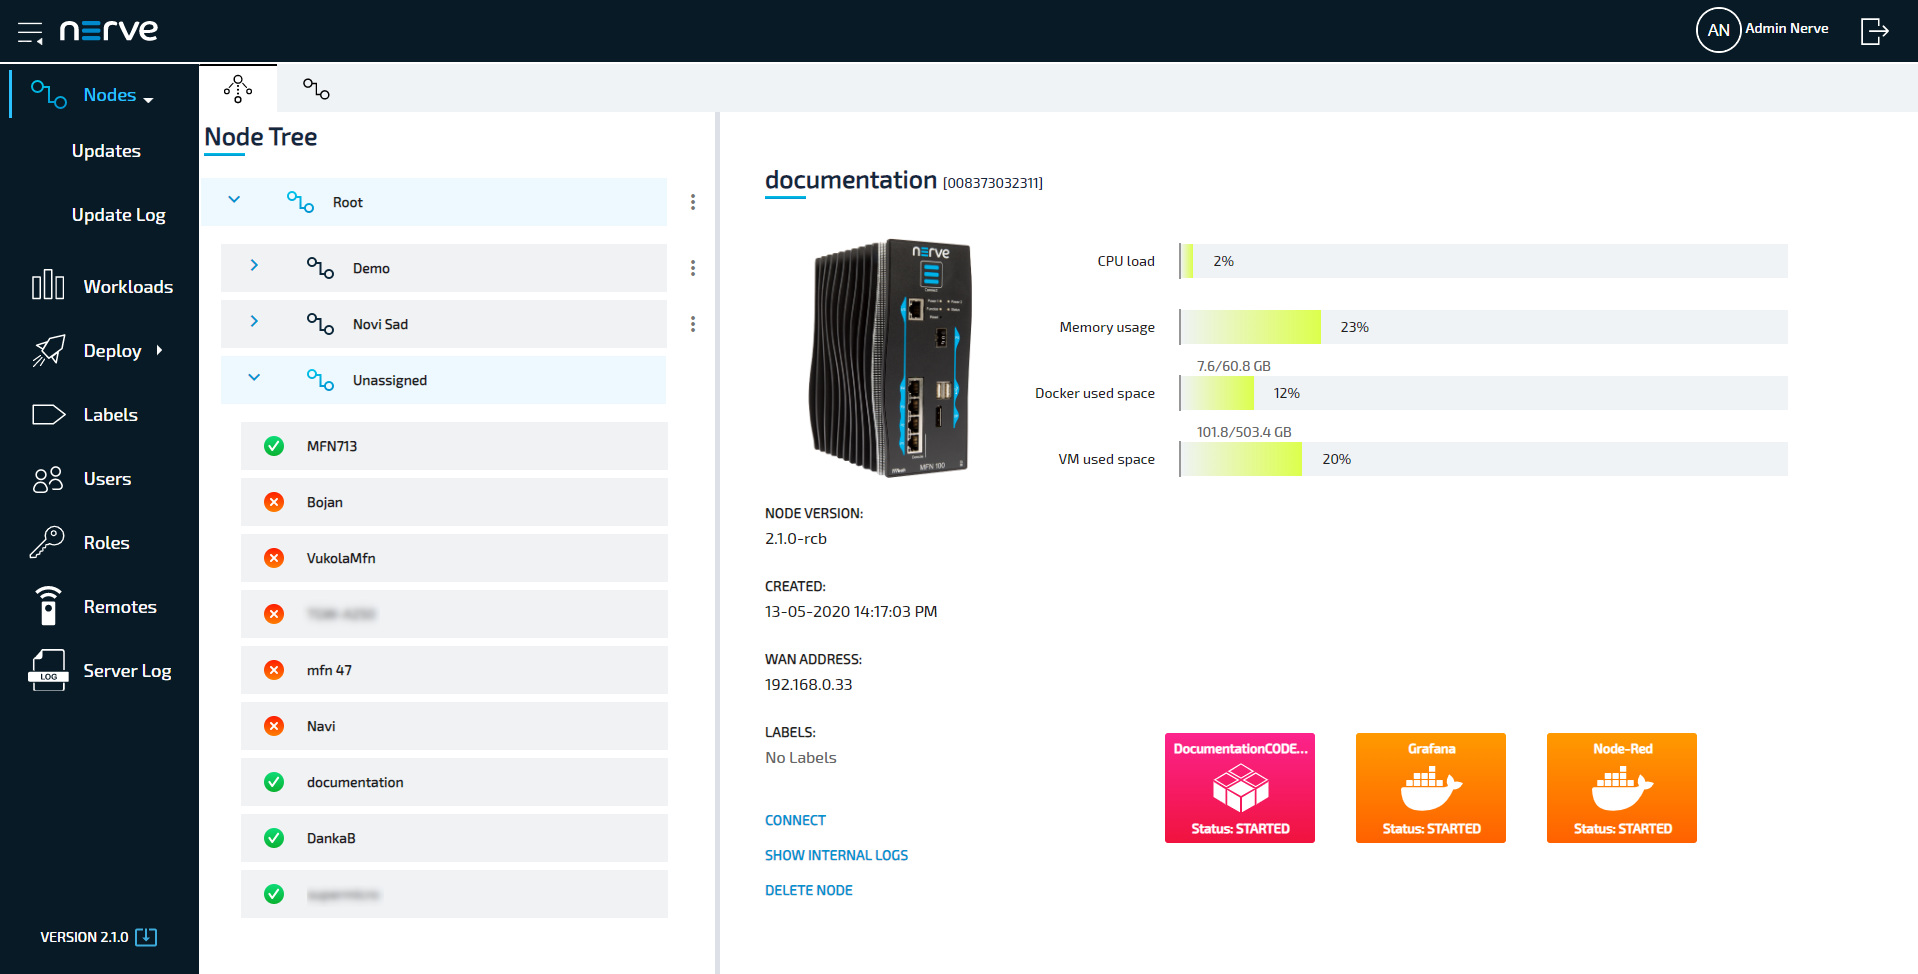
Reach the workload control area by clicking the tile of each workload. All workloads are started as soon as they are deployed.
Note
CODESYS applications can only be controlled through the Local UI.
Removing logical volumes after unsuccessful VM deployment
If a virtual machine workload fails in the download phase of the deployment process, it is possible that the logical volumes created for the workload stay behind. This does not negatively impact the system. However, the disk space reserved for the virtual machine workload will stay reserved unless it is removed. Follow the instructions below to find out the workload ID of the failed deployment and how to remove the logical volume.
Finding out the workload ID
Every workload has a unique ID that is used for naming the logical volume when it is created during the deployment process. This workload ID can be found in a JSON file when a workload is exported from the Management System.
- Access the Management System.
- Export the virtual machine workload the deployment of which has failed by following Exporting a workload. The workload is downloaded as a TAR file.
- Navigate to the folder where the TAR file is located.
- Extract the TAR file.
- Open the JSON file with a text editor. The TAR file only contains one JSON file.
-
Look for
"workloadId"in the file. It is the second entry in the file.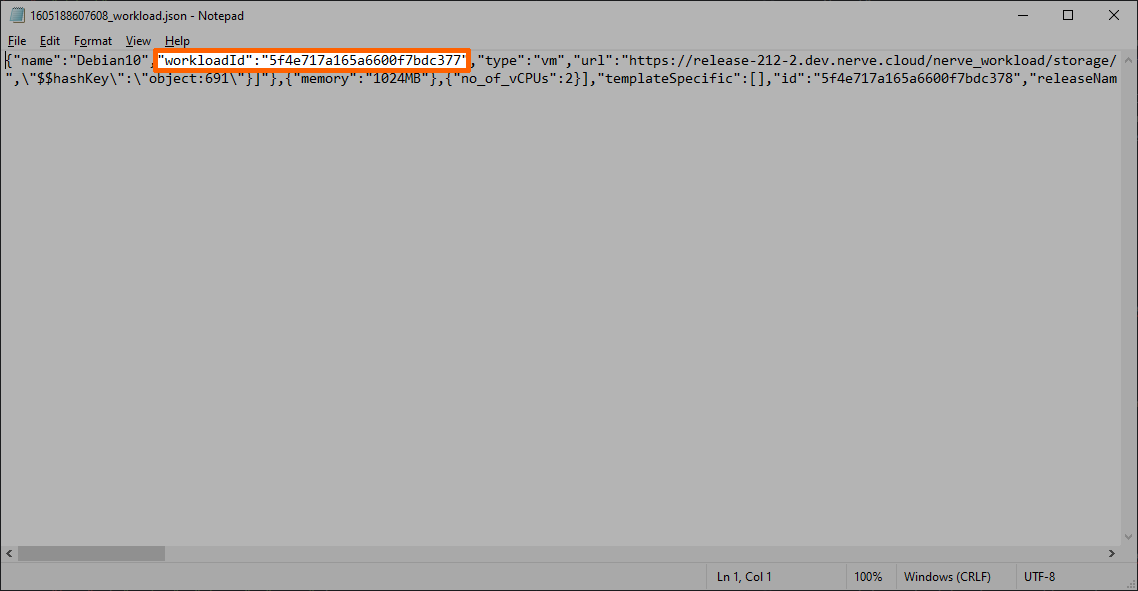
-
Note down the ID. It is required to identify the logical volume that needs to be removed.
Removing the logical volumes
With the workload ID of the unsuccessfully deployed workload, the logical volumes can be correctly identified and removed. For this, the workstation needs to be connected to the physical port of the Nerve Device associated with host access, and the network adapter IP address of the workstation needs to be configured in the correct range. This information is device specific. Refer to the device guide for information on the Nerve Device.
Note
The following instructions require access to the Linux host system of Nerve Blue. Using host access requires expert Linux knowledge as system internal changes can be performed. Note that changes may impact the Nerve Blue system.
- Open an SSH client like PuTTY.
-
Enter the IP address for host access to the Nerve Device under Host Name (or IP address) to log in to the host of the Nerve Device.

-
Log in with the credentials for host access to the Nerve Device.
- Enter
lsblkto display a list of volumes. -
Find the logical volume containing the
workloadIdfrom the JSON file.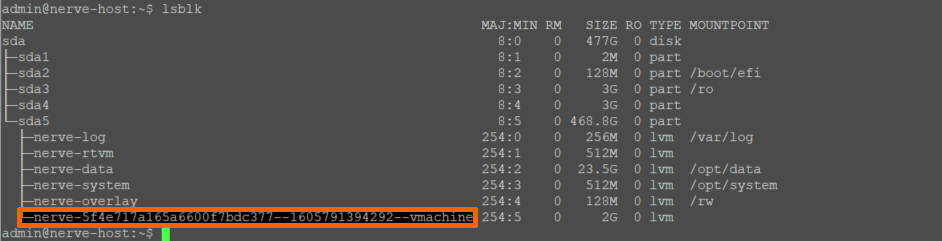
-
Enter the following command to remove the logical volumes:
sudo lvremove /dev/nerve/<volume-name> -y
Note
Note that the steps above can also be performed through a remote connection. Refer to Configuring a remote tunnel to a node for more information.