Node-RED
Node-RED is an open source programming tool for wiring together sensor inputs, APIs and online services. It provides a browser-based editor that makes it easy to wire together flows using the wide range of nodes in the palette that can be deployed to its runtime in a single-click.
Refer to the official Node-RED homepage and the Node-RED documentation for more information on Node-RED.
Deploying Node-RED
The Node-RED workload is pre-configured in the Nerve Management System as part of the delivery so that the application can be used out of the box. Follow the steps below to deploy Node-RED to a Nerve Node. The pre-configured workload is set up with the following settings:
| Setting | Value |
|---|---|
| Name | Node-RED_Tutorial |
| Release name | 1.2.7-12 |
| DOCKER IMAGE | From Registry is selected with an Image path to the Docker image. |
| Port settings | Protocol TCP Host Port 1880 Container Port 1880 |
| Container name | Node-RED |
| Network name | wan |
| Network name | bridge |
| REMOTE CONNECTIONS | NAME Node-RED TYPE TUNNEL PORT 1880 |
- Log in to the Management System.
-
Select Deploy in the navigation on the left.
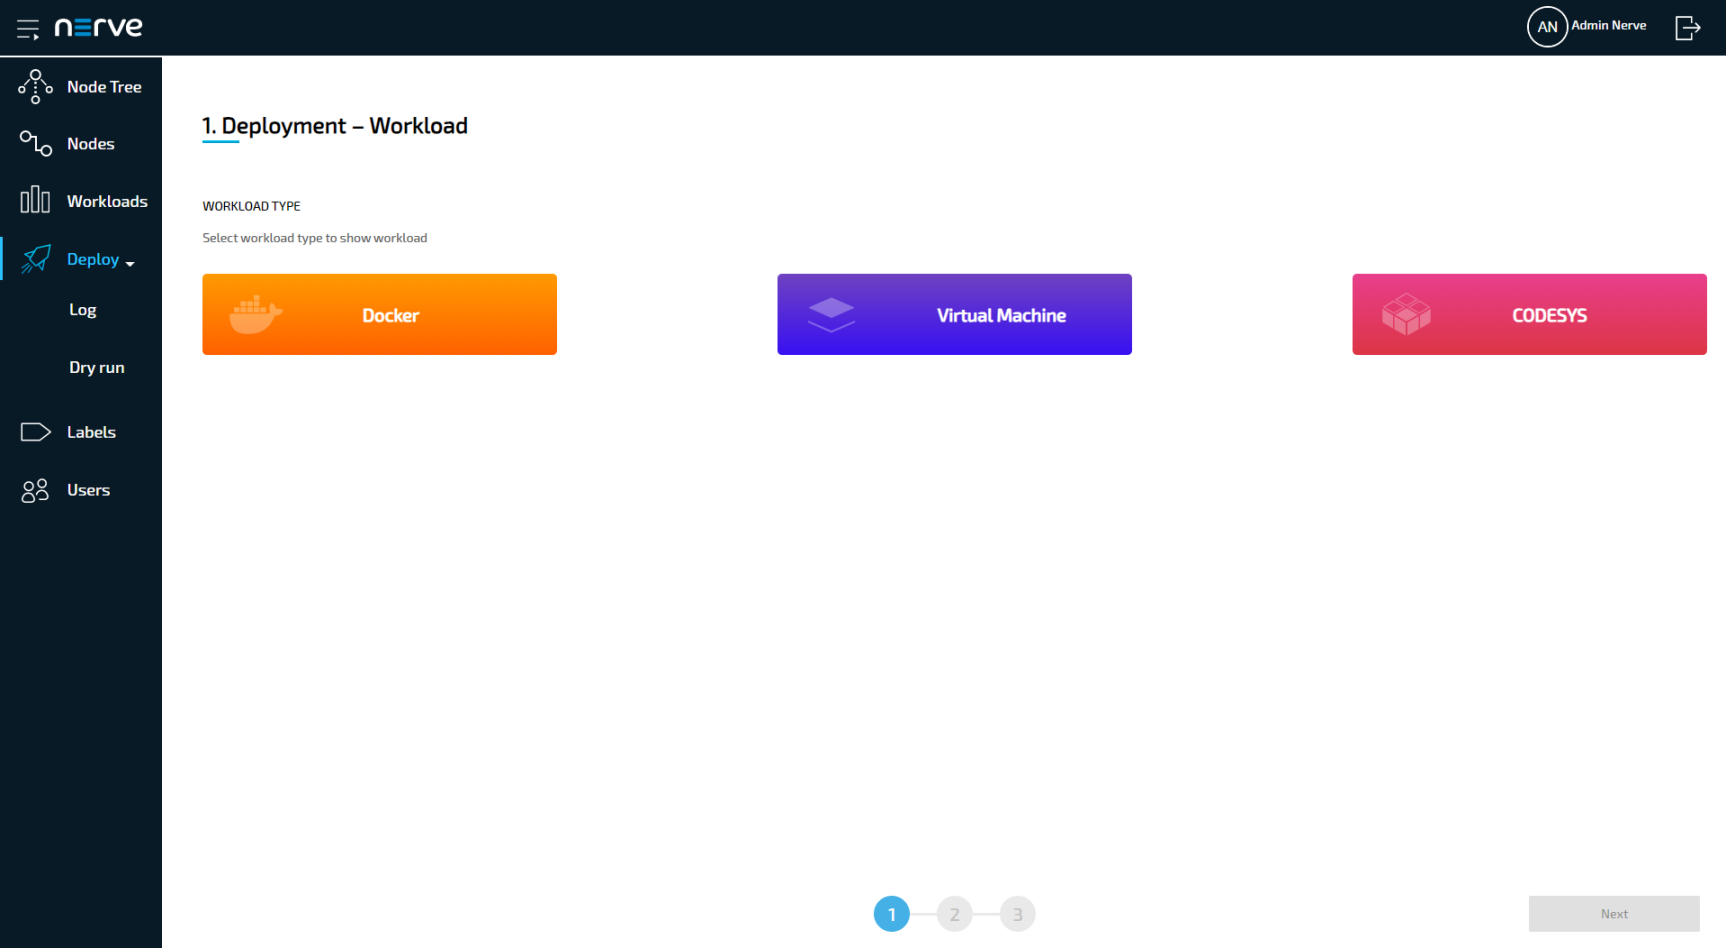
-
Select the orange Docker tab. A list of Docker workloads will appear below.
- Select Node-RED in the list of workloads. A list of version of this workload will appear to the right.
-
Select the latest version of the workload.
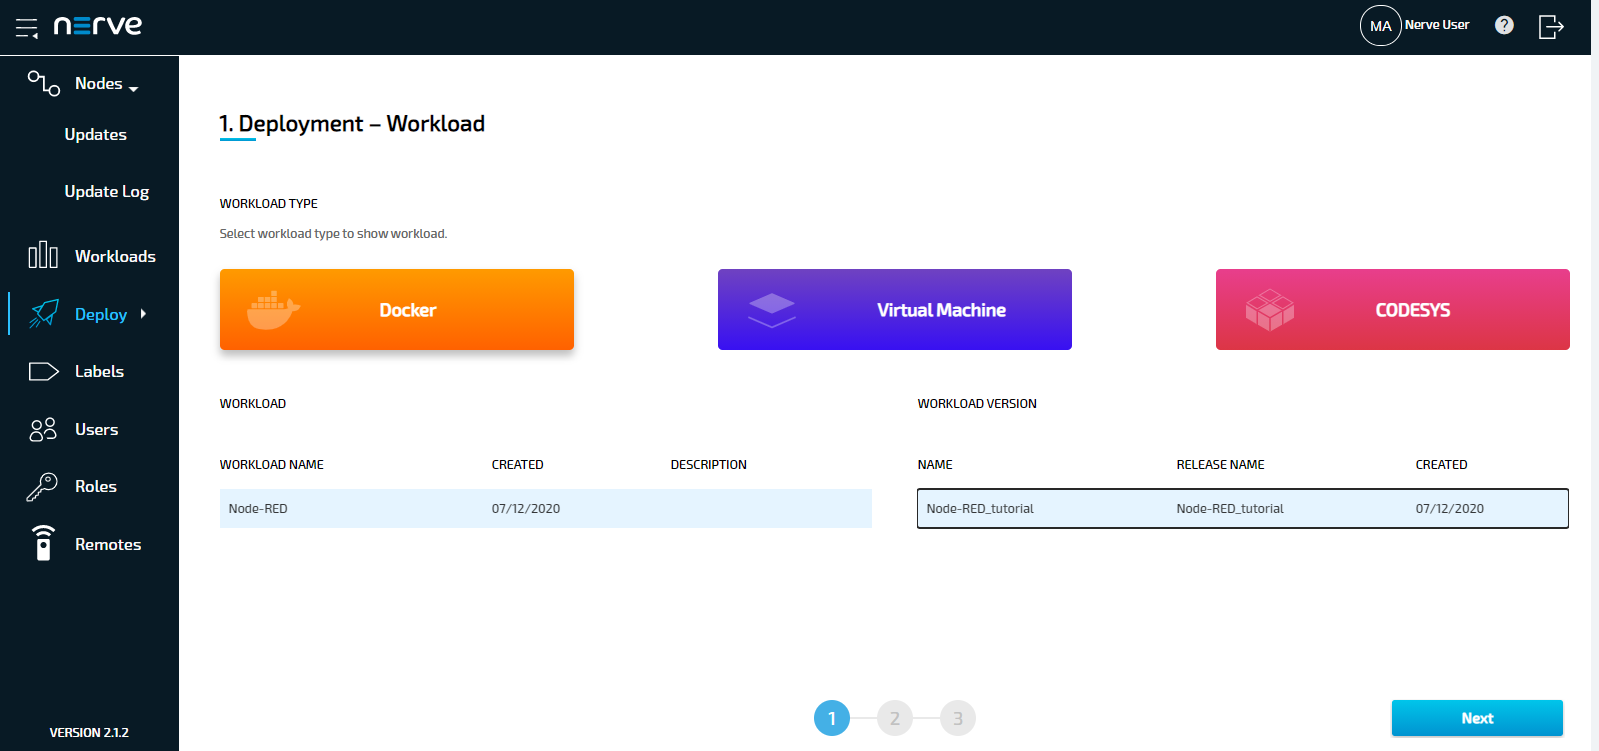
-
Select Next in the lower-right corner.
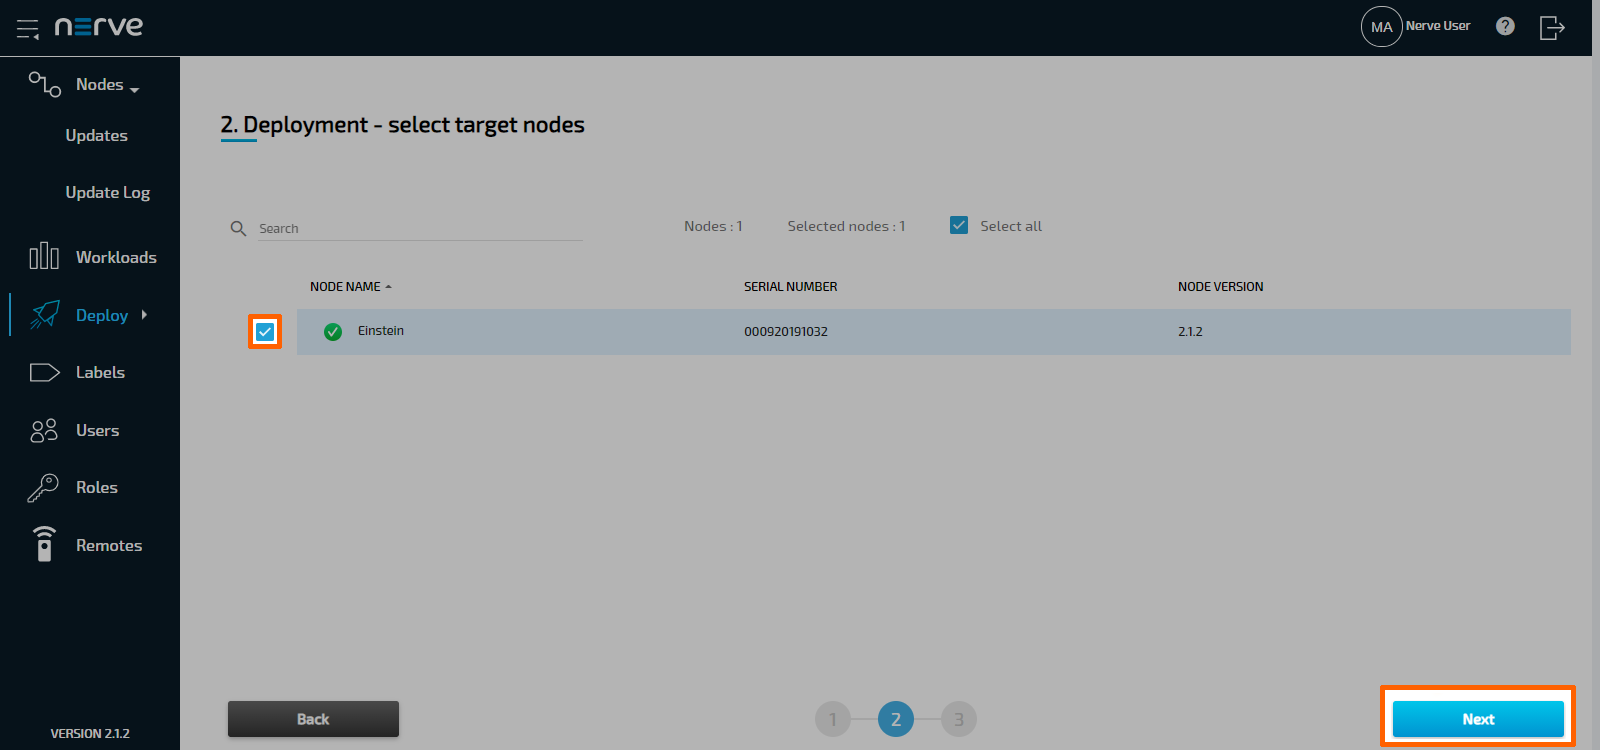
- Tick the checkbox next to your node.
-
Select Next in the lower-right corner.
-
Select Deploy to execute the deployment.
Optional: Enter a Deploy name above the Summary of the workload to make this deployment easy to identify. A timestamp is filled in automatically.
The deployment should now be visible at the top of the deployment log. Click the log entry of the deployment to see a more detailed view.
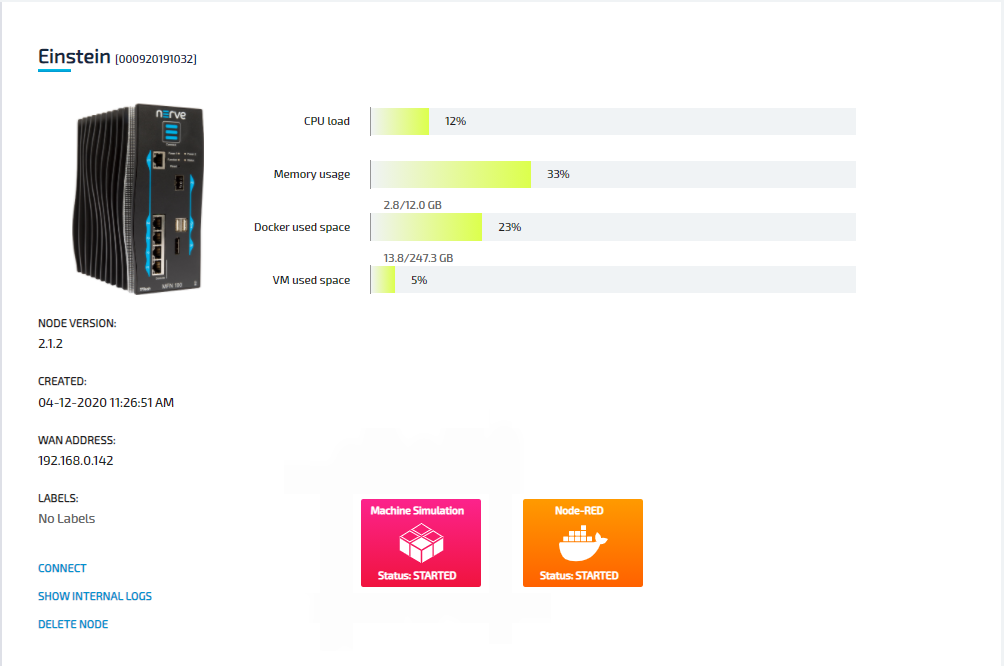
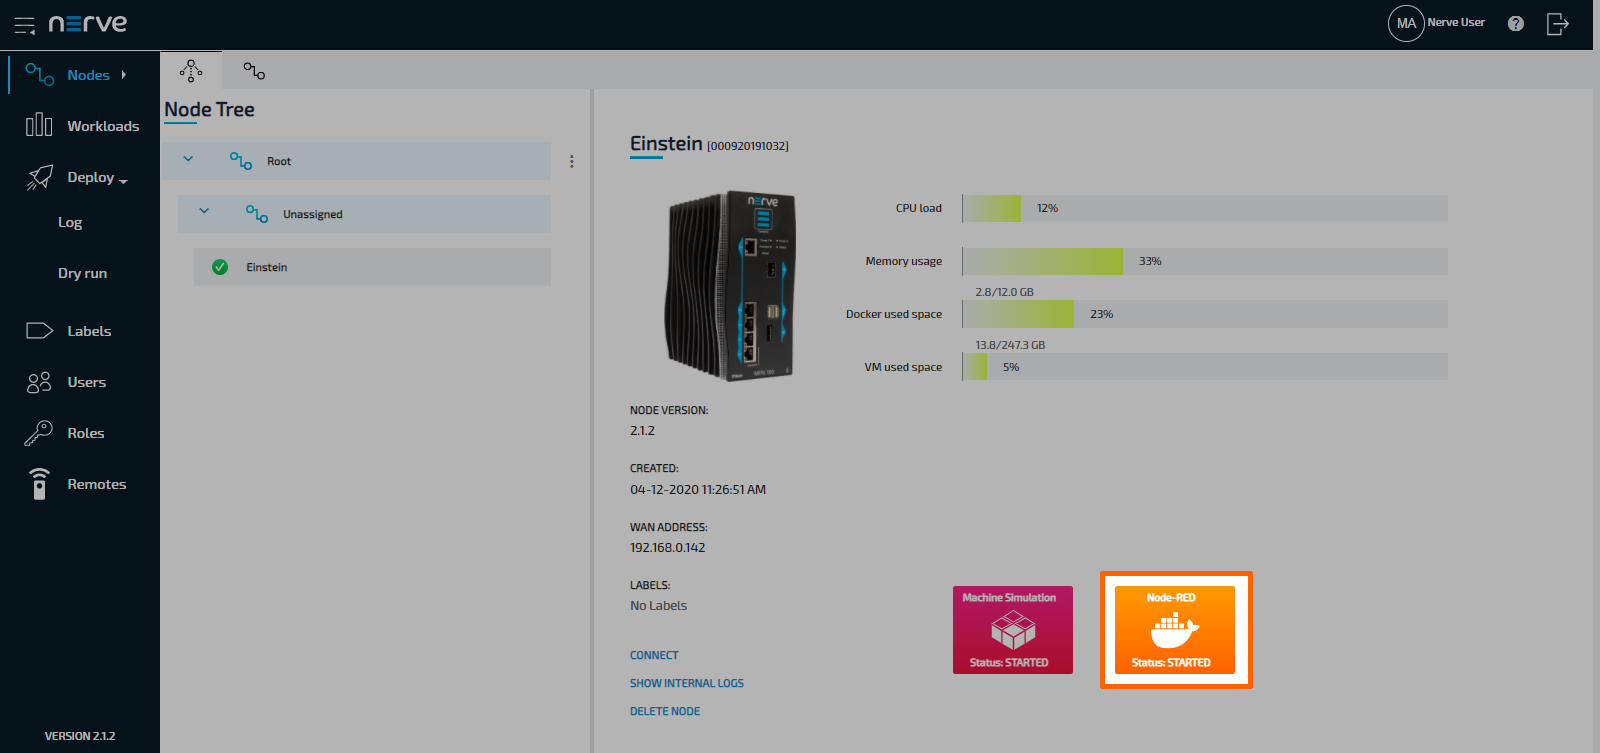
To confirm if the workloads have been deployed successfully, select Nodes in the navigation on the left. Select your node in the node tree and confirm if two workload tiles are showing underneath the bar graph. The workloads should show the status STARTED.
Note
It can take a number of seconds until the status of workloads switches from IDLE to STARTED after deployment.
Connecting to Node-RED
After deployment, Node-RED is accessible at port 1880 on the Nerve Device through a web user interface. The pre-configured remote tunnel will use this port and port 1880 on the local computer to create a connection between the computer and the Nerve Device to access the interface of Node-RED. Before continuing, make sure the Nerve Connection Manager that was part of the delivery is installed, as it is required for using remote tunnels.
Note
Local admin rights might be required to successfully install the Nerve Connection Manager. In case a remote tunnel is not pre-configured, refer to Remote tunnels for more information on remote tunnels.
- Select Nodes in the navigation on the left.
- Select the node with the deployed Node-RED workload in the node tree.
-
Select the Node-RED Docker workload.
-
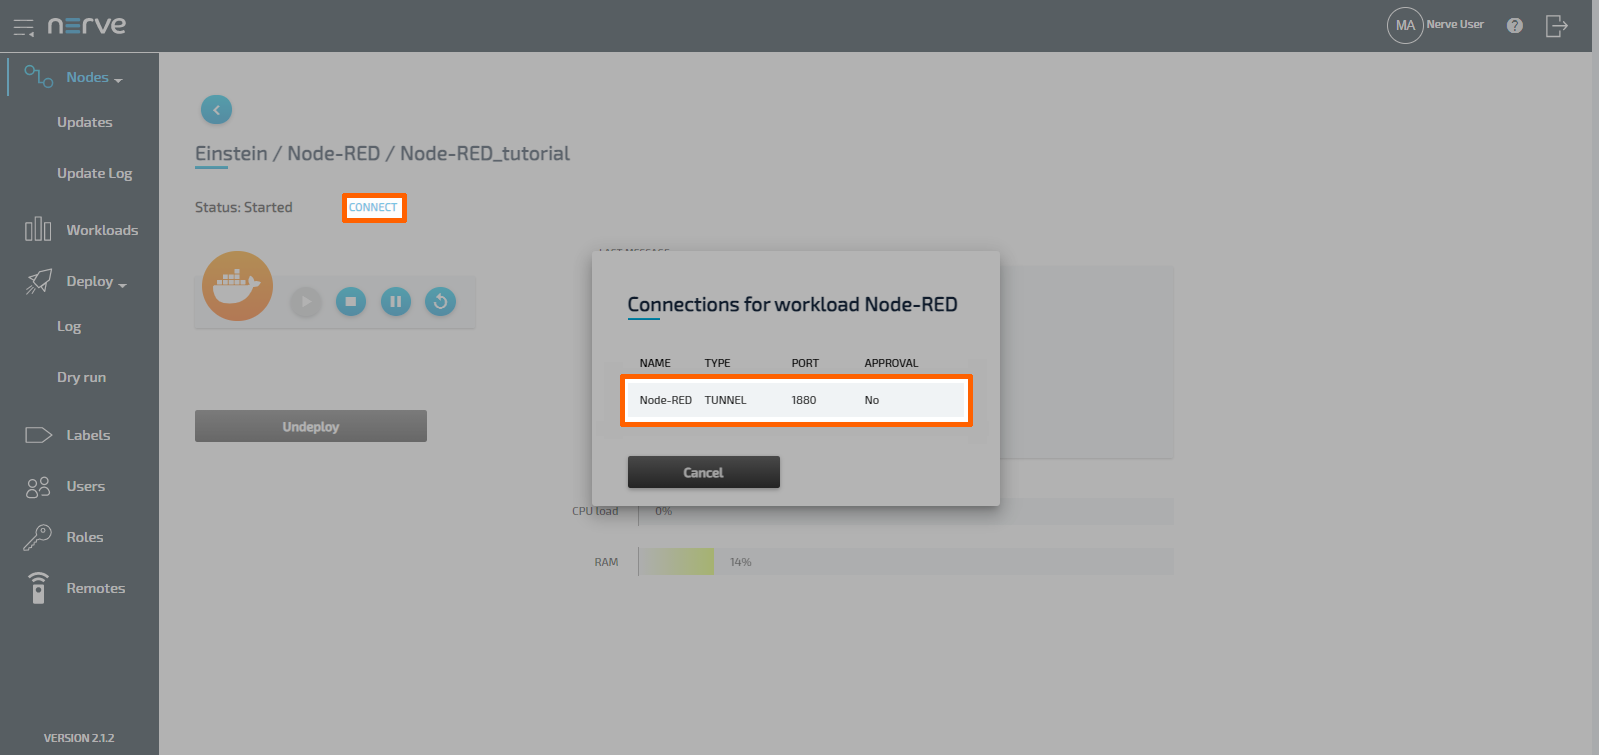
Select CONNECT next to the workload status. Available connections will appear in a window.
-
Select the Node-RED remote tunnel from the list.
-
Select Click me in order to run application in the new window.
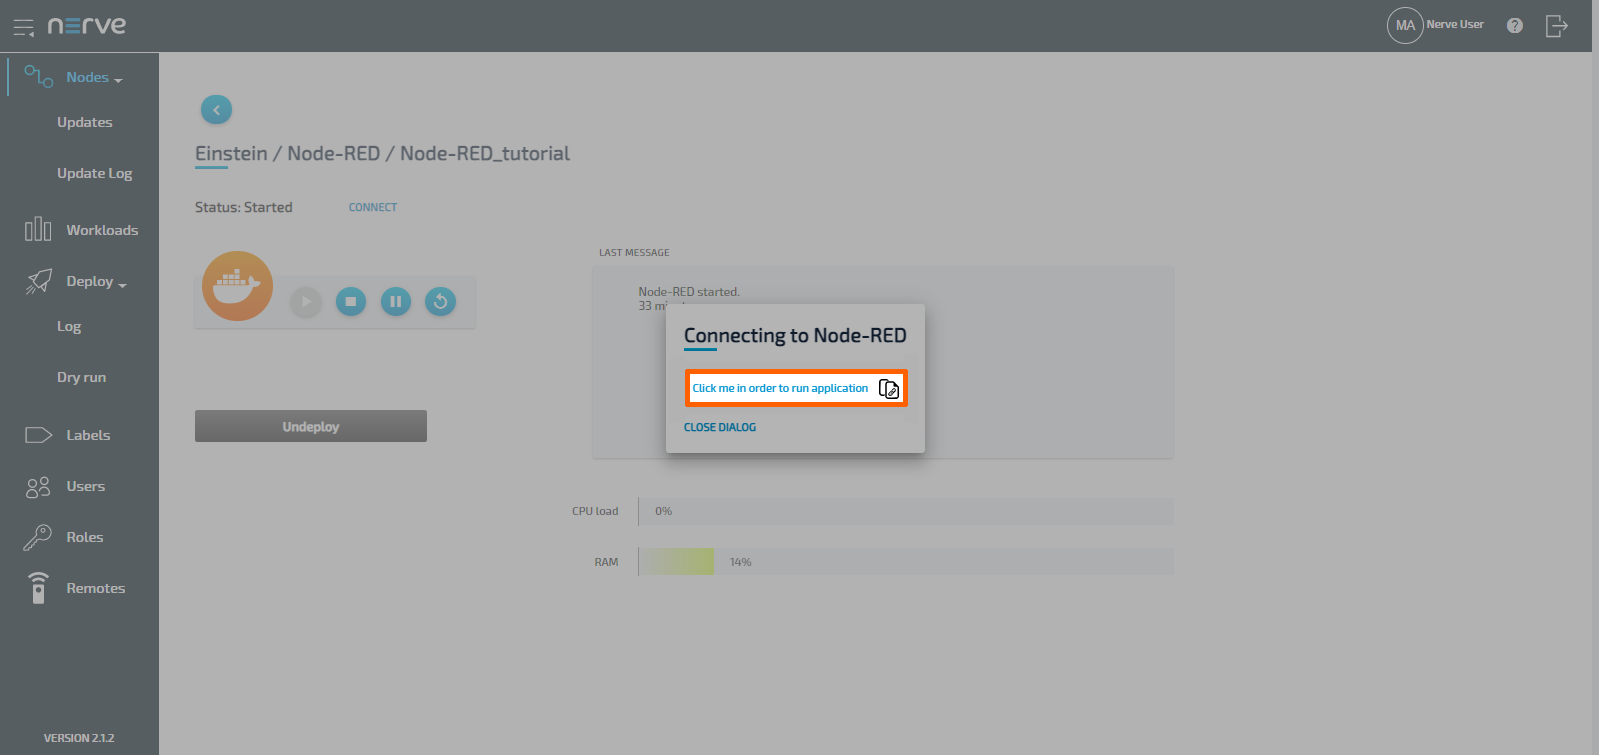
-
If the Nerve Connection Manager installed correctly, confirm the browser message that the Nerve Connection Manager shall be opened.
Depending on the browser that is used, this message will differ. The Nerve Connection Manager will start automatically once the message is confirmed.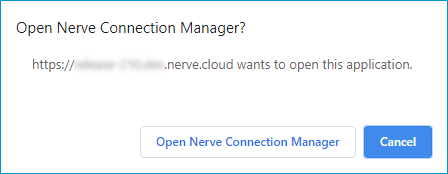
Note
If the Nerve Connection Manager does not start automatically, refer to Using a remote tunnel to a workload in the user guide.
The remote tunnel will be established once the Nerve Connection Manager starts and the remote connection will turn green in the Nerve Connection Manager. The remote tunnel is now ready to be used.
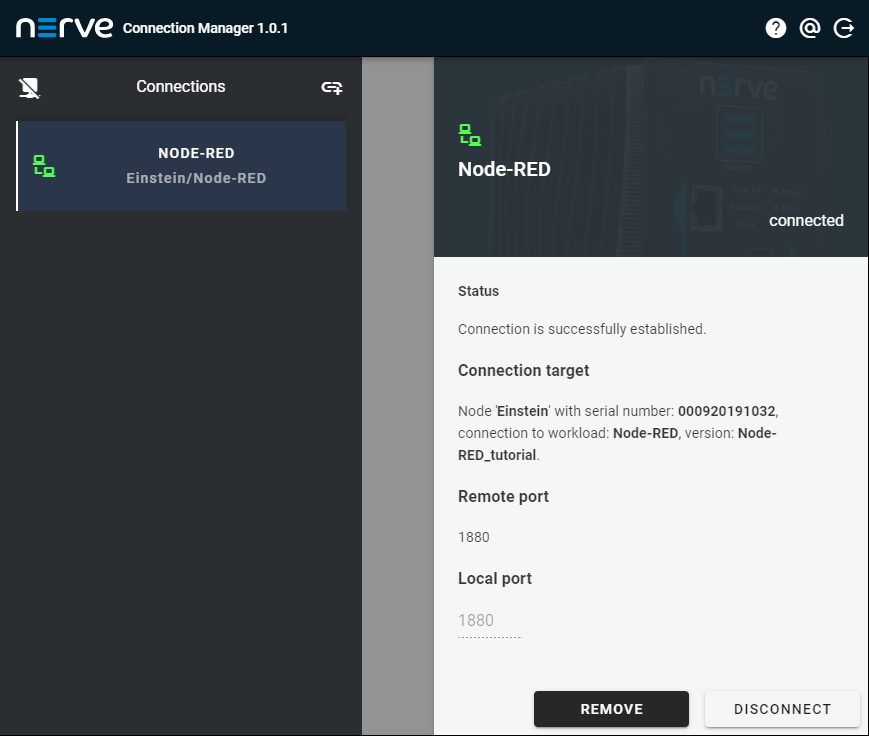
Open a new browser tab and enter localhost:1880 to open Node-RED.

Examples of using Node-RED with Nerve Blue
The following is a list of documentation examples of how Node-RED is used with Nerve Blue. New examples will be added in the near future.
Tutorial: Machine efficiency insight
Node-RED is part of the Nerve Blue trial, which demonstrates how to gain insight on machine efficiency. There, Node-RED is used to analyze machine performance and display machine efficiency data in an OEE and quality dashboard. Refer to Tutorial: Machine efficiency insight for more information.