What is new in version 2.10.0?
This is an overview of the features and changes added in the latest version of Nerve. For an extensive list of all changes, refer to the release notes.
Docker Registry on the Management
Seamless Docker image management: Effortlessly pull and push Docker images with Nerve's integrated Docker registry from your development environment. This feature streamlines your workflow, saving time, bandwidth and optimizes the storage on the Node. Additionally, having a centralized registry within Nerve ensures that all your images are easily accessible and organized, reducing the risk of errors and inconsistencies. This integration allows for faster deployment cycles and easier collaboration among team members, as everyone can access the same set of images.
Workload deployment to the node can potentially take only a fraction of the previous needed time as the layered files system is used to transfer images. Layers already present on the node are not transferred again.
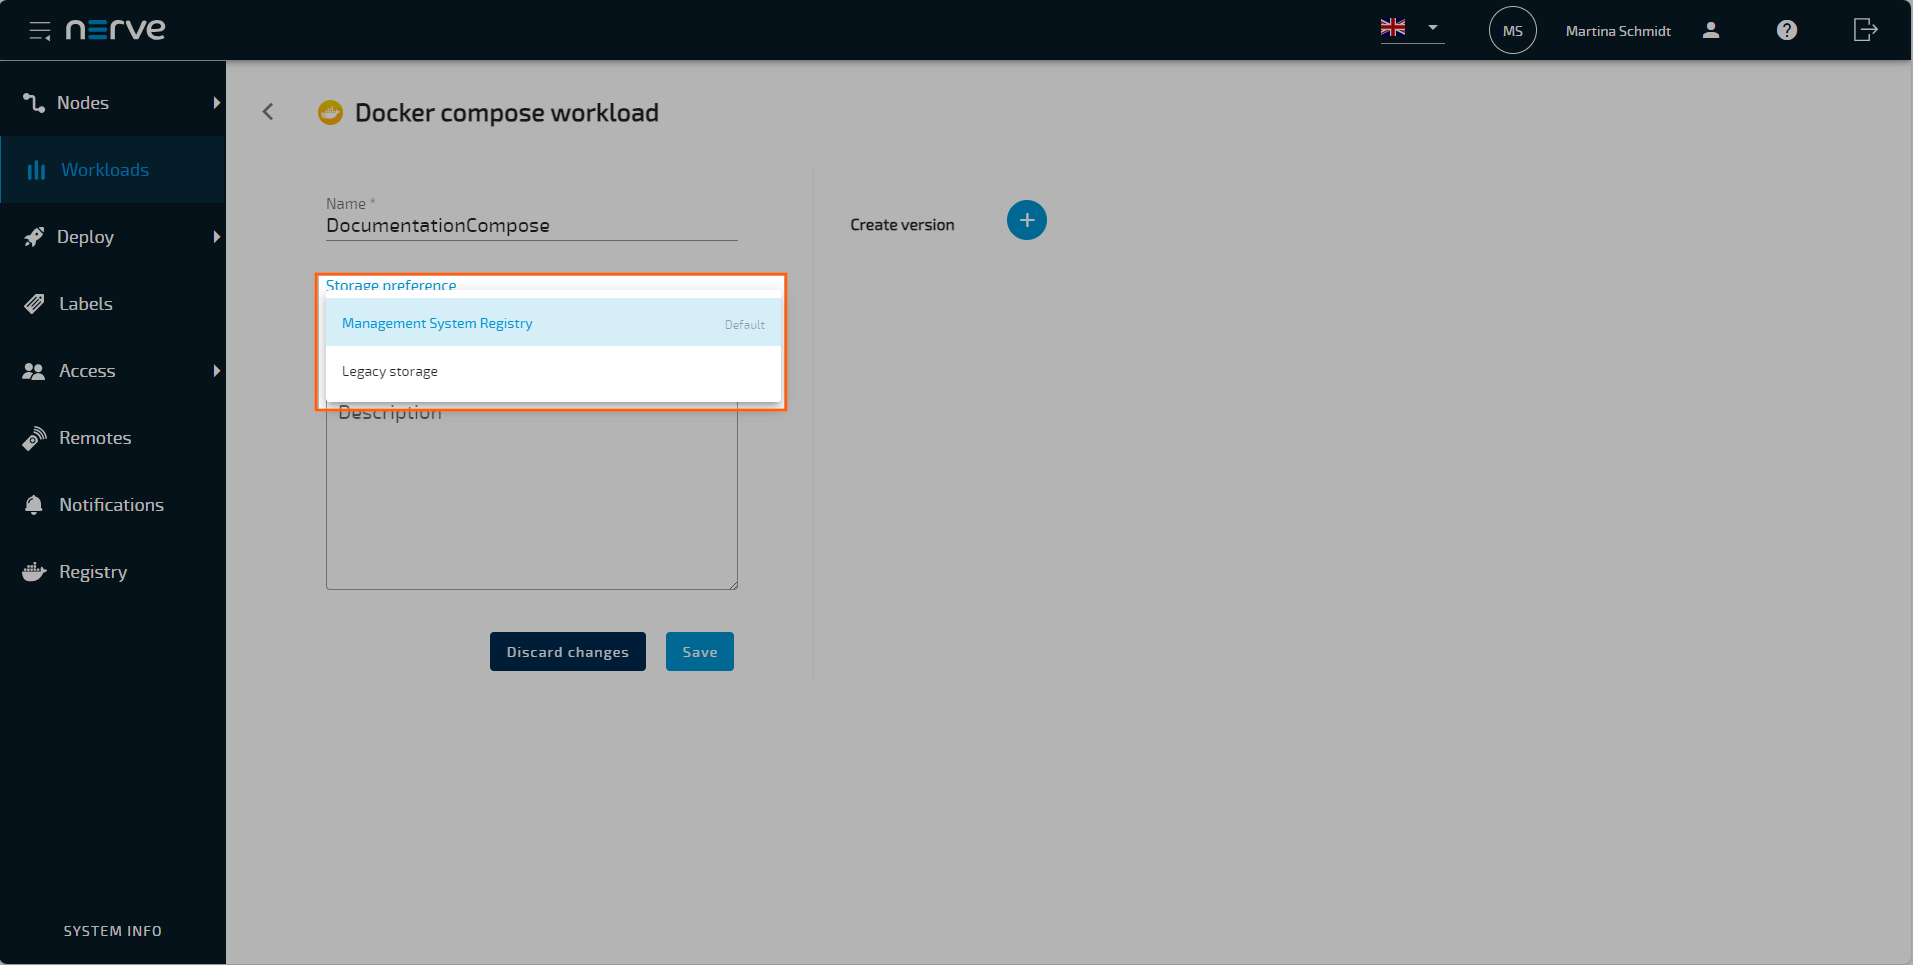
Users can decide when to migrate to workloads stored in the Docker Registry in Management System. Simply create a new workload and select as storage place the registry. The user workflows on the workload definition and deployment remains the same. Docker registry based workloads can be deployed only Nodes versions 2.10 or later.
The image linking for registry based workloads is flexible. As long the the workload is not marked as released, the workload reference to an image can be changed. Either delete an existing tag in the registry and tag a different image or change the tag reference in the workload itself. The workload references to Docker image tag.
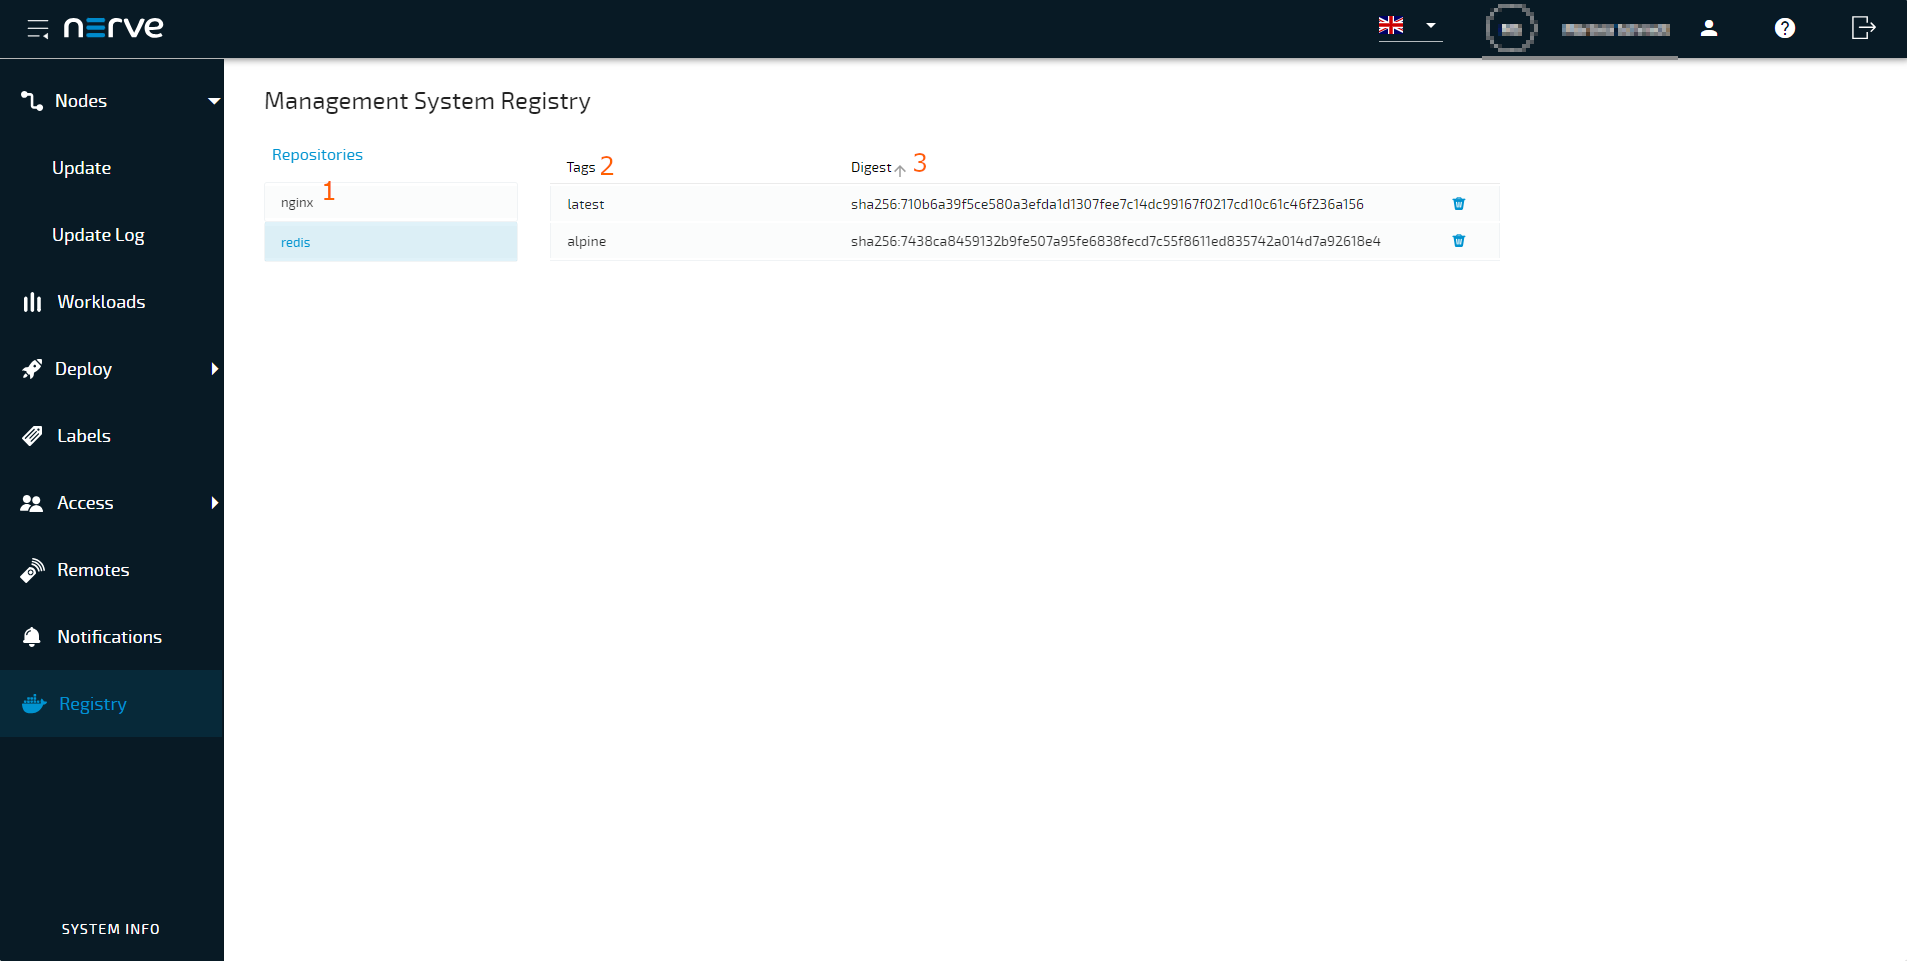
The Docker registry in the Management System is as any other Docker registry. You can use command line on you PC to log in. Use the same credentials as for Management System to log in. Additionally the Management System provides a new view to show all stored images with their tags on the Management Systems Docker registry. This gives a quick overview on the used images and enables also a quick clean up.
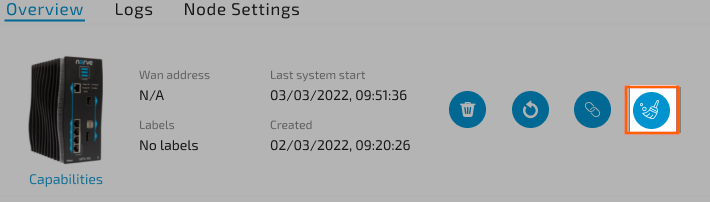
After removing a workload from a Node usually also the image is removed, but the user can also choose to keep the image for other purposes. There is an additional function in the node view to clean up any unused Docker images from the Node and free up disk space.
See the the Docker registry chapter for more details.
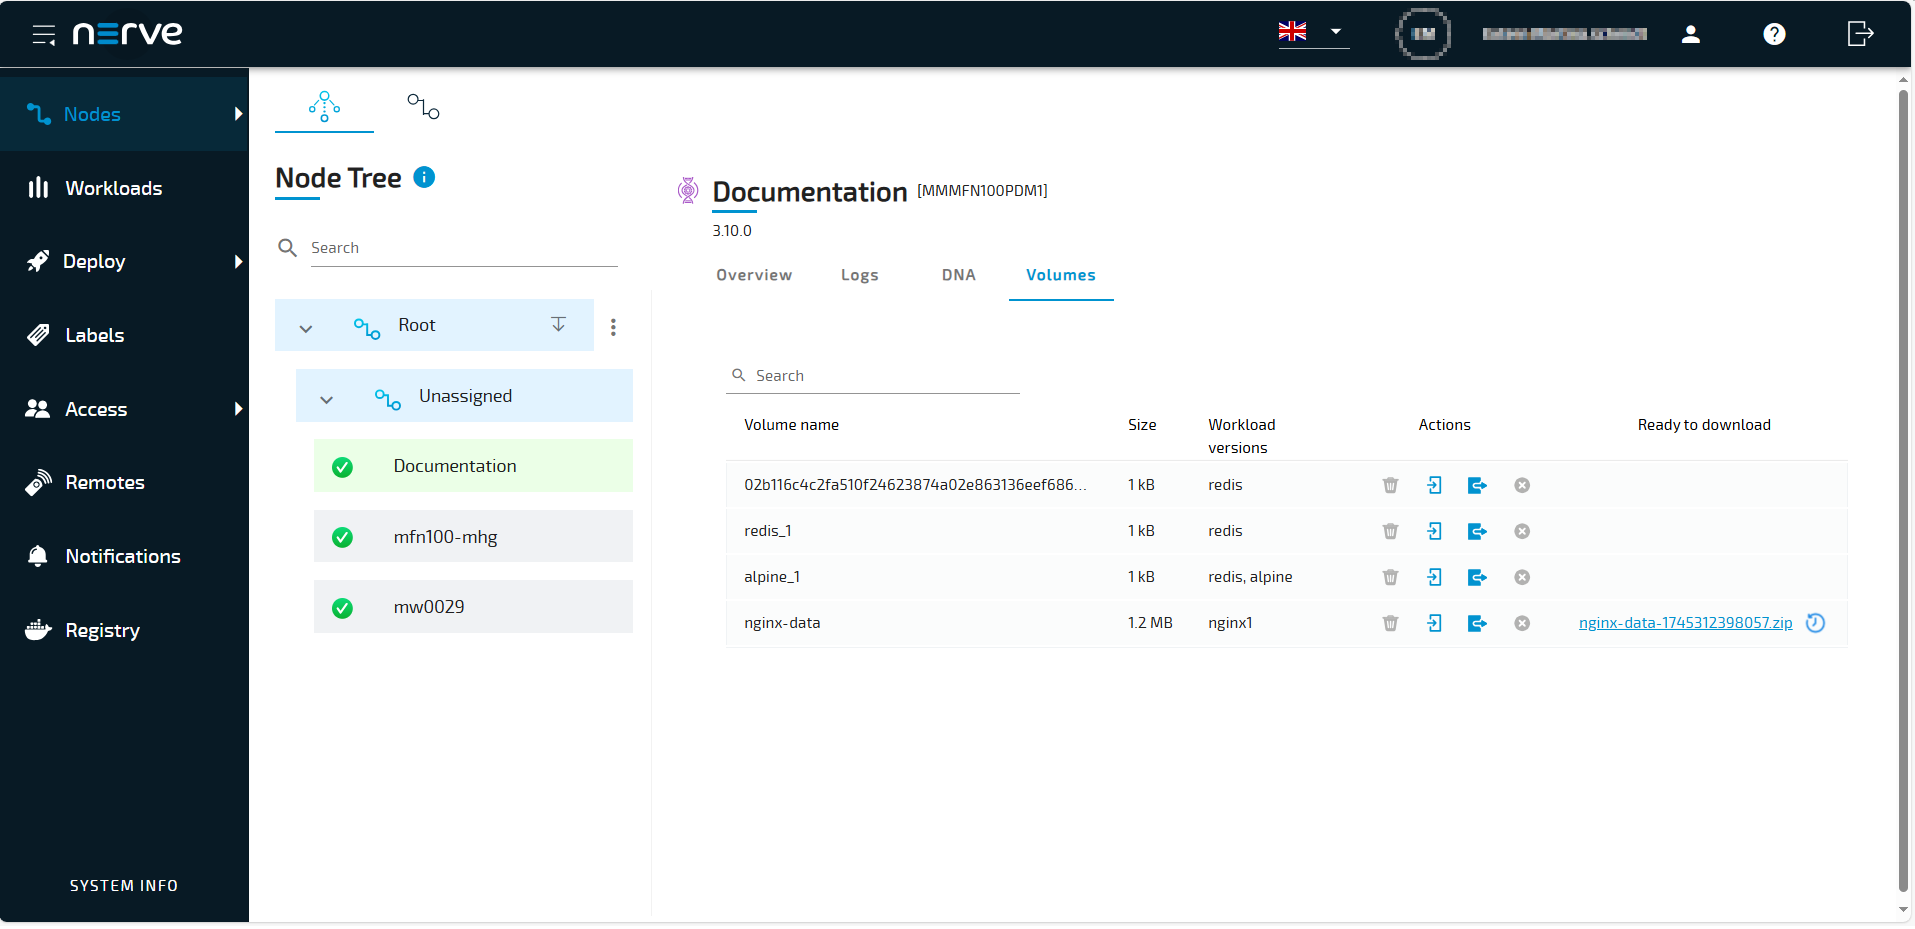
Full access to the Docker Volumes
Import and Export Docker volumes content on the node. Now with the full access to the Docker volumes the data management is simplified by allowing you to easily back up, restore, and migrate, ensuring that your critical information is always protected and readily available.
The Docker volumes tab and can be accessed from the newly created Volume Tab in the Node view. From here you can requested an export of the volume content and later download it from the Management System. You can also send content to be imported to the node from the same view. All Docker volumes present on the Node can be accessed this way.
The nodes Docker volumes can be also easily accessed from the Local UI interface.
Audit Logs on the Node
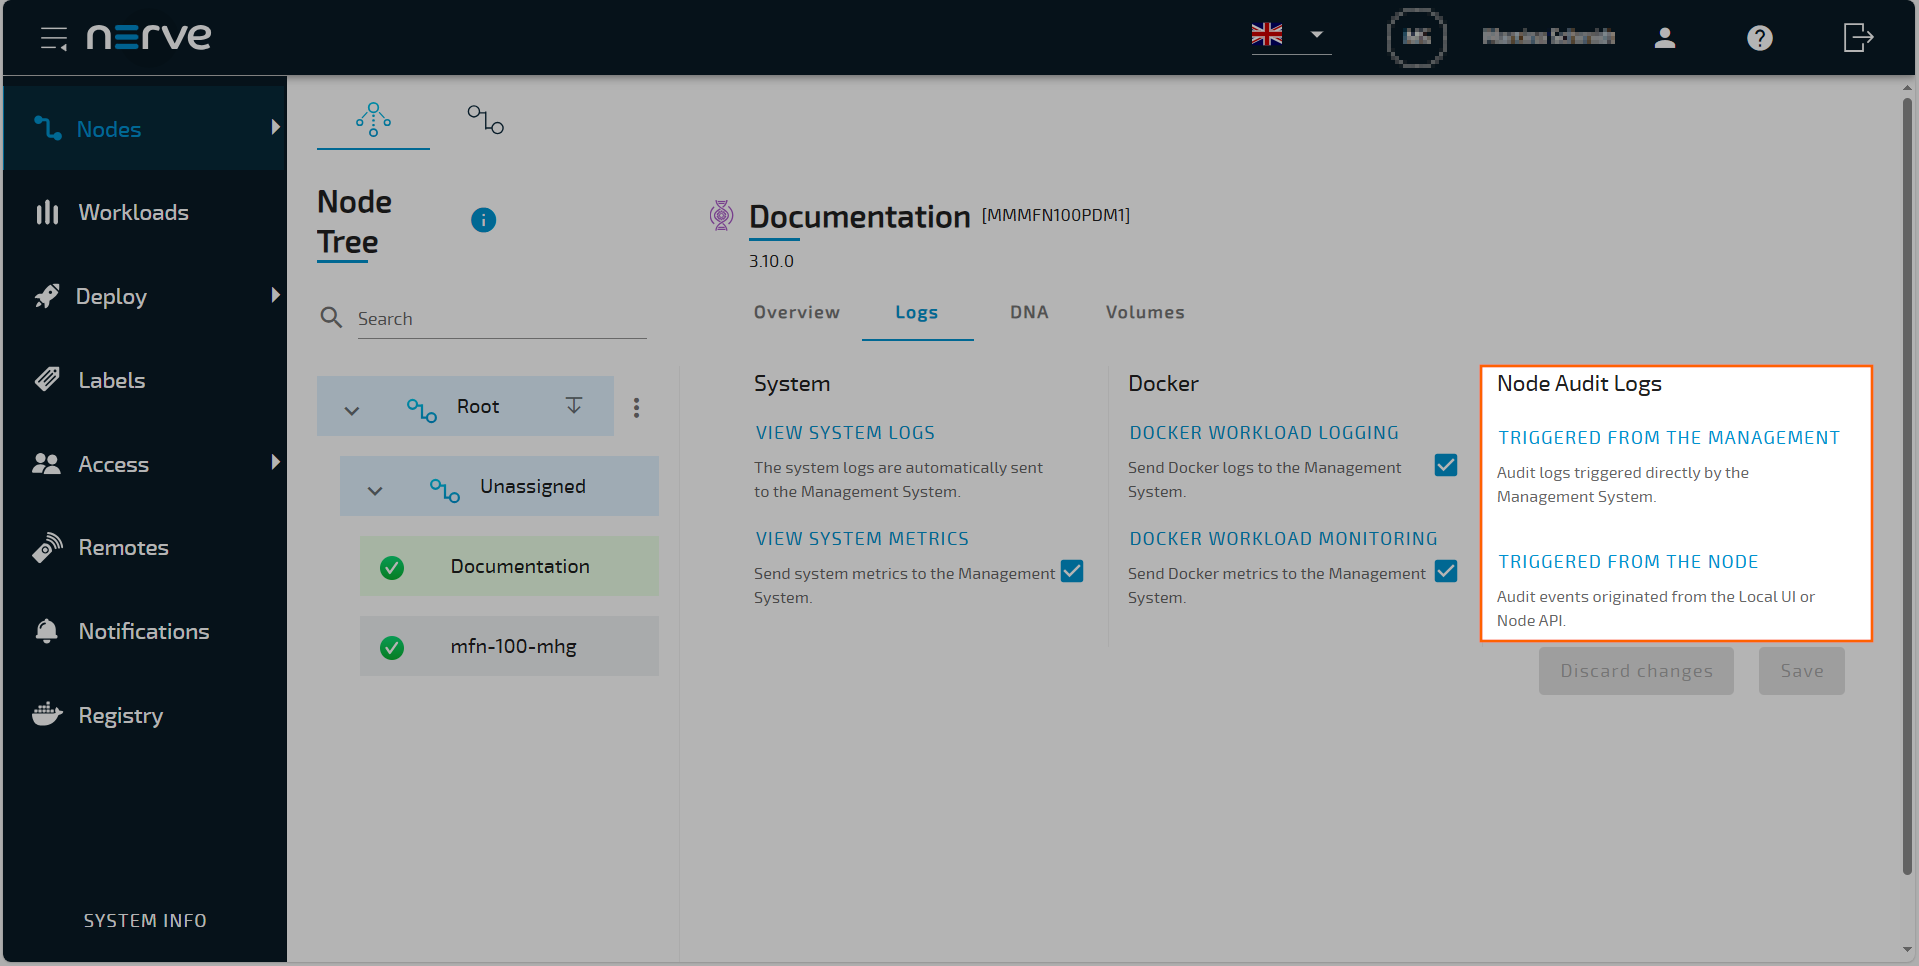
Enhanced Security and Transparency: Keep track of all activities on your nodes with detailed audit logs additionally to the already available Management System Audit logs. This feature boosts security by providing a clear record of actions, helping you monitor and manage your Node effectively. Audit logs are essential for maintaining security and compliance. They allow you to detect and respond to suspicious activities promptly, ensuring your system remains secure and trustworthy. Furthermore, having comprehensive audit logs aids in troubleshooting and forensic analysis, enabling you to quickly identify and resolve issues. Developers can use these logs to understand system behavior and ensure that their code is functioning as intended. See here for more details.
Audit logs for the custom Workloads
Also any workload on the Node can use the audit log mechanism implemented inside Nerve. This enables easy to achieve and quick compliance with security regulations for your application. See here for more details.

Block Incoming Communication on the WAN Port
To reduce the risk of attacks, you can block all incoming traffic on the WAN interface, which will limit the potential entry points for attackers and decrease the overall attack surface. See here for more details.
DNA Parameters in the Node page
Optimized Node Configuration: Easily configure DNA parameters directly from the Node DNA Tab. Fine-tuning the DNA Apply target configuration parameters enables you to optimize your nodes for specific tasks. This feature provides developers with greater control over node behavior, allowing for more tailored and efficient configurations. See here for more details.