Users
Note
This page describes the standard user management in the Nerve Management System. When LDAP authentication is active, user attributes and details are carried over from an LDAP server. Refer to LDAP for more information on LDAP synchronization.
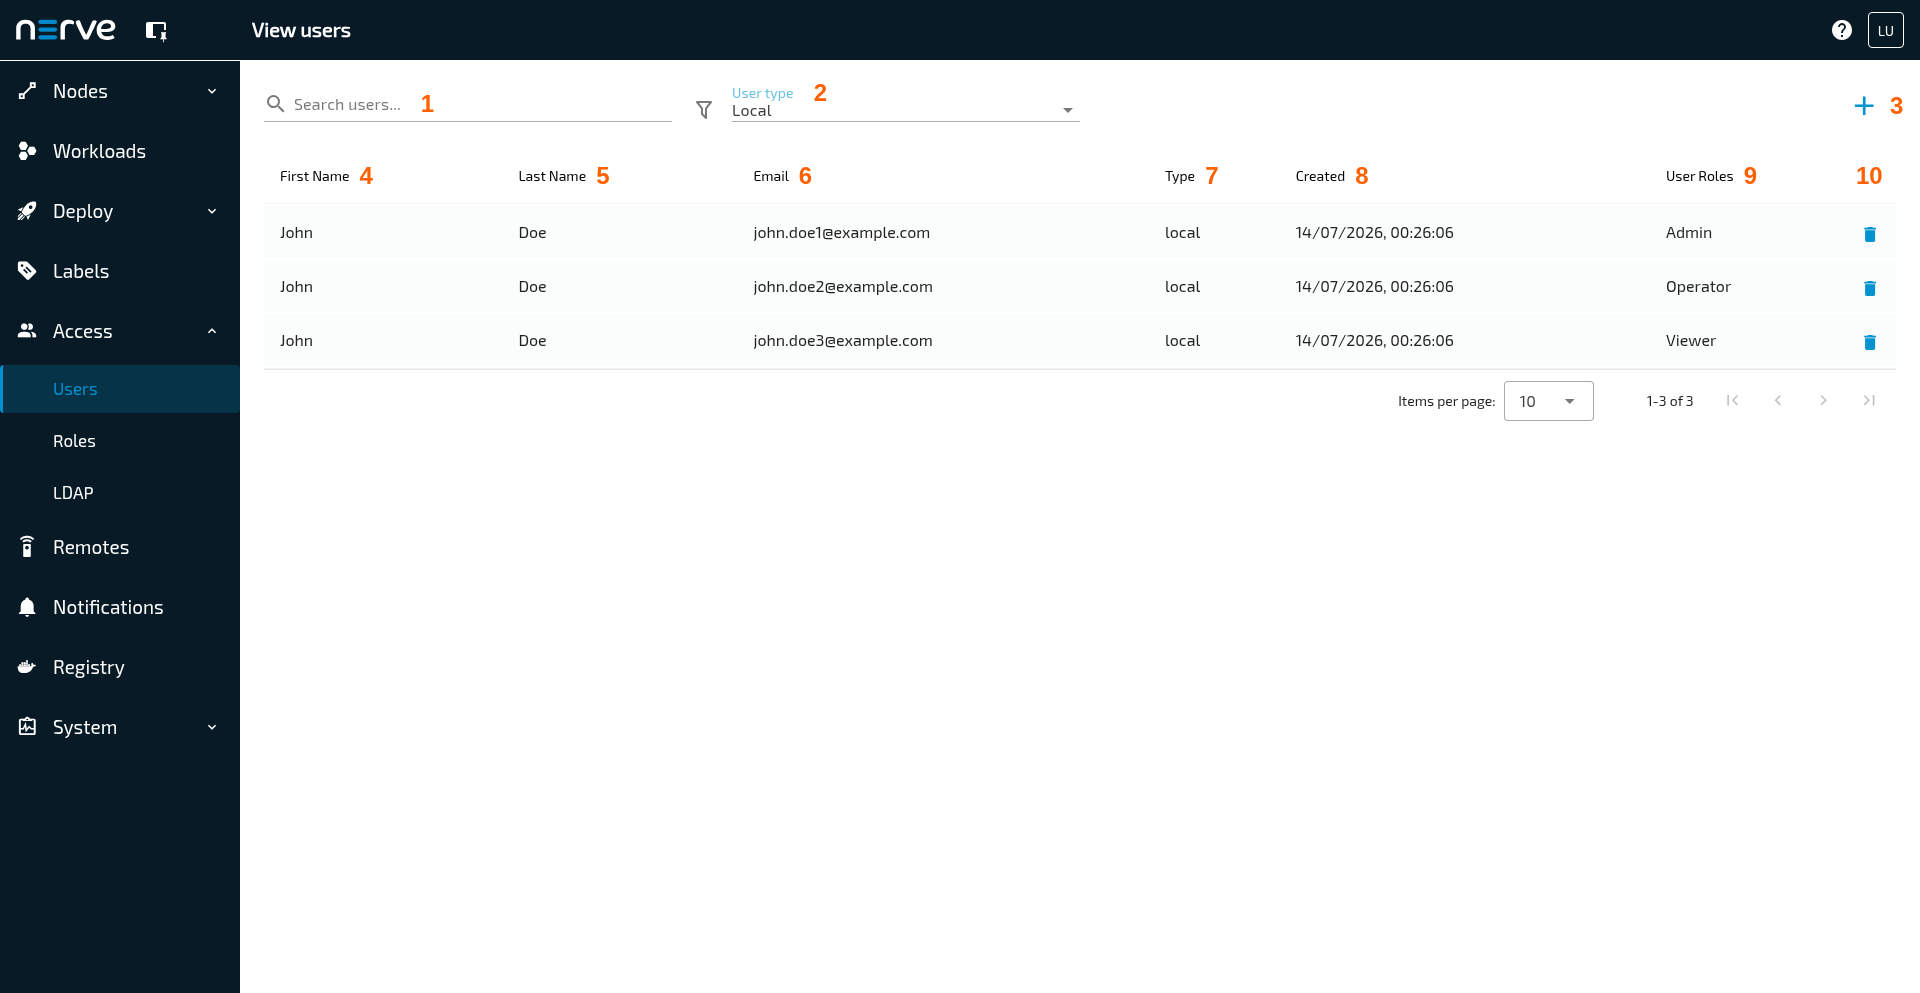
Select  Access > Users to open the menu View users. This menu offers a list of all registered users. Every user has their own user profile with details about the user. There is one default user that is created with the Management System. The credentials for this user can be found in the customer profile.
| Item | Description |
|---|---|
| Search users (1) | Use the search bar to filter the list of users. The columns First name, Last Name and Email are the targets of the search. |
| User type (2) | Filter the list of users by authentication method. The target of the filter is the Type column and the options are Local, Ldap and All. |
| Add User (3) | Select this icon  to add a new user. Note that new users cannot be added when LDAP synchronization is active. |
| First Name (4) | This is the first name of the registered user. It is displayed in the upper-right corner when the user is logged in. |
| Last Name (5) | This is the last name of the registered user. It is displayed in the upper-right corner when the user is logged in. |
| Email (6) | This is the e-mail address of the user. It is used as the username for logging in to the Management System in case of local authentication. When LDAP authentication is active, the username attribute that is carried over from LDAP synchronization is used to log in. The system also uses this e-mail for sending the activation link and the instructions on how to reset the login password. Note that passwords cannot be changed or reset if LDAP authentication is active. |
| Type (7) | This column shows the type of the user according to the authentication method used:
|
| Created (8) | This is the date and time stamp the user was created. The date format is DD/MM/YYYY, hh:mm:ss. |
| User Roles (9) | The roles that are assigned to a user are displayed in this column. |
| Action (10) | This column contains icons representing different actions. Here, it contains a delete icon for deleting users. |
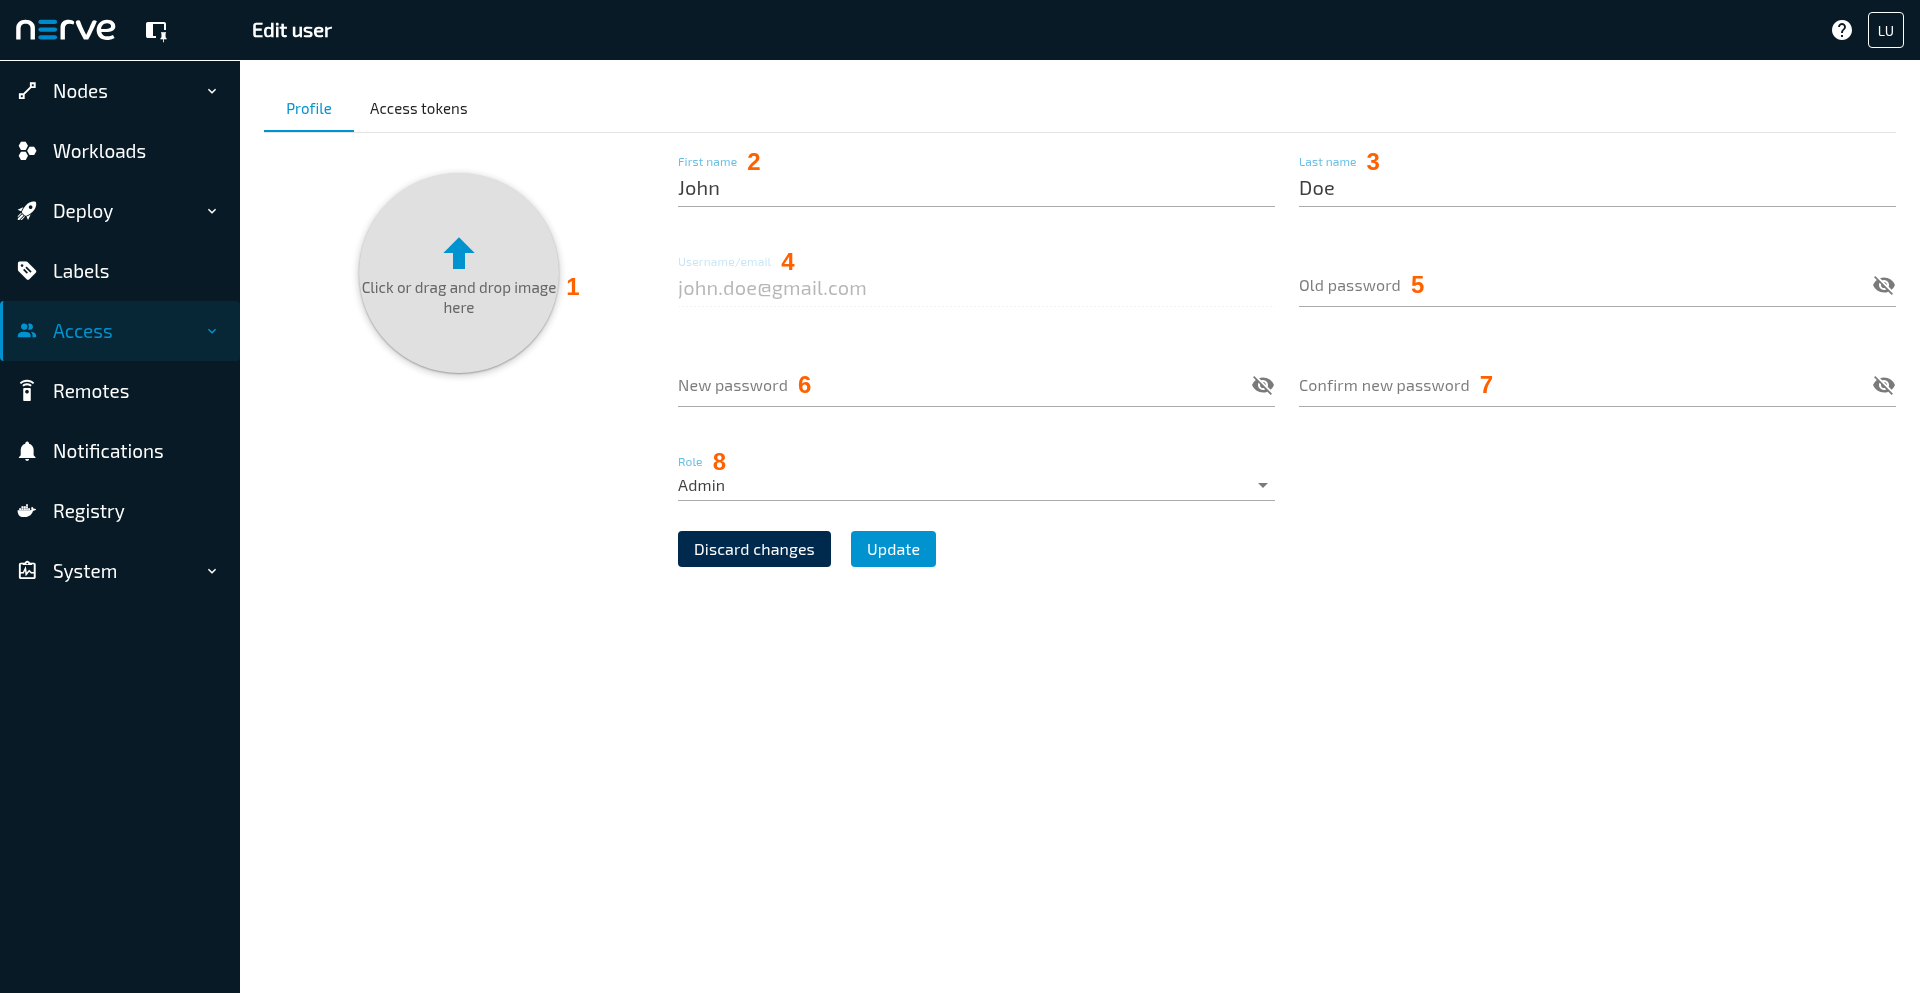
Selecting any of the users leads to their user profile. An admin can edit the details of any user profile if local authentication is active. This includes Profile Picture, First name, Last name, Language and Role. The e-mail address of a user cannot be changed. The password for an account can only be changed by the respective (currently logged in) user. Note that users cannot be edited when LDAP authentication is active.
| Item | Description |
|---|---|
| Profile picture (1) | Select this or drag and drop an image into the gray circle to upload a profile picture for the user. It is displayed in the upper-right corner when the user is logged in. Note that a profile picture cannot be set for users coming from LDAP synchronization. |
| First name (2) | This is the first name of the registered user. It is displayed in the upper-right corner when the user is logged in. |
| Last name (3) | This is the last name of the registered user. It is displayed in the upper-right corner when the user is logged in. |
| Username/email (4) | This is the e-mail address of the user. It is used as the username for logging in to the Management System in case of local authentication. When LDAP authentication is active, the username attribute that is carried over from LDAP synchronization is used to log in. The system also uses this e-mail for sending the activation link and the instructions on how to reset the login password. Note that passwords cannot be changed or reset if LDAP authentication is active. |
| Old password (5) | Enter the current password here when changing the password. This can only be done by the active user when local authentication is active. |
| New Password (6) | Enter the new password here when changing the password. This can only be done by the currently logged in user when local authentication is active. |
| Confirm new password (7) | Enter the new password again when changing the password. This can only be done by the currently logged in user when local authentication is active. |
| Role (8) | This defines the role of the user. Refer to Roles and Permissions for more information. |
Adding a new user
Admin users or users having the UI_USER:CREATE permission assigned in a role need to create new users before these can set a password and log in to the Management System. Note that new users cannot be added when LDAP authentication is active.
- Select Access > Users in the menu bar on the left side.
-
Select the
Add new user symbol in the upper-right corner.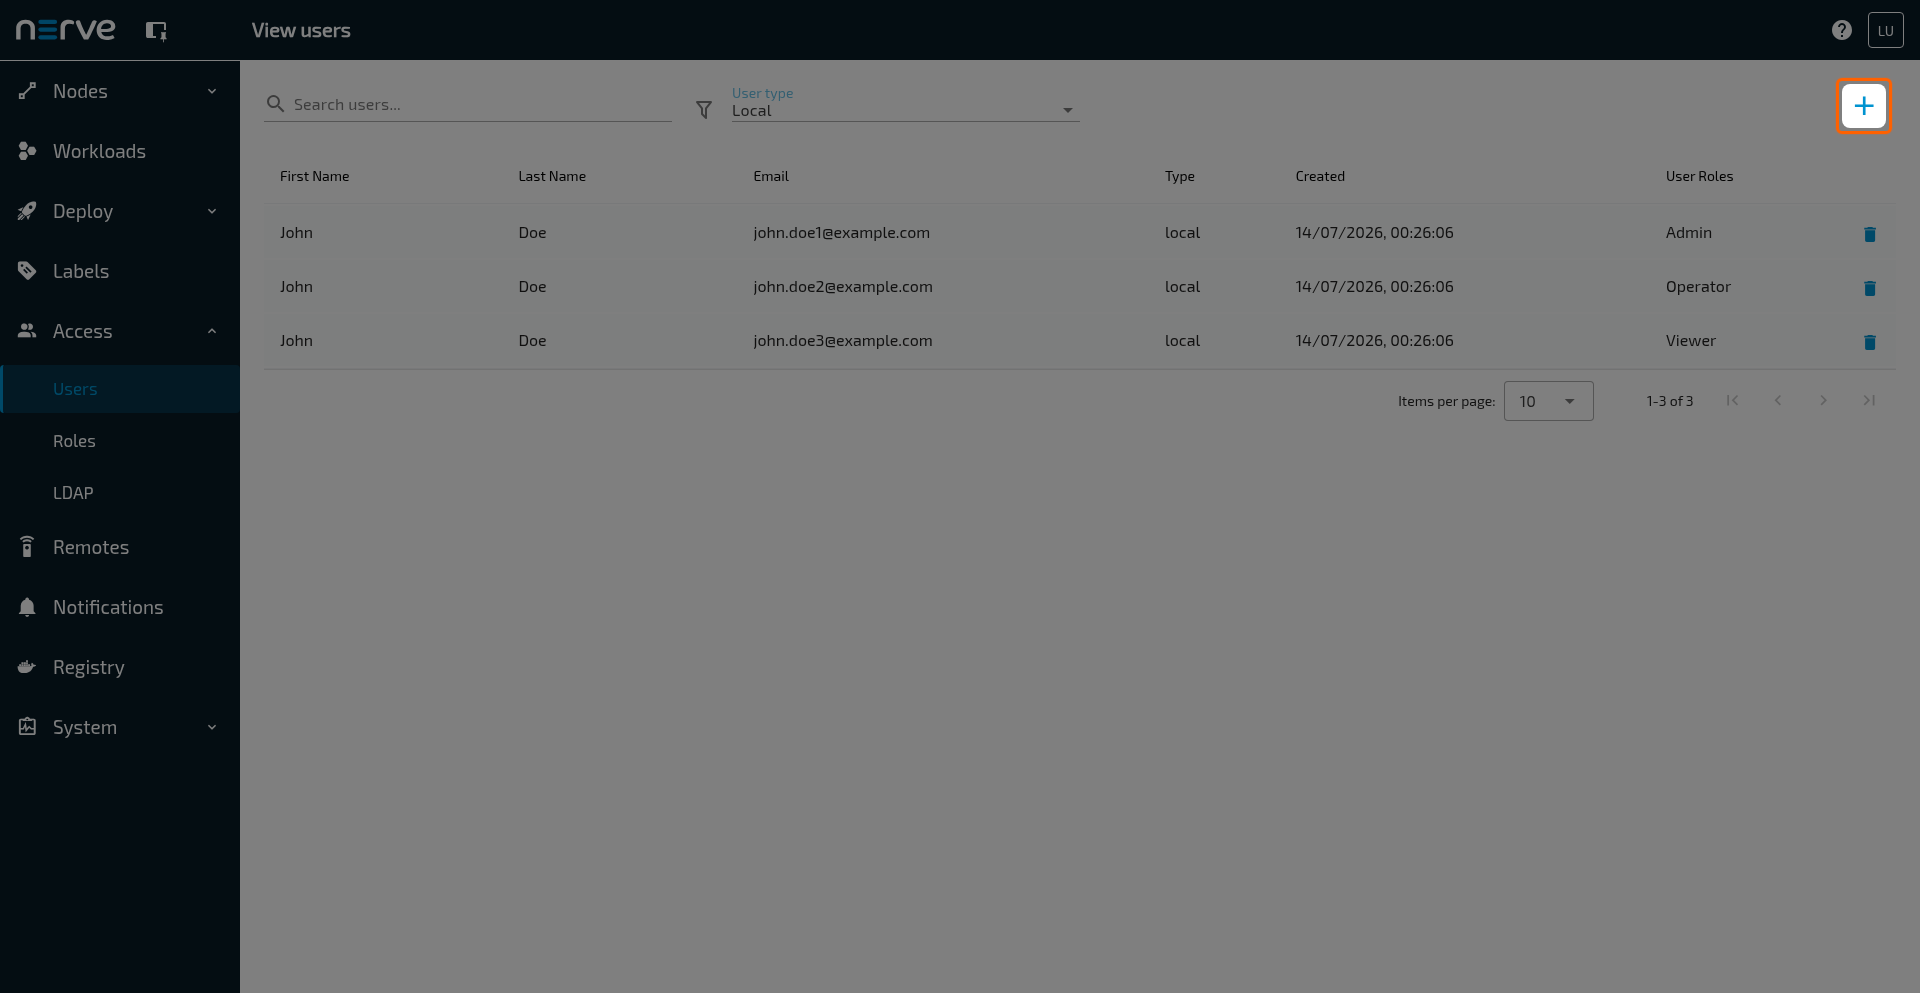
-
Enter the required information: First name, Last name and Username/email.
- Upload a Profile Picture (optional).
- Select one or more roles from the drop-down menu under Role. Refer to Roles and Permissions for more information.
- Select Save to create the user.
The user must activate the account using a link sent to their e-mail. The activation is automatically sent to the specified e-mail address after the account is created.
Activating a user
Newly created users are sent an activation link to the specified e-mail address when the user was created. Following the link, the user will need to set their password in order to be activated and to be able to log in to the Management System.
- Follow the activation link that was sent to the specified e-mail address.
-
Enter the new password to use for Management System access under New Password and Confirm Password.

Note
The password must contain at least one uppercase letter, one lowercase letter and one number. It must be at least 8 characters. These are the default configurations for the password policy. They can be adjusted if necessary. For more information refer to Section Configuration in Security hardening guidelines.
-
Select SAVE NEW PASSWORD.
The new user is now activated and can log in immediately with their e-mail address and the password they have defined.
Resetting credentials
In case a user does not remember their password, a request to reset the credentials can be sent from the login page of the Management System.
Note that passwords cannot be reset if LDAP authentication is active.
- Enter the URL of the Management System in a browser.
-
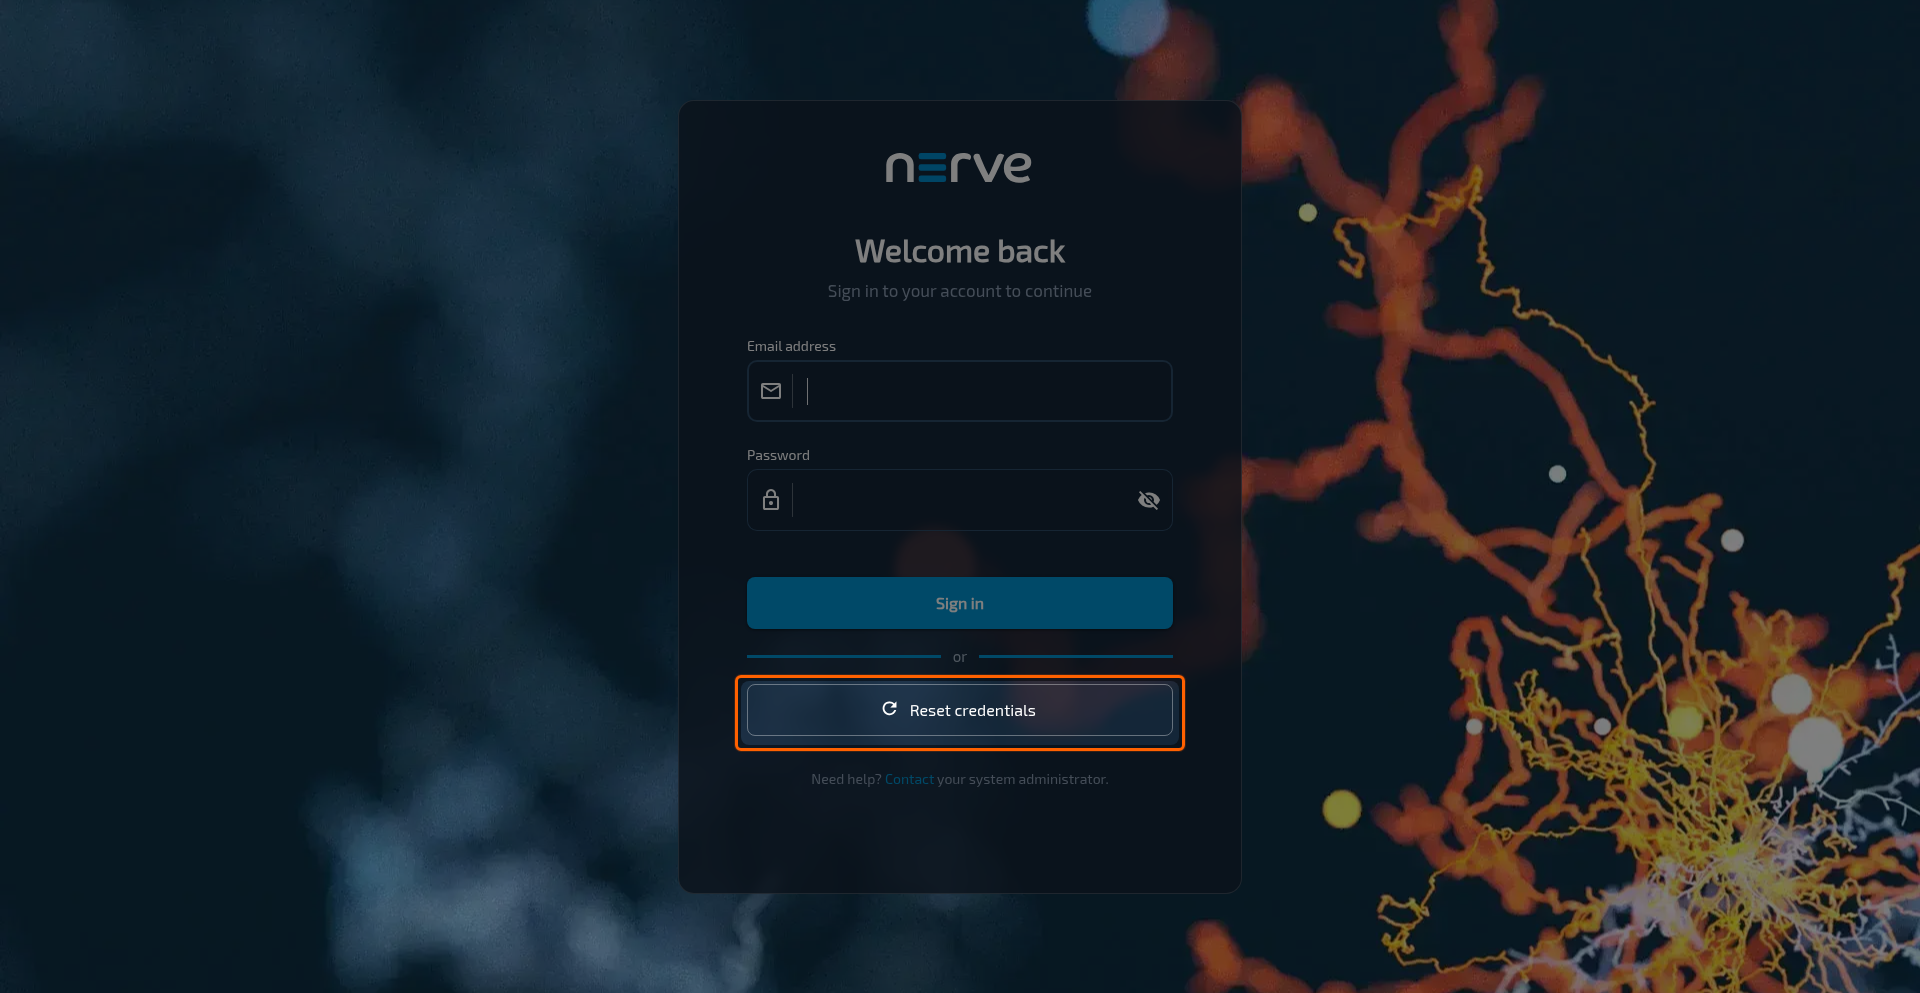
Select
 Reset credentials.
-
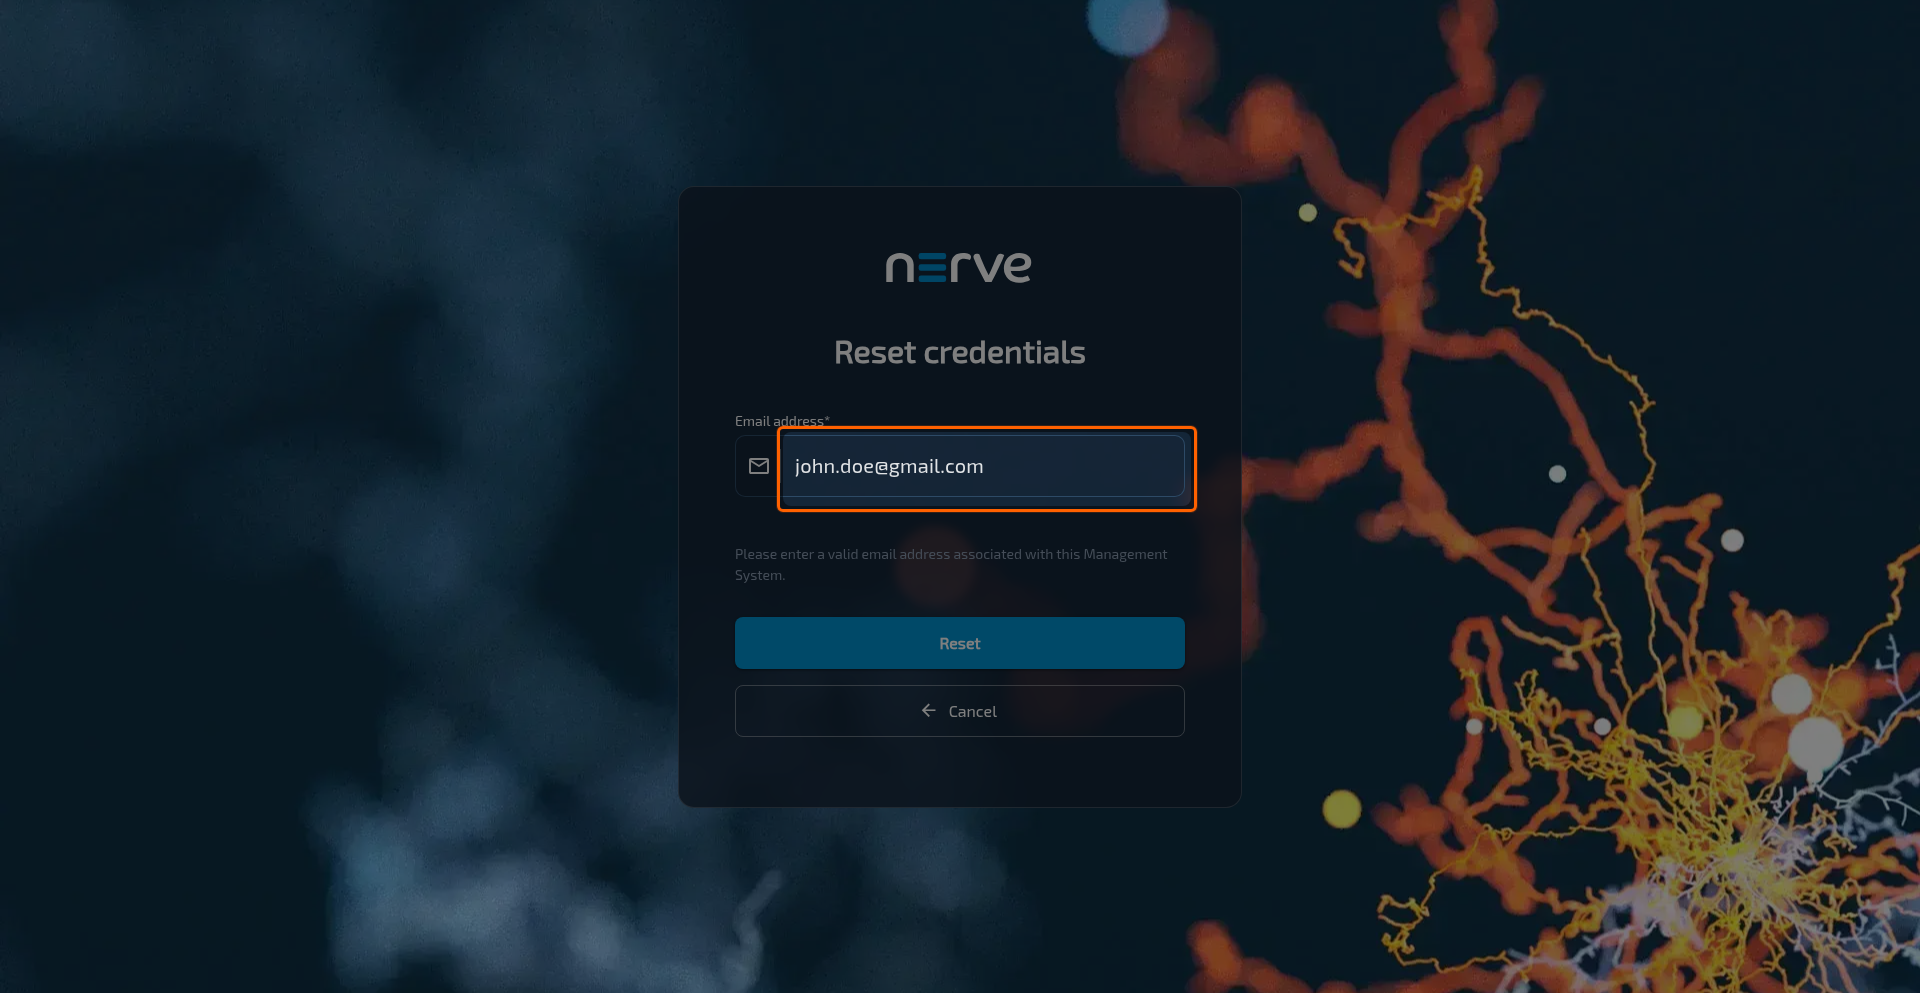
Enter the e-mail address of the account that needs to reset the password.
-
Select Reset. An e-mail with instructions is sent to the e-mail address of the account.
- Follow the link from the e-mail to reset the password.
-
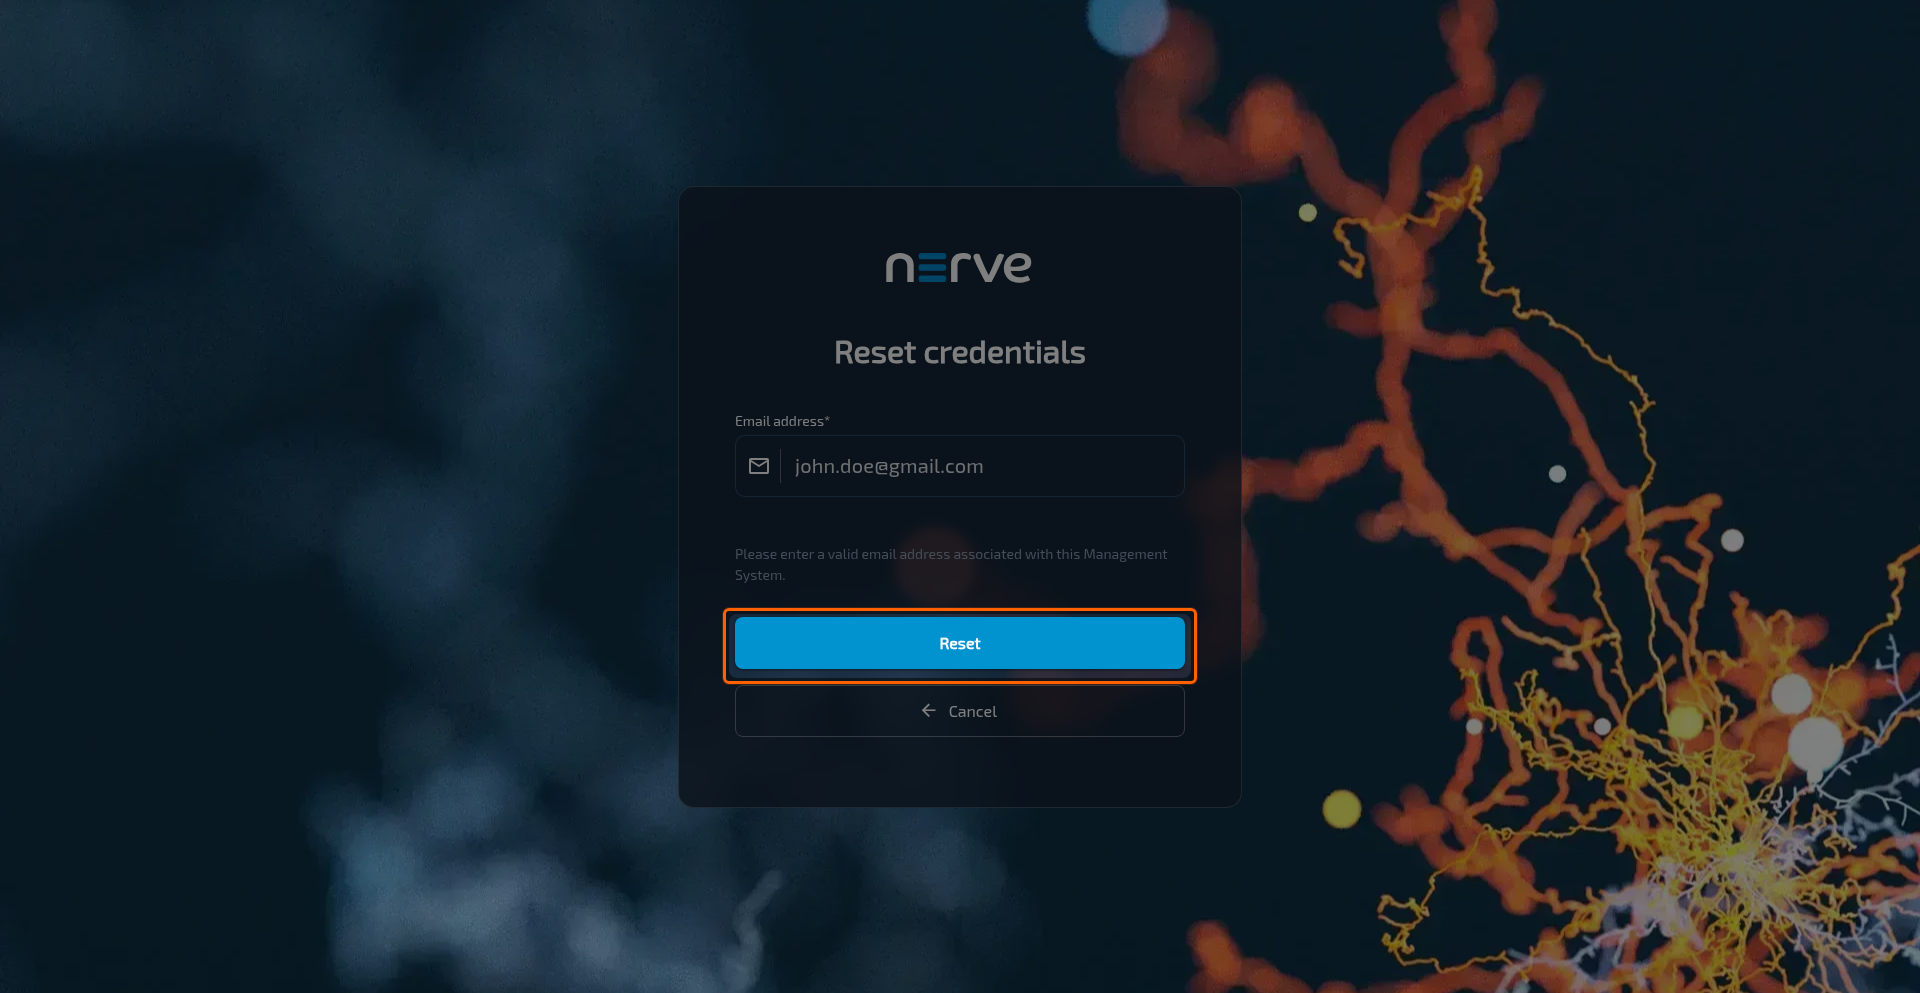
Enter the new password for Management System access under New Password and Confirm Password.
-
Select Reset to save the new password.
The password has been changed and the user can log in immediately with their e-mail address and the new password.
Deleting a user
Admin users or users having the UI_USER:DELETE permission assigned in a role can delete any user that is registered in the Management System.
Note that users cannot be deleted when LDAP authentication is active.
- Select Access > Users in the menu on the left side.
-
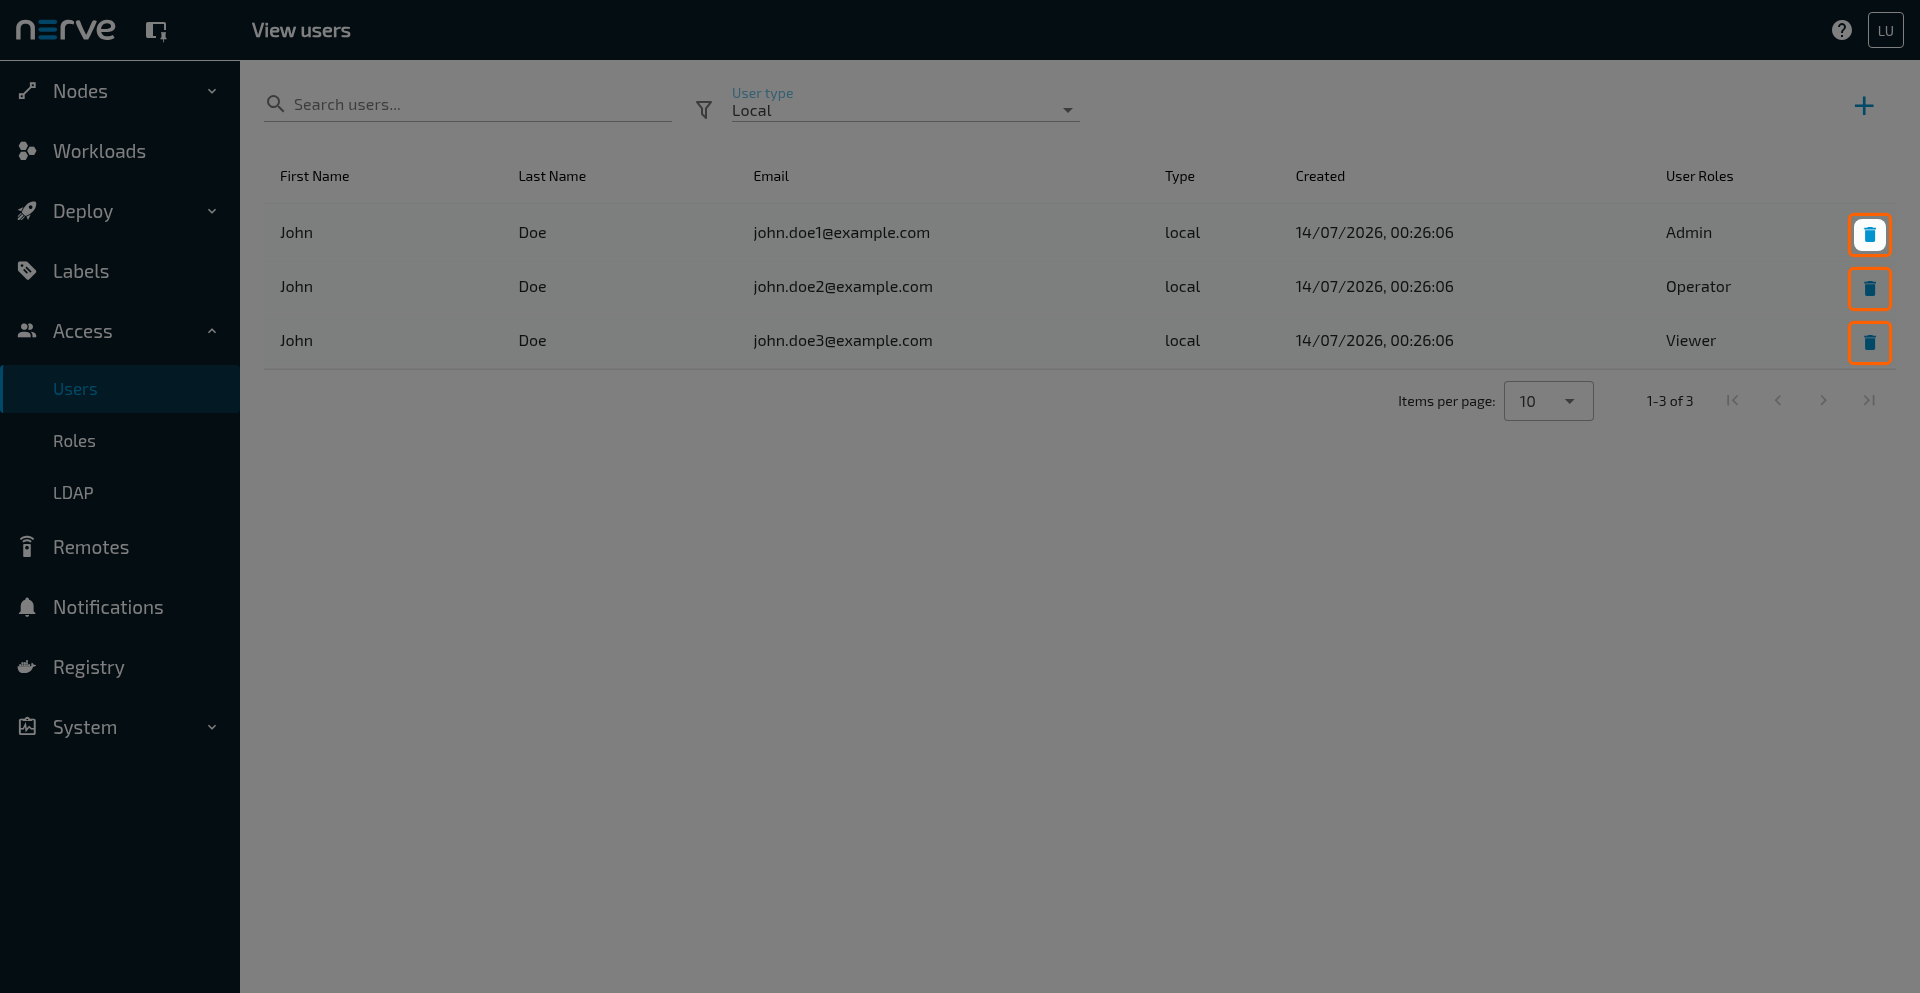
Choose the user to delete.
-
Select the
 Delete icon in the Action column.
- Select Yes to confirm the deletion of the user.
Edit user settings
To edit your user setting proceed as follows:
- Select Access > Users in the menu on the left side.
- Select your user in the list.
-
Modify your user settings as needed.
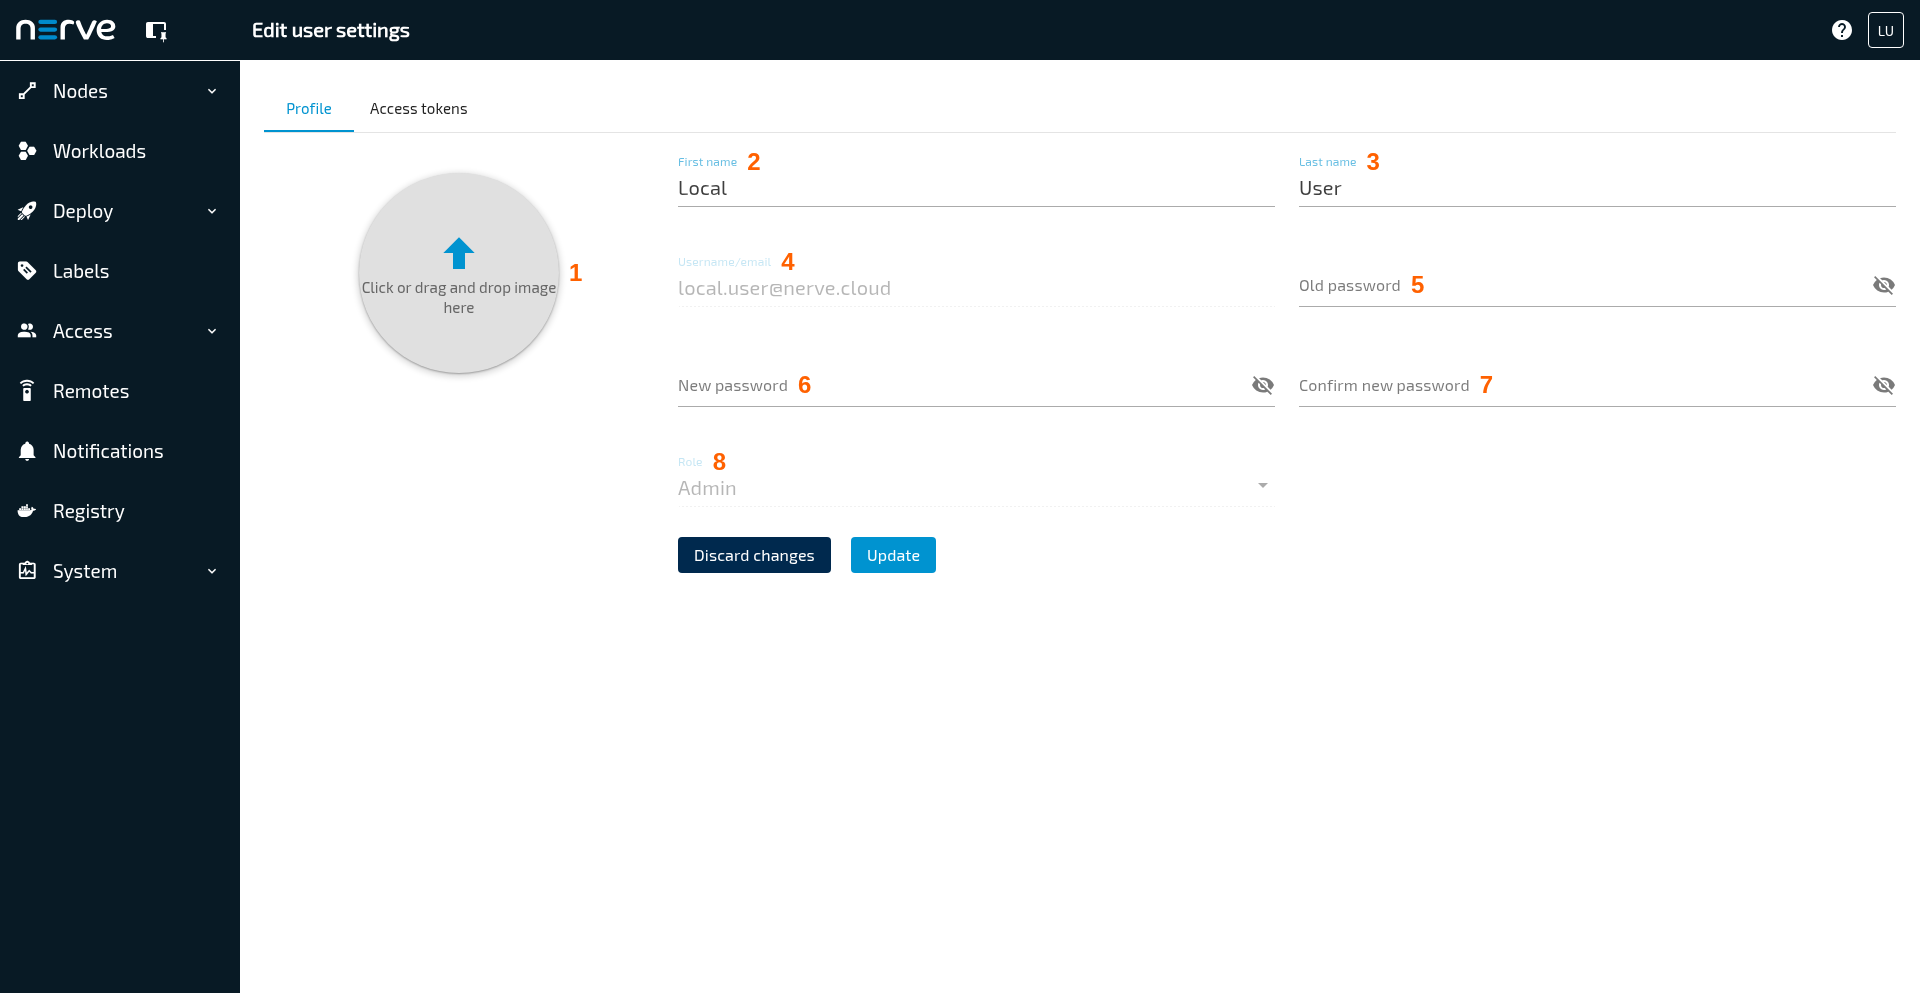
Item Description Upload Profile picture (1) Upload a profile picture (optional). First name (2), Last name (3) Edit your first and last name here. Username/email (4) Your email address is displayed here. Old password (5), New password (6), Confirm new password (7) To change your password, enter your current password in Old password, then enter your New password and re-enter it in the Confirm new password field to verify it.
Your password must contain at least 1 uppercase letter, 1 lowercase letter, and 1 number, and be between 8 and 100 characters long.Role (8) Your assigned role is displayed here. Refer to Roles and Permissions for more information. -
Select Save to confirm the changes.
Manage access tokens
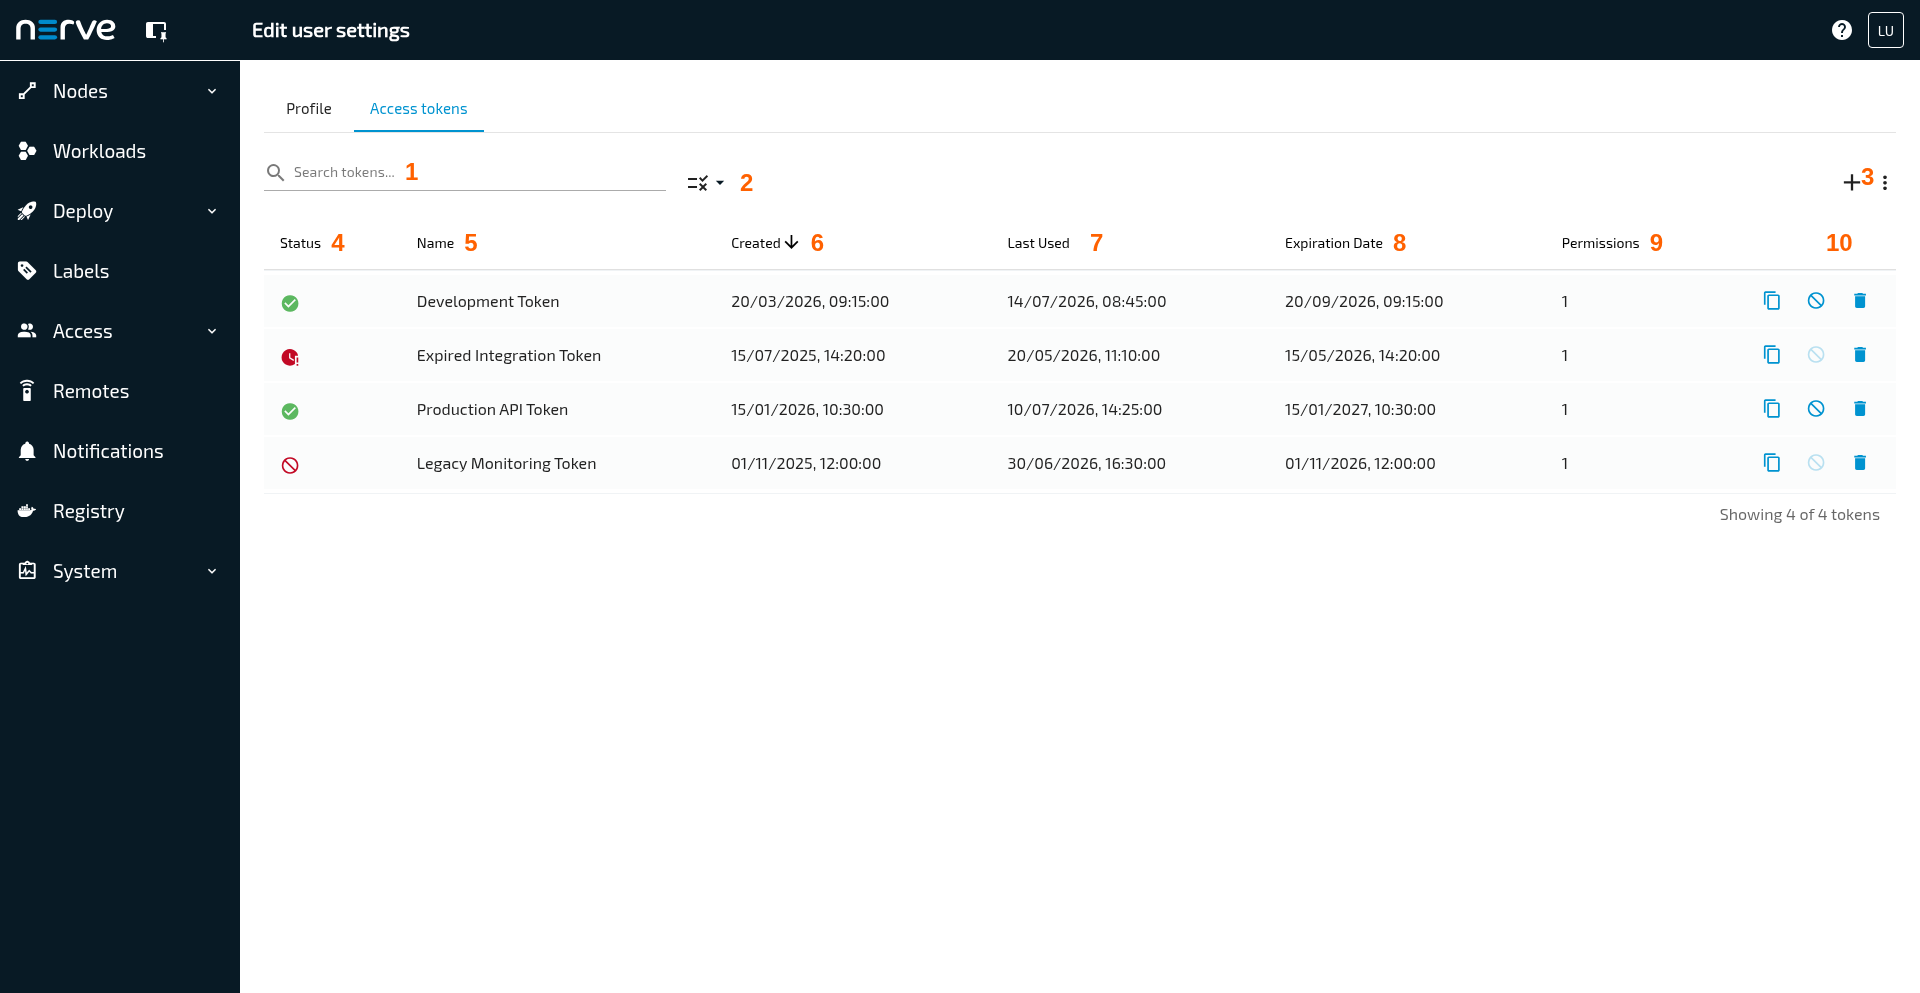
Personal access tokens provide a secure way to authenticate requests to the Management System (MS) API without requiring a username, password, or MFA challenge. This makes them ideal for automated scripts, integrations, and CI/CD pipelines. To improve security and control, access tokens can be managed independently, revoked at any time, and configured with expiration dates.
Select the User icon >  Settings > Access tokens to display the list of access tokens.
| Item | Description |
|---|---|
| Search tokens (1) | Use the Search token field to find matches in the Name (5) column. |
| Filter (2) | Use the  Status icon to filter access tokens by their state. A blue small number  next to a filter icon indicates the number of selected filters. Select the Status icon, then select  Reset to clear the selected filter. |
| Add access token (3) | Select Add access token to crate a new access token. |
| Status (4) | This is the status of the access token. The icon provide a quick visual overview of the current state of the access token. Hover over an icon to view more detailed information about the corresponding status.  Active  Revoked  Expired |
| Name (5) | The name of the access token. |
| Created (6) | This is the date when the access token was created in the format DD/MM/YYYY, hh:mm:ss. |
| Last Used (7) | This is the date when the access token was last used in the format DD/MM/YYYY, hh:mm:ss. |
| Expiration Date (8) | The date when the access token expires in the format DD/MM/YYYY, hh:mm:ss. |
| Permissions (9) | The number of permissions the access token has. |
| Actions (10) | This column contains icons representing different actions. This column contains icons representing available actions for the access token:
|
While most management tasks for access tokens can be performed through the user interface, the following advanced operations are available only through the Management System API. Access to these operations is restricted and requires the corresponding permissions. For more information refer to Roles and Permissions.
- Revoke or delete another users' access token.
- Re-enable your own access token.
- Re-enable another users' access token.
For more information how to use the Nerve API, refer to the Nerve API documentation.
For security reasons, personal access tokens provide restricted access to the Management System API. Certain endpoints are intentionally excluded and reject requests authenticated using a Bearer token.
The following categories of endpoints are not accessible using a personal access token:
- User management: Endpoints for creating, updating, deleting, and managing user profiles.
- Access token management: Endpoints for creating, modifying, revoking, or re-enabling access tokens.
- RBAC: Endpoints for managing roles and permissions.
- MFA: Endpoints related to multi-factor authentication configuration.
- LDAP: Endpoints for LDAP integration and configuration.
Add access token
To create a personal access token proceed as follows:
- Select the User icon in the header.
- Select Settings > Access tokens.
-
Select
Add access token in the upper-right corner.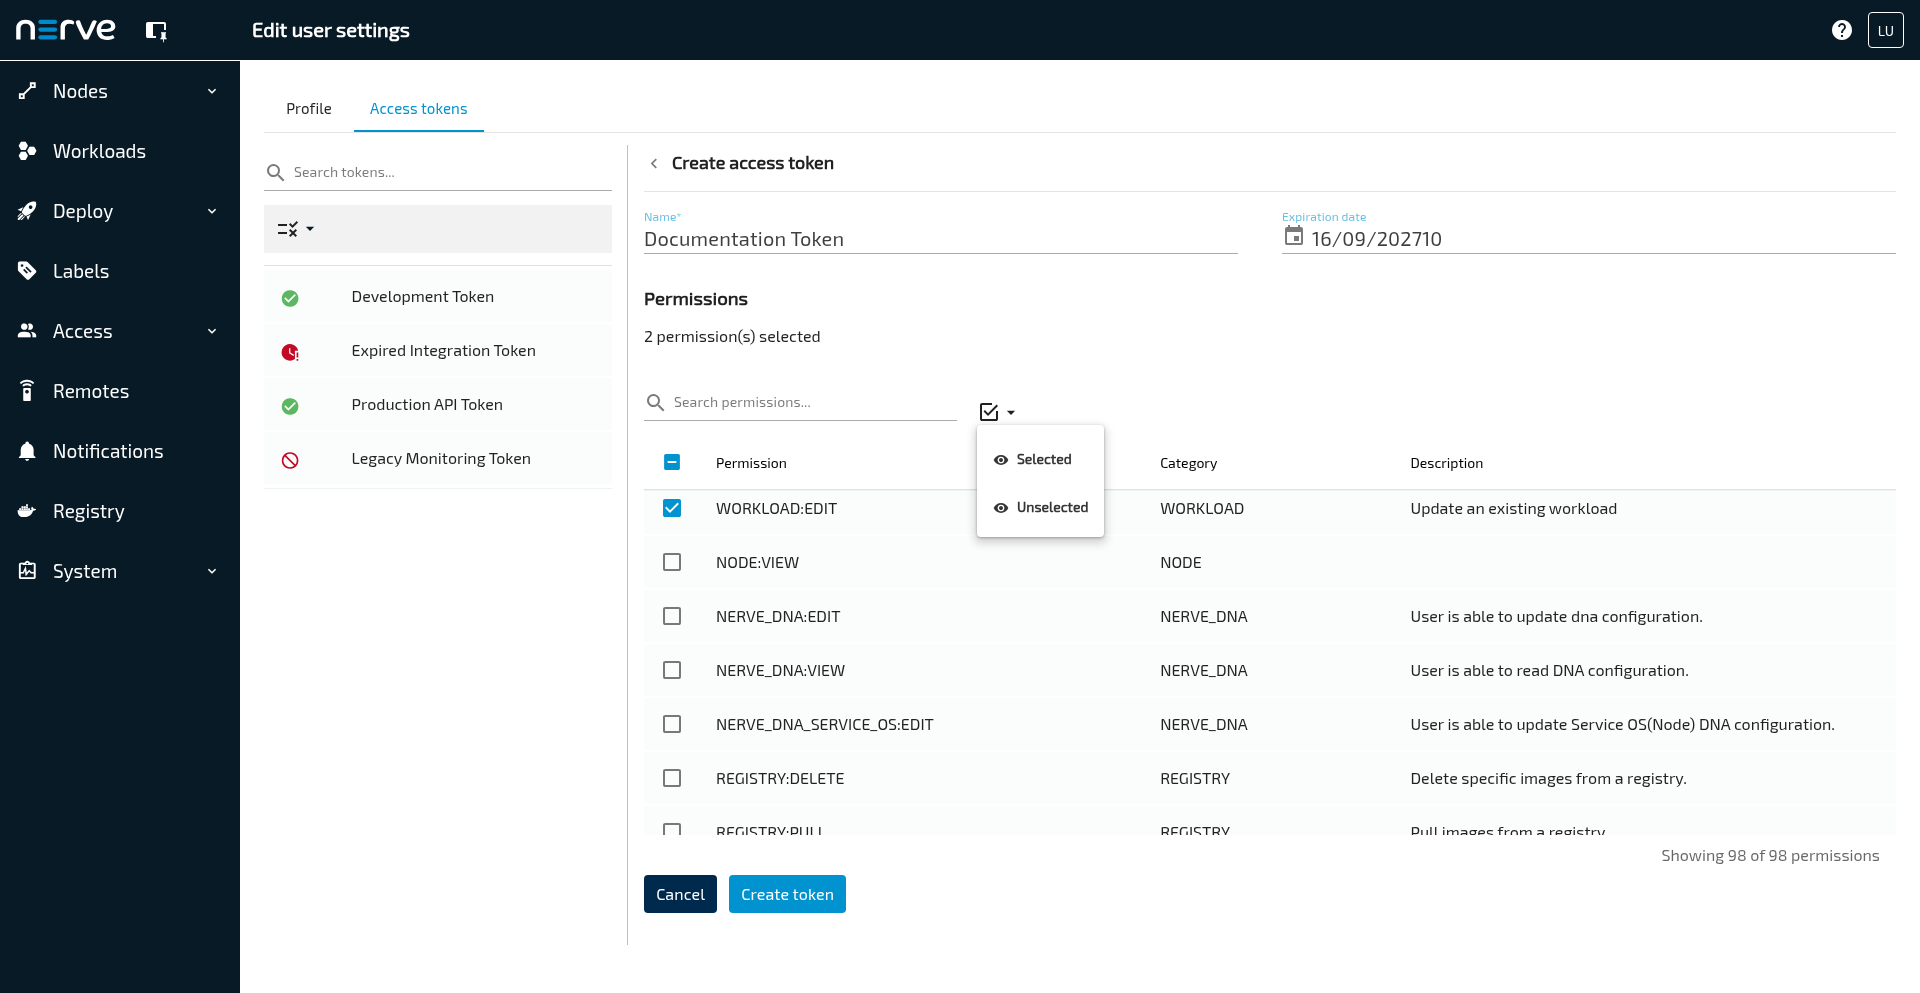
-
Enter the Name for the access token.
- Select an Expiration date.
An access token can be valid for a minimum of one day and a maximum of one year. -
Select the applicable permissions.
Use the Search permission field and the Filter by selection icon to narrow down the list of available permissions.
For mor information about permissions refer to Roles and permissions.Note
You can only assign permissions that are assigned to your role.
-
Select Create token.
-
Select the
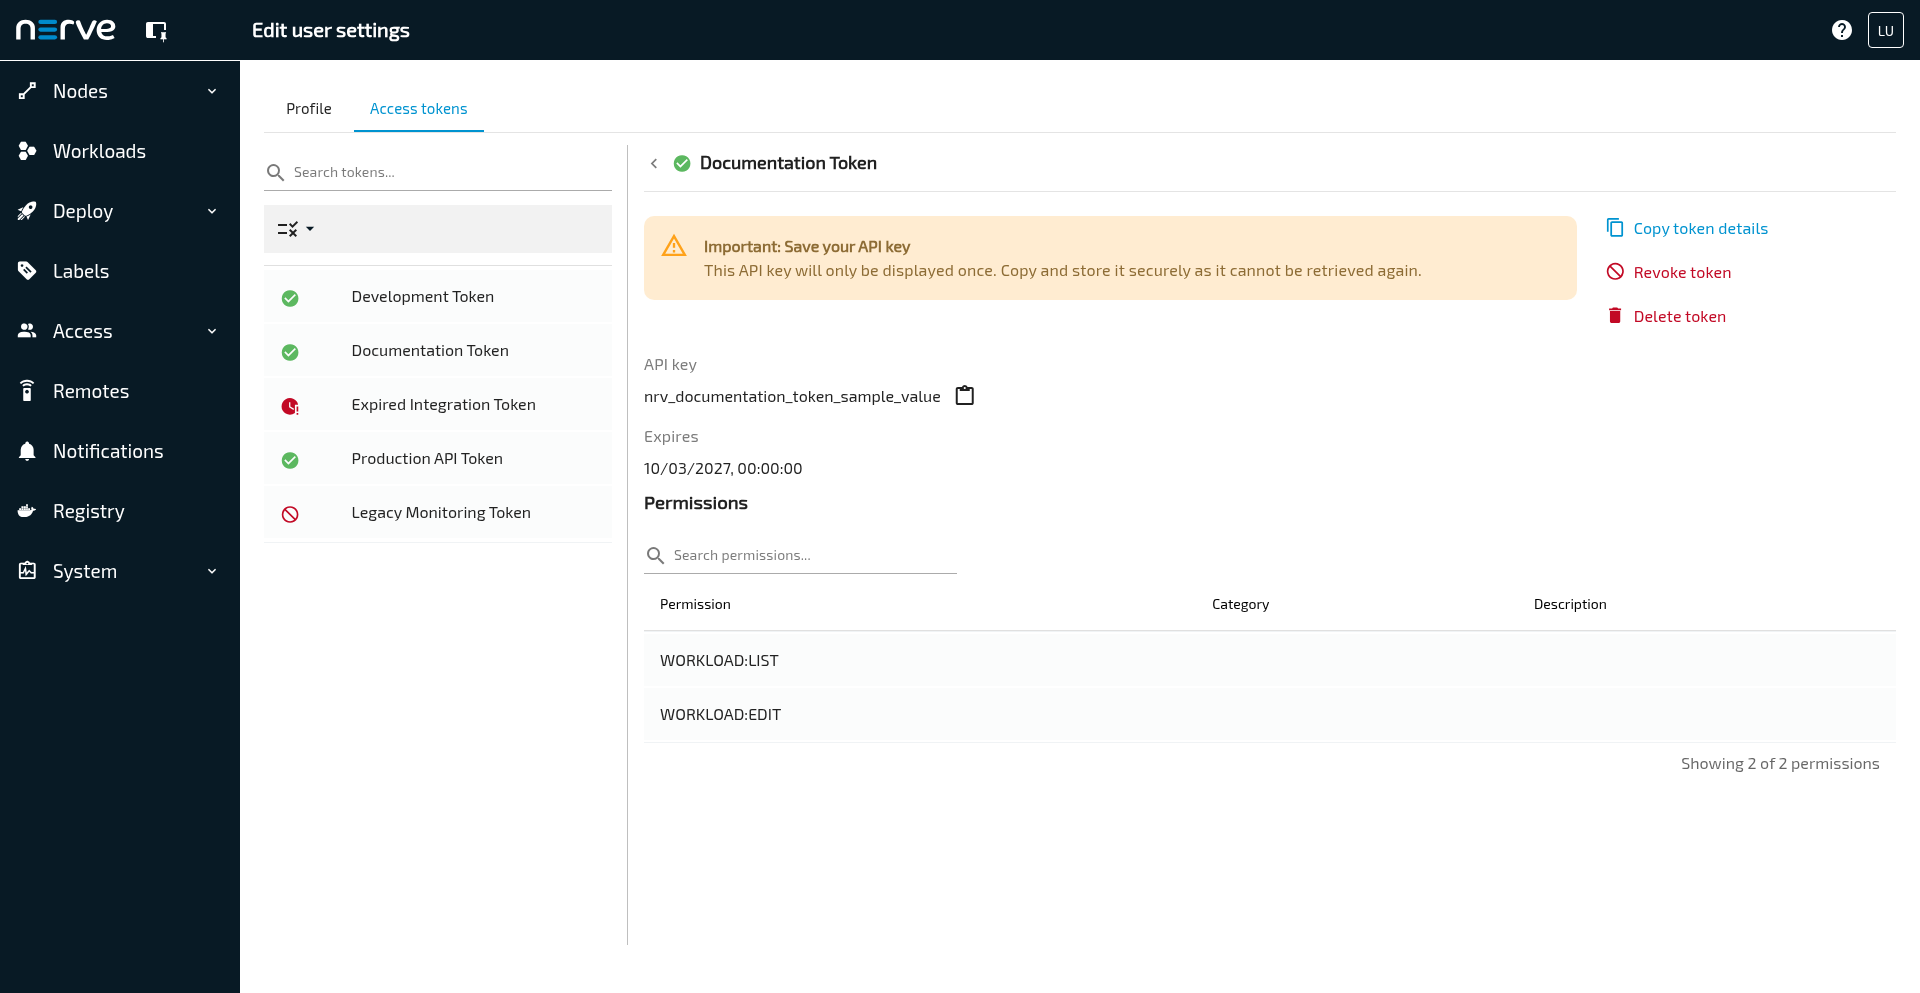
 Copy to clipboard icon to copy the API key to your clipboard, as it will only be displayed once.
Note
Store the API key in a secure location and ensure that no unauthorized person has access to it. For security reasons, the API key cannot be viewed again after it has been created.
Copy an access token
You can duplicate personal access token to create a new one with the same configuration.
- Select the User icon in the header.
- Select Settings > Access tokens.
- Locate the access token that you want to duplicate.
-
Start the copy action by using one of the following methods:
- Select the Copy icon
 for the access token in the list.
OR
- Select the access token in the list and then select Copy token details.
- Select the Copy icon
-
The Create access token page opens with the selected access token's configuration prefilled. The Name field contains the original token name with
(1)appended. All other data and settings are copied from the selected access token. Refer to Add access token for the next steps.
Revoke an access token
You can revoke personal access tokens when they are no longer needed or may be compromised.
- Select the User icon in the header.
- Select Settings > Access tokens.
- Locate the access token that you want to revoke.
- Start the revoke action by using one of the following methods:
- Select the Revoke icon for the access token in the list.
OR
- Select the access token in the list and then select Revoke token.
- Select the Revoke icon
- Select Yes to confirm the revocation of the access token.
Delete an access token
You can delete personal access tokens that are no longer needed. Deleted tokens can no longer be used to authenticate Management System API requests.
- Select the User icon in the header.
- Select Settings > Access tokens.
- Locate the access token that you want to delete.
-
Start the delete action by using one of the following methods:
- Select the Delete icon for the access token in the list.
OR
- Select the access token in the list and then select Delete token.
- Select the Delete icon
-
Select Yes to confirm the deletion of the access token.