OPC UA Server security
The OPC UA Server security example demonstrates an OPC UA Server configuration with:
- all available security end-points configured (security mode and security policy), including unsecured end-points
- two users added (logins)
- certificates added for security connection
- application URI set
- the certificate of an external OPC UA client added to the trust list.
To try this example, an OPC UA Server and an OPC UA client are needed. This example uses UaExpert. The OPC UA Server temperature sensor simulation is deployed in form of a Docker workload next.
Provisioning and deploying an OPC UA Server at the node
First, the temperature sensor simulation OPC UA Server must be deployed to the node as a Docker workload. Download the Data Services OPC UA demo sensor found under Example Applications from the Nerve Software Center. This is the Docker image that is required for provisioning the demo sensor as a Docker workload.
- Log in to the Management System. Make sure that the user has the permissions to access the Data Services.
-
Provision a Docker workload by following Provisioning a Docker workload. This example uses TTTech OPC UA Server - demoSensor as the workload name. Use the following workload version settings:
Setting Value Name Enter any name for the workload version. Release name Enter any release name. DOCKER IMAGE Select Upload to add the Docker image of the sensor simulation that has been downloaded from the Nerve Software Center. DOCKER SPECIFIC INFO Select New port and enter the following settings: - Protocol: TCP
- Host Port: 4848
- Container Port: 4848
Container name tttech-opcua-server-demosensorNetwork name bridge -
Deploy the provisioned Docker workload by following Deploying a workload.
Obtaining certificates
Once the OPC UA demo sensor is deployed, the certificate files have to be obtained and imported to the node. In this example, a script to generate a self-signed certificate key pair is used. The script can be downloaded under Example Applications from the Nerve Software Center. It uses the OpenSSL library in order to make the generation of the certificate more convenient. If preferred, other tools or certificates can be used. Consult the IT administrator before continuing.
The script can be used the following way. Note that Python version 3.7.0 or higher is required to run the script:
| Item | Description |
|---|---|
| Usage | create_ss_certificate.py [-h] [-k KeySize] [-a NetworkAddresses] [-d Duration] ApplicationURI CertificateName [OutputPath] |
| Arguments | -kKey length, defaults to 2048 -aNetwork addresses in comma separated list, defaults to empty list -dNumber of days to certify the certificate for, defaults to 30 ApplicationURIEnter the Application URI, mandatory argument CertificateNameEnter the name of the generated files, mandatory argument. OutputPathDestination where certificate and private key files are placed after generation, defaults to current working directory |
Enter the following command to generate a self-signed certificate and private key pair:
python create_ss_certificate.py -a 172.20.2.1 urn:gateway.server server <outputpath>
Note
- Note that a hostname can be used when creating a certificate. However, an entry in
/etc/hostsmust be created on the Linux machine so that the hostname can be resolved. The OPC UA Server output of the Gateway must be accessed with the hostname that was given when creating the self-signed certificate. - Note that
172.20.2.1applies to Nerve Devices that have a physical mgmt port like the MFN 100. If the used device does not have a mgmt port, refer to the device guide page of the device to find out which IP address to use.
To obtain the certificate from UaExpert, start UaExpert and go to Settings > Manage certificates. There a list of current certificates and their location is displayed. The standard location of the uaexpert.der certificate is
.../unifiedautomation/uaexpert/PKI/own/certs/uaexpert.der.
Importing certificates
Importing certificates is done using the graphical configuration tool on the node. The instructions below show the import of the UaExpert certificate as well as the self-signed certificate and key. Note that the certificates have to be in the DER format. If other certificates are used, convert certificates first before importing. OpenSSL can be used for converting certificates. Also, note that this example uses the UaExpert client. Any OPC UA Client can be used. Import the corresponding certificate of the used OPC UA Client in DER format instead.
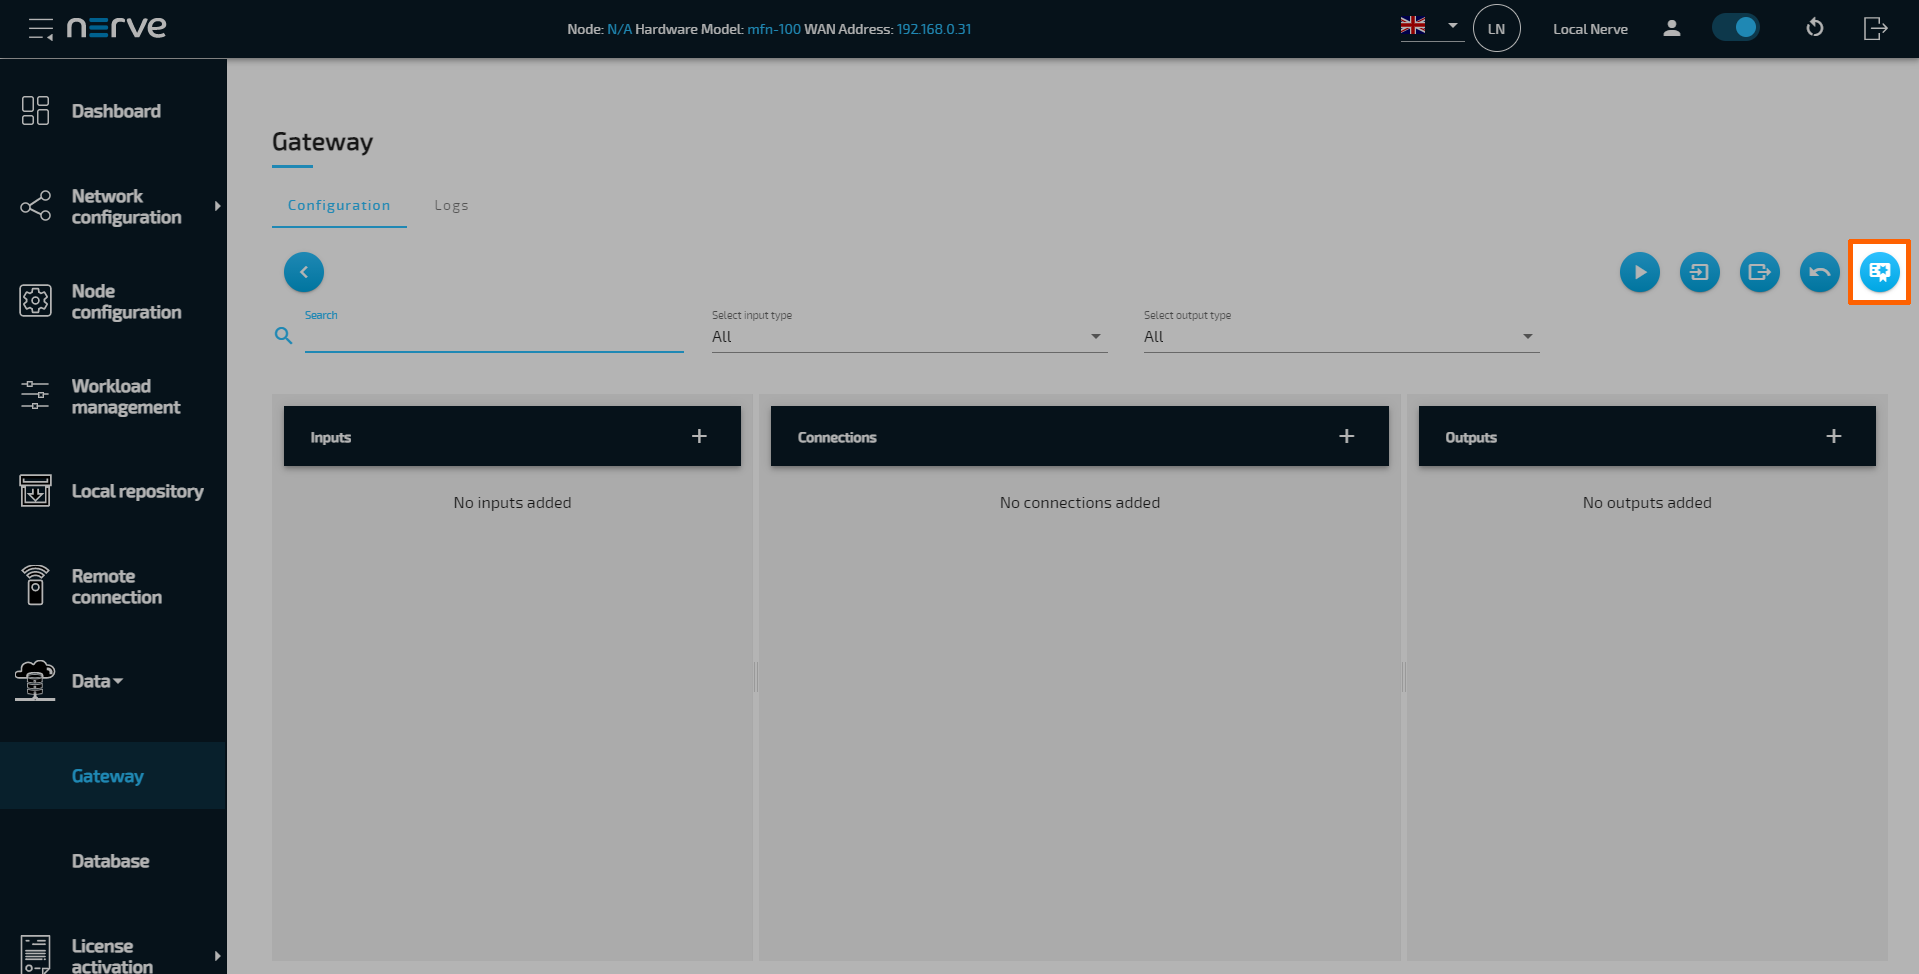
- Log in to the Local UI.
- Select the arrow next to Data to expand the sub menu.
- Select Gateway.
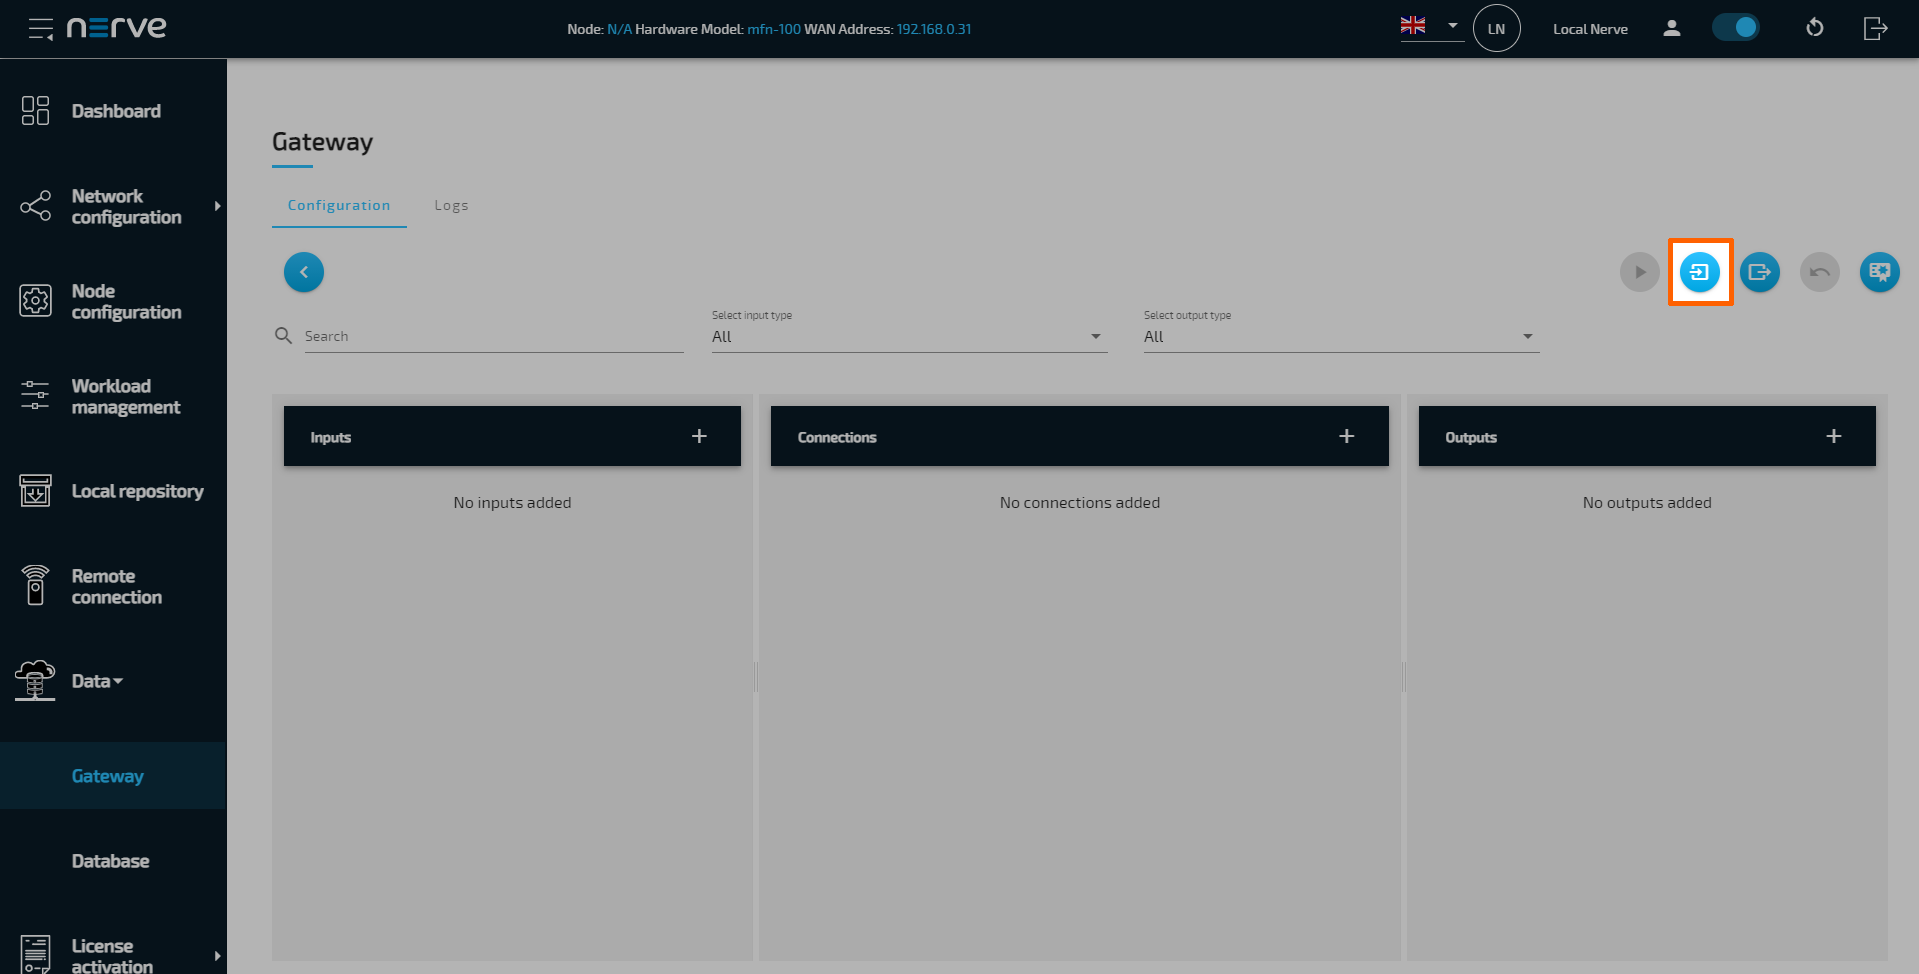
-
Select the Edit configuration symbol on the right to enter editing mode.

-
Select the Import certificates symbol.
-
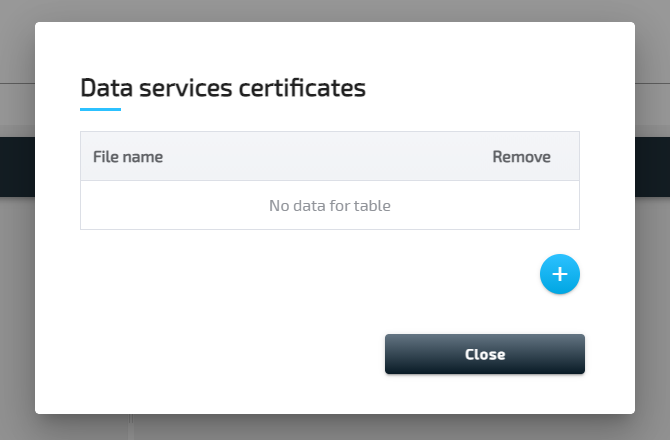
Select the plus symbol in the overlay that appeared.
-
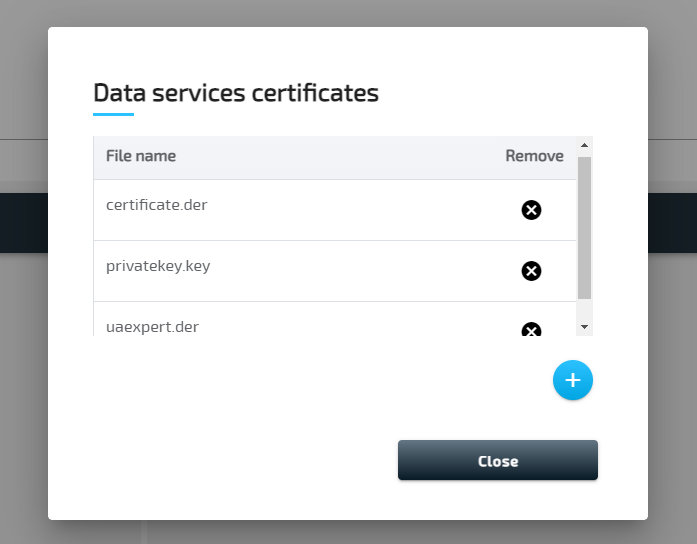
Add the UaExpert certificate as well as the self-signed certificate and key.
-
Select Close
Configuring the Data Services Gateway
Through the JSON configuration below, the OPC UA Client connects to the OPC UA Server demo sensor and periodically reads the values of temperature and humidity. That data is published as an OPC UA Server output. In the OPC UA Server output configuration example, the following security settings are used:
- Two username/password entities are added for logging in to the server.
securityModeandsecurityPolicysettings are both set toallto create security endpoints for all available combinations.- Certificate and private key file names are set according to the files that were imported to the node earlier.
applicationUriis set in the description section. It must comply with the application URI set in the certificate.- The UaExpert client certificate is added to the trust list.
Follow the instructions below to apply the Gateway configuration.
-
Access the Local UI on the node. This is Nerve Device specific. Refer to the table below for device specific links to the Local UI. The initial login credentials to the Local UI can be found in the customer profile.
Nerve Device Physical port Local UI MFN 200 P3 http://172.20.2.1:3333 MFN 100 P1 http://172.20.2.1:3333 Kontron KBox A-250 ETH 2 <wanip>:3333
To figure out the IP address of the WAN interface, refer to Finding out the IP address of the device in the Kontron KBox A-250 chapter of the device guide.Siemens SIMATIC IPC427E X1 P1 http://172.20.2.1:3333 Siemens SIMATIC IPC BX-39A X1 P1 http://172.20.2.1:3333 Vecow SPC-5600-i5-8500 LAN 1 http://172.20.2.1:3333 Compulab fitlet3 LAN3 http://172.20.2.1:3333 -
Select the arrow next to Data to expand the Data Services sub menus in the navigation on the left.
- Select Gateway.
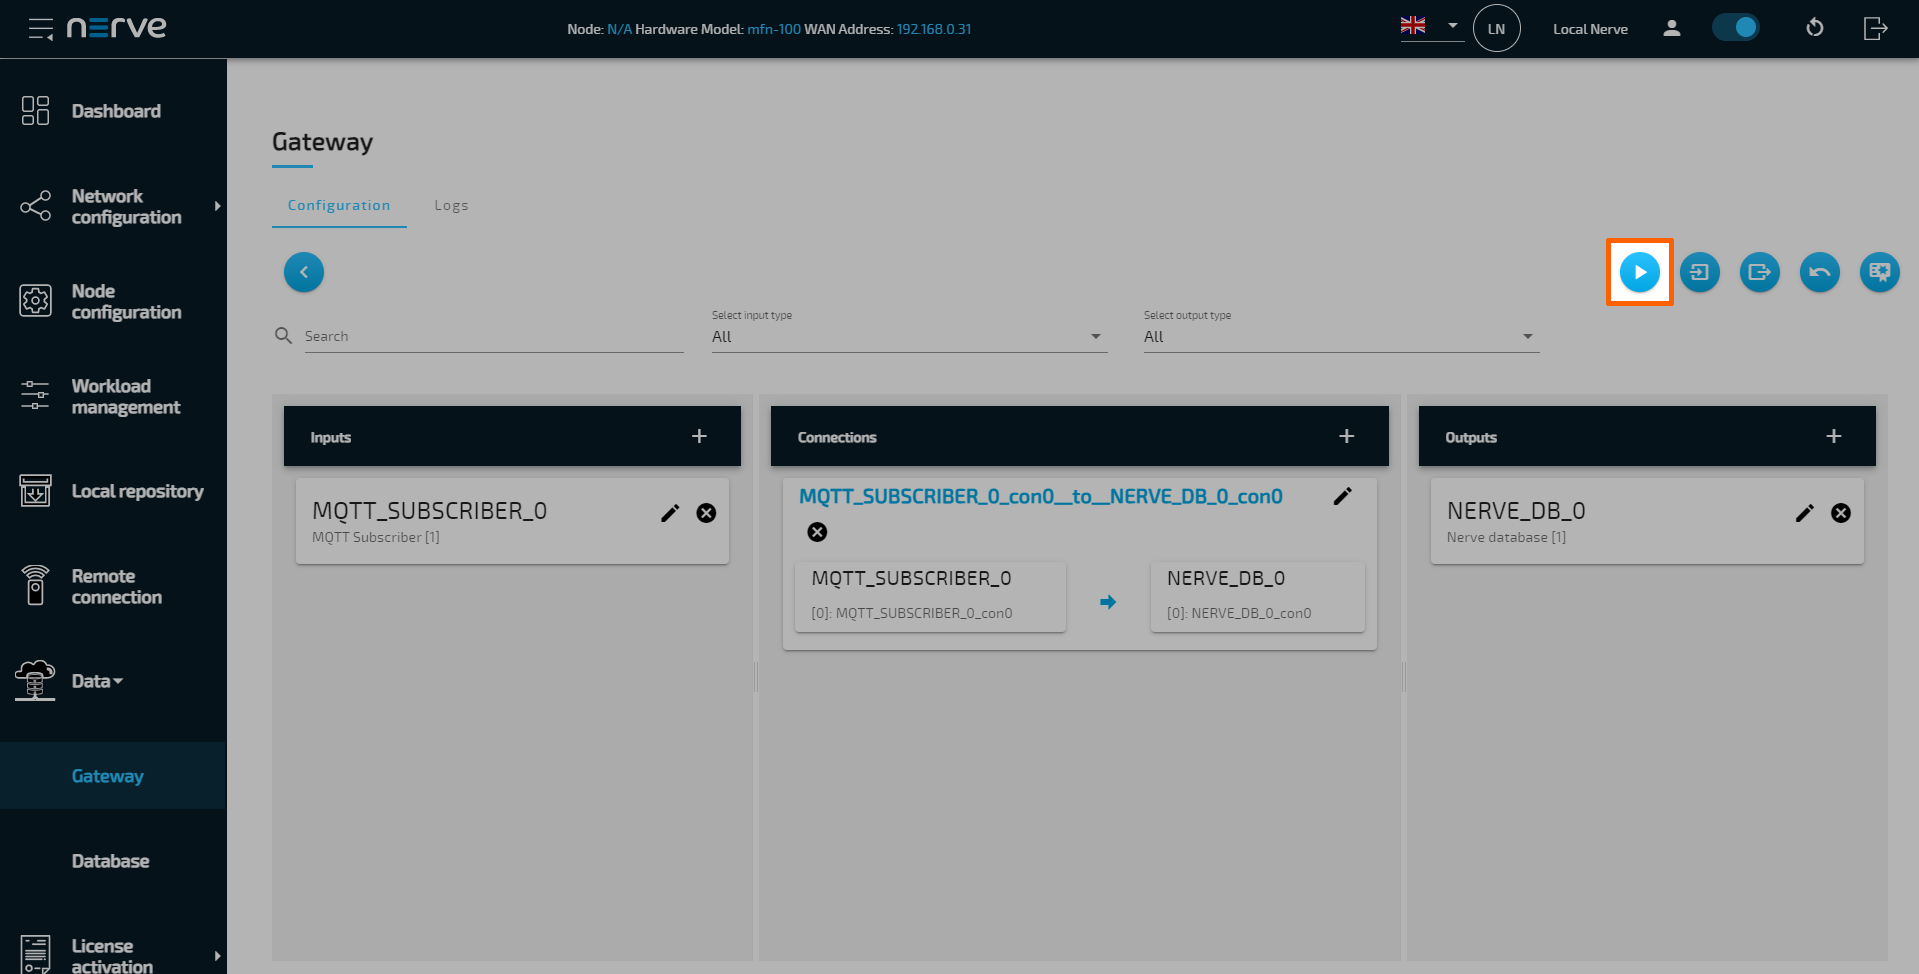
-
Select the Edit configuration icon on the right to enter editing mode.
-
Create a JSON file out of the following Gateway configuration:
{ "inputs": [ { "name": "client_demo_sensor", "type": "OPC_UA_CLIENT", "serverUrl": "opc.tcp://localhost:4848", "pollingInterval_ms": 1000, "connectors": [ { "name": "poll", "accessType": "polling", "nodes": [ "ns=2;i=2", "ns=2;i=4" ] } ] } ], "outputs": [ { "name": "output_opc_ua_server", "type": "OPC_UA_SERVER", "port": 4840, "logins": [ { "username": "usr1", "password": "pwd1" }, { "username": "usr2", "password": "pwd2" } ], "securities": [ { "securityMode": "all", "securityPolicy": "all" } ], "certificate": { "certFilePath": "server_crt.der", "keyFilePath": "server_key.der" }, "description": { "applicationUri": "urn:gateway.server" }, "trustList": [ "uaexpert.der" ], "connectors": [ { "name": "OutputFromDemoSensor", "browseName": "OutputFromDemoSensor", "identifier": "s=OutputFromDemoSensor" } ] } ], "connections": [ { "name": "opcua_client_to_opcua_server", "input": { "index": 0, "connector": 0 }, "output": { "index": 0, "connector": 0 } } ] } -
Select the Import button.
-
Add the JSON configuration file containing the code above from the file browser.
-
Select the Deploy button. A success message pops up in the upper-right corner.
The configuration is now deployed. The graphical configuration tool now reflects the contents of the JSON file. Exit editing mode by selecting the arrow on the left. Details of each input and output can be opened by selecting the magnifying glass symbol next to each input and output.
Select the Logs tab to view the Gateway logs for more information.
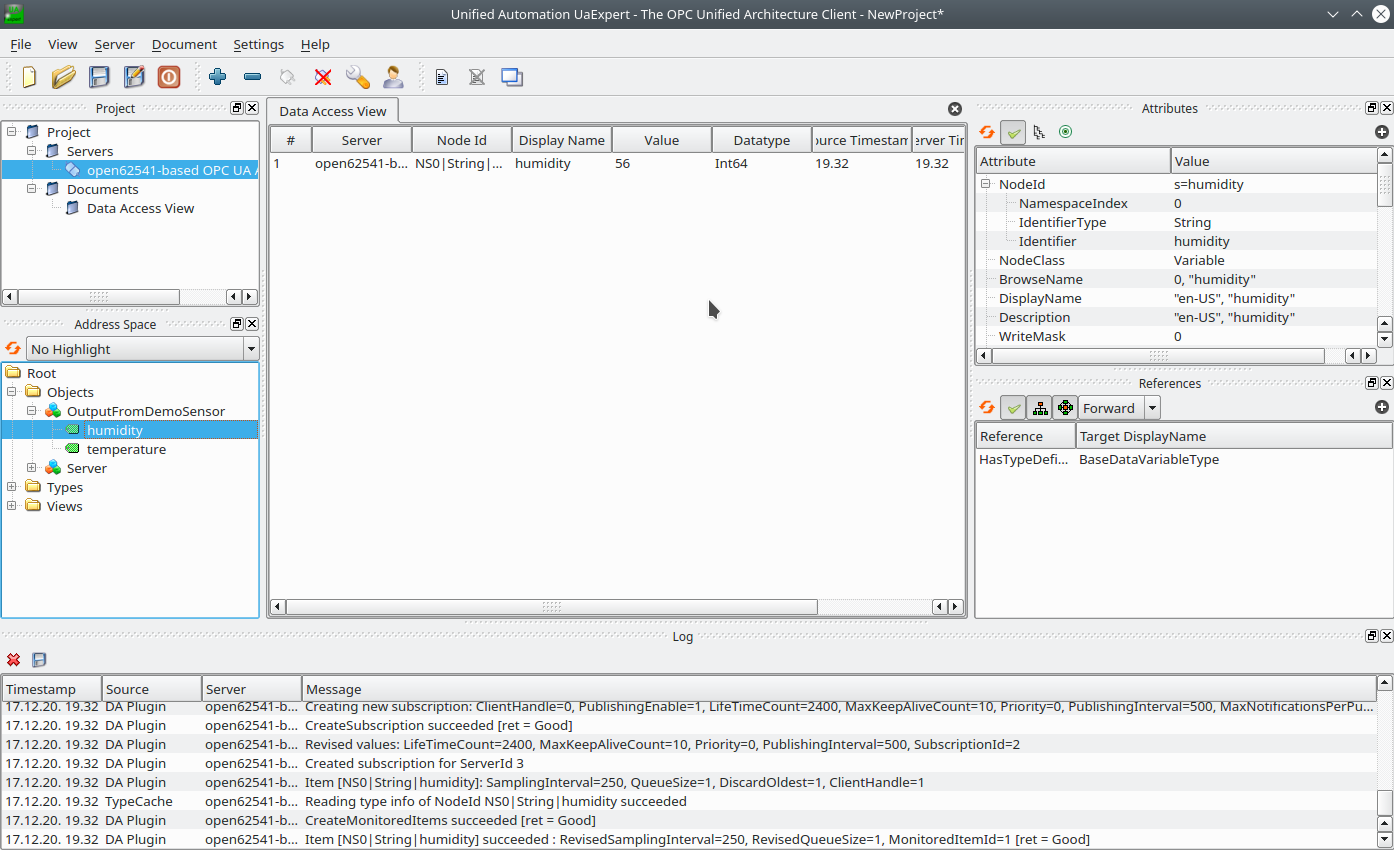
Verifying data with the UaExpert OPC UA Client
The temperature and humidity simulation data can be checked visually using a third party application. This example uses the UaExpert OPC UA Client. The desired variables are located in the address space, and by adding them to the data access view, their values can be observed.
Note
In order to download the UaExpert OPC UA Client, it is required to create a free account at unified-automation.com.
Before continuing, make sure to follow the UaExpert documentation through the first steps with the UaExpert client. Afterwards follow the instructions below:
Note
In the screenshots below, opc.tcp://mfn100:4840 is used to connect to the OPC UA Server output of the Gateway, as mfn100 had been defined as the hostname when the self-signed certificate was created. Use 172.20.2.1 if this example was followed or replace mfn100 with the IP address or hostname that was used when creating the certificate earlier.
-
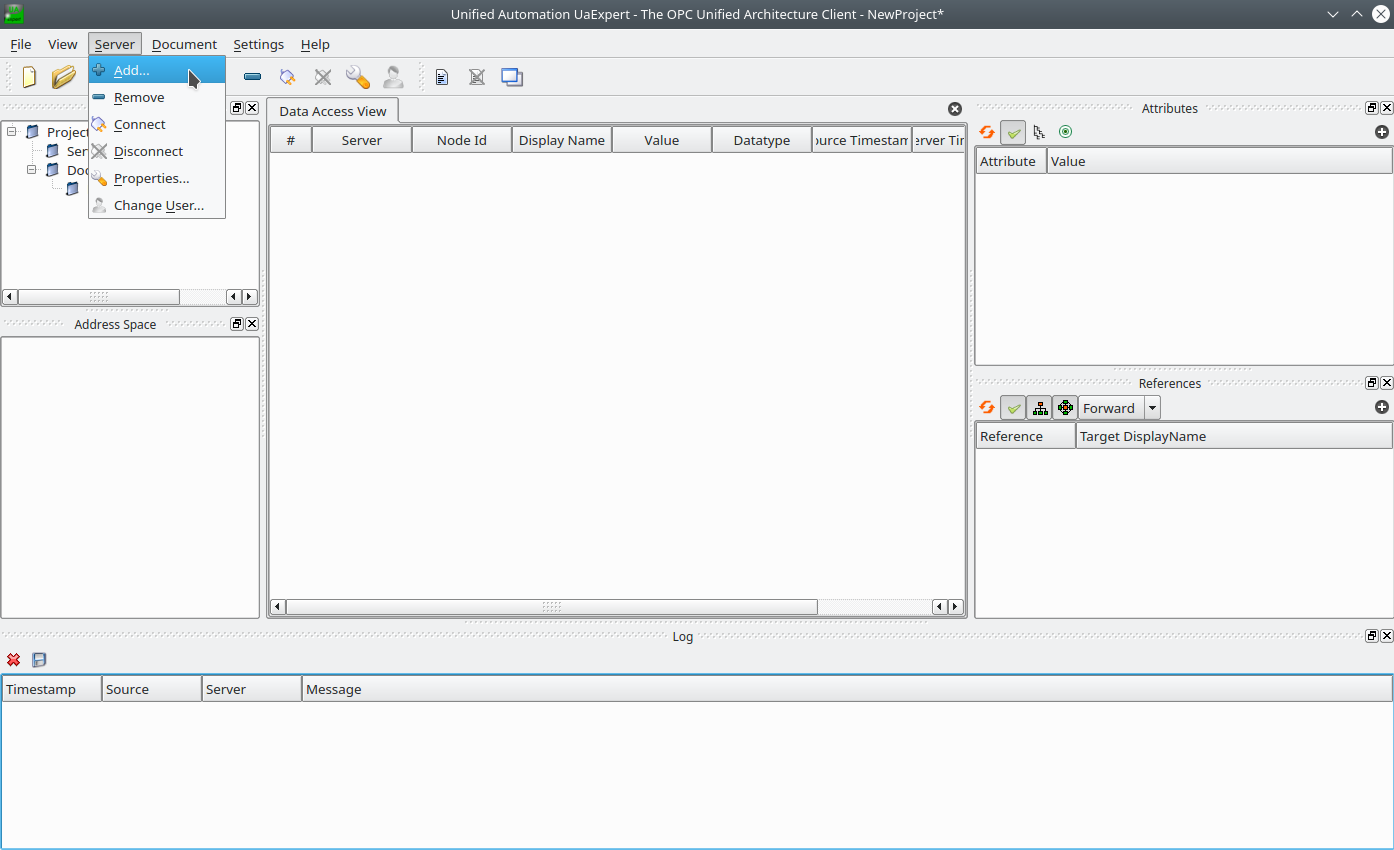
Select Server > Add... in the main menu or select the plus icon in the toolbar.
-
Select Double click to Add Server... under Custom Discovery.
-
Enter
opc.tcp://<hostname>:4840. The new server now appears under Custom Discovery.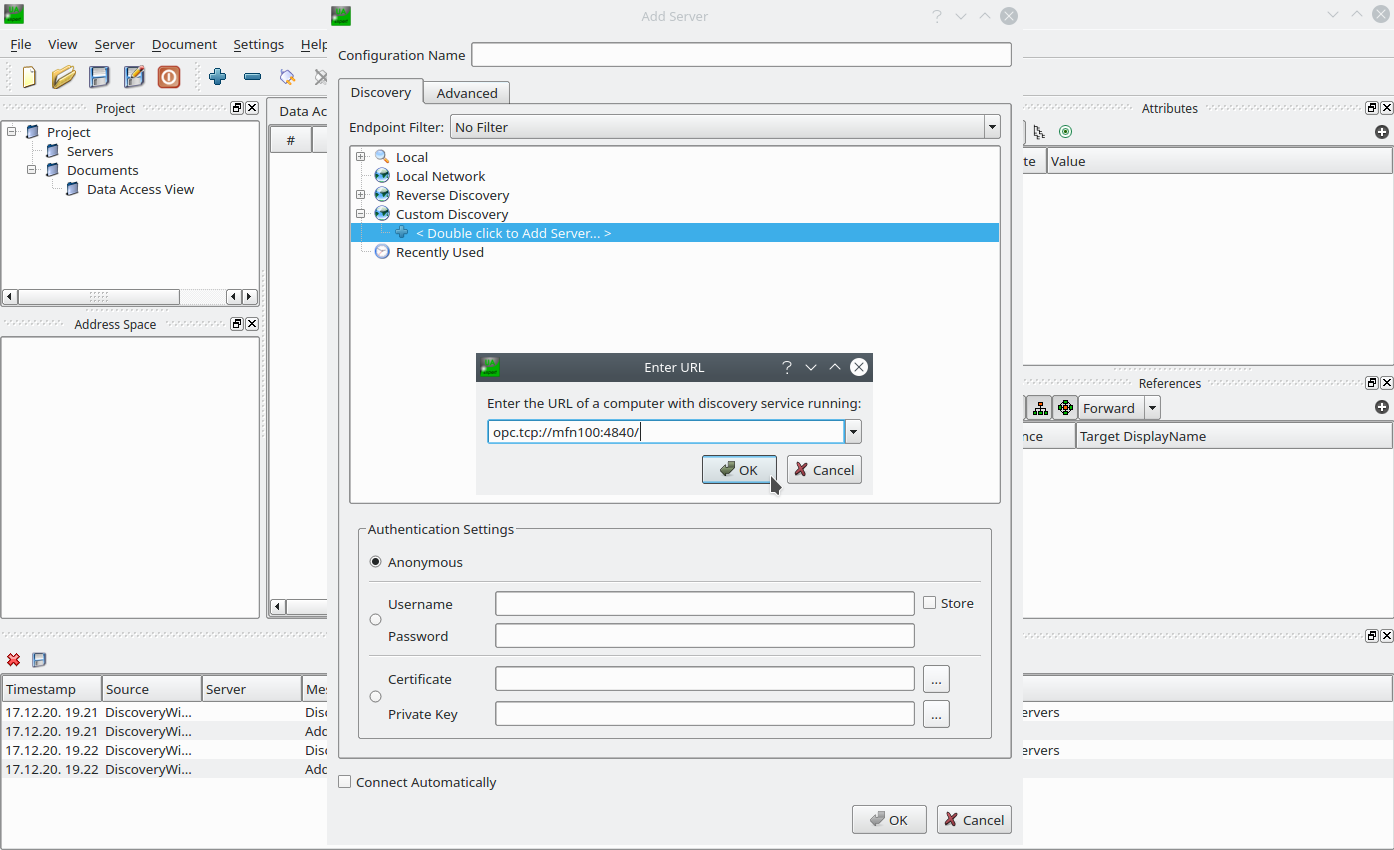
-
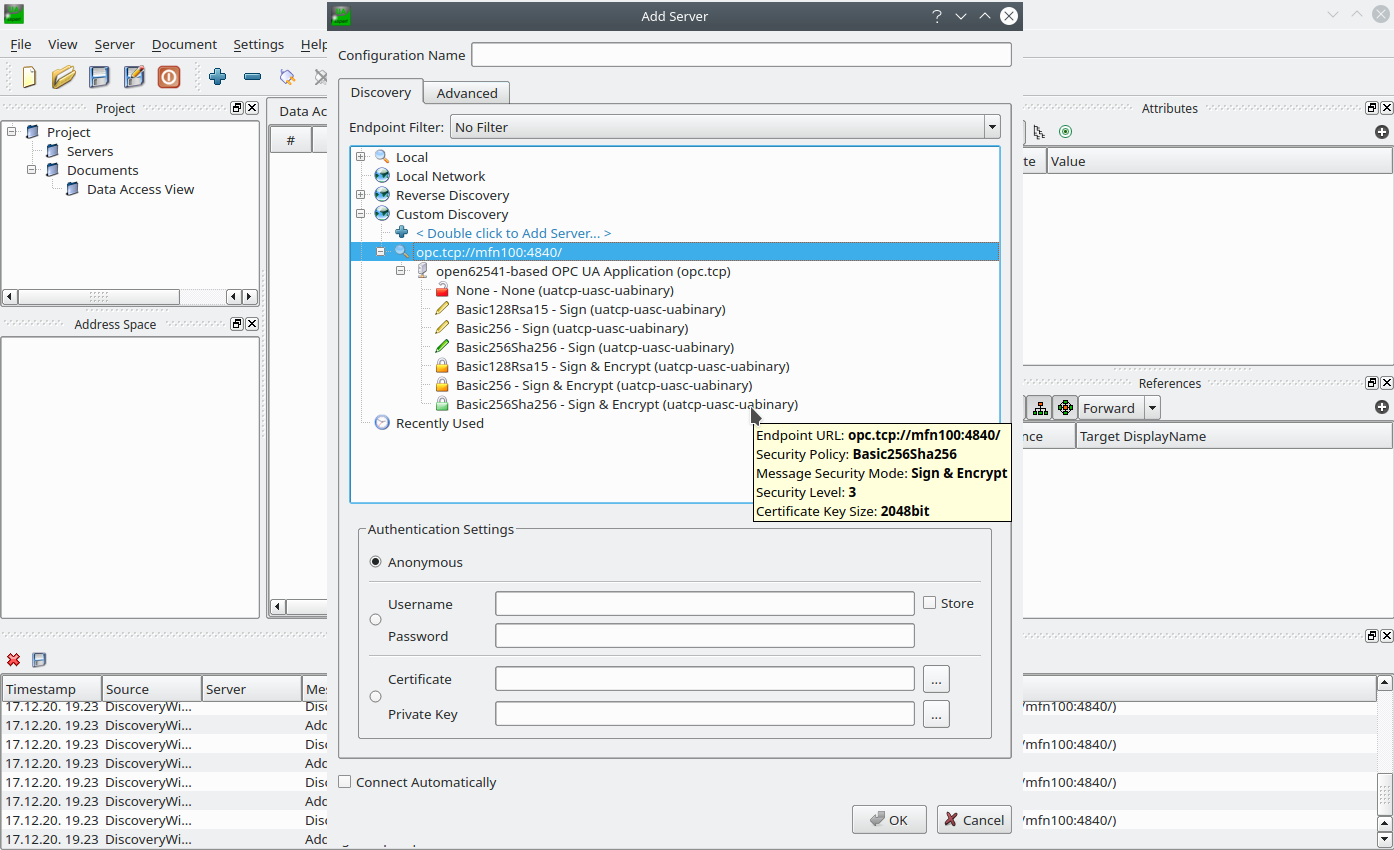
Expand the arrow next to the left of the new server to show all accessible endpoints of the server.
-
Double-click the desired security policy from the list. This example uses the Basic256Sha256 security policy. The server configuration now appears in the Project panel under Servers on the left side.

-
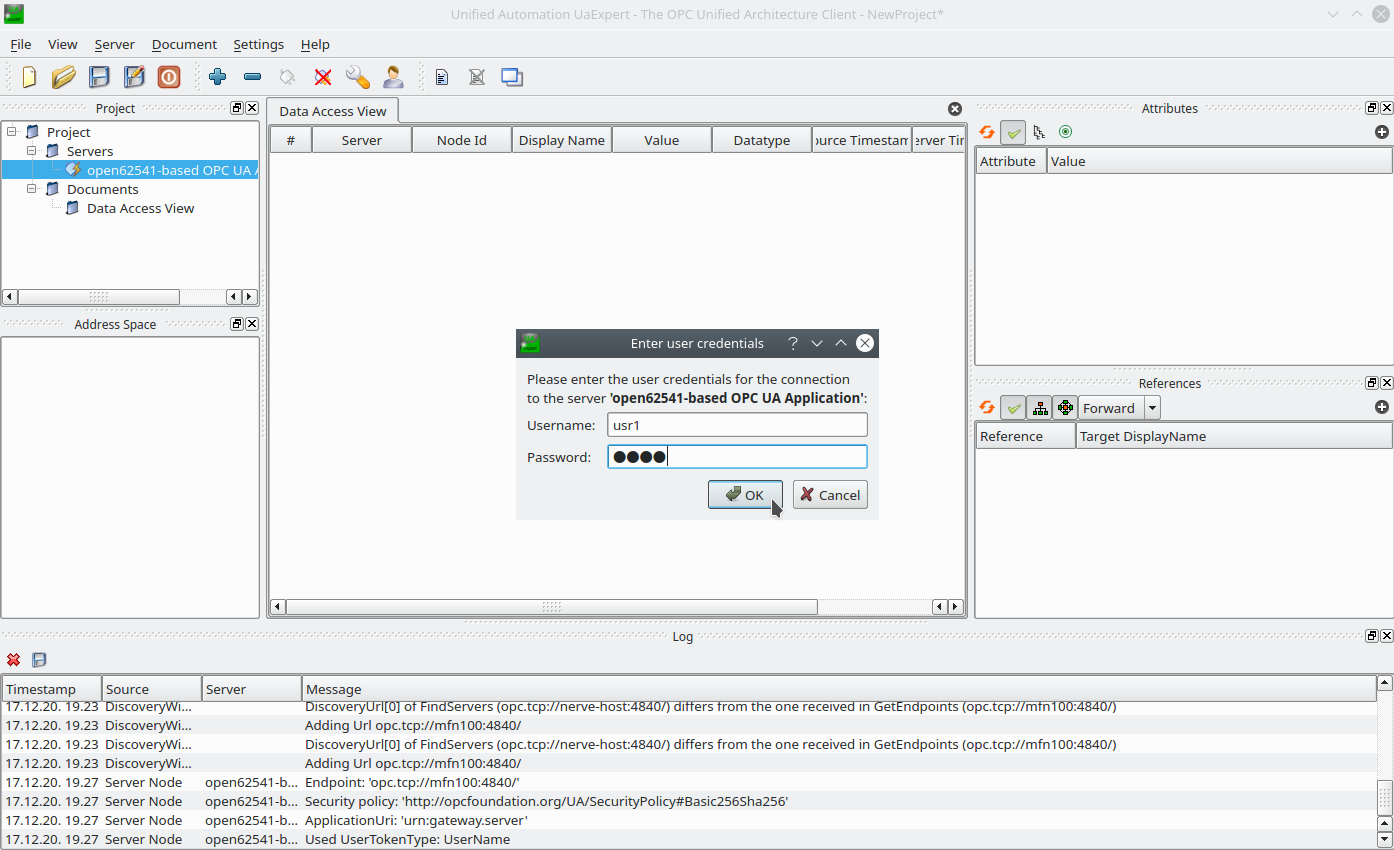
Select the server configuration in the Project panel.
- Select Server > Connect in the main menu or select the Connect Server icon in the toolbar to establish a connection to the server.
-
Enter the username and password that were set in the OPC UA Server output configuration.
-
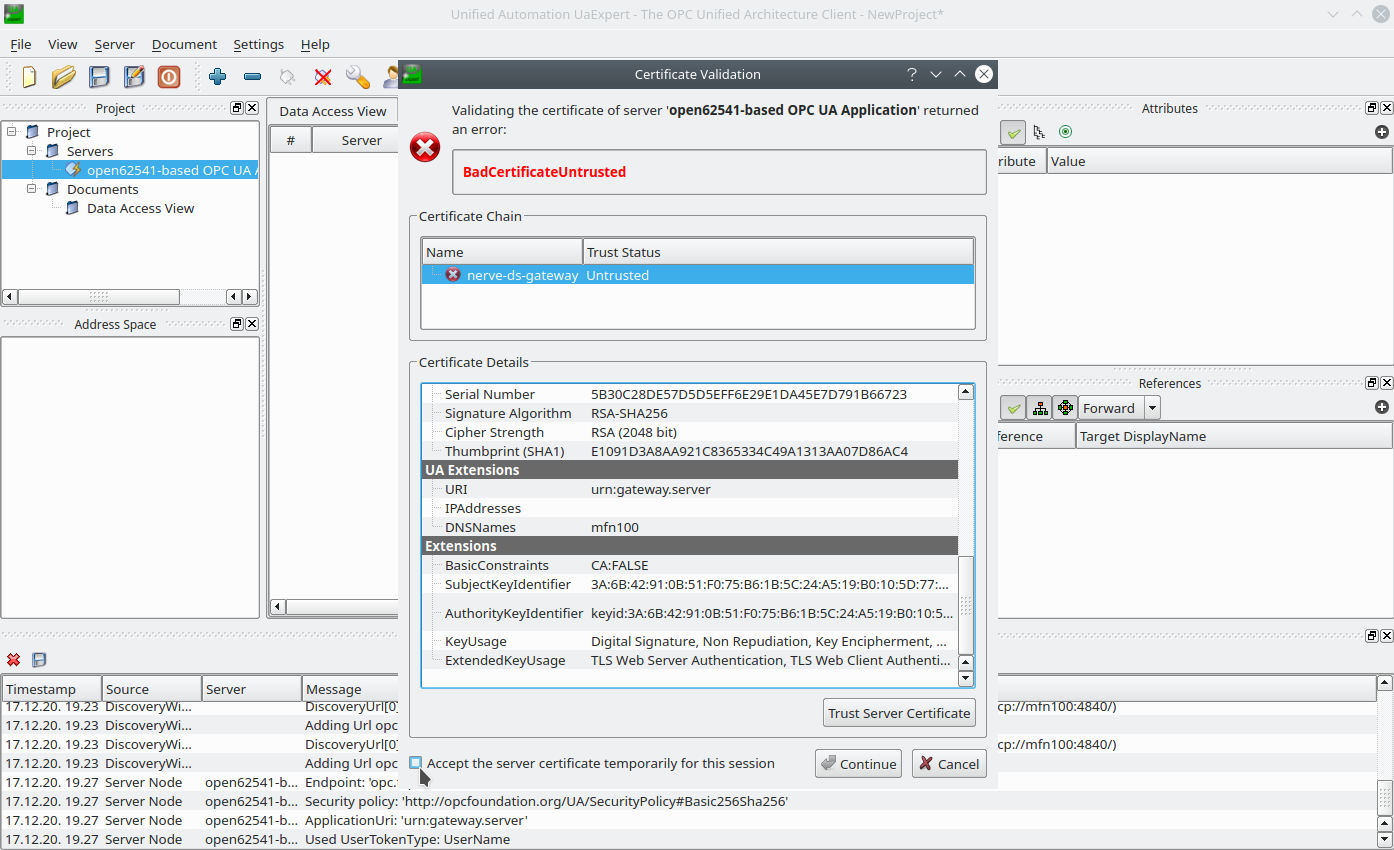
Select OK. The OPC UA Server certificate is retrieved next. Details are shown in the Certificate Validation window.
-
Tick the checkbox next to Accept the server certificate temporarily for this session.
Note
Alternatively, select Trust Server Certificate to always trust this certificate in future sessions.
-
Select Continue.
All connection steps are logged in the Log panel at the bottom. Once connected, the OPC UA Server's address space appears in the Address Space panel on the left. Expand Objects > OutputFromDemoSensor in the Address Space panel on the left and drag-and-drop the temperature and humidity variables to the Data Access View in the middle to monitor their values.