Streamsheets
With Streamsheets, technical or business end users can create stream processing applications by using their existing spreadsheet knowledge (e.g. from Microsoft Excel or Google Sheets). As a no-code platform, it gives non-programmers the opportunity to work with event streams and create applications through drag and drop, filling cells with values and formulas, and creating charts and graphs in the way they already know.
Streamsheets can be used in many areas of IoT, stream processing and protocol conversion or gateways to build apps that enable workflow automation, monitoring, and perform control in real-time. Solutions can run either in the cloud or on-prem.
For more information on Streamsheets, refer to the official website and the official documentation.
Requirements for usage with Nerve
To use Streamsheets in combination with Nerve, the following things are required:
- Nerve Management System with at least one node registered
- Nerve Connection Manager
- A trial license and files from Cedalo
Use the Cedalo contact form to request a trial version for the on-premise version of Streamsheets. Once the requirements are met, continue with the instructions below.
Setup and installation
The instructions below are split into multiple parts to make them easier to follow. The first part focuses on gathering all required files, renaming them and creating ZIP files for workloads that will be used in the Nerve Management System. The later parts cover how to create the workloads in the Management System and get Streamsheets ready to be used with Nerve.
Gathering files and creating configuration ZIP files
The delivery from Cedalo includes a license, credentials for their Docker registry and a number of files. The following is a screenshot of all files that are part of the delivery, contained in a folder:

Follow the instructions below to get the files ready to be used:
- Make sure that the files above are located in a folder on the local PC.
- Rename the Cedalo license file to
license.lic. -
Copy the
license.licfile intostreamsheets/license/
-
Create the folder structure
streamsheets/packages/gateway/config/ -
Copy the
init.jsonfile from thestreamsheetsfolder intostreamsheets/packages/gateway/config/.
The required files and folders are now created and moved into their required places. Now the contents of those folders can be zipped to be used as configuration files for the Streamsheets workload.
- Open the
streamsheetsfolder. -
Add the contents to a ZIP filed named
streamsheets.zip.
-
Open the
/mosquitto/folder. -
Add the contents to a ZIP filed named
mosquitto.zip.
This finishes the preparation of the files.
Provisioning Streamsheets as a workload
With the files prepared, Streamsheets can now be provisioned as a Docker Compose workload. Keep the credentials for the Cedalo Docker registry at hand that were part of Cedalo's delivery.
- Log in to the Management System.
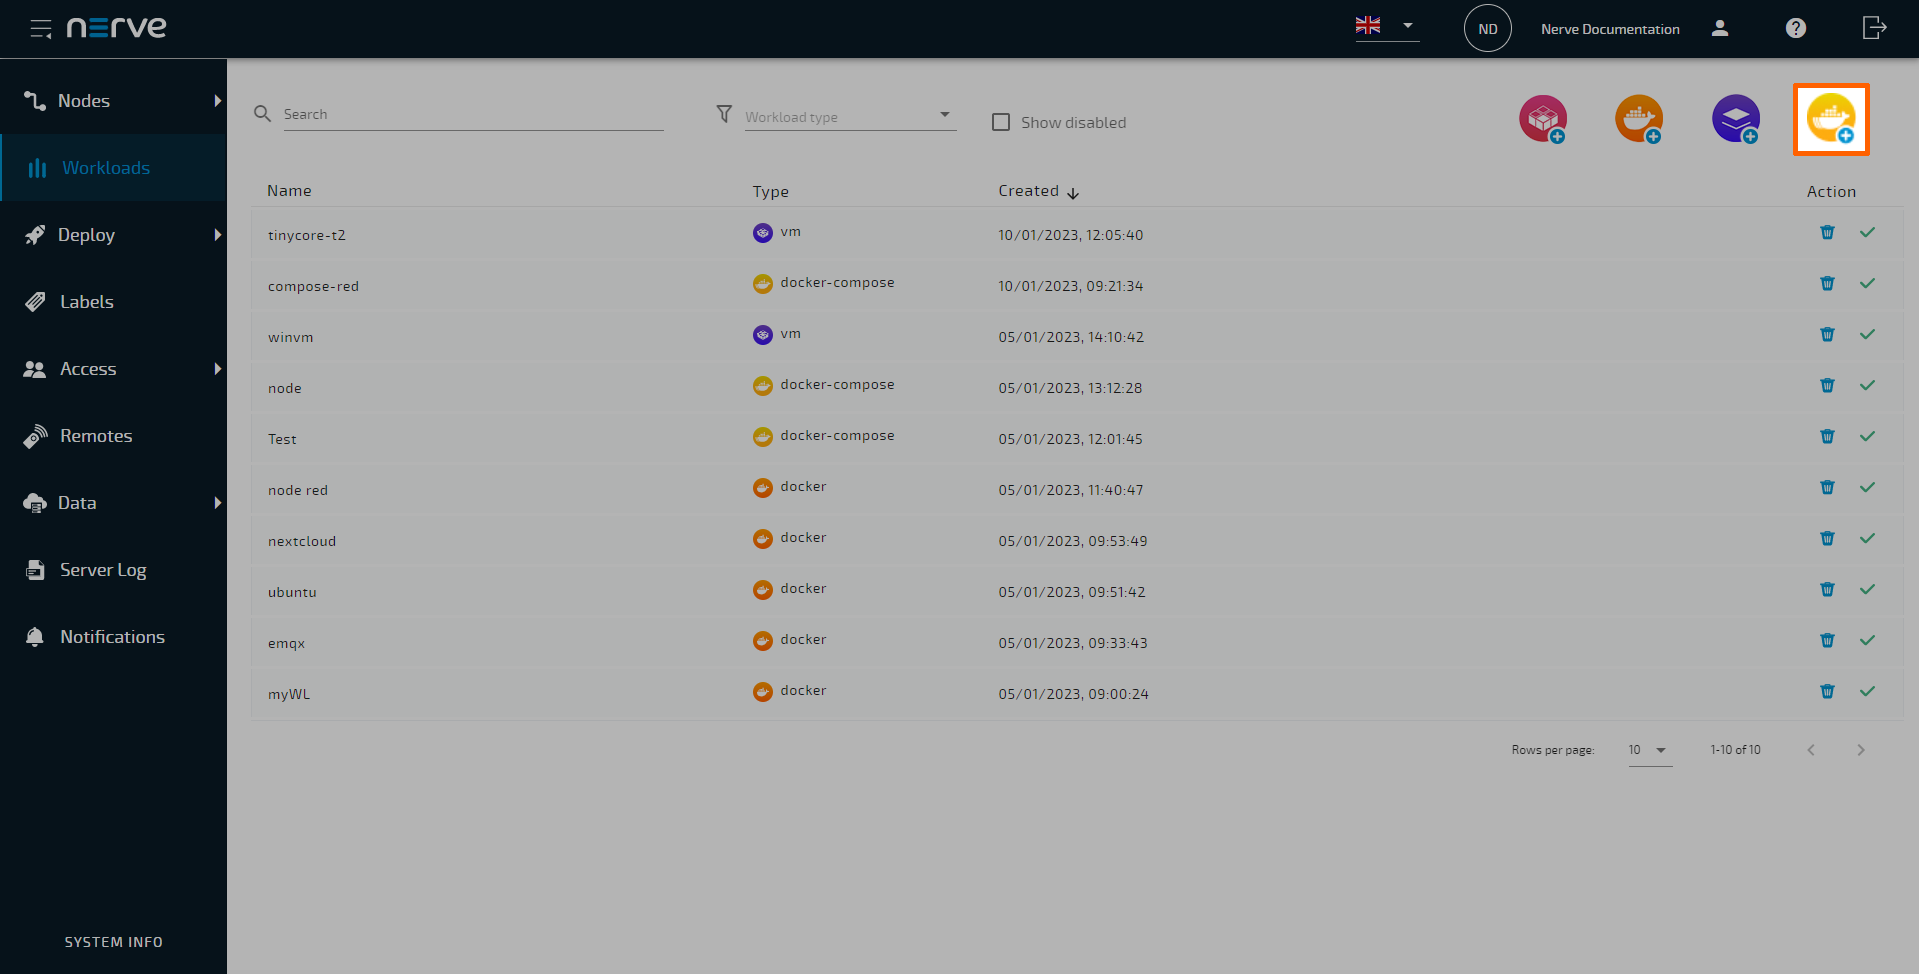
- Select Workloads in the navigation on the left.
-
Select the Docker Compose symbol (Add new Compose workload) in the upper-right.
-
In the new window, enter a name for the workload. This example uses Streamsheets.
-
Select the plus symbol next to Create version to add a new version of the workload.

-
In the next window, enter the following information in the Basic tab:
Category Settings and descriptions VERSION SPECIFIC INFO Version name
Enter a name for the version of this workload.
Compose file
Select the upward arrow symbol to open the file browser and upload the following docker-compose-nerve.yml file.
Once the compose file is added, its contents are displayed on the right.
With the compose file uploaded, the Registries and Services tab becomes active and can be used to configure volumes for storage.
- Select the Registries and Services tab.
-
Enter the log in credentials received from Cedalo under registry.cedalo.com/streamsheets.

-
Select the drop-down menu in the Configuration storage column for the mosquitto row.
-
Select mosquitto:/mosquitto/.

-
Select the drop-down menu in the Configuration storage column for the streamsheets row.
- Select streamsheets-config:/streamsheets/.
-
Tick the checkboxes in the Restart on conf. update for both mosquitto and streamsheets.

Identical to the Registries and Services tab, the Remote Connections tab became active after the upload of the compose file, and it can be used to configure a remote connection to the Streamsheets service.
- Select the Remote Connections tab.
-
Select the plus icon next to Remote tunnel under Remote Connections.

-
Enter the following information:
NERVE PARAMETERS Name
Enter a name for the remote connection. This example uses streamsheetsui.
Local acknowledgment
Select Yes or No from the drop-down menu.
Selecting Yes will require approval of the remote connection in the Local UI before the connection can be established. If No is selected, the settings in the Local UI do not apply.
Service
Select streamsheets from the drop-down menu.NETWORK PARAMETERS Port on workload
Enter8080.
Port on PC
Enter the port that will be used for communication on the local PC. This example uses8086. -
Select Add to save the remote connection configuration.

The connection is saved and now displayed in the Remote Connections tab, showing the Name, Type and Port of the remote connection.

-
Select Save in the lower-left corner to save the workload version.
The system is now downloading the required Docker images. Once this is done, the workload is ready to be deployed.
Deploying the Streamsheets workload
Select the rocket icon to deploy the workload directly after provisioning and follow the steps in Deploying a workload from the workloads menu.

Otherwise the workload can also be deployed from the Deploy menu. Refer to Deploying a workload from the deploy menu for more information.
Applying configuration files to the Streamsheets workload
Once the workload has been deployed, configuration files need to be applied. This is done from the node control screen of the Streamsheets workload.
- Select Nodes in the navigation on the left.
- Select the node tree symbol.
- Select the node running the Streamsheets workload from the node tree.
-
Select the Streamsheets workload in the node details view on the right.

-
Follow the instructions on how to apply configuration files to a Docker Compose workload to apply the
streamsheets.zipfile to the streamsheets service.
-
Repeat the steps to apply the
mosquitto.zipfile to the mosquitto service.
Streamsheets is now ready to be used.
Connecting to the Streamsheets UI
Depending on the location of the Nerve device, there are different ways to connect to the Streamsheets UI:
- Locally, if the local PC is connected to the management port of the Nerve device.
- Remotely, if the Nerve device is not located in vicinity.
If the local PC is connected to the management port of the Nerve device, accessing the Streamsheets UI can be done simply through a web browser.
- Open a web browser.
- Enter
172.20.2.1:8080to access the Streamsheets UI.
With this, it is possible to work with Streamsheets. Refer to the official Streamsheets documentation for more information and help with Streamsheets.
To connect remotely, the Nerve Connection Manager is required, as the connection will be established using a remote tunnel through the Management System. Download the latest version of the Nerve Connection Manager from the Nerve Software Center and install it before continuing. The remote tunnel that will be used has already been configured when the Streamsheets workload was created.
- Follow the instructions on how to use a remote tunnel to a workload to establish a remote connection.
- Open a web browser.
- Enter
localhost:<portonpc>to access the Streamsheets UI. This example used port 8086 so the URL islocalhost:8086.
With this, it is possible to work with Streamsheets. Refer to the official Streamsheets documentation for more information and help with Streamsheets.